This functionality provides the possibility to store documents in Azure Blobstorage. There are two ways to achieve this. You can additionally store documents in blobstorage when creating an Automergeworkingitem or via a global setting, but in this case, documents will no longer get stored in Dynamics 365, solely in Blobstorage.
Learn here how to get an Azure Blob Storage SAS URL.
If you want to store documents in Blobstorage simply create a new Automergeworkingitem. You can do this via a workflow like in this example. For the basic information about how to setup a workflow in CRM look at this article.
At some point in your workflow procedure an Automergeworkingitem is created. Follow the instructions as described in the above article and make sure that all the necessary fields are filled out: Name (1), AutoMergeAction (2), TemplateToExecute (3), PrimaryRecordUrl (4) and SaveAs (5).

Figure 4: AutomergeWorkingItem
- Go to “AttachToEntity” and paste the SAS token that was created into the Sharepoint-URL (1) field. Go to Direction (2) and change the value to “Entity To Blobstorage”. Save your changes.
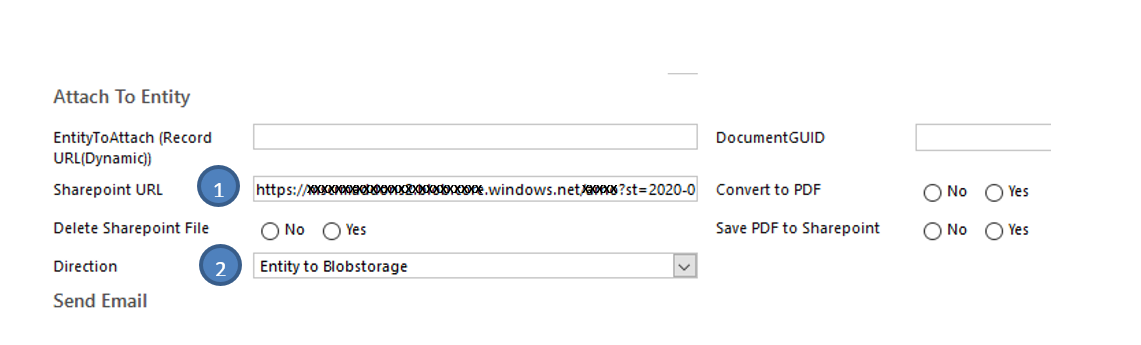
Figure 5: Where to paste your SP-URL
Using Azure Blob for Temporary documents
See the following article if you only want to use Azure Blob for storing temporary documents created by DocumentsCorePack: Temporary Document Storage Locations in DocumentsCorePack