One-Click-Actions (OCAs) are predefined settings for the DocumentsCorePack Dialog (DCP Dialog) to simplify and streamline document generation and delivery within Dynamics 365 and PowerApps. Admins can create One-Click-Actions. Step-by-Step: How to configure a One-Click-Action will guide you through the process. After a user selects a record/records in an entity to view and selects Create Document, these OCAs will be available to the user in the DCP Dialog, if the user meets the display rules.
Example: Accounting needs to generate PDF invoices, send them by email to the customer, save a copy to SharePoint and also get a printed copy.
An admin can automate these tasks by putting them in an One-Click-Action that acts as a mini-app that users can run with a single click.
Step by step video
Step-by-Step description
In this guide, we will show you how to create a new OCA to send a pdf to a customer by e-mail and save it to SharePoint.
To get started, open your Dynamics 365 Settings, navigate to the MSCRM-ADDONS section, and select DocumentsCorePack (DCP).


The main configuration window will appear with tab options for configuring the DCP in general.
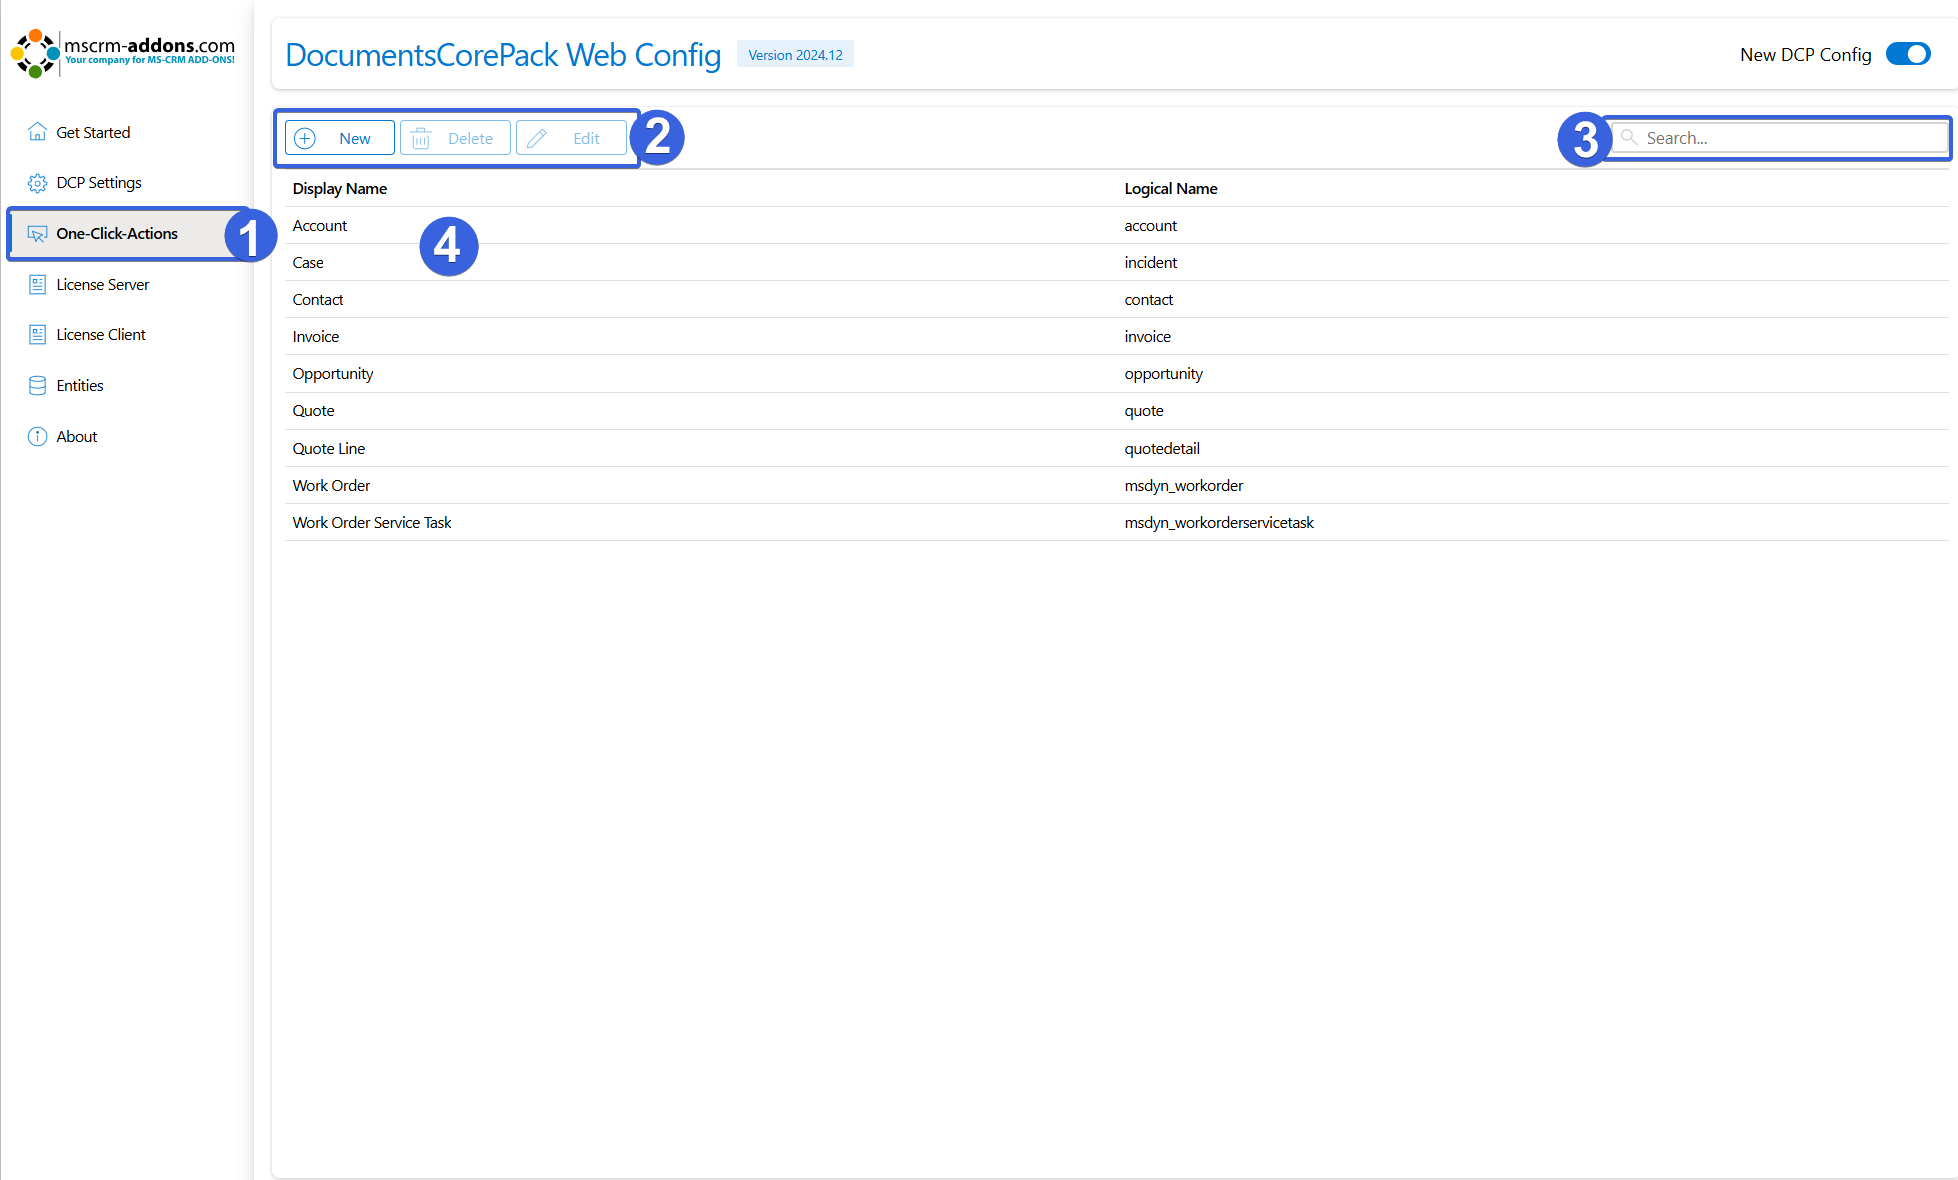
❶ Select the One-Click-Actions tab in the DCP main configuration window.
❷ The buttons in this group allow you to edit, delete, or add an entity to the list.
❸ Enter the entity name in the search box to locate the entity you want to create OCAs for. If the entity is not listed, add it with the New button.
❹ To open the entity you want, select it and click the Edit button, or double-click the entity. This will open a new dialog where you can create and manage OCAs for the entity.
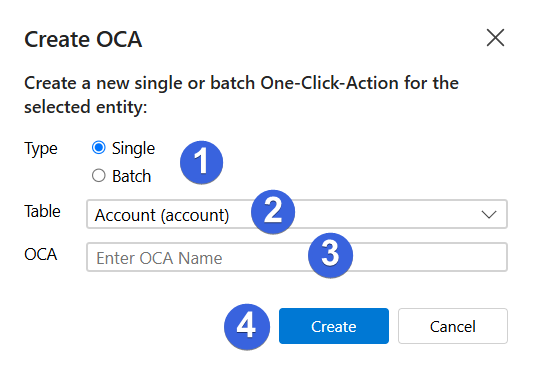
Select the New button to add an entity to add an OCA for.
❶ In this window, select Single to create a new Single Action OCA.
❷ Open the drop-down menu under Entity to select an entity.
❸ Type a name for your OCA in the Name box.
❹ Save your selections with the Create button.
After hitting the Create button, you will be provided with the configuration window for Single Record Actions. You will then need to go through the four following screens (General Settings, Template Settings, Processing Settings, Review Settings) to configure your OCA in detail.
Please note:
- The available wizard options may vary depending on what was previously selected.
- Once an OCA has been created, it can be edited again in the same way with these four screens.
Step 1: General Settings of One-Click-Action
❶ You can edit the name you previously entered for the OCA.
❷ You can add a description, which is helpful for users running the OCA.
❸ The two checkboxes enable you to
- Set the OCA as the default, which means this OCA will run whenever the user clicks Create-Document.
- Hide the OCA from the DCP dialog, meaning the OCA will be temporarily hidden from the user.
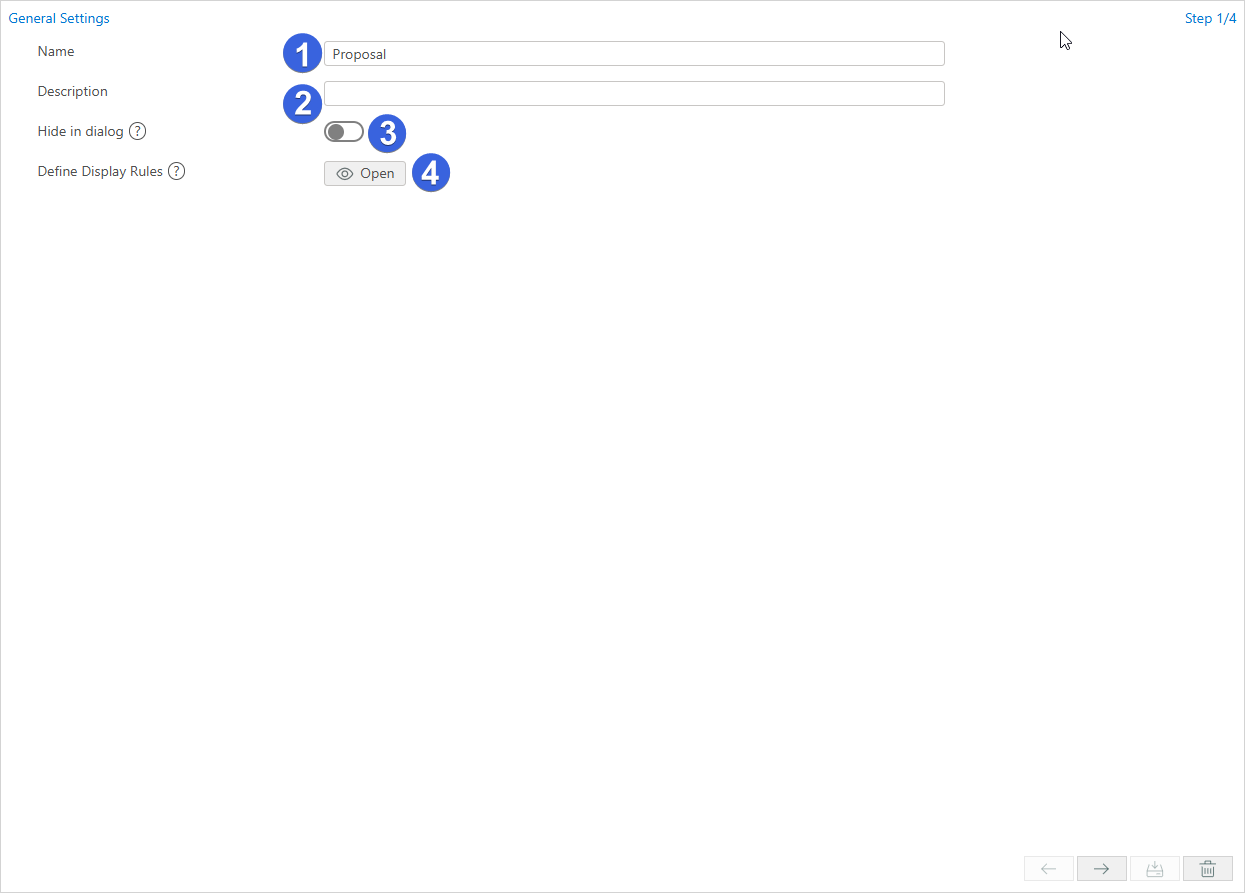
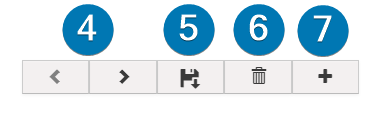
Use the buttons at the bottom right of the page to complete the following as needed:
❹ These buttons allow you to move forward to the next step or back to the previous one. When you are happy with your configuration, continue forward.
❺ Press the Save button to save changes to your OCA.
❻ Press the Delete button to delete your OCA.
❼ Press the + button to set display rules.
Step 2: Template Settings
These settings allow you to configure your template selection in detail.
There are three template types available. Each open a different scenario, each of which we will explore in detail.
a. Allow User Selection
b. Predefine Template
c. Use MultiPart
We will first cover how to set your template settings, and then explain the differences between the three template options. Set your template settings with the instructions below.
❶ First, select your template type by opening the drop-down menu next to Template Selection and clicking on one of the three options.
❷ Clicking the Edit Template checkbox enables the user to edit the template before the document is created.
❸ Your selected template type may offer a grouping feature. Follow the steps below to activate this feature.
- To the right of Conditional Template Group, press Open to launch a dialog where entity attributes can be linked to template groups (template groups are collections of templates – often representing operational aspects – defined in the template designer).
- Thus, if the predefined attributes match those of the selected record, the user of the OCA can choose from contextual sets of templates. This is useful if you want to offer only templates from the same department as options.
Please Note: The options and controls available in the following screens may vary depending on the template type selected and other selections.

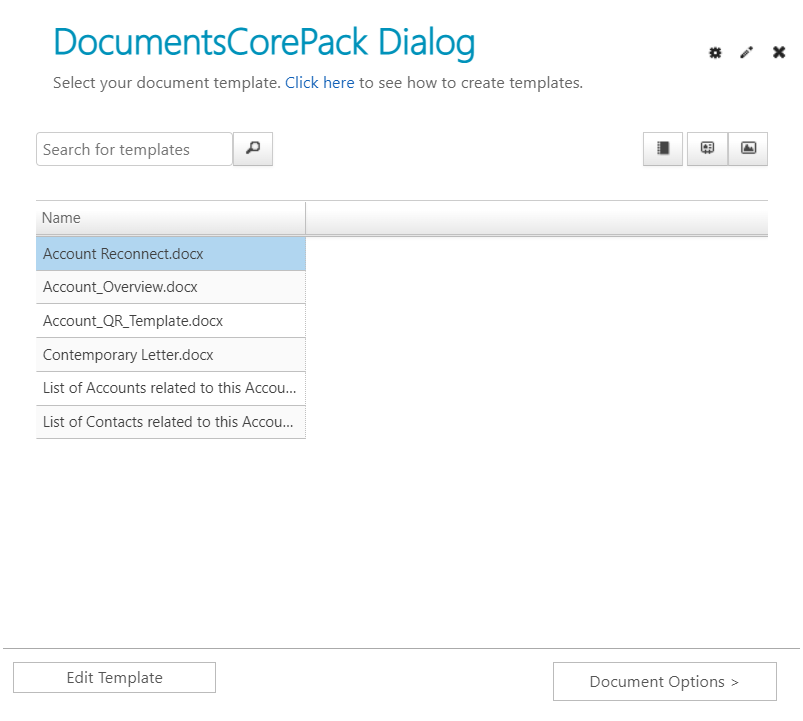
a) Allow User Selection
The Allow User Selection template defines an OCA where the user can select a template themselves when running the OCA.
To see how this looks from a user’s perspective, you can select your Account Entity in your Dynamics 365 and press Create Document.

The DCP Dialog will then open so that you can select your template. The user must press the Next button to advance to the next screen (in this case, to select document processing options).

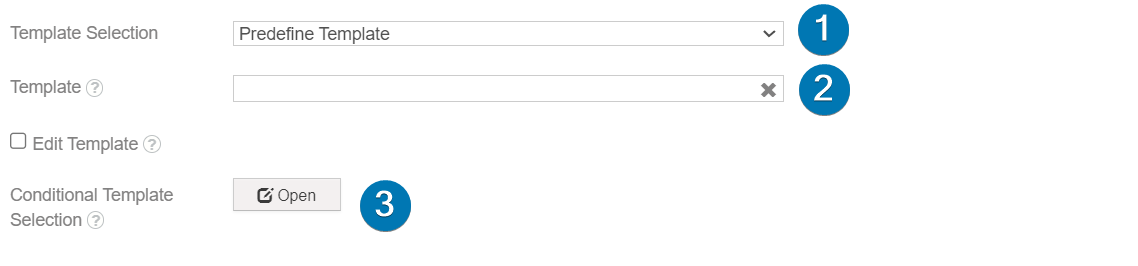
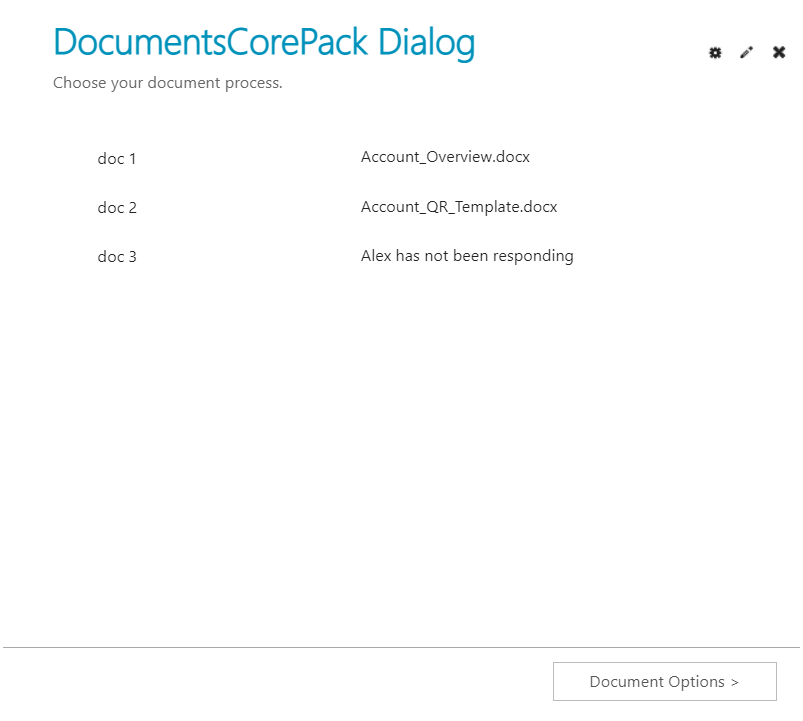
b) Predefine Template
❶ The second template type in the drop-down menu for Template Selection is Predefine Template.
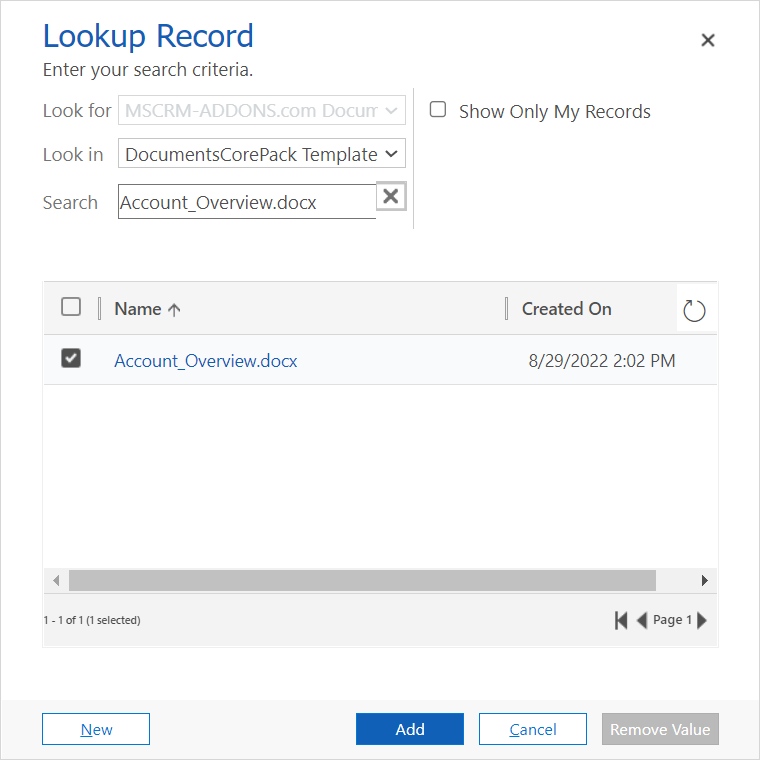
❷ Click in the Template field to open a lookup window to search for a suitable template that you want to set for the OCA, and then Add it.
❸ A Conditional Template Selection button is provided for this template type.
- You can select Open to the right of this button to open a window to define templates that are conditionally displayed to the user based on attributes that must match attributes of the current (user-selected) record.
- For example, based on a customer’s location, the template of the appropriate language can be automatically supplied when the user runs the OCA.
Please Note:
- This means that the user does not have a DocumentsCorePack template selection. The template is used automatically.
- Refer to this article if you are interested in learning about template creation.
- Click on the + button to add a template or note.
- Click on the template name to open a window showing template information and uses for managing and creating template.
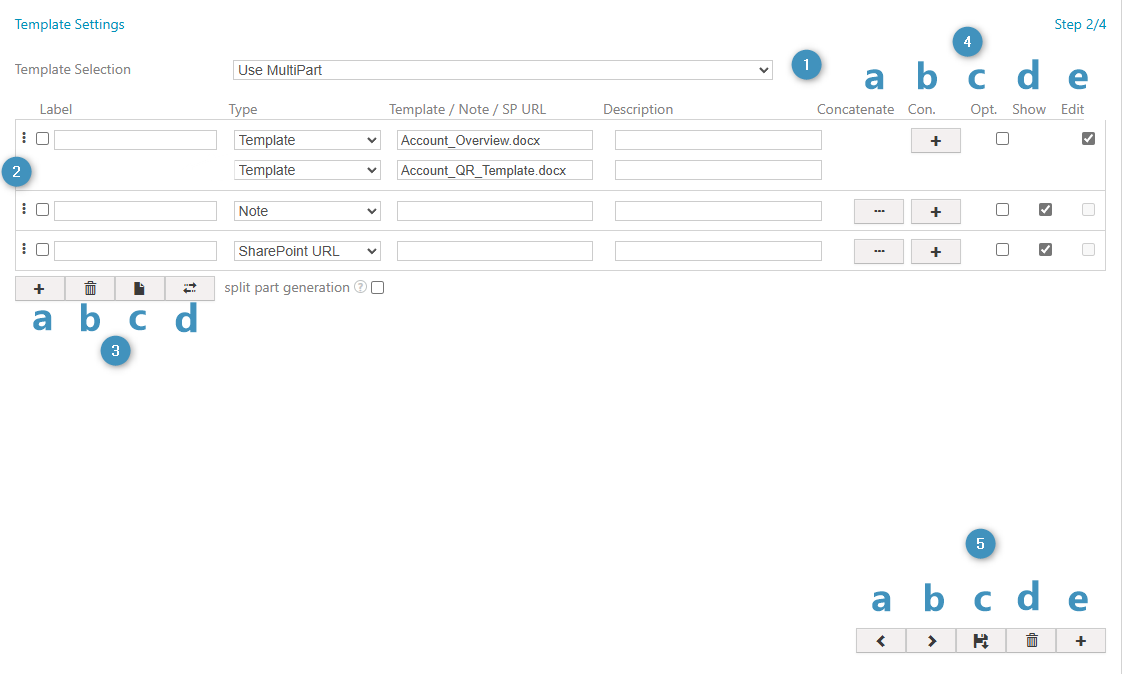
c) Use MultiPart
❶ The third option in the drop-down menu is Use MultiPart. This template allows for a compound document (a document made up of parts, such as dynamic DCP templates and static documents like pdf files) as a mixture of several predefined and/or freely selectable documents. Click here to learn more about MultiPart documents.
Please Note: From here on we will call the document parts DocParts for short.
❷ The first two DocParts of the docx type have been combined into one, as can be seen in figure 12. The DocPart Type can be a MS Word template (docx), note or SharePoint URL (hosted document). It can have a label and description, which are shown to the user when running the OCA.
❸ The following functions can be applied to selected DocParts.
- (a) Add another part
- (b) Delete the part
- (c) Combine the selected DocParts. To do this, you must select more than one DocPart to combine them.
- (d) Disassemble selected combined DocParts.
❹ The following settings can be applied to a DocPart.
- (a) Concatenate: Click the “…” button to open a dialog where you can set how the DocPart will be concatenated to the previous DocPart.
- (b) Conditions: Define conditions that determine if a DocPart should be displayed or hidden. The results of these conditions are based on that of the selected record.
- (c) Option: Enables a checkbox that will appear next to the DocPart in the DCP-Dialog that determines if the DocPart should be included or omitted from the final generated document.
- (d) Show: Set whether this DocPart is visible in the DCP-Dialog or not
- (e) Edit: Set whether this DocPart can be edited in the DCP-Dialog or not
❺ Use these buttons to complete the following steps:
- (a + b) Go to the previous or next wizard-step
- (c) Save the settings made in this step
- (d) Delete the OCA
- (e) Set display rules for this OCA. Learn how here
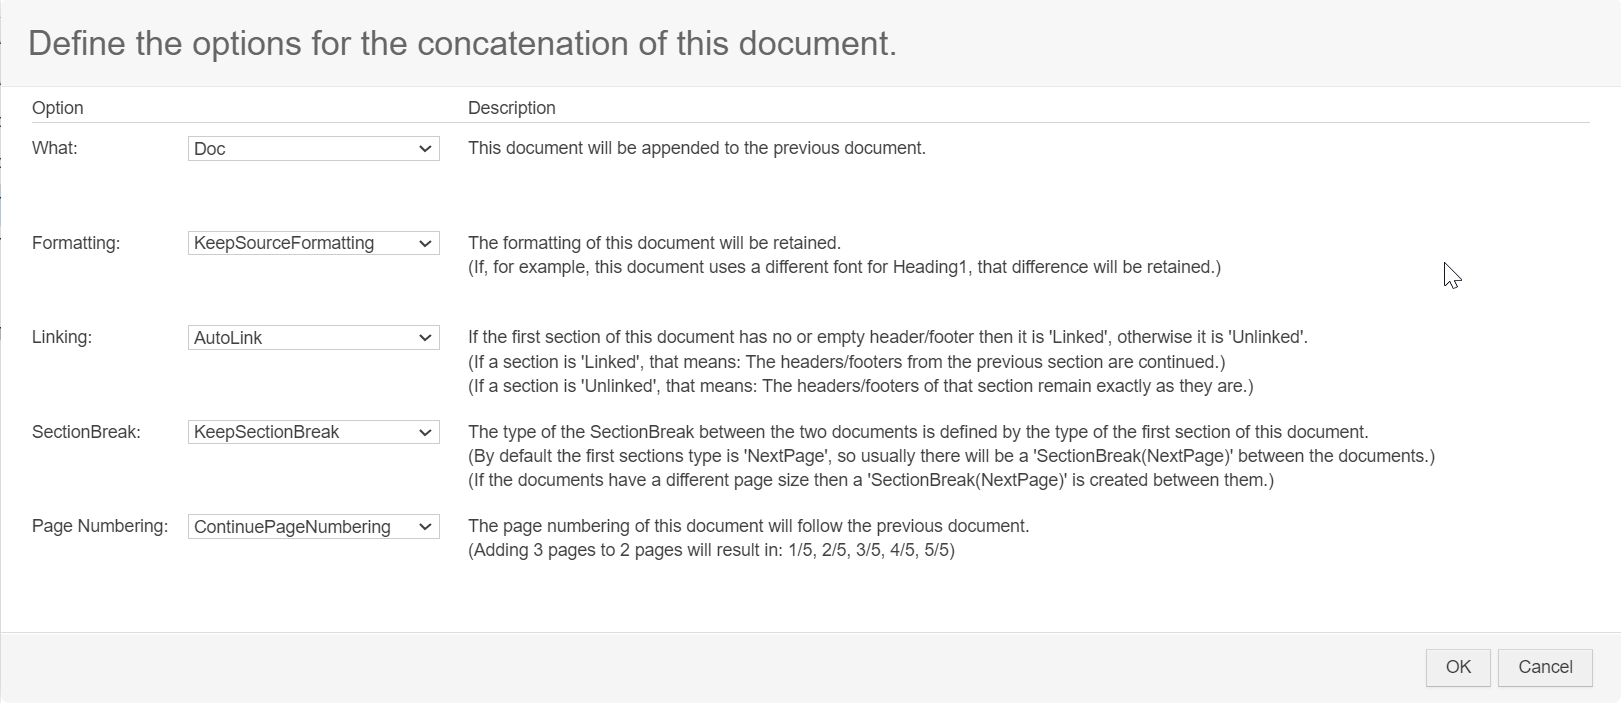
If you press the Concatenate button as described in ❹a, an overview (Figure 12) will open where you can define your concatenating options with the drop-down-list, and then confirm your selections. Learn more about the Concatenate Syntax here.
Step 3: Processing Settings
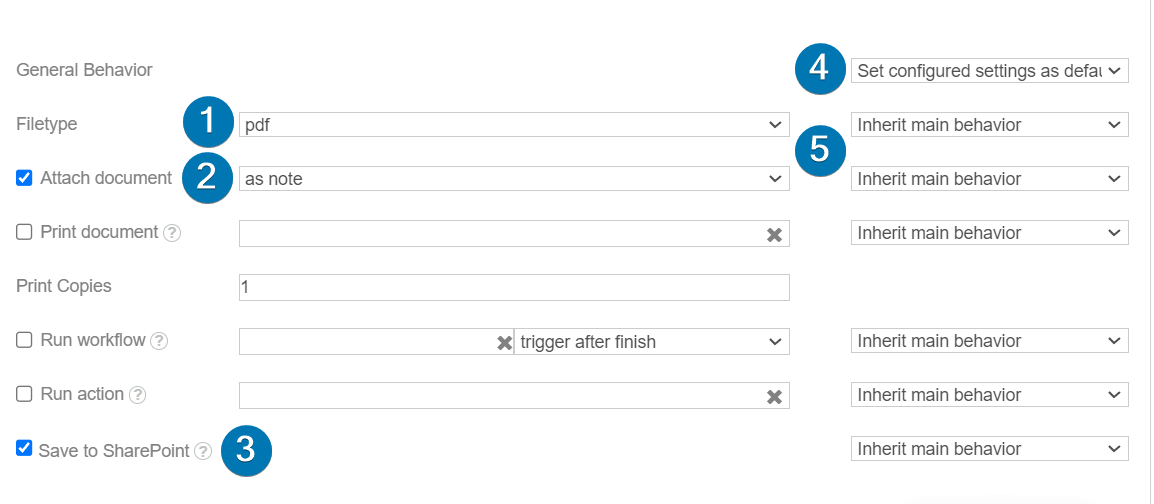
During this step, you can define the actions that should be done after the document creation. In this example (figure 13), the action is defined as the following:
❶ Send the Account_Overview as .pdf.
❷ Attach the document as a note.
❸ Save it to SharePoint.
❹ You can set your General Behavior. There are 3 possibilities:
- Set configured settings as default.
- Hide configured settings.
- Disable configured settings.
❺ You can inherit the main behavior or:
- Do not save.
- Set as the default.
- Hide this setting.
- Show, but do not allow changes.
Finally, move to the next step with the arrow at the bottom right of the screen.
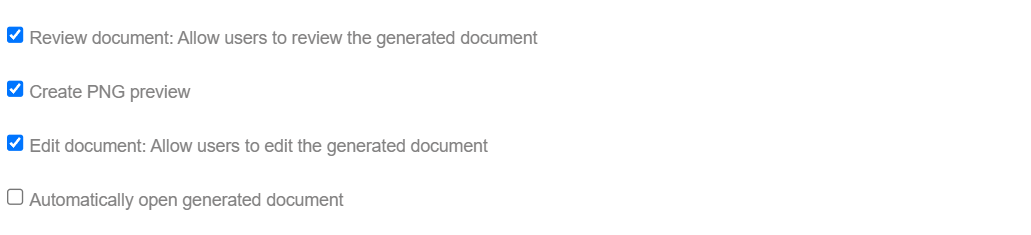
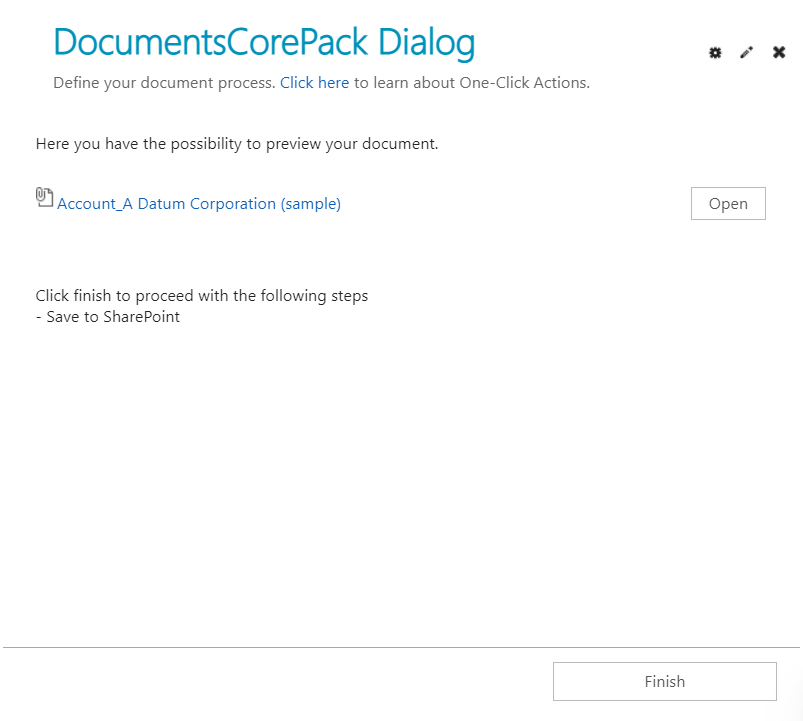
Step 4: Review Settings of One-Click-Action
You can review your document, create a PNG preview and automatically open your document, like you can see in figure 16.
After configuring all steps, you must save your OCA (highlighted in yellow in figure 14).
Test your One-Click-Action
If a Dynamics 365 user now clicks on Create Document, the user will automatically be provided with the available OCAs. They will only have access to the OCAs for which they meet the predefined display rules.
The user can easily navigate the OCAs by using the search bar, or by selecting to view the list of recently used, most used, or their favorite OCAs at the top right of the screen. OCAs can be marked under My Favorites by the user by selecting the right corner of the OCA to show a star. OCAs can also be grouped however is convenient for the organization, such as being grouped based on department or the language of users, as seen in Figure 16.


Click on the OCA you want, and the windows in the following figures below will open, depending on your template selection:
a. Allow User Selection.
b. Predefine Template.
c. Use MultiPart

Here is a preview of a generated document. You can edit or you can finish the OCA.
Look back in Dynamics 365 for your generated template.

That’s it! If you require further assistance or would like to share feedback, please reach out to us at support@mscrm-addons.com.
For additional reference to related topics, please explore the articles below: