This article outlines how to create a simple work order template.
In this step-by-step description, we will create a work order template, consisting of general information about the work order, and a few related tables. This template will make use of the following features:
This guide is based on a sample template. To view the finished sample template, please see the attached document at the bottom of this article.
For a video version of this guide, please see the video below:
Step 1: Setting the base entity
When creating a template, it is always important to set your base entity first. This is because the fields displayed in the Template Designer will be determined by this base entity, and once a field has been inserted into a template, the base entity can no longer be changed. In this case, our base entity is Work Order, so we will set the Type accordingly.

Step 2: Adding our text and general structure
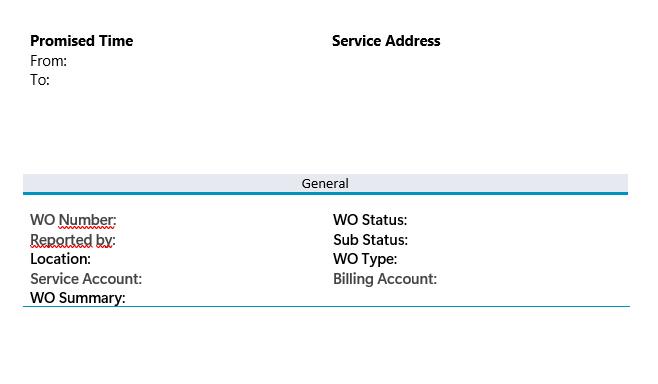
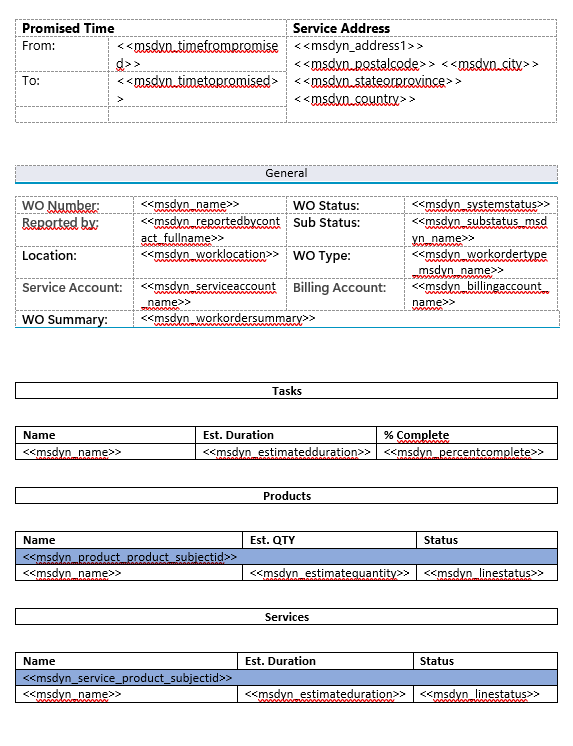
We will begin by adding our text and general structure to our template. For this example, this is what our template looks like.
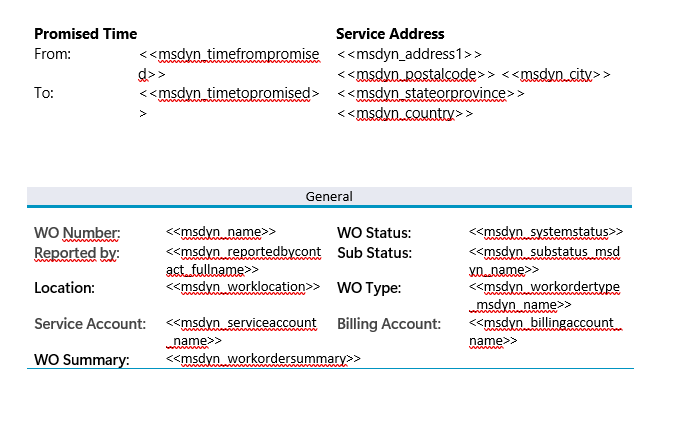
Step 3: Adding our standard fields
To create our work order template, we need to include some fields that cover the basic information about our work order. These standard fields will come either from the Work Order entity itself, or from its lookup fields
Step 4: Creating our tables
Under our General section, we want to create three tables for this work order. These tables will be based on the Work Order Service Task, Work Order Service, and Work Order Product entities. To create these tables, we will need to open the Relationship Designer through the Add Relationship/Entity button in the Template Designer.
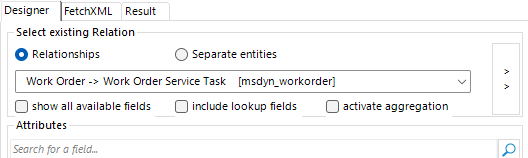
For our first table, we will establish a relationship with the Work Order Service Task entity.
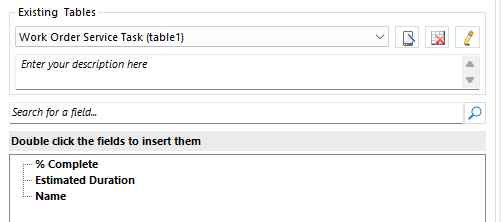
Here, we will need to select the % Complete, Estimated Duration, and Name fields. Click OK once all fields have been selected. The table should appear like the following in the Template Designer.
For our second table, we will establish a relationship with the Work Order Product entity. Similar to above, we will select the relationship in the Relationship Designer. Then, we will select the Estimate Quantity, Line Status, and Name fields.

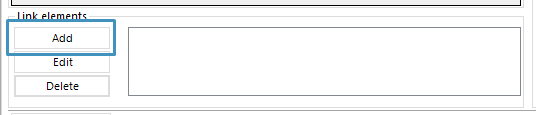
Then, we will need to add a Link Element, which can be added at the bottom of the window.
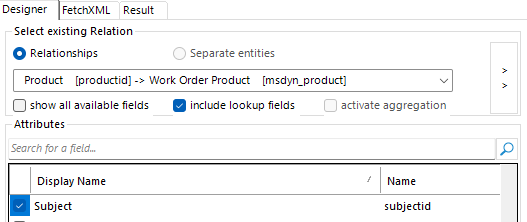
In this window, we will create a new N:1 relationship with the Product entity. We will need the Subject field from this entity. This field can be located in the field list after selecting the “include lookup fields” checkbox. Once the Subject field has been selected, Click OK and accept all changes.
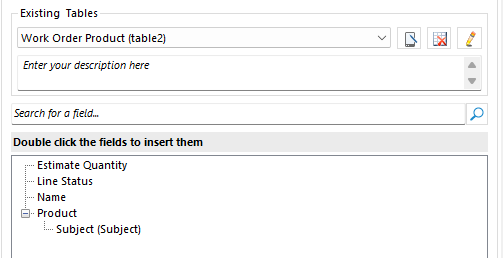
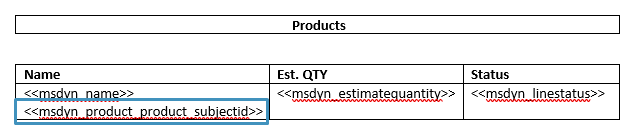
This table should now appear like the following in the Template Designer.
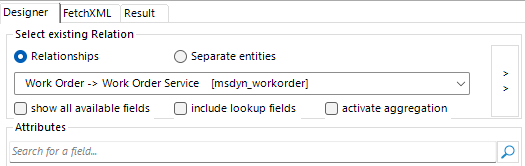
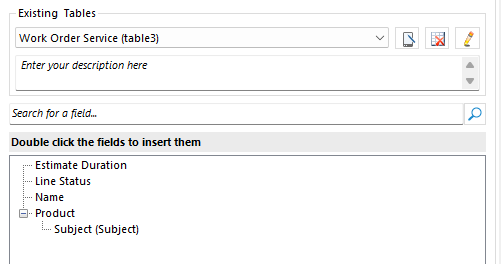
For our last table, we need to establish a relationship with the Work Order Service entity.
We will select the Estimate Duration, Line Status, and Name fields. Like the Work Order Product table, we will also need to add a Link Element. We’ll establish a relationship to the Product entity just like before and add the Subject field.
Once all changes have been saved, this table should look like the following in the Relationship Designer.
With the fields set up, we are now ready to create the tables themselves.
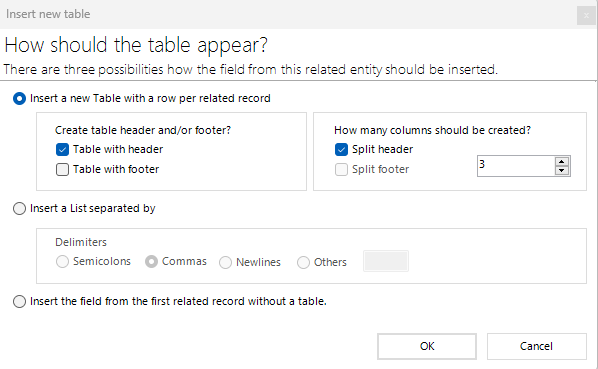
Each table will have the same general structure. We will start by creating a table based on the Work Order Service Task relationship by double-clicking on the Name field in the fields list. We’ll set up the table with the following settings:
Once the table is created, we can add our % Complete and Estimated Duration fields to it, alongside our already-added Name field. We’ll also add some appropriate column names.

We will repeat this process for our other tables. We’ll also add some single-cell tables to keep things looking organized.
Our tables should now look like this.

There’s one more thing we need to add: grouping.
Step 5: Grouping
When applying grouping to a table, you can organize your dynamically generated table into categories. This can be handy in situations where, for example, you would want to categorize products as “electronics” or “services.”
To apply grouping to a table, you first need to add the field you want to group your table by into the table. In our case, we’ll add the Subject field from our Work Order Product relationship into the table.
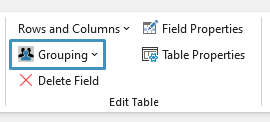
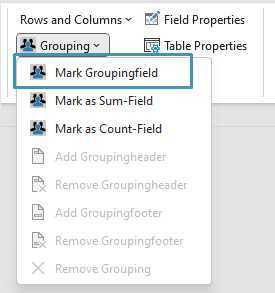
Once the field has been added, we will click on it and then navigate to the Edit Table group in the www.mscrm-addons.com tab. Then, we’ll click on the Grouping dropdown and select Mark Groupingfield.
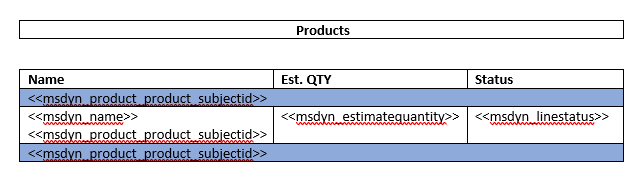
The result should look like this:
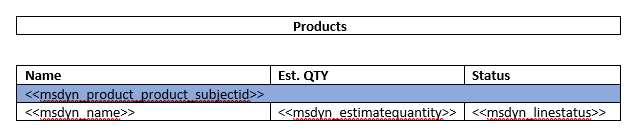
We can remove the field itself from our main table row, as it is not needed in our table. Additionally, we can delete the grouping footer by selecting the footer, navigating back to the Grouping dropdown and selecting Remove Groupingfooter.
Our table should now look like this:
This process can be repeated for our Work Order Service task. We will not do this for our Work Order Service Task table.
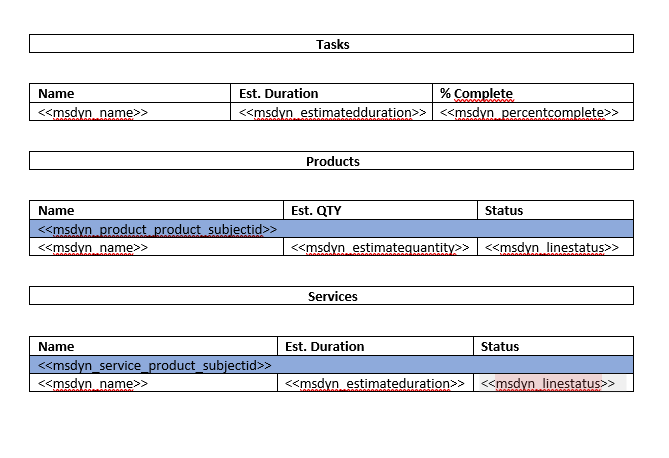
The tables should end up looking like this:
Step 6: Generating a document
At this point, your template should something like this:
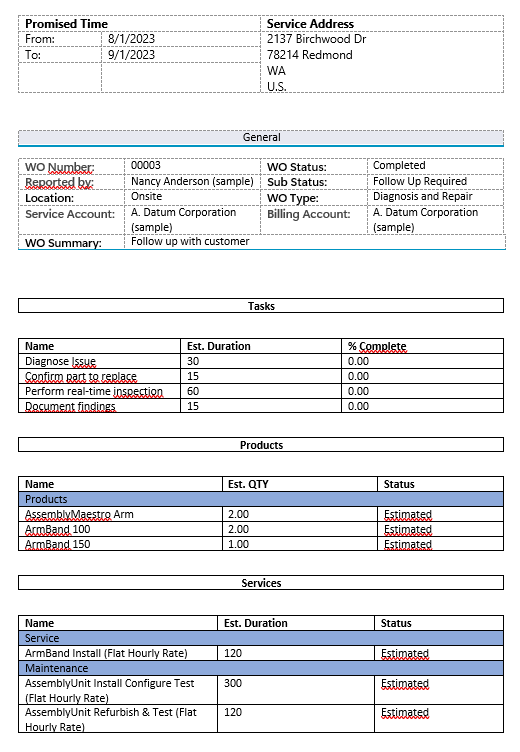
When we run this template against some data, we receive the following result. Note the grouping on the last two tables.
That’s it! We appreciate your feedback! Please share your thoughts by sending an email to support@mscrm-addons.com.