This article outlines how to create a simple invoice template.
In this step-by-step description, we will create an invoice template, consisting of general invoice details, the invoice’s products, and tax and discount information. This template will make use of the following features:
This guide is based on a sample template. To view the finished sample template, please see the attached document at the bottom of this article.
For a video version of this guide, please see the video below:
Step 1: Setting the base entity
When creating a template, it is always important to set your base entity first. This is because the fields displayed in the Template Designer will be determined by this base entity, and once a field has been inserted into a template, the base entity can no longer be changed. In this case, our base entity is Invoice, so we will set the Type accordingly.

Step 2: Adding our text and general structure
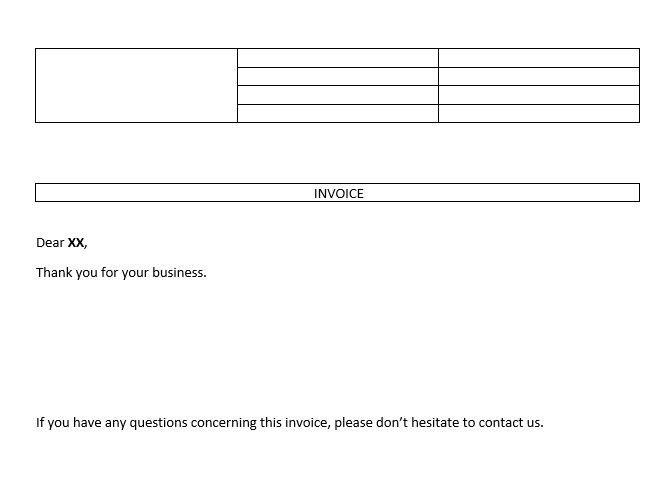
We will begin by including our text and general structure to our template. For this example, this is what our template looks like.
Step 3: Adding our standard fields
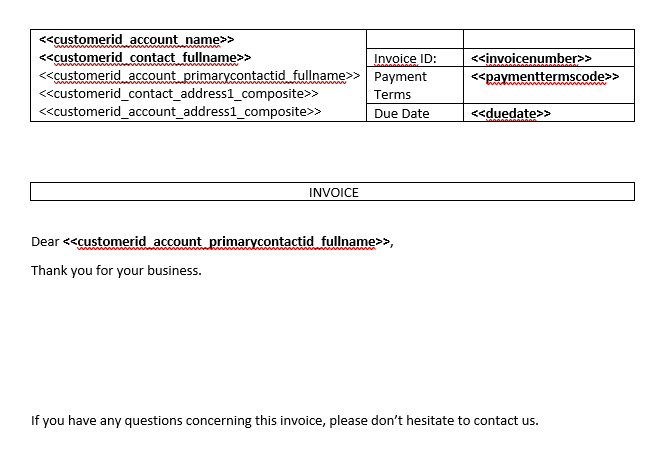
To create our invoice template, we need to include some fields that cover the basic information about our invoice, such as details about our customer and the invoice itself. These standard fields will come either from the Invoice itself, or from its lookup fields
Step 4: Adding our table
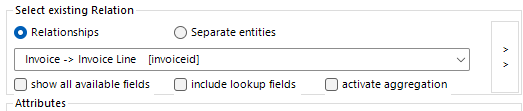
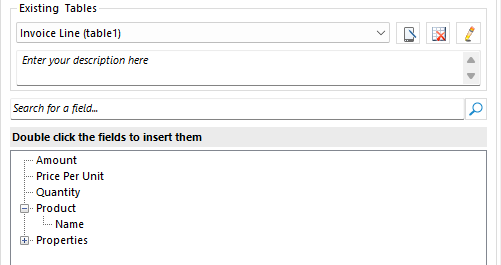
For our table, we will create it based on the Invoice Line entity. We will create it by accessing the Relationship Designer and locating the Invoice->Invoice Line relationship. Once that relationship has been selected, we will select the Amount, Price Per Unit, and Quantity fields.
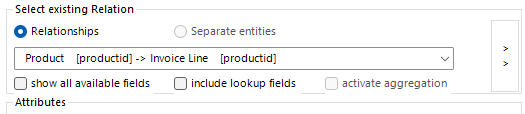
After we select the fields, we need to add a Link Element. This can be found at the bottom of the Relationship Designer.

This will bring us to another Relationship Designer window. Here, we need to select the Product->Invoice Line relationship. Once that is selected, we must also select the Name field to get the name of our product.
With that, click OK on both Relationship Designer windows. If done correctly, your fields list under the Additional Tab should look something like the following:
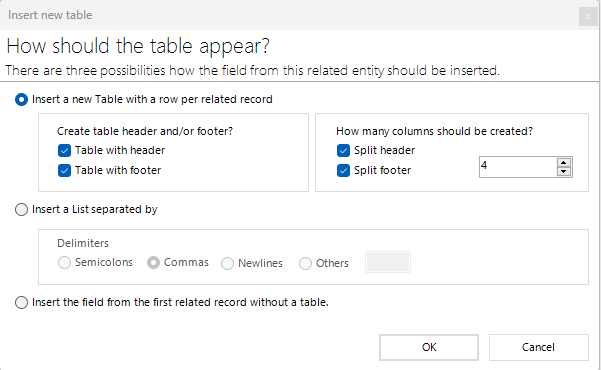
To create the table, double click on the Name field. We will structure our table like so:
Then, we will fill in the fields of our table, and give each column an appropriate name. We will also add the Total Detail Amount field from the Standard tab in the footer. Our table now looks like the following:

Step 5: Adding our conditional fields
On top of our table of products, we also want to include some extra fields that show any discounts or taxes that my be applied to our invoice. However, we only want to include these fields if they are applicable i.e.: if there are no discounts available, we do not display that field.
This is where Condition Fields come into play. We can include these fields in our template to do exactly as mentioned.
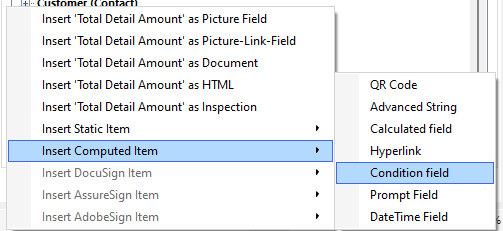
We’ll begin by creating a Condition Field through the Insert Fields menu.
We will first create a condition for our discounts. In our example, we’ll include a name (as highlighted below) and select the Total Discount Amount field. The operator dropdown will be set to greater than with a value of 0. It should look something like the following:

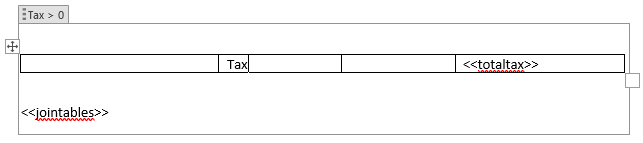
Click OK. You should see the following field in your template.
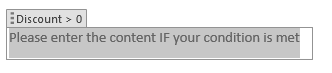
The contents of this field will only be displayed in the result document if the condition is met. In our case, if the discount is greater than zero (ex: if the field’s value is $20), the contents will be shown in the result document. It will not be shown if it is zero.
We want to include a Word table inside of this field and include our Total Discount Amount field as well. This way, the value of this field will be shown if the condition is met.

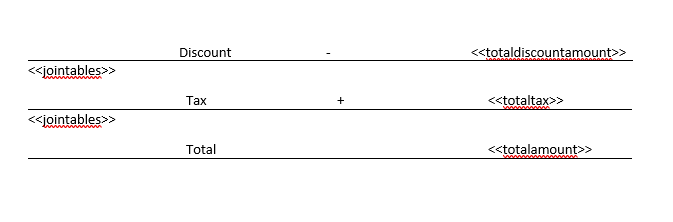
This is what we want our condition fields to be structured like in this template. We will create two other condition fields like this. However, we want to add in one other field within this condition field: the Join Table field
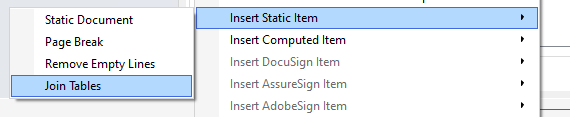
The Join Table field can be inserted between two tables to merge them into one table. In our case, since we want to include two other condition fields similar to the one above, we can insert the Join Table field between the tables to join them into one structure.
To insert this field, navigate to the Insert Fields menu once more. You can find this field under the Insert Static Item submenu
Once selected, the Join Table field will be inserted at the location of your cursor. Please make sure that this field is inserted below our discount table.

We are now finished with this condition field. We can proceed to the next field: the Total Tax field.
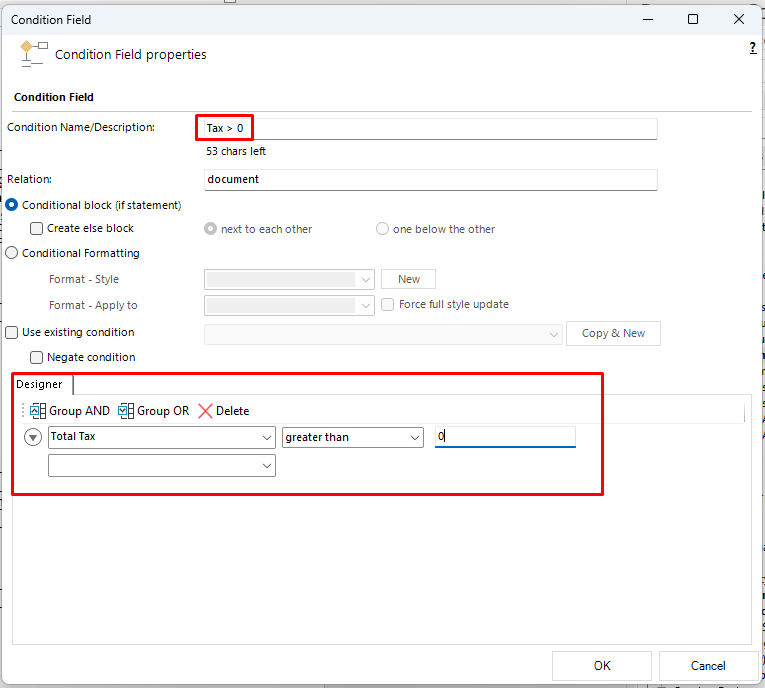
This condition field is set up just like the one before. In the end, it should look similar to the following:
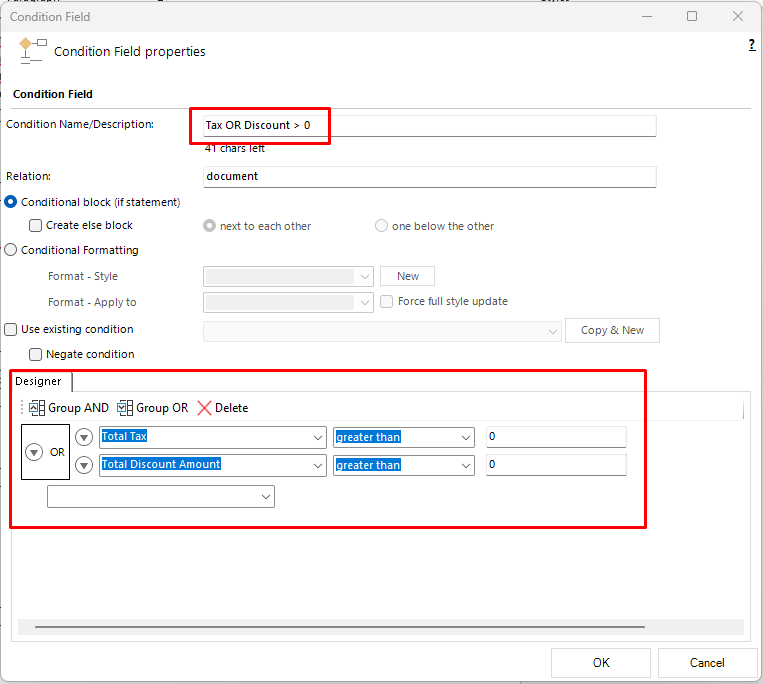
For our last condition field, we want to have our Total Amount field displayed only if either the Total Discount Amount or Total Tax is greater than zero. This can be set up by creating a condition field with two conditions. To do this, you need only create a condition field like normal and set up two conditions. Once they have been created, you can select both rows and click the Group OR button.

This will group them together under a single OR condition statement.
Click OK. You can then insert a Word table into the condition field along with the Total Amount field like we have done so far. Since this is our last condition field, we do not need another Join Table field.

Finally, we can adjust the borders on the tables if need be.
Step 6: The result document
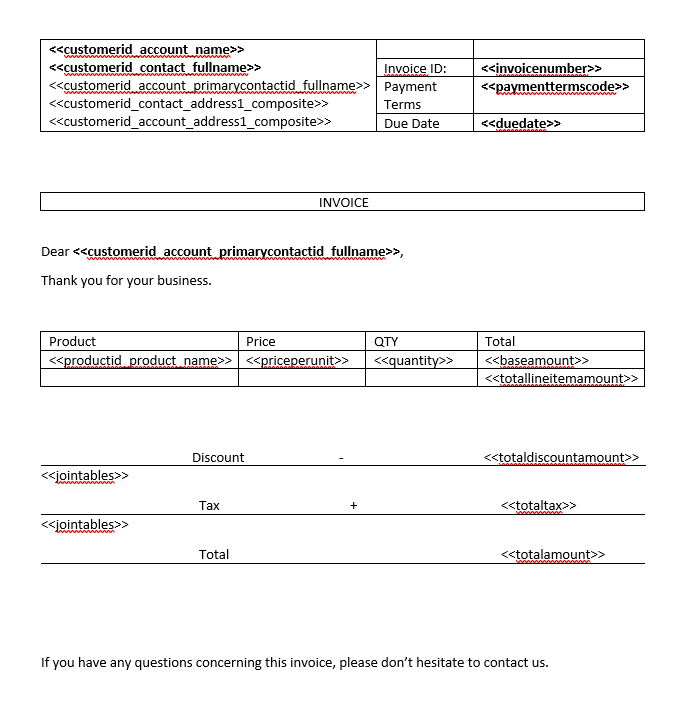
With our fields, tables, and condition fields now in place, we can now test our template. For reference, this is what our template currently looks like:
If we merge it with an Invoice record that we have in our system, this is what we will have as our result:
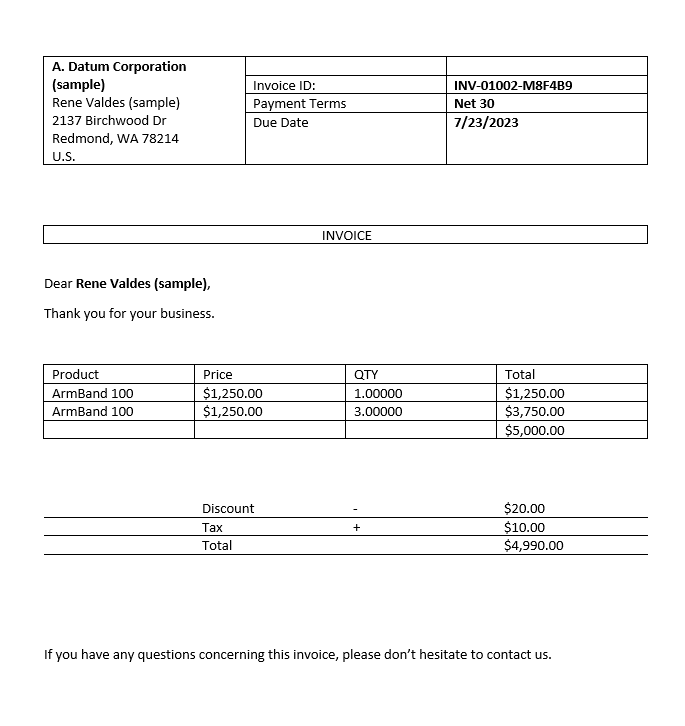
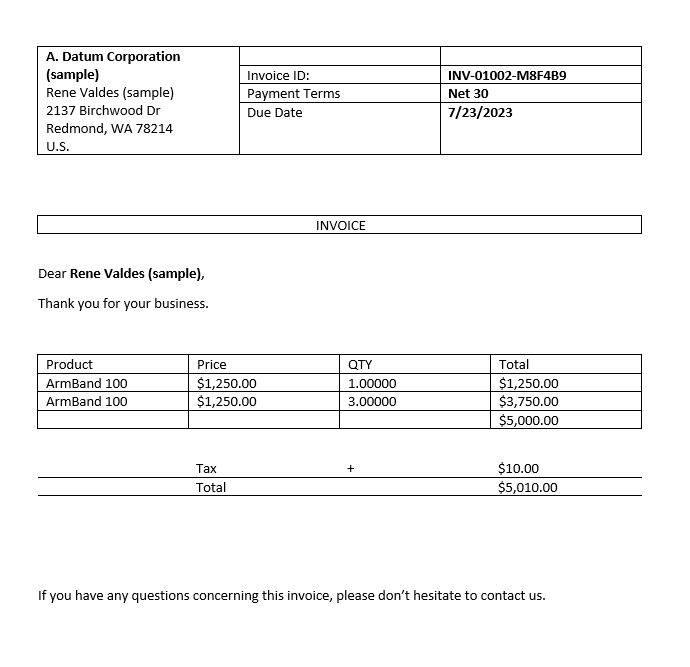
Note that the Discount, Tax, and Total rows are all merged thanks to the Join Tables field. Additionally, the Discount and Tax fields are present since they are greater than zero. If we change the discount to zero instead, we will find that the row disappears as expected.
That’s it! We appreciate your feedback! Please share your thoughts by sending an email to support@mscrm-addons.com.