• Release History
  • Documentation
  • Back to www.mscrm-addons.com
  • Release History
  • Documentation
  • Back to www.mscrm-addons.com
home/Knowledge Base/DocumentsCorePack(DCP)/Step-by-step: How to set up look-up prompts for relations

Step-by-step: How to set up look-up prompts for relations

1524 views 1 Updated on May 27, 2025

With this special version of the prompts feature, you have the ability to select one or multiple related records while generating a document, rather than all records. This article covers step-by-step how to set up look-up prompts for relations in your templates with the DocumentsCorePack (DCP) Template Designer.

Step 1: Locating the look-up prompts

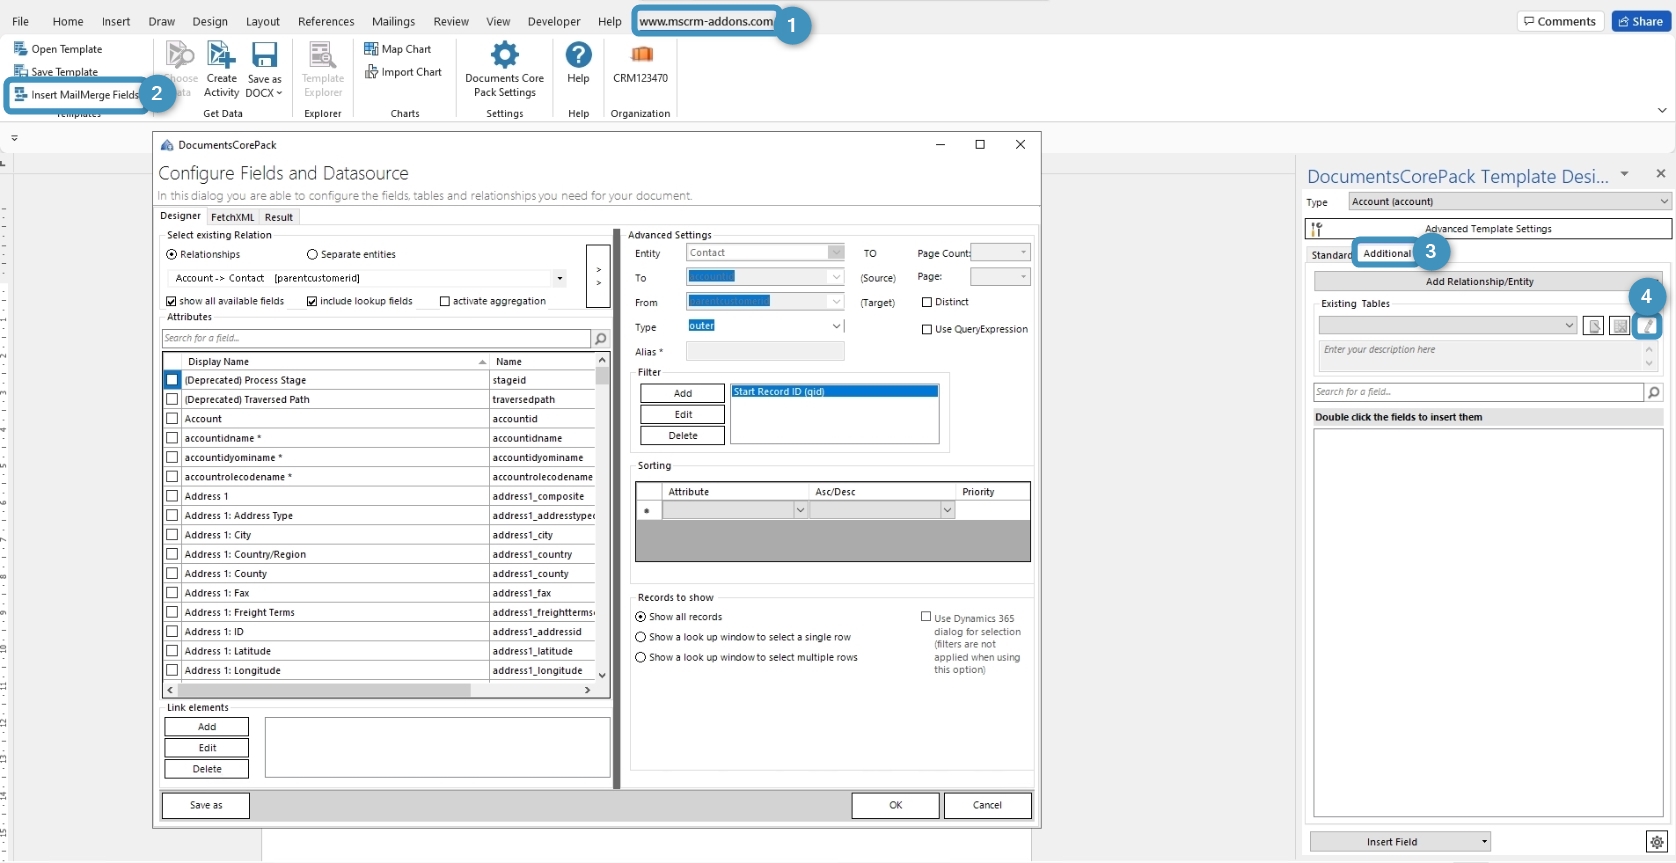
Unlike other prompts, look-up prompts are created with the relationship designer. To access it, complete the following:

❶ Navigate to the www.mscrm-addons.com tab.
❷ Select Insert MailMerge Fields to open the DCP Task Pane.
❸ Go to the Additional tab.
❹ Select Edit.

Open the relationship designer
Figure 1: Open the relationship designer

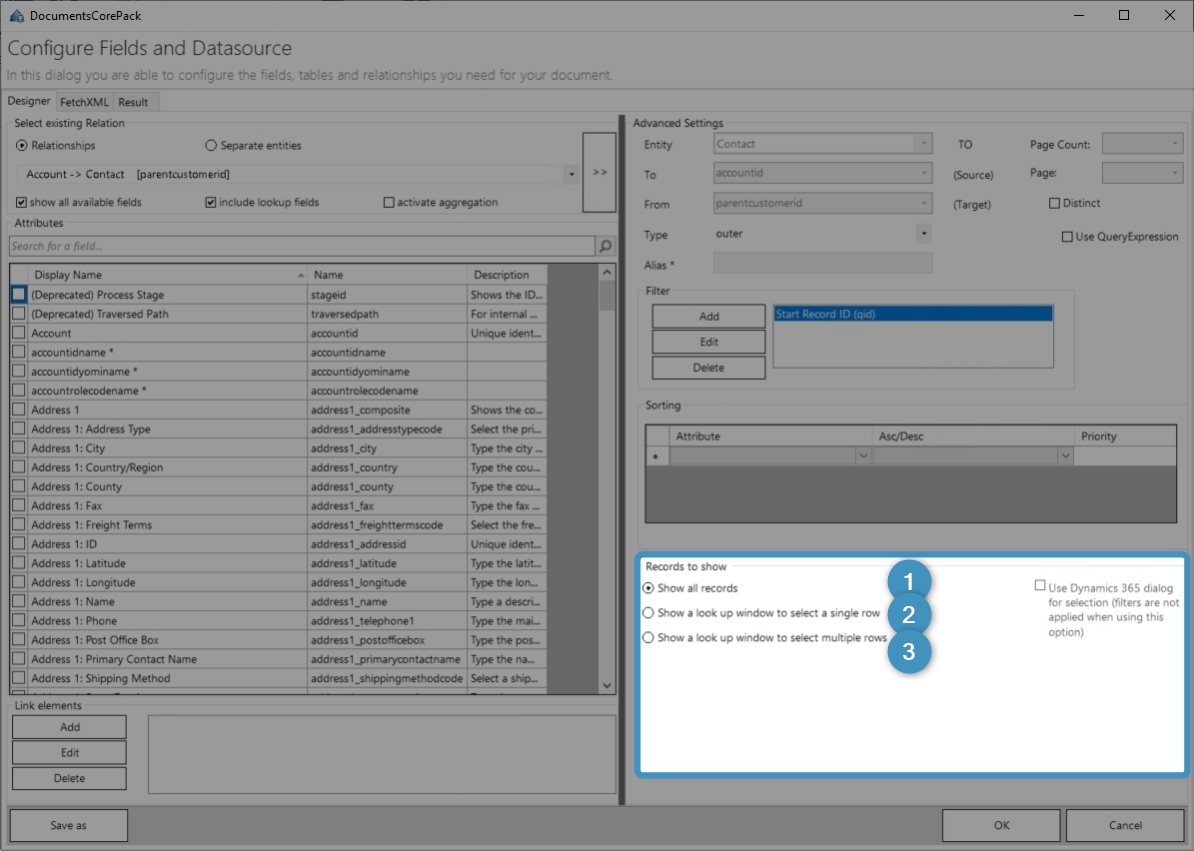
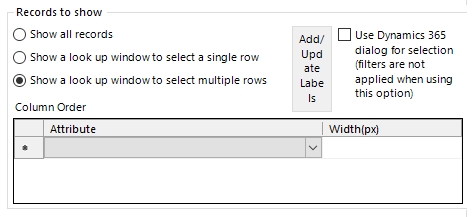
Within the Records to show section, you can find three options:

❶ Show all records
❷ Show a look-up window to select a single row
❸ Show a look-up window to select multiple rows

Records to show
Figure 2: Records to show

Step 2: Defining the look-up prompt

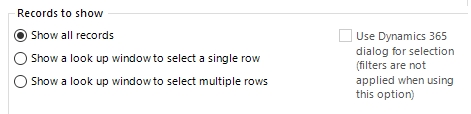
Before you can create the prompt, you must select the base behavior of the relation from the following options:

a. Show all records
By selecting this option, all related records will be displayed and there is no need for a prompt.

Show all records
Figure 3: Show all records

b. Show a look-up window to select a single row
Select just one row instead of displaying all related records.

Show a lookup window to select a single row
Figure 4: Show a look-up window to select a single row

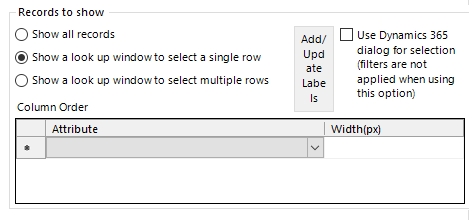
c. Show a look-up window to select multiple rows
Select multiple rows instead of displaying all related records.

Show a lookup window to select multiple rows
Figure 5: Show a look-up window to select multiple rows

Step 3: Defining a Label

To define a label, click the ❶ Add/Update Labels button.

Add/Update Labels button
Figure 6: Add/Update Labels button

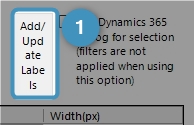
Each option requires at least one label. A label is a text that is displayed in the DocumentsCorePack dialog in front of the actual control.

If a label for the current user language in Dynamics 365 is set, this translation will be displayed. If there is no label that matches the current user’s language, the first one in the list is displayed.

After you have set up the label, you are able to use your template.

Define a label.
 Figure 7: Define a Label

Step 4: Save your template 

Before you can use or test your template, please save it. Use the Save template option in the www.mscrm-addons.com tab of Microsoft Word to publish the template to Dynamics 365.

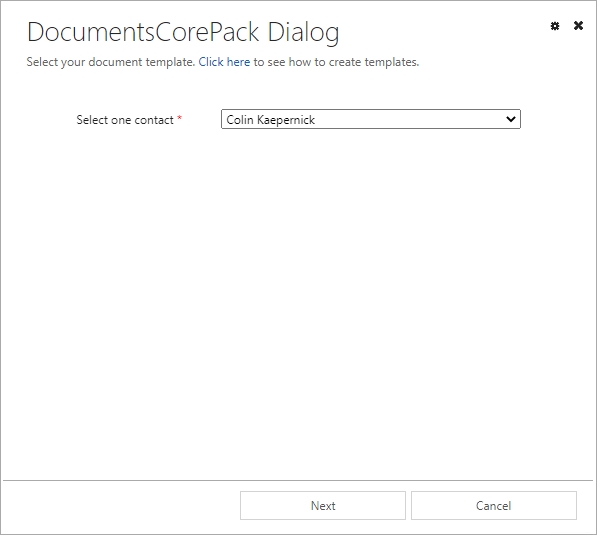
Step 5: Generate the document

While generating the document, you will be prompted to select one or multiple related records.

Please note: Prompts do not work with the Template Designer, but by using the DCP dialog (accessed via the Create Document button in Dynamics 365).

 Our prompt in the DCP Dialog
Figure 8: Our prompt in the DCP Dialog

Look-up prompts in Power Automate

Look-up prompts can be created in Power Automate as well. When creating a flow that generates a document through the DocumentsCorePack Connector, you can create a prompt via the Prompts parameter.

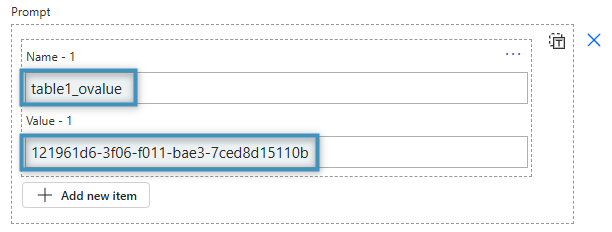
When defining the parameter, you will need to enter the name of the prompt alongside its value. Its name should match the name in your template, plus an added “_ovalue” to format it correctly. Its value should be the GUID of the record to be selected. Below is an example.

A look-up prompt in Power Automate
Figure 9: A look-up prompt in Power Automate

That’s it! We appreciate your feedback! Please share your thoughts by sending an email to support@mscrm-addons.com.

Was this helpful?

1 Yes  No
Related Articles
  • 3 Ways DocumentsCorePack Transforms Proposal, Quote, and Contract Creation
  • DeepSign for DocumentsCorePack 
  • Generate and send a document for e-signing using DeepSign
  • How to prepare a document for DeepSign
  • Why Document Generation Is Still the Most Broken Part of Your CRM Workflow
  • How to migrate One-Click-Actions (OCAs) between environments
Latest Articles
  • How to Eliminate Excess Storage Costs in Microsoft Dynamics 365 Without Losing Access to Emails and Attachments
  • 3 Ways DocumentsCorePack Transforms Proposal, Quote, and Contract Creation
  • DeepSign for DocumentsCorePack 
  • Generate and send a document for e-signing using DeepSign
  • How to prepare a document for DeepSign
Popular Articles
  • DocumentsCorePack Template Designer – Getting Started
  • Step-by-Step: How to configure a One-Click-Action
  • Application Access for Dynamics 365
  • How to find your environment’s unique name in Microsoft Dynamics 365
  • How licenses are counted
Top Rated Articles
  • “Undefined”-labels in Chrome and Edge 114 and higher
  • Important information for Dynamics 365 online customers using DocumentsCorePack and/or AttachmentExtractor
  • How to activate the DocumentsCorePack Connector for PowerApps & Microsoft Flow
  • How licenses are counted
  • How to insert Condition Fields in DocumentsCorePack Templates designer
Categories
  • *News and General Infos* 64
  • Webinars 45
  • Template Designer(DCP 196
  • DocumentsCorePack(DCP 257
  • TelephoneIntegration (TI 65
  • AttachmentExtractor (AE 74
  • PowerSearch (PS 50
  • ActivityTools (AT 61
  • SmartBar (SB 54
  • GroupCalendar (GC 47
Our Vision

“We see it as our purpose to provide products that simplify and speed up our customers’ Microsoft Dynamics 365 experience.”

Knowledgebase
LogIn
mscrm-addons.com
  • Products
  • Online Shop
  • Downloads
  • My Account
About Us
  • About Us
  • Case Studies
  • Newsletter
  • Partner Program
  • Contact
Support
  • Support
  • Terms & Conditions
  • Documentation
  • Webinars
  • Legal Documents
  • Impressum
  • © 2022 www.mscrm-addons.com. All Rights Reserved.