This blog article guides you through the test of the compatibility of your phone system with the TelephoneIntegration addon for Microsoft Dynamics 365. For more information, please also have a look at the corresponding documentation.
The tool offers two communication channels. You need only one of them to be able to use our CTI.
Via TAPI
For testing, via TAPI you require a valid TAPI driver from your phone system vendor.
Via SIP
For testing SIP protocol, you need a valid sip user account. For this, you require SIP username, SIP password and SIP domain (PBX server).
The testing consists of 7 steps you have to follow:
1. The tool can be downloaded and downloaded from our website.
2. After the extraction, start the PhoneTest.exe.
3. Select your desired channel of communication (TAPI or SIP).
4. Test an incoming call.
5. Test an outgoing call.
6. Evaluate the results.
Step 1: Download and start the tool
First, please download the ZIP file here, extract and open it by hitting the PhoneTest.exe file. Start the tool and press the [Get Startted]-button.
Step 2: Select the plugin
Next, please choose the plugin interface you want to test.

Figure 1: Choose the plugin interface you want to test
Step 2: Configure plugin
If selecting TAPI, you need to select your TAPI line provided by your TAPI driver and hit the [Next]-button. Please note: If the selected line cannot be activated, the [Next]-button will stay disabled.
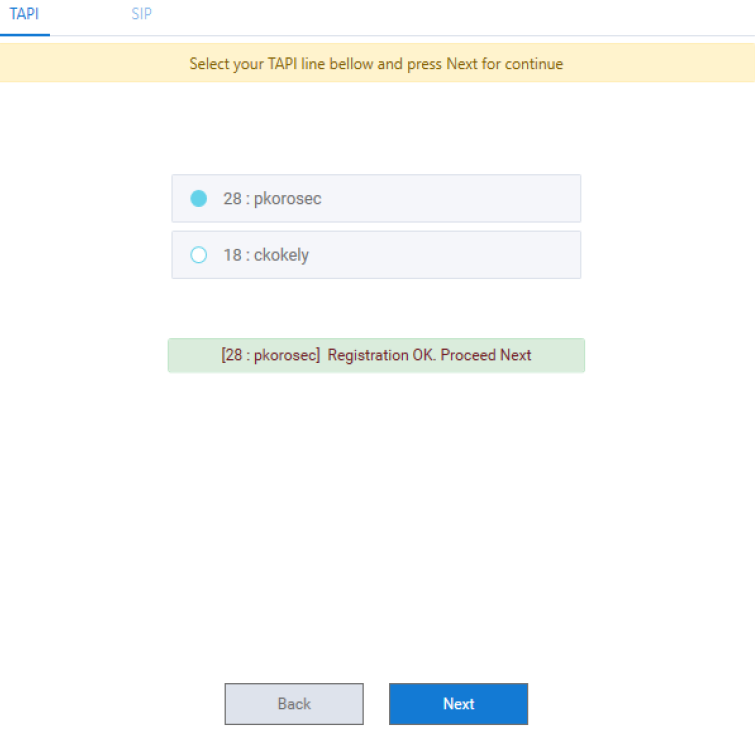
Figure 2: Configure plugin via TAPI
If selecting SIP, you need to type in your SIP credentials – your username, password and the domain as you can see below. Choose Advanced option if you need to set detailed settings like authorization name, proxy, …

Step 3: Grant access
In the firewall-window please grant access to the phone test tool as you can see in the figure below.
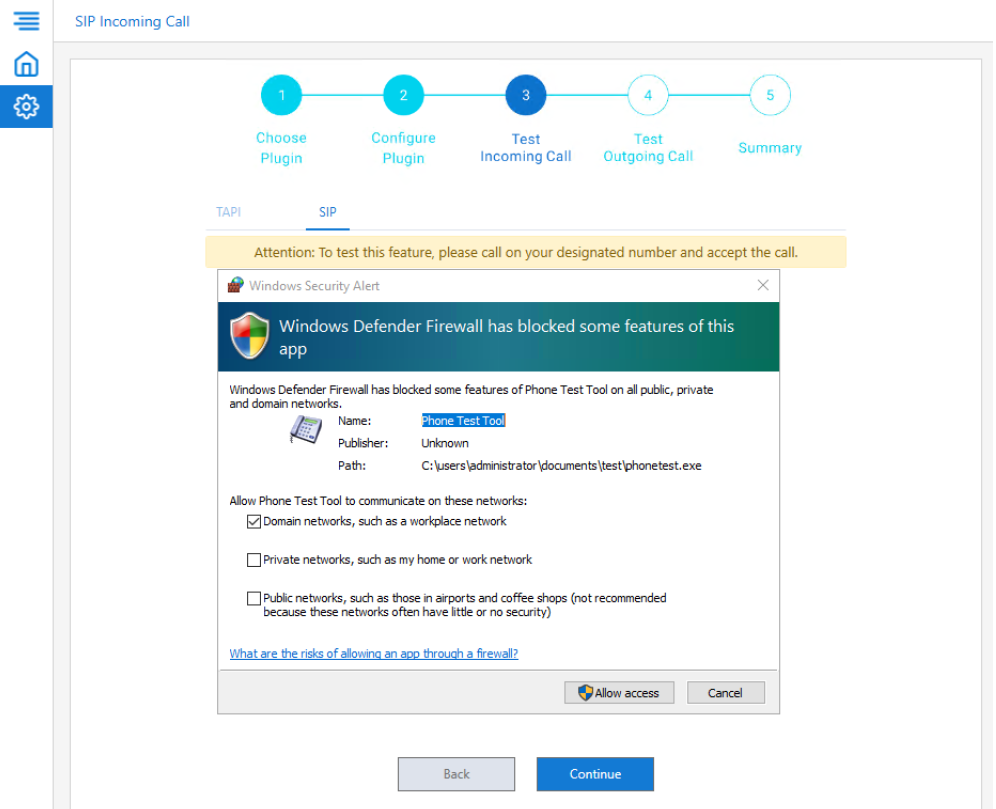
Figure 4: Grant access to the phone test tool
Step 4: Test incoming call
After successful registration with your SIP user account, you can now test an incoming call. Hit the [Continue]-button in order to do that.

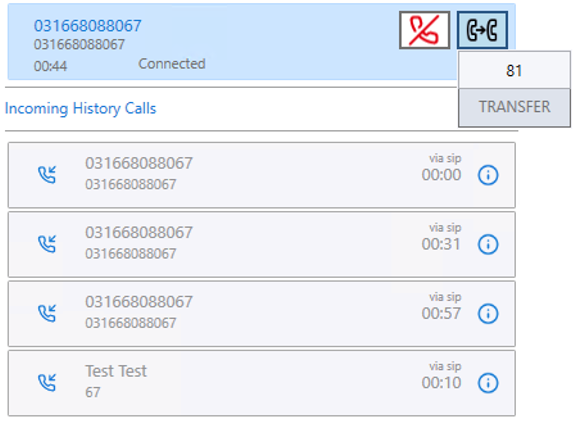
Accept or decline the call by clicking one of the buttons.

It is also possible to perform direct call like for example to transfer it to another extension.
Step 5: Test outgoing call
In order to test outgoing calls, please type in the number you want to call and hit the phone symbol to dial the number.

At the bottom, you will find enabled features listed that were successfully tested.

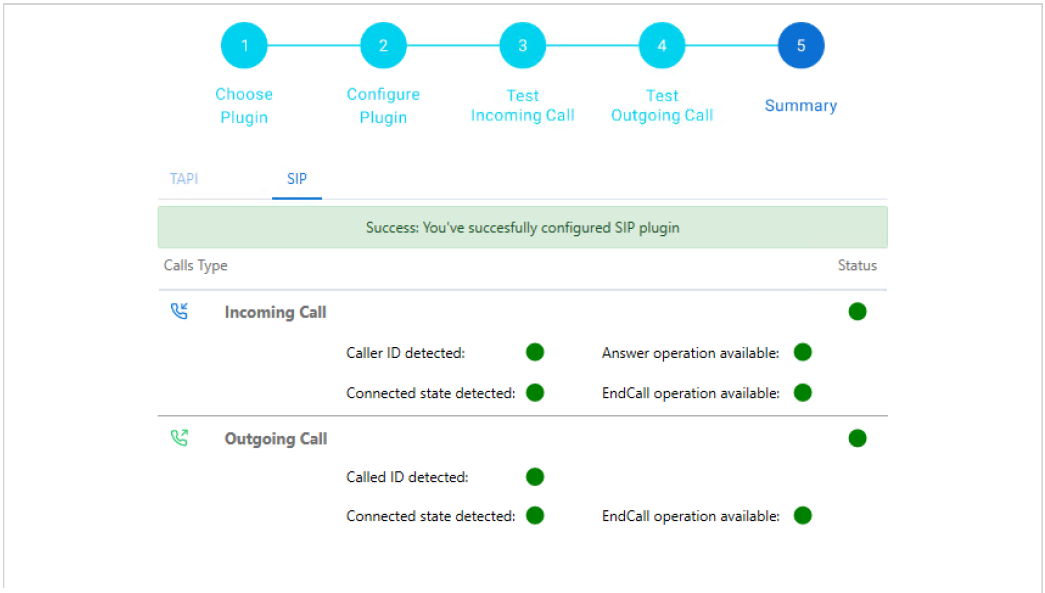
Step 6: Evaluation of all inocoming and outgoing calls
In the end, we evaluate the incoming and outgoing call. We check if the caller/caller number was detected if the Answer/EndCall operation is possible and if we can observe the state of the call. If everything is green, then the TelephoneIntegration addon is compatible with your phone system as you can see in the figure below.
That’s it! We appreciate your feedback! Please share your thoughts by sending an email to support@mscrm-addons.com.