NOTE: This article details the current online service configuration for .

For the classic configuration, please see here.
The AttachmentExtractor Online Service Configuration (Modern UI) is the central hub for managing your services. Here, you can create brand new services, or configure and modify existing ones.
This article outlines the AttachmentExtractor Online Service Configuration (Modern UI) the array of options available on this platform, beginning with how to access the AttachmentExtractor service configuration itself.
Table of Contents for the AttachmentExtractor Online Service Configuration
Accessing the Service Configuration
Accessing the Online Service Configuration
To access the Service Configuration, navigate to our ❶ website and click on ❷ My Account. You can then access the Service Configuration page by selecting ❸ Manage Services.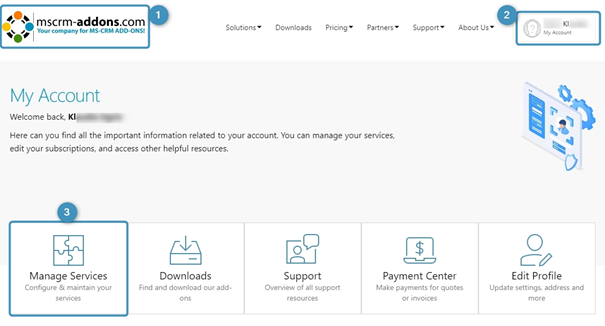
The Service Configuration page displays a list of configured services. If you don’t configure any services, the system will leave the page empty.
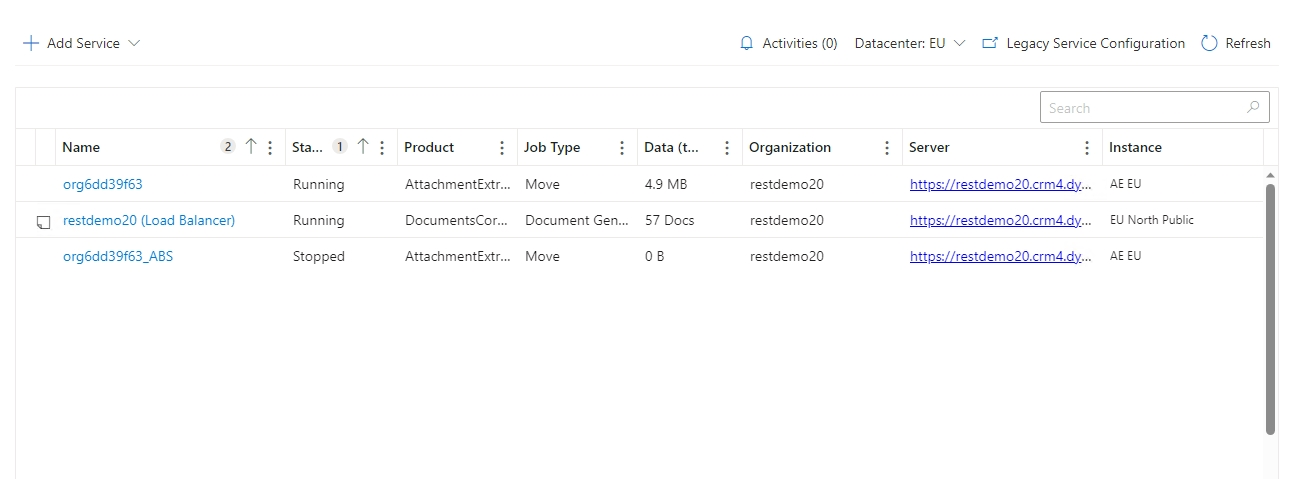
Selecting any services will bring up the Service Configuration Overview, along with a list of tabs that contain more configuration options and other information.
1. Overview
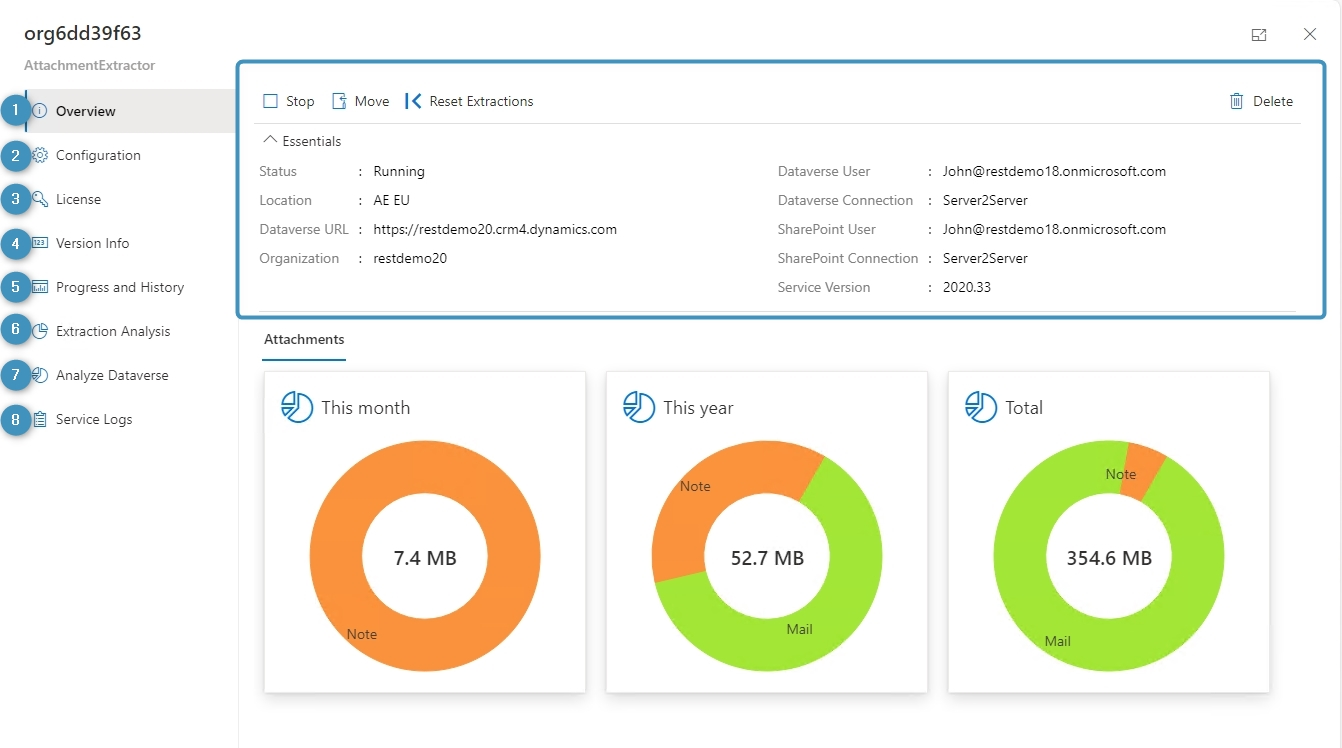
This page shows all the essential information about the service, like the Status, Dataverse URL, Organization, etc, as seen in the highlighted section of the figure below.
In this section, you can also Stop, Move, Reset Extractions, and Delete the service.

2. Configuration

The system divides the Configuration tab as follows:
- Save button: Update your service here.
- Dynamics Details: Find the essential details about Dynamics 365 in this section. You can also edit or open Dynamics 365.
- SharePoint Details: Find an overview of your SharePoint connection here. You can edit or remove the connection.
- Extraction Mode: Select whether to extract email content or attachments.
- Storage system: Decide which attachment storage system your AttachmentExtractor Service should use.
- SharePoint Integration: Select in your SharePoint settings whether you want to use Dynamics 365 Integrated SharePoint or a specific SharePoint location.
- Storage Option for Entities without Document Management enabled: You can store entities without document management enabled daily or weekly on a specific SharePoint library. You can also decide which entities not to extract.
- Extract: Select what should be extracted.
- Email Subfolder: Extracted email attachments will be saved to the location defined here.
- Note Subfolder: Extracted note attachments will be saved to the location defined here.
- Appointment Subfolder: Extracted appointments will be saved to the location defined here.
- Data Processing: Specify if only a copy of your attachments should be saved to SharePoint or if you want your attachments extracted entirely. Once extracted, the file is replaced with a .url file that points to the extracted file on SharePoint.
- Minimum attachment size filter: Set the minimum size for attachments to be extracted.
- Only extract attachments older than: Enter a time value to extract attachments that are older than X hours/days/weeks/months. (minimum value = 0).
- Enable text-only E-mails in timeline: Decide if only e-mail text or if all e-mail content should be displayed in the timeline.
Advanced Settings

- Enable Debugging: When enabled, generates debug logs during the extraction process. Log files will be available as soon as the service is saved.
- Stop service on single item error: When enabled, the service will stop if an error occurs with a single item.
- Single Item Error Threshold: The service will stop after a specified number of single item errors.
- Add markup to filenames for extracted files: This option is activated by default. Please note that disabling will remove any visible indicator to an extracted attachment.
- Create SharePoint Attributes: When enabled, this option will create SharePoint attributes for all transferred files.
- New folder per: Specify whether to create a new folder weekly or daily. This option only applies to Dynamics 365 integrated SharePoint.
- Blacklist / Whitelist: Specify whether to use a blacklist or whitelist and select the entities to add. The system will not extract entities on the blacklist but will extract entities on the whitelist.
- Notify service changes immediately: To avoid false positives, we send out emails after 30 minutes if there is still an issue with the service. Select this option to receive an email immediately instead.
- Static time range start: Set the start of the time range.
- Static time range end: Set the end of the time range.
- Skip solution import: If you enable this option, the setup will assume you have already imported all necessary solutions to create a service and will skip the import process. Please note that if a particular solution is missing, the creation of the new service will fail.
- Synchronous solution import: When enabled, the setup will try to import the solutions synchronously.
- Skip role assignment: If you enable this, the system will skip the role assignment. Please note that you must create a custom role covering the required rights or manually assign the security roles. Otherwise, users will not have the permission to use AttachmentExtractor.
- Use SharePoint compatibility connection: When enabled, improves performance with the SharePoint connection.
- Note: This requires SharePoint 2013 or higher and native REST endpoint communication.
Advanced Settings (Extraction Mode – Email Content)

When you set Extraction Mode to extract Email Content, additional settings will appear:
- Activity Party Cleanup: This feature cleans up links of activity parties (To, From, CC, ect.) by changing any associated email addresses to the next higher available entity type in accordance to the established field hierarchy.
- Field Hierarchy: The field hierarchy that Activity Party Cleanup will follow. The system will set an activity party in the following order (from lowest to highest):
- Lead
- Contact
- Account
- System User
- Queue
- Full Body Extract: Extracts the content of an email (email body), leaving only a placeholder behind. This placeholder contains the original content of the email as text.
- Only fully extract e-mail bodies older than: Set the time for extracting email bodies.
- Extract Note Description: Moves descriptions of notes to an Azure Blob Storage.
For more information on how to create an email content service, please see here.
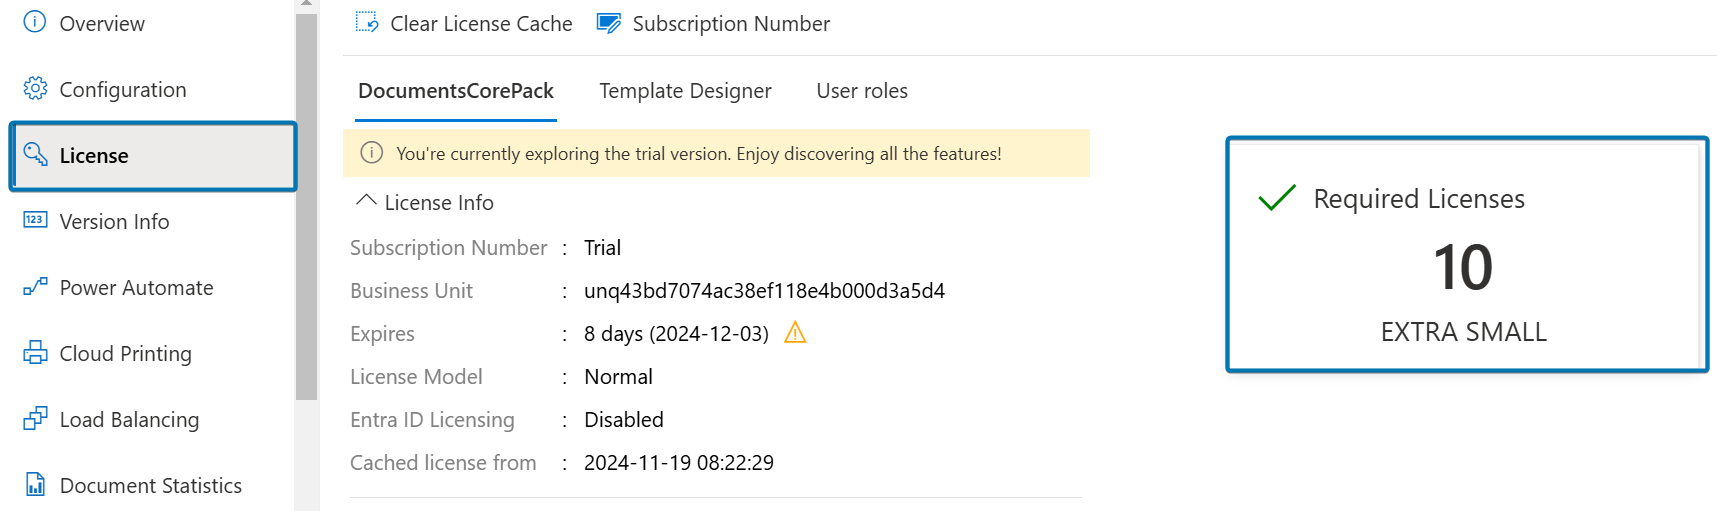
3. License
Under License, you can install a new license or see the overview of the currently installed license. DocumentsCorePack comes with a fully supported, 14-day trial license.
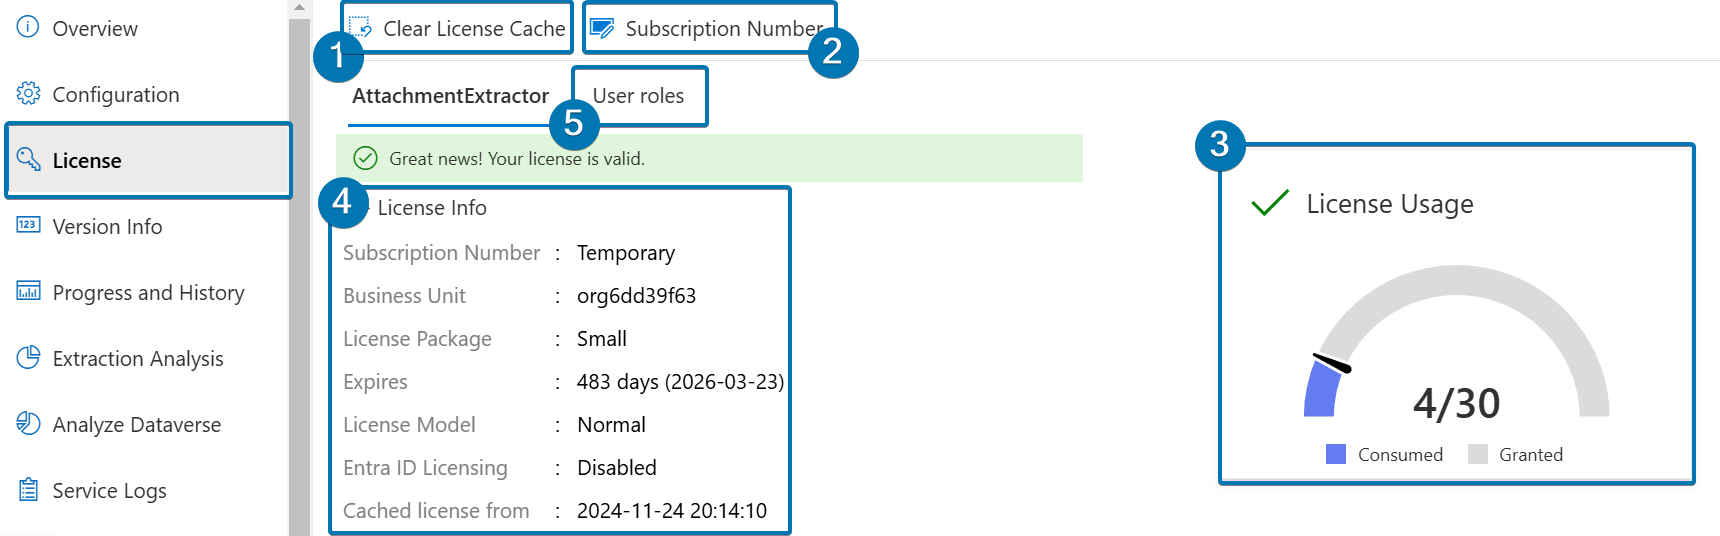
- Clear License Cache: Clears your License Cache and enforces a reload of your current licensing situation.
- Subscription Number: See or change your Subscription ID here.
- License Usage: View the number of available licenses you have in use.
- License Info
- Subscription Number: Tells whether the license if temporary, a trial, or another license category
- Business Unit: This specifies the organization associated with the license.
- License Package: The license package of your service.
- Expires: View when your license expires.
- License Model: Shows whether the license model is Normal Licensing or Per User Licensing.
- Entra ID Licensing: Check if Entra ID Licensing, also known as Team Member Licensing, is enabled.
- Cached license from: Shows the timestamp when the license information was last cached.
- User Roles: View specific licensing information for each user and role.
Here is the license view for a trial. The system shows the number of required licenses rather than the license usage.
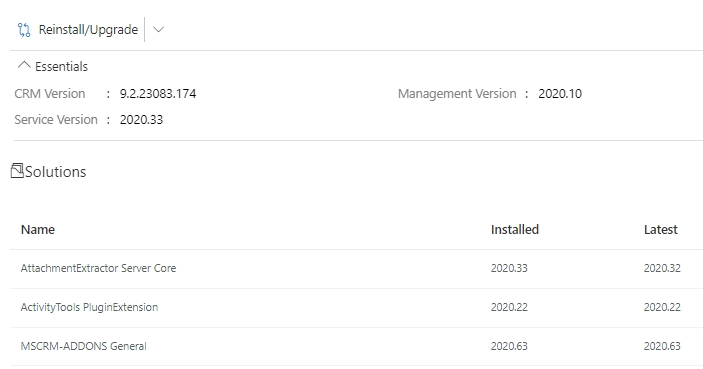
4. Version Info
In the Version Info tab, you can see an overview of your Dynamics 365 (CRM), Service and Management versions. With a click on the Reinstall/Upgrade button in the top left corner, you can reinstall or upgrade your version.
5. Progress and History
The Progress and History tab displays an overview of your file extraction history, showing the number of notes processed, emails processed, and so on. The Progress tab displays a list of extracted items. The Failures and Body failures tab displays the history of your failed items.

6. Extraction Analysis
In the Extraction Analysis tab, you can analyze and view the details of extracted records. In either the Extraction Analysis or Single Item Extract sub tab, you can analyze a record under the Add Extraction Analysis (or Add Single Item Extract) button by providing its URL.
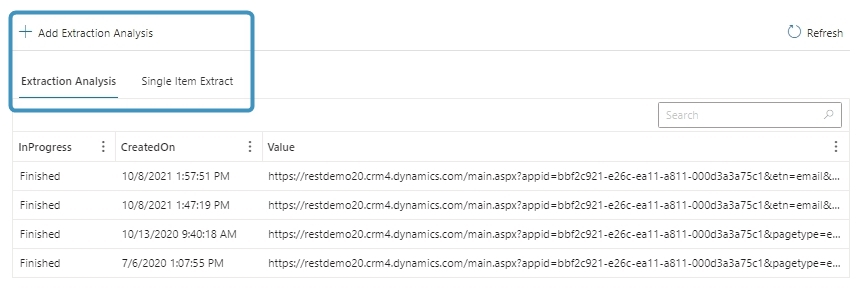
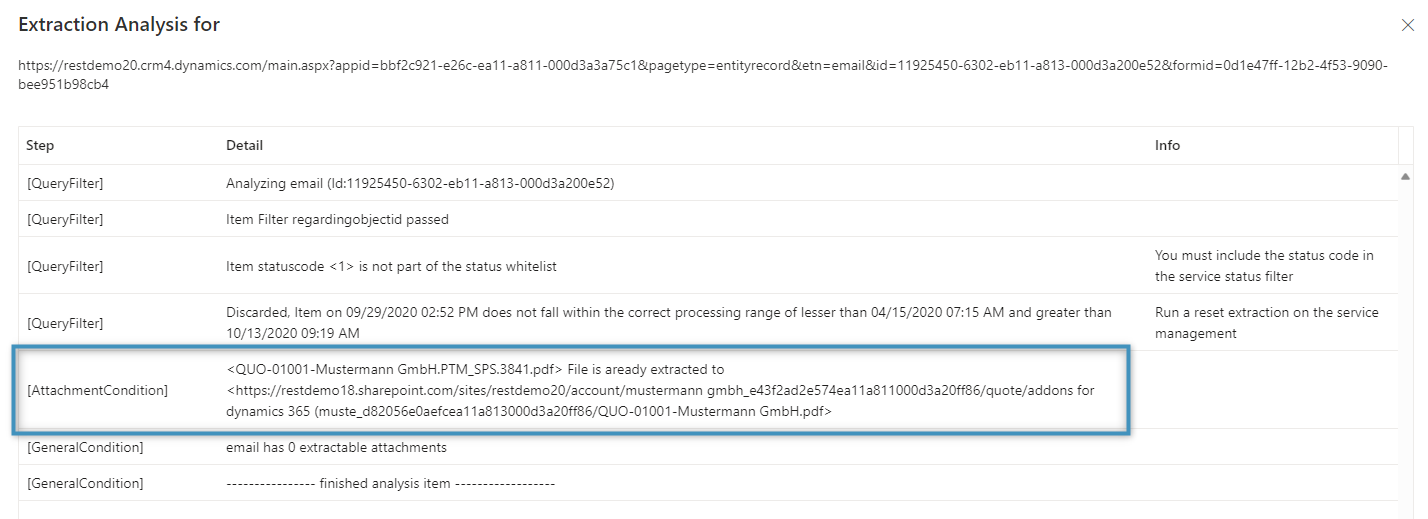
After the analysis finishes, you can select an item to view its details.
7. Analyze Dataverse
In the Analyze Dataverse tab, you can view reports that detail the overall memory consumption of your tables in your environment. Click the Start Analysis button to generate a report.
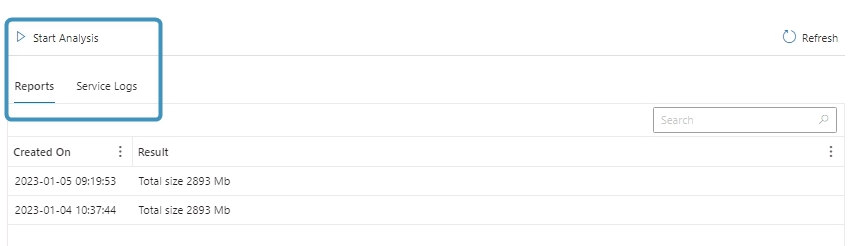
Each report breaks down the memory consumption, displaying the size and number of rows of each individual table. This helps to give an estimate of how much space you can save with AttachmentExtractor.

8. Service Logs
The Service Logs tab provides valuable insights into service health. Our support team mainly uses this information to gain information about the service.
Please note: The system keeps service logs for about 14 days.

That’s it! We appreciate your feedback! Please share your thoughts by sending an email to support@mscrm-addons.com.