• Release History
  • Documentation
  • Back to www.mscrm-addons.com
  • Release History
  • Documentation
  • Back to www.mscrm-addons.com
home/Knowledge Base/DocumentsCorePack(DCP)/Step by Step: How to automate payment reminders in Microsoft Flow

Step by Step: How to automate payment reminders in Microsoft Flow

1076 views 1 Updated on January 29, 2023

This article outlines how to generate an automated payment reminder in Microsoft Flow.

In this step-by-step description, we create a scheduled flow that executes a DocumentsCorePack (DCP) template against a list of invoice records where the due date is on or before today’s date. For each result, an overdue notice is sent using a standard email in Dynamics 365.

1. Create a scheduled Flow.
Build a scheduled flow and define when to execute it.

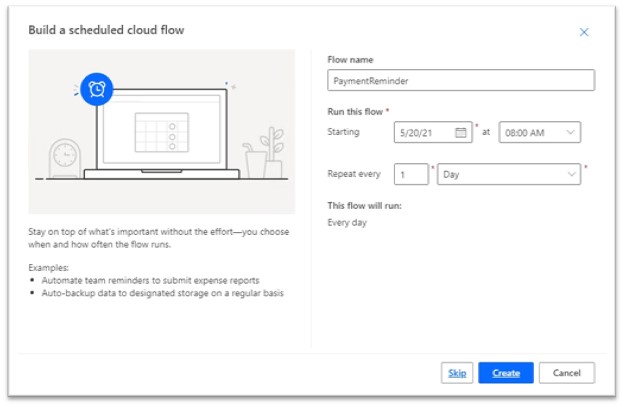
Figure 1: Creation of a scheduled flow

2. Get overdue invoices.
Click on Create and select the List rows action of the Microsoft Dataverse.

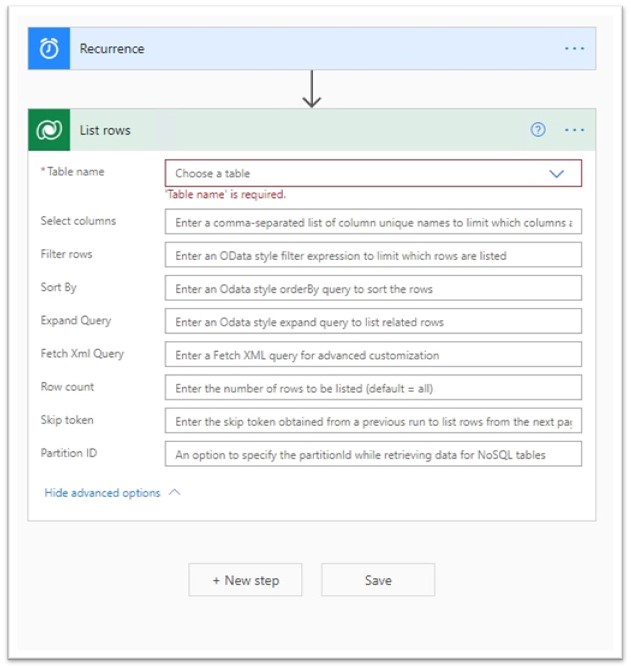
Figure 2: Obtain overdue invoices

Please select the entity(table) from which you want to start. In this example, we start from the entity(table): Invoice.

Since we only want Invoice records where the due date is on or before today and the status is “active”, we added a filtered Fetch-XML.

Filtered Fetch XML for "active" invoices.

Figure 3: Specify Invoice selection and further requirements

3. Create Document.
Within the Apply to each section, we use the DCP connector to add a
Create Document Job (sync) action.

Figure 4: Create Document

Select a template that is based on Invoice and select the InvoiceId as the EntityId. In our example, the file type has to be HTML since we want the document to be placed as the content of our email.

4. Create an Email record.
Click on Add an action to add a new row and to specify it as an email message.

Figure 5: Create an Email record

5. Attach the document to the email.
Please press Add an action again and select the Attach DocumentJob to Email action from the DocumentsCorePack Connector.

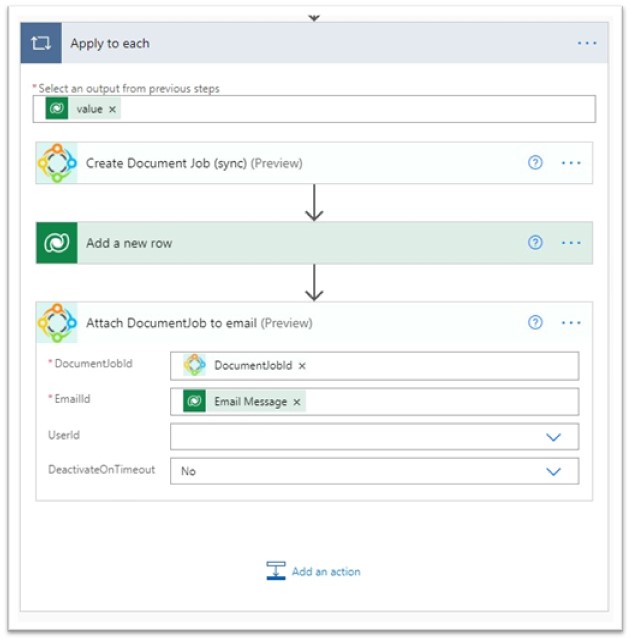
Figure 6: Attach the document to the email

Provide the DocumentJobId and the EmailId to make sure each resulting document will be attached to the email.

6. Send the email.
For our final action, we need to add the Send email action of the DCP connector.

Figure 7: Set the Send Email action

Provide the email record, a sender and a recipient before you save your flow.

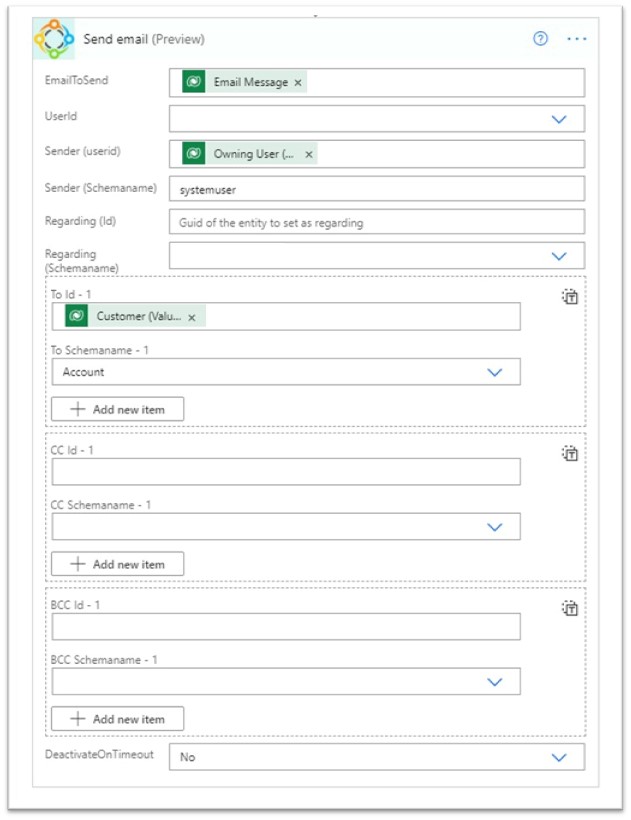
Figure 8: Provide email record, sender and recipient

The final flow should look like the following, and you are ready to test your flow.

Figure 9: Sample final flow

Back to “The DocumentsCorePack connector for PowerApps and PowerAutomate (Microsoft Flow)“.

That’s it! We appreciate your feedback! Please share your thoughts by sending an email to support@mscrm-addons.com.

Was this helpful?

1 Yes  No
Related Articles
  • How to share the Connection of the DocumentsCorePack Connector
  • AssureSign for DocumentsCorePack
  • How to conditionally remove a watermark in DocumentsCorePack templates
  • Document Processing with DocumentsCorePack (DCP)
  • How to activate SharePoint in DocumentsCorePack
  • Fillable PDF forms
Leave A Comment Cancel reply

You must be logged in to post a comment.

Latest Articles
  • How to share the Connection of the DocumentsCorePack Connector
  • How to update the metadata in the DocumentsCorePack Template Designer
  • Working with Product Properties in DocumentsCorePack
  • How to work with the Relationship Manager
  • Using virtual tables in DocumentsCorePack
Popular Articles
  • Where do I find the Unique Organization name in Microsoft Dynamics 365?
  • DocumentsCorePack Template Designer – Getting Started
  • mscrm-addons.com Application Access for Dynamics 365 (App Access) – DocumentsCorePack
  • DocumentsCorePack Online Service Configuration
  • Step-by-Step: How to configure a One-Click-Action
Top Rated Articles
  • IMPORTANT information for Dynamics 365 online customers using DocumentsCorePack and/or AttachmentExtractor
  • How to activate the DocumentsCorePack connector for PowerApps & Microsoft Flow
  • Step-by-Step: How to configure a One-Click-Action
  • Online Services: Required Application Permissions
  • Where do I find the Unique Organization name in Microsoft Dynamics 365?
Categories
  • *News and General Infos* 51
  • Webinars 35
  • Template Designer(DCP 179
  • DocumentsCorePack(DCP 192
  • TelephoneIntegration (TI 65
  • AttachmentExtractor (AE 62
  • PowerSearch (PS 48
  • ActivityTools (AT 59
  • SmartBar (SB 53
  • GroupCalendar (GC 46
Our Vision

“We see it as our purpose to provide products that simplify and speed up our customers’ Microsoft Dynamics 365 experience.”

Knowledgebase
LogIn
mscrm-addons.com
  • Products
  • Online Shop
  • Downloads
  • My Account
About Us
  • About Us
  • Case Studies
  • Newsletter
  • Partner Program
  • Contact
Support
  • Support
  • Terms & Conditions
  • Documentation
  • Webinars
  • Legal Documents
  • Impressum
  • © 2022 www.mscrm-addons.com. All Rights Reserved.