• Release History
  • Documentation
  • Back to www.mscrm-addons.com
  • Release History
  • Documentation
  • Back to www.mscrm-addons.com
home/Knowledge Base/Template Designer(DCP)/The “Insert Remove Empty Lines” button in DocumentsCorePack templates

The “Insert Remove Empty Lines” button in DocumentsCorePack templates

1883 views 0 Updated on April 14, 2023

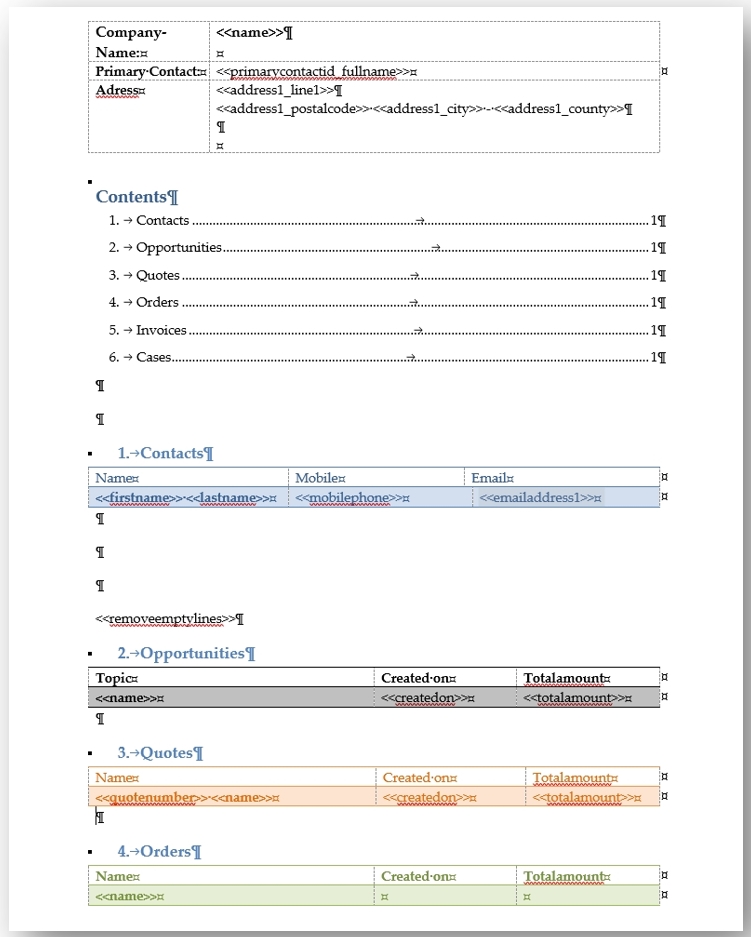
Remove Empty Lines fields are a simple way to dynamically structure your document after a merge process. In this example, empty lines are shown in the document on the left (between the Contact table and the Opportunities table), but in the document on the right, these empty lines are deleted.

There are empty lines
Figure 1: No empty lines removed

Learn how to remove empty lines below:

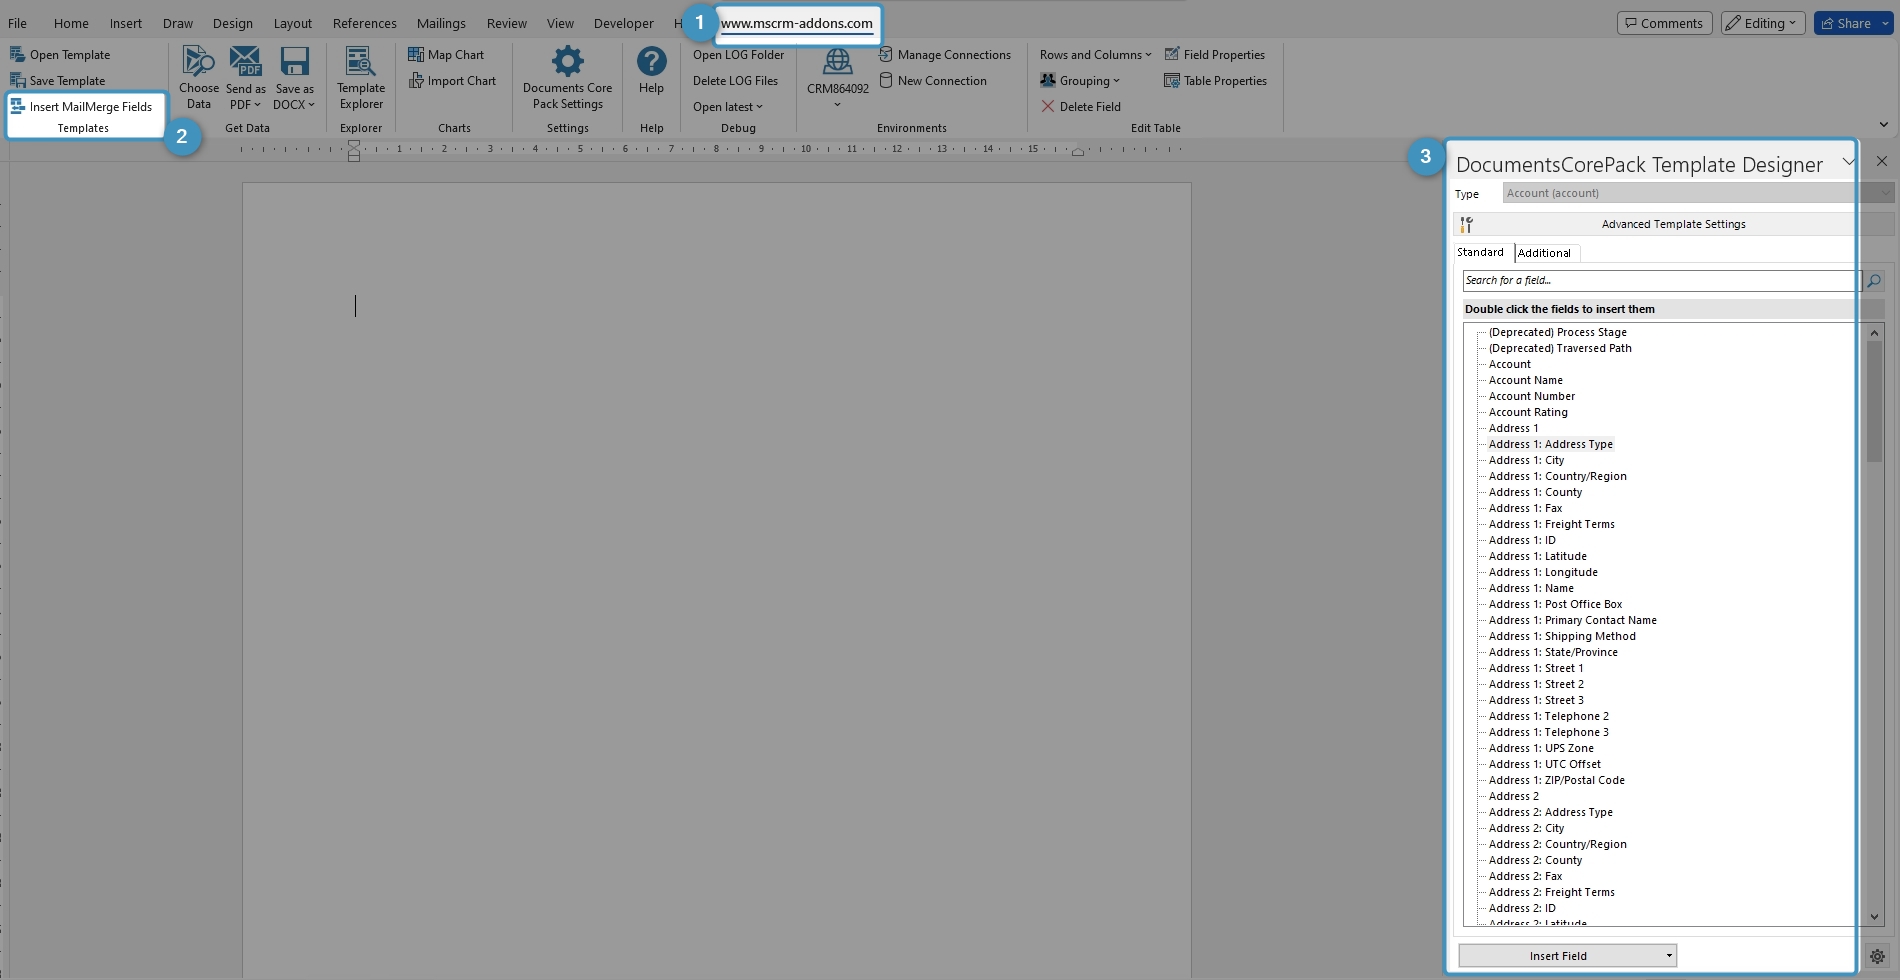
Step 1: Open a DocumentsCorePack (DCP) template or create a new one. Navigate to the ❷ Insert MailMerge Fields within the ❶ www.mscrm–addons.com tab and the ❸ DCP task pane opens.

It shows how to open DCP TemplateDesigner
Figure 2: Open DCP TemplateDesigner

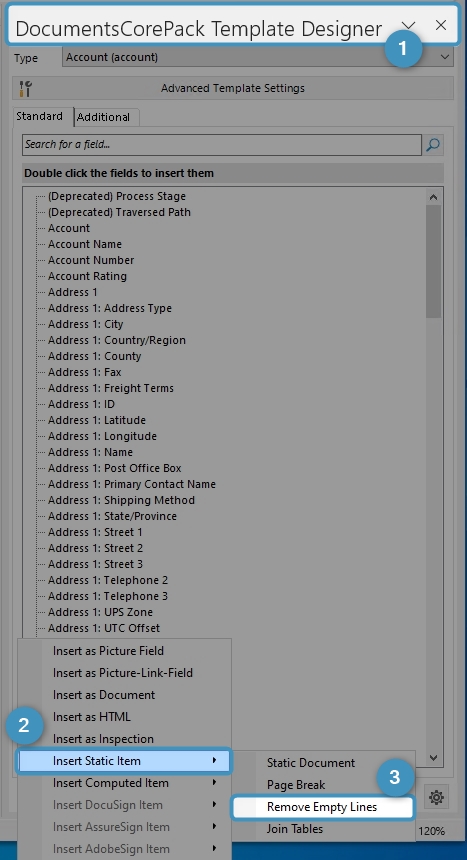
Step 2: Navigate to the ❶ DCP task pane, click the  Insert Field button, choose ❷ Insert Static Item and then select ❸ Remove Empty Lines.

Shows DCP task pane, the option Remove Empty Lines
Figure 3: DCP task pane – Remove Empty Lines

Step 3: Place the Remove Empty Lines in your DCP template, as shown below. 

Insert "Remove Empty Lines" in your DCP template.
Figure 4: Insert “Remove Empty Lines”

Step 4: Now merge the template by pressing the Choose Data button in the Word ribbon. 

Merge the template and the empty lines are removed.
Figure 5: Result – empty lines removed after merge

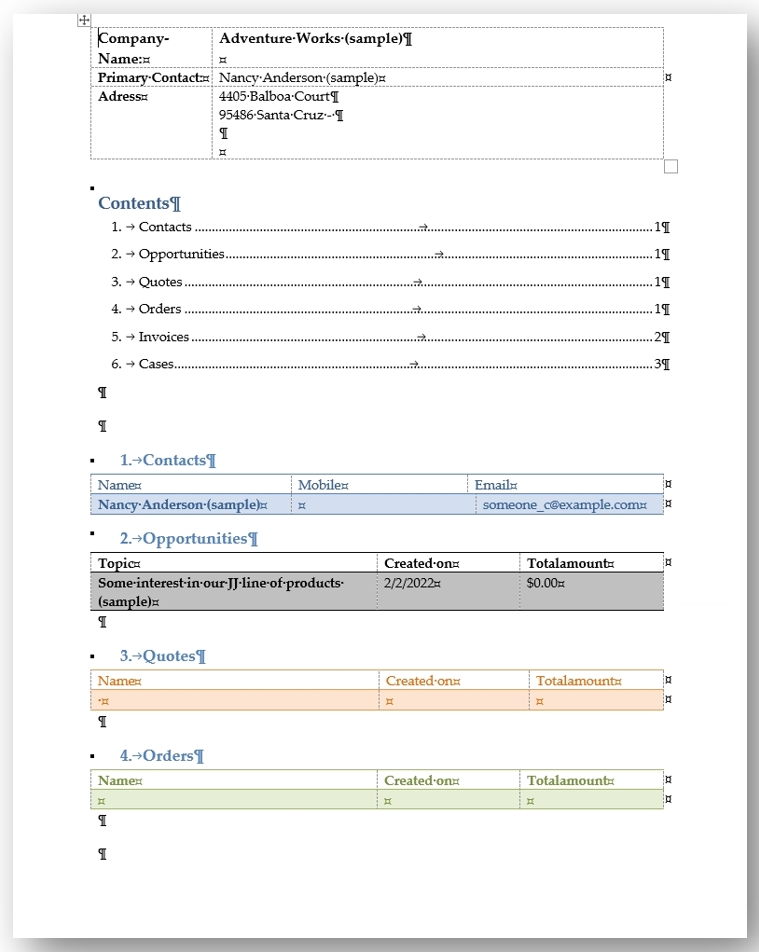
You have now successfully removed empty lines with the DCP TemplateDesigner.

That’s it! We appreciate your feedback! Please share your thoughts by sending an email to support@mscrm-addons.com.

Was this helpful?

Yes  4 No
Related Articles
  • Ensuring correct time zone display for DateTime fields
  • How to compare a date-fields with the current date 
  • Create a template for XML or plain text
  • E-Invoicing with DocumentsCorePack
  • How to add content from SharePoint to a document
  • Using MS Word field codes in DocumentsCorePack templates
Latest Articles
  • DocumentsCorePack: Best practices for Dynamics 365 on-premises to online migration projects
  • Multilingual Support in DocumentsCorePack
  • Recap: ColorCloud 2025
  • Configure DocumentsCorePack within custom pages
  • AI-Powered Document Generation with Copilot in Sales
Popular Articles
  • DocumentsCorePack Template Designer – Getting Started
  • Step-by-Step: How to configure a One-Click-Action
  • Application Access for Dynamics 365
  • How to find your environment’s unique name in Microsoft Dynamics 365
  • How licenses are counted
Top Rated Articles
  • “Undefined”-labels in Chrome and Edge 114 and higher
  • Important information for Dynamics 365 online customers using DocumentsCorePack and/or AttachmentExtractor
  • How to activate the DocumentsCorePack Connector for PowerApps & Microsoft Flow
  • How licenses are counted
  • How to insert Condition Fields in DocumentsCorePack Templates designer
Categories
  • *News and General Infos* 62
  • Webinars 44
  • Template Designer(DCP 196
  • DocumentsCorePack(DCP 250
  • TelephoneIntegration (TI 65
  • AttachmentExtractor (AE 72
  • PowerSearch (PS 50
  • ActivityTools (AT 61
  • SmartBar (SB 54
  • GroupCalendar (GC 47
Our Vision

“We see it as our purpose to provide products that simplify and speed up our customers’ Microsoft Dynamics 365 experience.”

Knowledgebase
LogIn
mscrm-addons.com
  • Products
  • Online Shop
  • Downloads
  • My Account
About Us
  • About Us
  • Case Studies
  • Newsletter
  • Partner Program
  • Contact
Support
  • Support
  • Terms & Conditions
  • Documentation
  • Webinars
  • Legal Documents
  • Impressum
  • © 2022 www.mscrm-addons.com. All Rights Reserved.