This blog article outlines how to execute a workflow for each record in a batch process. Please also have a look at this blog article about how to process a generated document in a workflow from the dialog (in the single case).
Please notice: The batch can ONLY run workflows that have been configured for the AutoMergeWorkingIntem entity. In order to process the records themselves, a sub-workflow has to be triggered, which can be done by the custom workflow activity “DCPWorkflowSandbox:TriggerSubWorkflow” that comes with the installation of our solution.
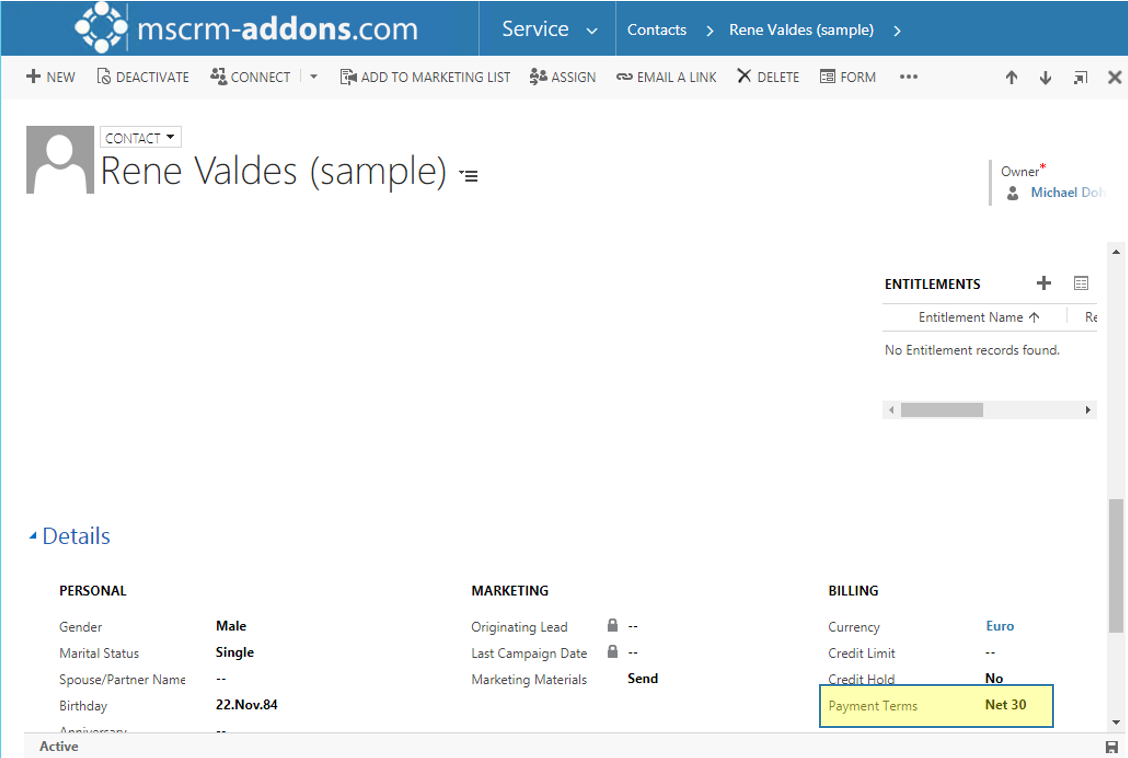
Within this tutorial, we will create such workflows step-by-step. The result will be an invoice which will be sent to a batch of customers and after the terms of payment will be updated to Net 30 in Dynamics 365 for these customers as you can see in the figure below.
Step 1: Create sub-workflow
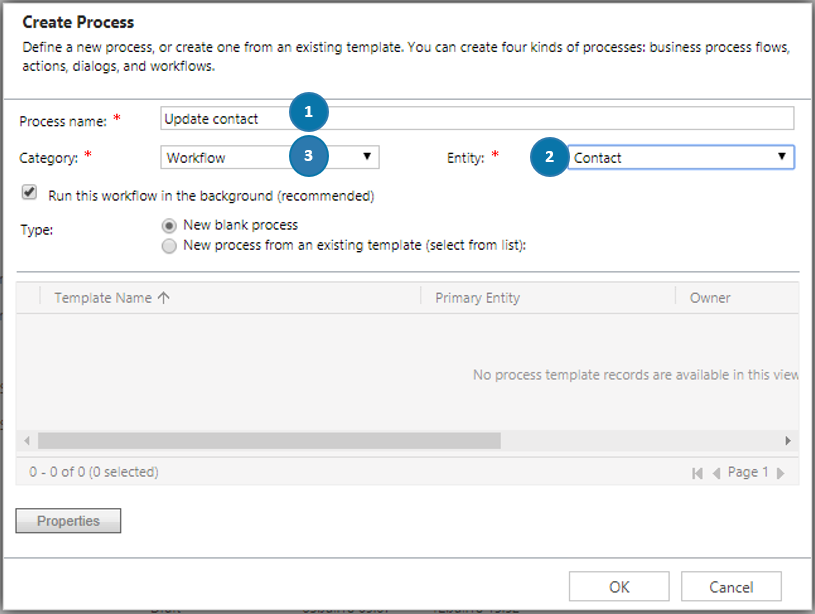
Please open your Microsoft Dynamics 365 and navigate to Settings > Processes. In the My Processes – area, click on the [New]-button in order to create a new workflow. A dialog pops up. Type in ❶ the name of your workflow, determine ❷ an entity – Contact in this case and select ❸ Workflow as the process category. Afterwards, hit the [OK]-button.
The window below pops up, where you can configure your workflow in detail. Please check the ❶ As an on-demand checkbox in the Available to Run-area and as Scope select ❷ Organization. Next, please add a new step by hitting on the [Add Step]-drop-down menu and select ❸ Update Record.
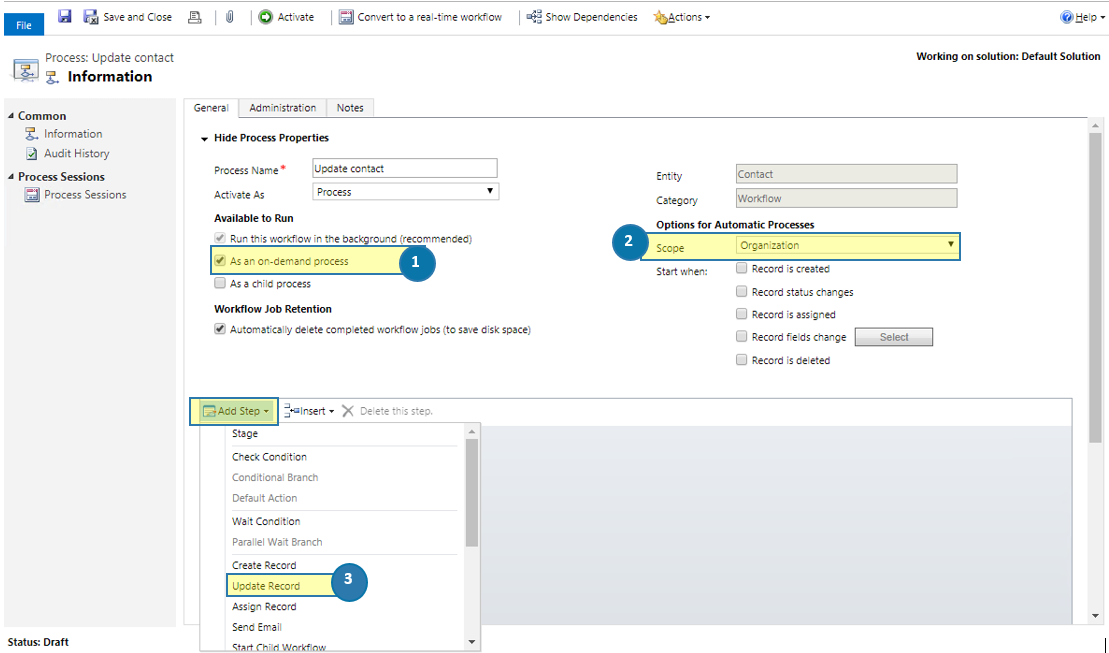
As soon as the step has been added to your workflow, please enter ❶ a name that remains you of what it contains, e.g. Update contact. Then open the drop-down menu, select ❷ Contact and hit the ❸ [Set Properties]-button.

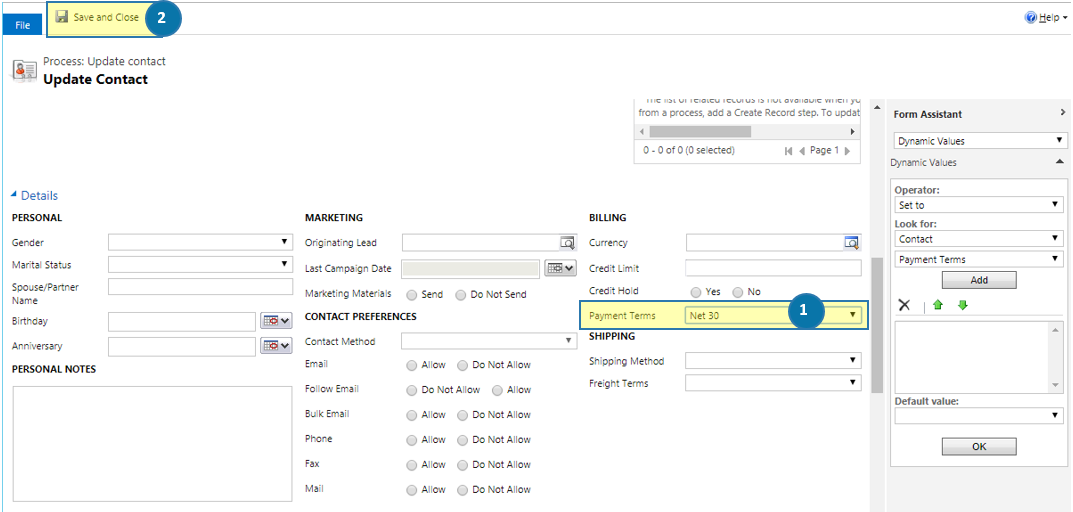
The dialog below opens. It allows you to configure your workflow. In this case, you have to select in the ❶ Payment Terms drop-down menu Net 30. To finish the workflow, please do not forget to click on the ❷ [Save and Close]-button.
After finishing the configuration, do not forget to activate your so created workflow by hitting the [Activate]-button located at the top.
Step 2: Create the AutoMergeWorkingIntem workflow which triggers the sub-workflow
As explained before, please create a new workflow. The window below pops up, where you can configure your workflow in detail. Please check the ❶ As an on-demand checkbox in the Available to Run-area and as Scope select ❷ Organization. Next, please add a new step by hitting on the [Add Step]-drop-down menu and select the ❸ DCPWorkflowSandbox – TriggerSubWorkflow workflow activity.

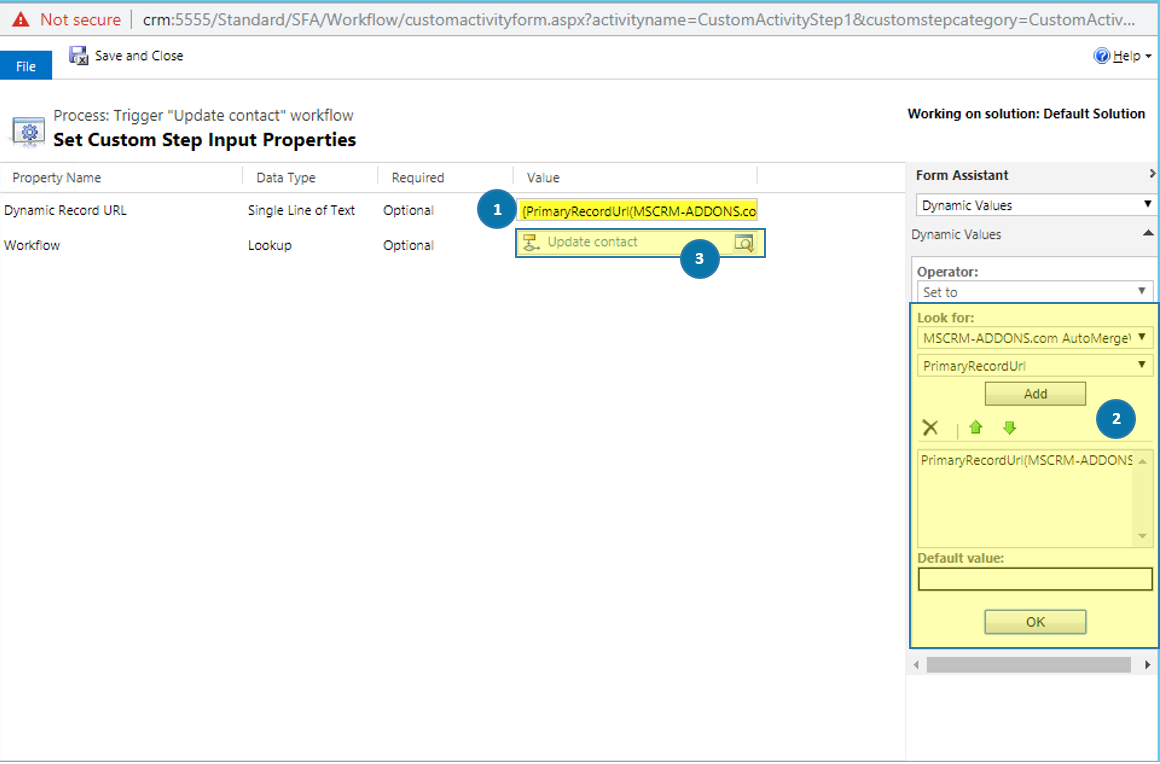
Next, please configure your workflow. Please set the cursor in the ❶ PrimaryRecordUrl-field and select ❷ PrimaryRecordUrl in the drop-down menu in the Form Assistant, click on the [Add]-button and hit the [OK]-button below (highlighted in yellow). The PrimaryRecordUrl-field is filled now. Then please search ❸ the sub-workflow “Update contact” you created before and do not forget to hit the [Save and Close]-button at the top.
After finishing the configuration, do not forget to activate your so created workflow by hitting the [Activate]-button located at the top.
That´s it – you can now use your workflow – Trigger “Update contact” workflow in the DCP dialog (please have a look at figure 11 at the bottom). Considering that sending an invoice to customers and updating the terms of payment is a commonly used action, we recommend creating a one-click-action to automate the process. So please continue with step 3.
Step 3: Create a Batch One-Click-Action
Please open the DocumentsCorePack Config Page by navigating to Dynamics 365-> Settings -> MSCRM-ADDONS -> DocumentsCorePack -> One-Click-Actions and hit the [Create Document]-button. You have to create a new One-Click-Action for the entity Contact in this case, so please hit ❶ the [New Batch]-button and type in ❷ the name of your One-Click-Action.

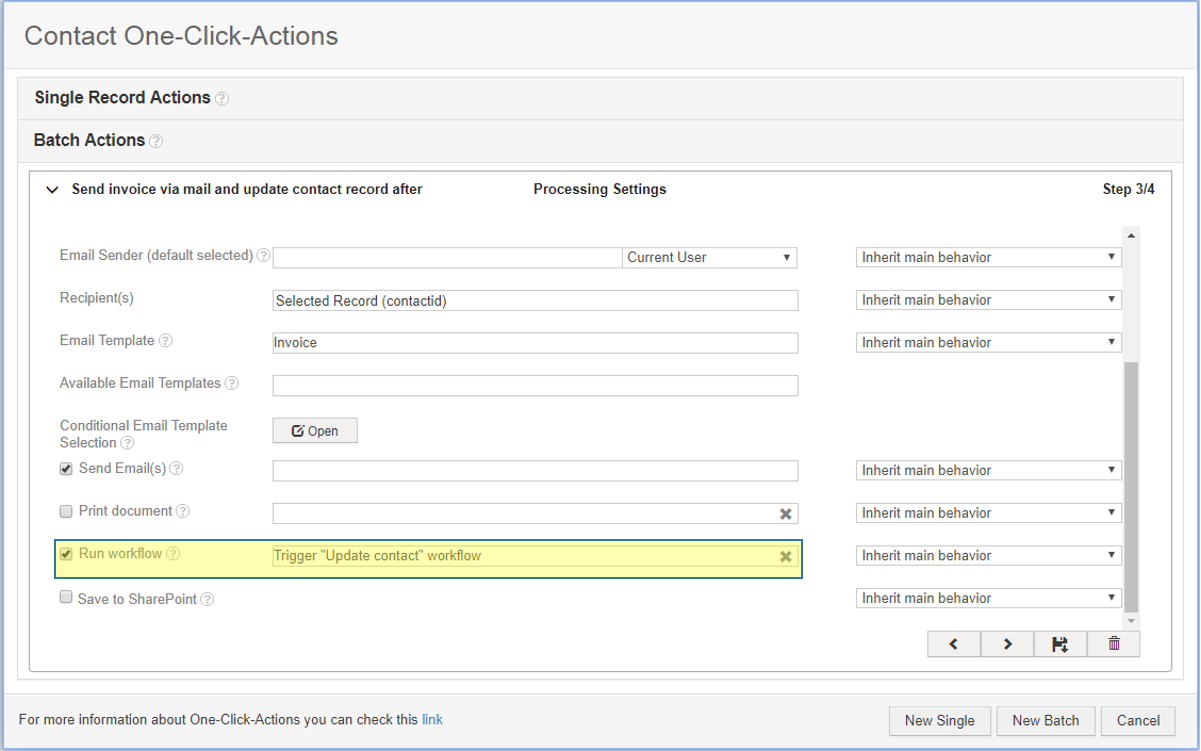
After hitting the [OK]-button, you will be provided with the configuration window for Batch Actions. More information about how to configure a One-Click-Action can be found in this blog article. Important is, that you check the Run workflow checkbox in your Processing Settings and select the so created workflow: Trigger “Update contact” workflow (highlighted in yellow below).
If a Dynamics 365 user now selects some records from the entity Contact and clicks on the [Create Document]-button, the user will be automatically provided with the new One-Click-Action “Send invoice via mail and update contact after”.
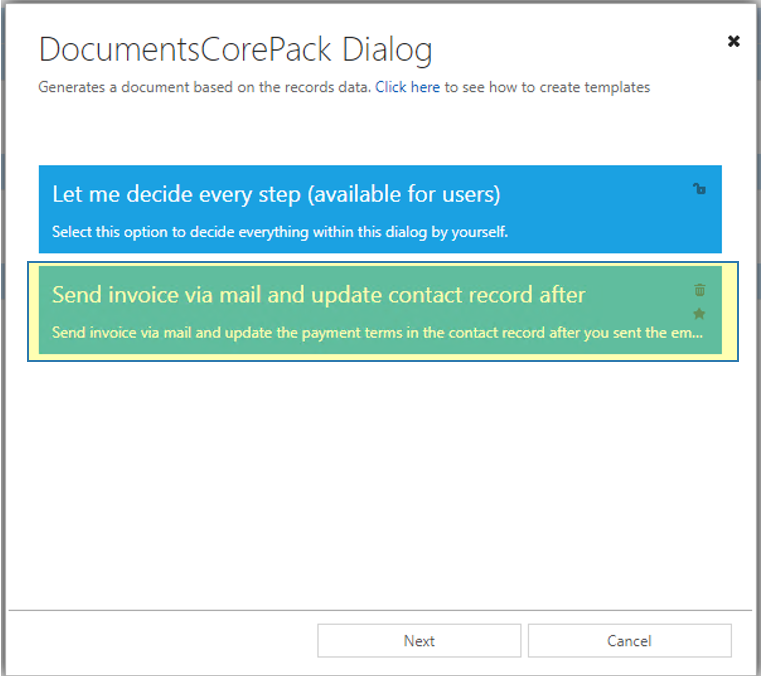
Hit the [Next]-button to continue. As shown in the figure below, the dialog ❶ attaches the invoice as an email attachment and by checking the ❷ Run workflow checkbox you can start the so created workflow, which triggers the “Update contact” as you can see below.

The result will be an invoice which will be sent to a batch of customers and after the terms of payment will be updated to Net 30 in Dynamics 365 for these customers (as in figure 1).
That’s it! We appreciate your feedback! Please share your thoughts by sending an email to support@mscrm-addons.com.