Initial Dynamics 365 user setup is performed in the Office 365 portal and then configured within Dynamics 365. You can use Office 365 Security Groups in the Office 365 Portal to control MS Dynamics 365 access.
This feature can be useful for different scenarios, including:
- Limiting access for development or testing in non-production Dynamics 365 Online instances.
- Restricting access to the Dynamics 365 Online production environment to system administrators only when importing a new solution set or other system maintenance.
- Creating special groups for sales, service, or other business groups for more organized user management.
There is a default security group that is pre-configured for Office 365 called System Administrators. This group includes all Office 365 users with global administrator rights.
You can access the Office 365 Portal and perform the following if you have global administrator rights in the Office 365 Portal. Log into the Office 365 Portal with your credentials to the home page. Once logged in, do the following:
1. On the home page, navigate to the Admin Center ❶ , enlarge the menu on the left side, and select “Groups – Active Groups“ ❷ on the navigation menu on the left side of the page.

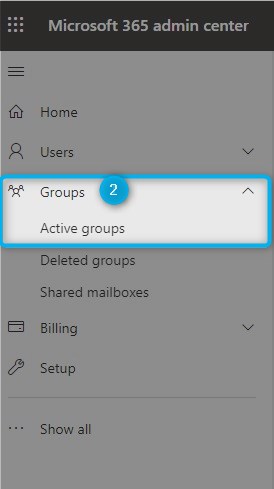
Figure 1: Microsoft Office 365 Admin Center – Groups
2. This will take you to the Groups list. Navigate to the Security tab, which will then take you to the Security Groups management pages.
3. Left click on the [+ Add a group] button to create a new group. This will open a new window where you can enter your new security group name.
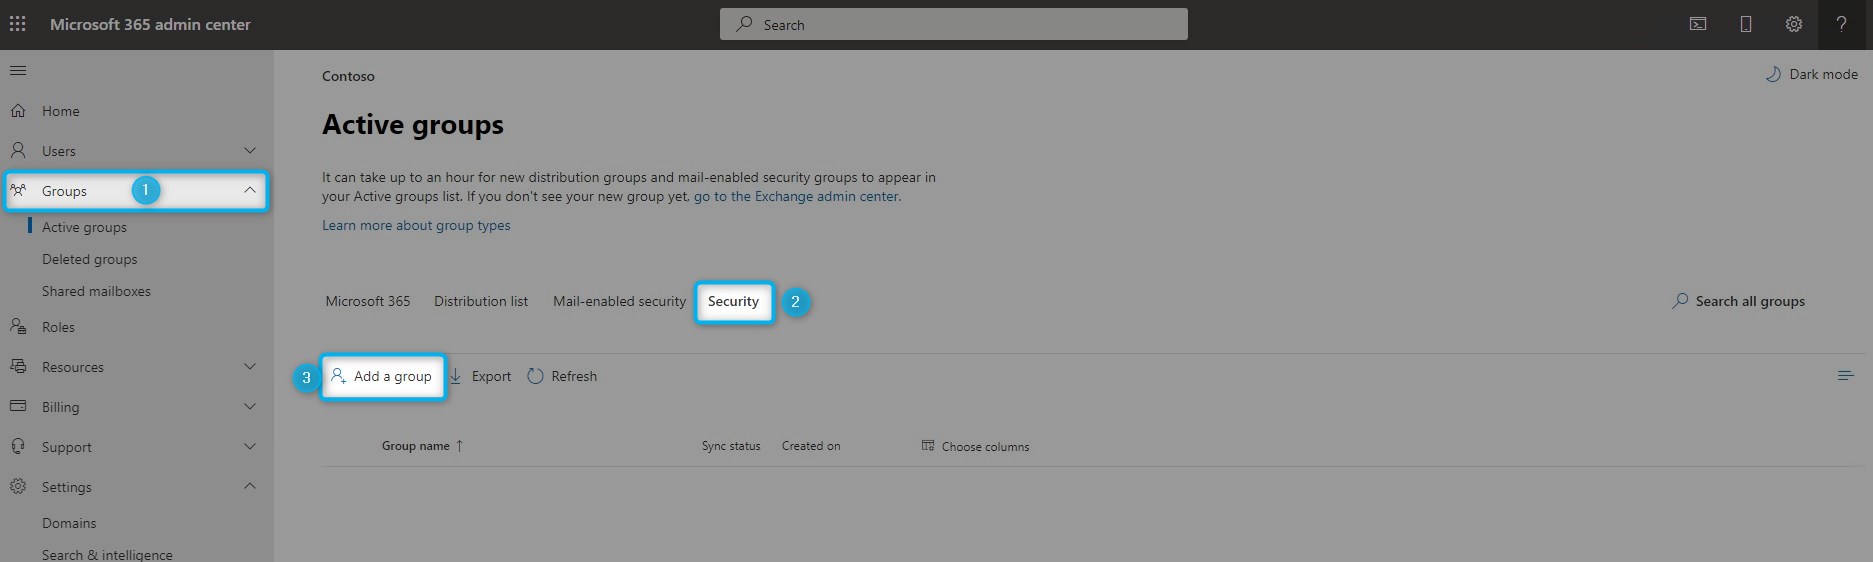
Figure 2: Office 365 – Security Groups
To create the group, begin with “Choose a group type“, such as in this example “Security“. Press the [Next] button.
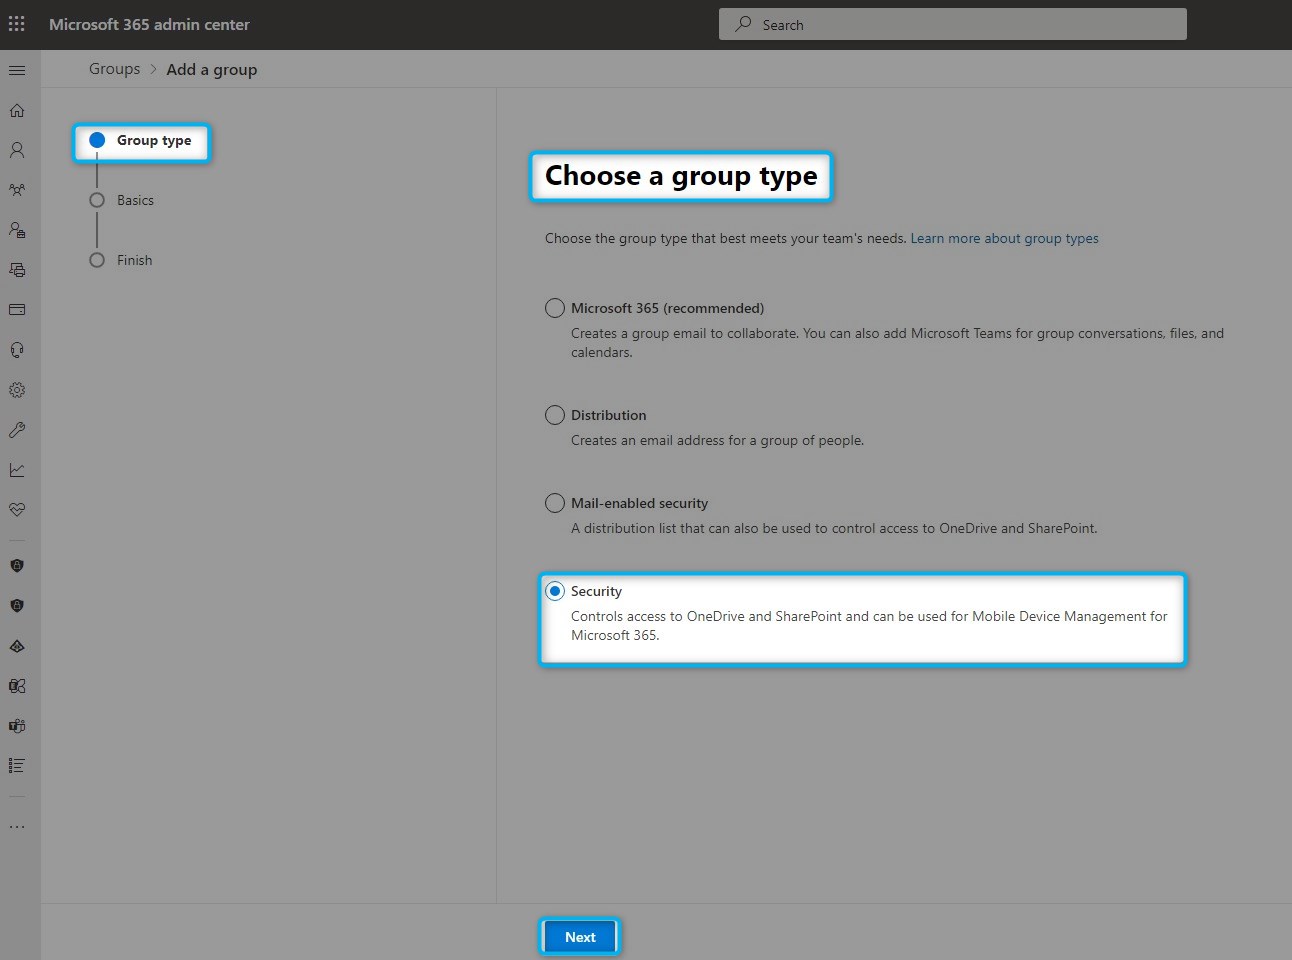
Figure 3: Group type
Enter a name for the group and add a description if you like. Press the [Next] button.
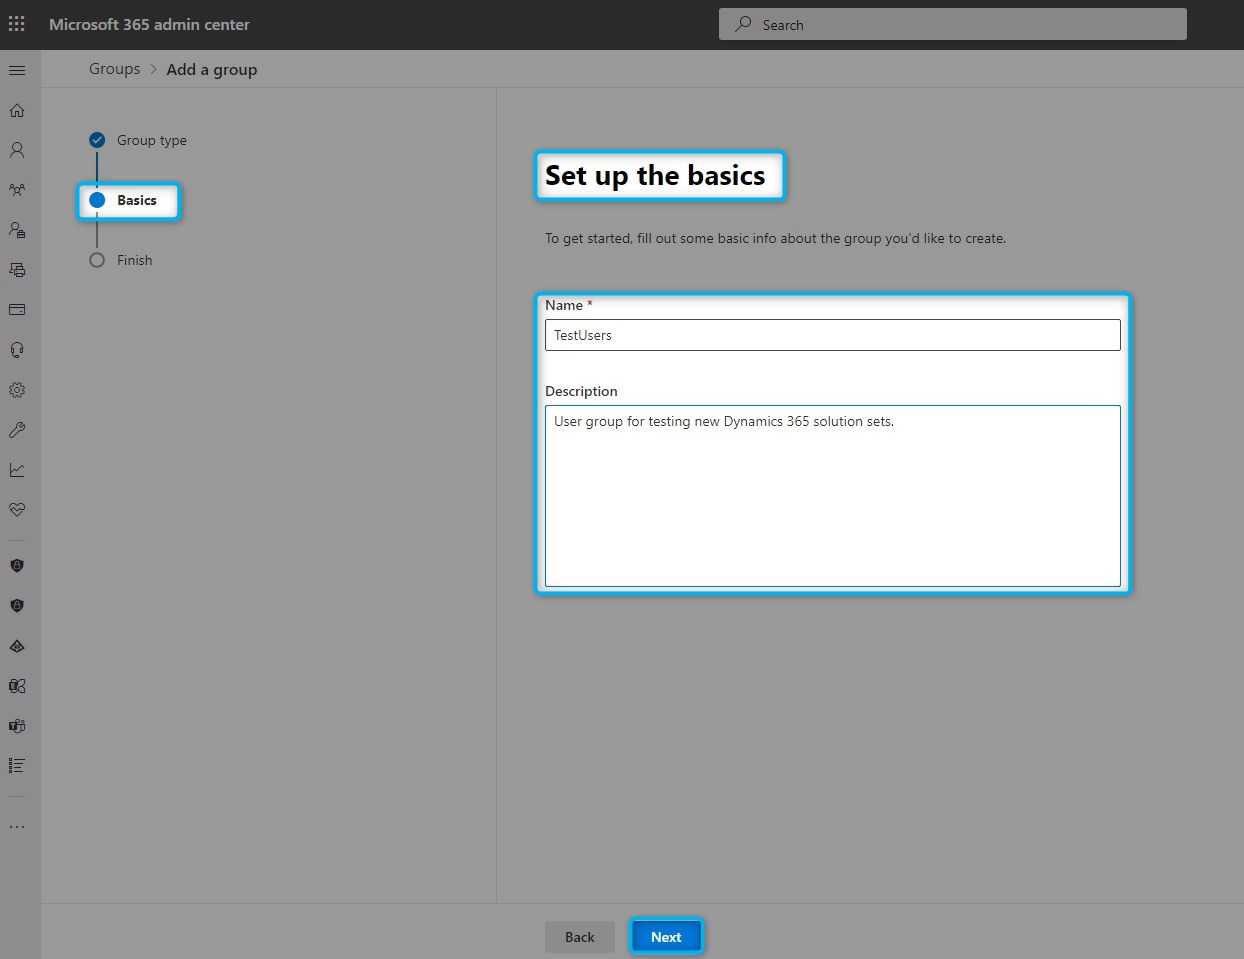
Figure 4: Basics
The “Finish” section will open. Review the information on this page, and if everything is right, then press the [Create group] button.
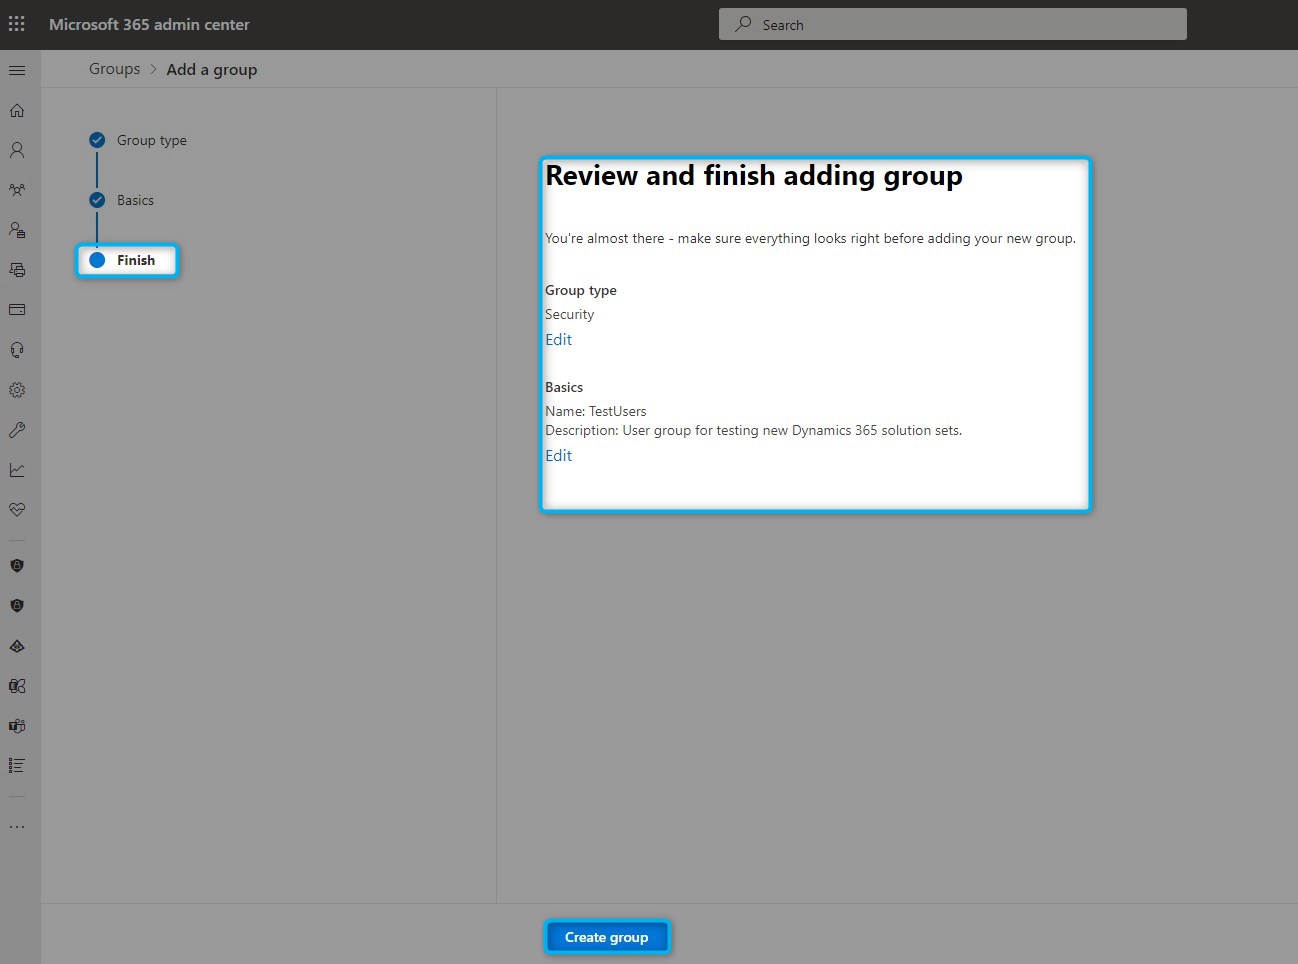
Figure 5: Finish
The “New group created” site will open. Press the [Close] button.

Figure 6: New group created
After selecting the group, the window below will open on the right side. Navigate to the “Members” tab. To add new “Owners” or “Members”, press “View all and manage ….”.
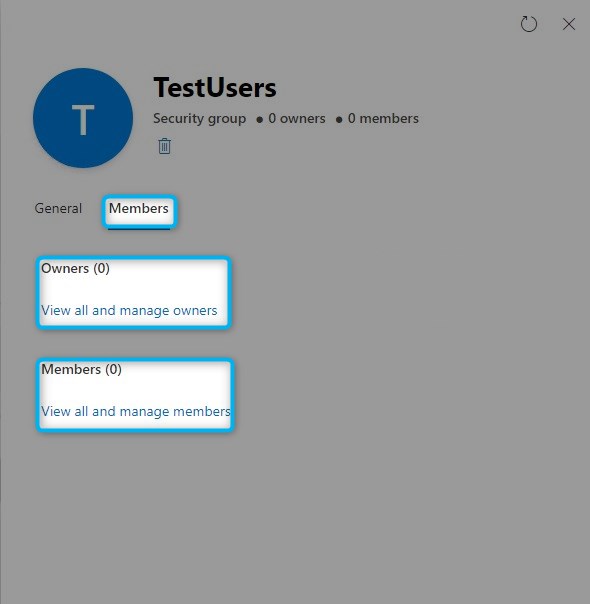
Figure 7: Created group edit-section
Press “+ Add owners”.
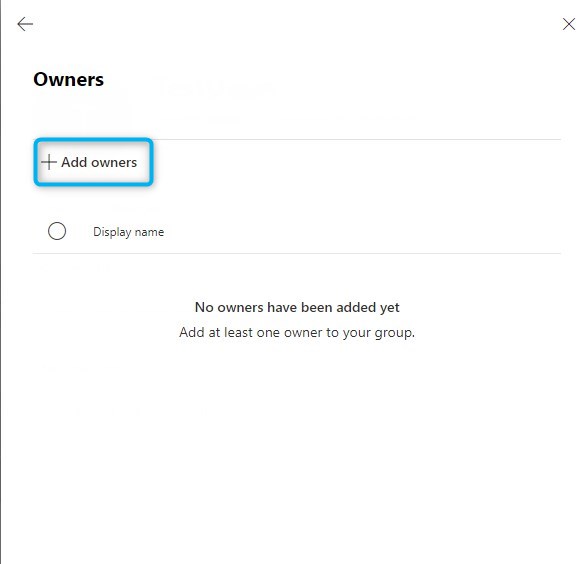
Figure 8: Add owners
A list with available owners is shown. Select the owner you want to add and press the [Add] button.
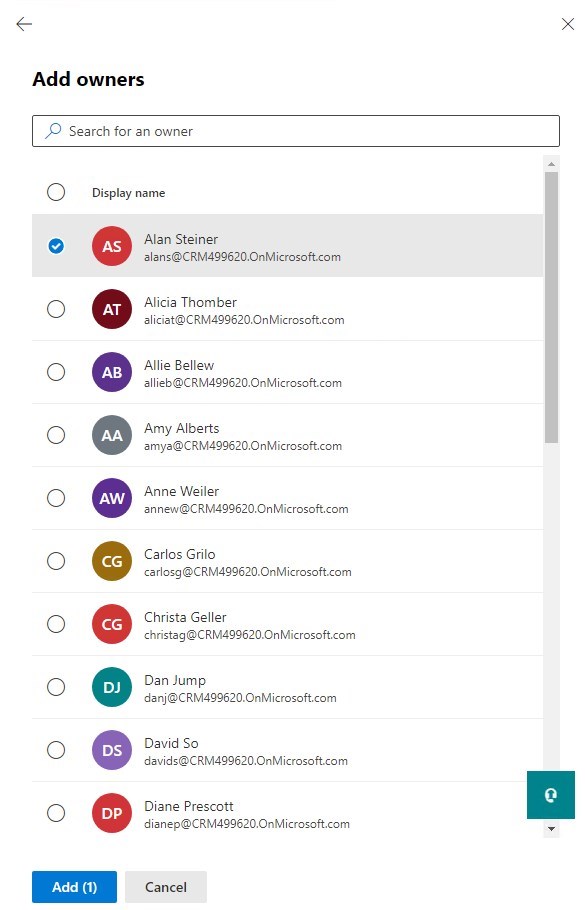
Figure 9: Add owners
Do the same procedure with “Members“ to add.
Your new security group has been created. Next, use it to limit access to Dynamics 365 to our Testing Users. Select the “All admin centers“ and click on “Dynamics 365 Apps“.
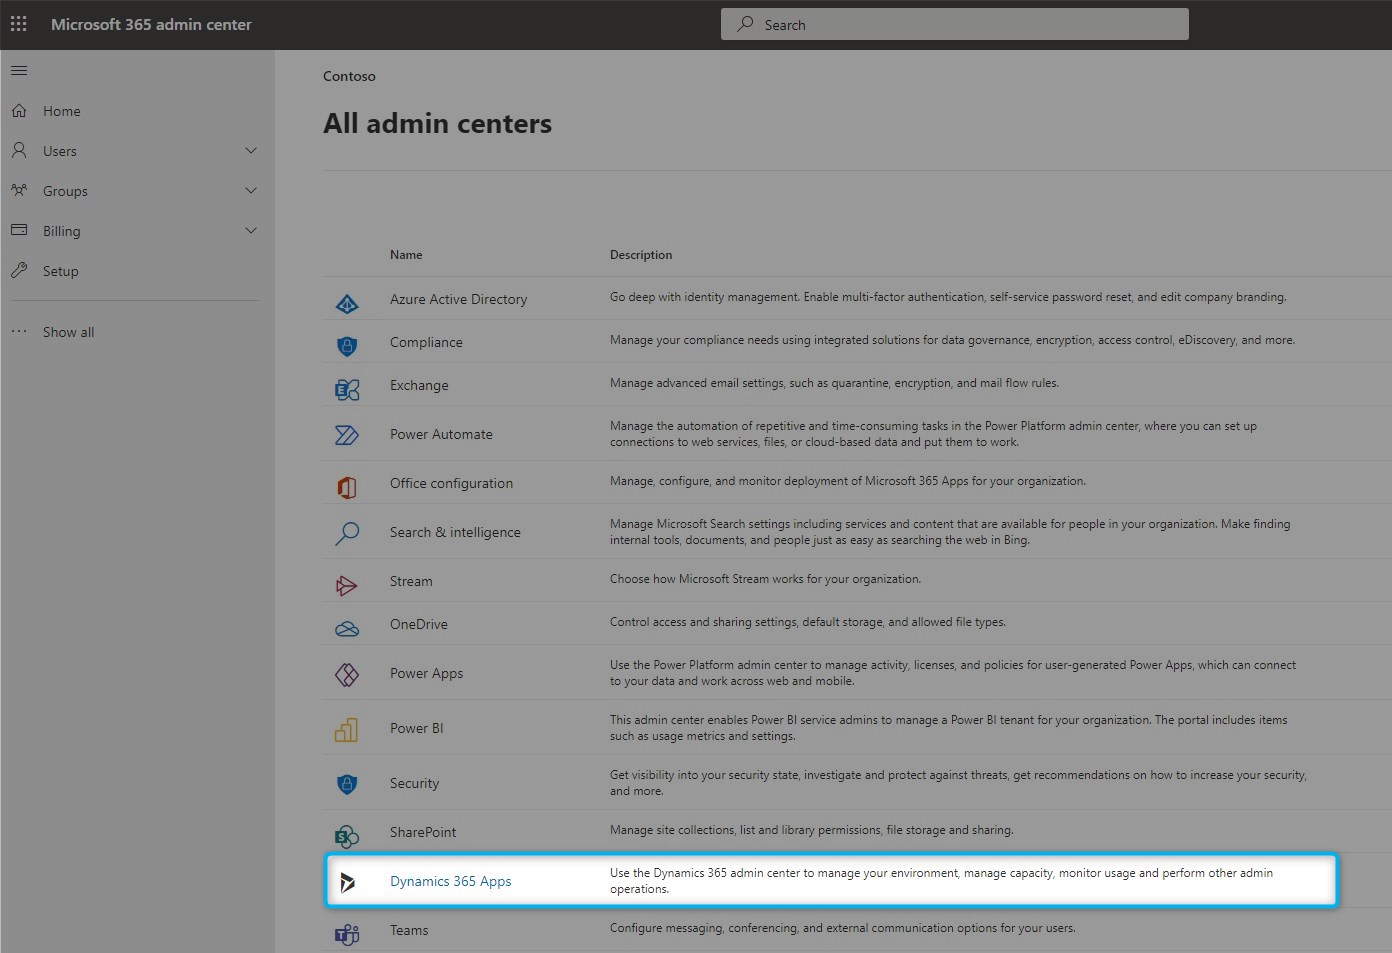
Figure 10: All admin centers
This site will open after selecting the correct environment. Press “Edit” to open the “Edit details” and then click the pen.

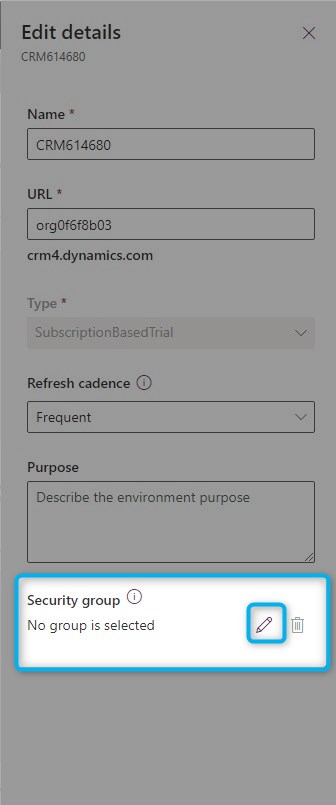
Figure 11: Edit your security group
All groups will show. Select the prepared group, such as in this case “TestUsers”. Press [Done] and [Save]. As long as the users in your group are licensed for Dynamics 365, access to your Dynamics 365 will be restricted to the users in the security group. Other licensed users inside of Dynamics 365 that are not in the security group will be disabled. To restore access, simply go back to the “Power Platform admin center” for that instance and clear the group name from the security settings.
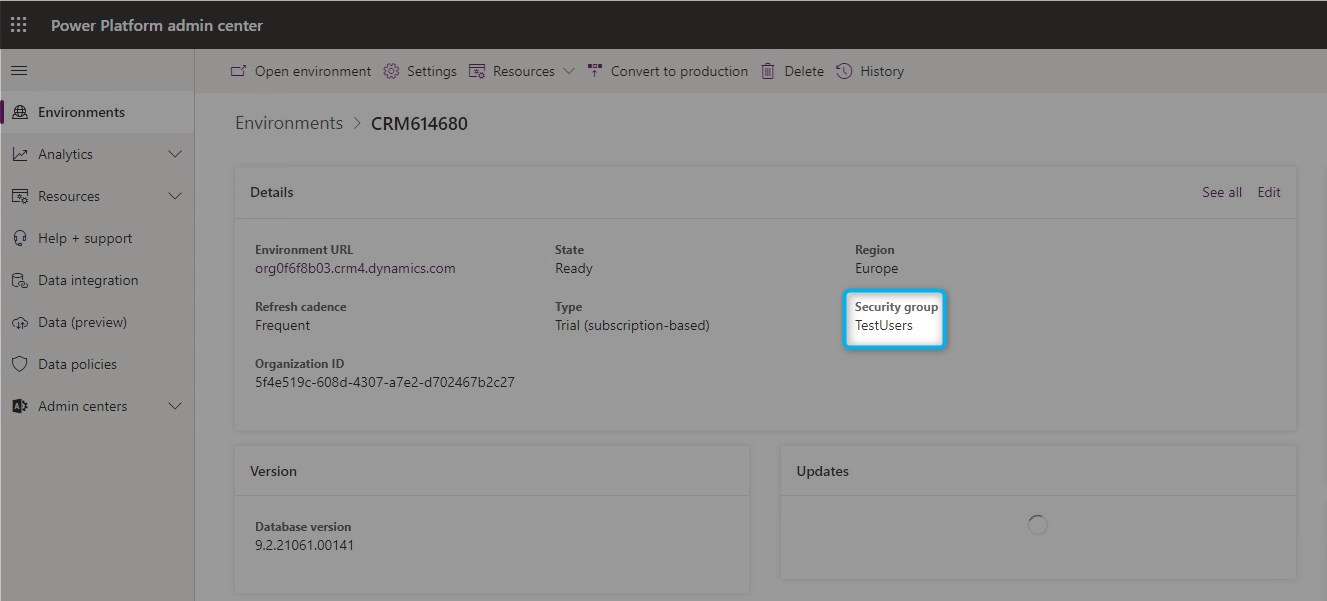
Figure 12: Adding edited security group to Your Dynamics 365