A virtual table (also called a virtual entity) is a special kind of table that takes data from an external source and represents that data in the form of a table in Microsoft Dataverse. This data can be manipulated like a normal table. As such, this means that the data from a dynamic table can be displayed in documents using DocumentsCorePack.
Note: This article assumes general knowledge of virtual tables. If you are unfamiliar with virtual tables, please visit this link: Get started with virtual tables (entities).
Using data from a virtual table in a template works similarly to normal tables. Once the table is created and included in your environment, it can be accessed from the Template Designer.
Prerequisites:
For every template that requires values from virtual tables, the “Use Query Expression” setting must be activated. This setting will convert the relevant FetchXML to Query-Expression, which is what allows for virtual table support.
Please note: “Use Query Expression V2” is the new recommended option for all new templates designed with virtual tables. This new option is available for DocumentsCorePack TemplateDesigner (Client) versions 10.49 and higher. This option can be found below the original in both the General Template Settings and the Relationship Designer. The new option was designed in order to solve some issues from V1, such as values being formatted in computers user localization and not in CRM user localization and result values not working with DCP condition fields.
“Use Query Expression” is still available so that existing templates are not affected, but when designing a new template with virtual tables, use the “Use Query Expression V2” option.
- When using a virtual table as the main entity: Check the setting in the Advanced Template Settings.

- When using a virtual table via a relationship: Check the setting in the relationship designer.

Note: If this setting is not enabled, an “Sql error: Generic SQL error” will occur during the merge process.

Limitations of working with Virtual Tables
- When using the “Use Query Expression” setting for virtual tables, aggregation and all features that use aggregation (such as Charts) do not work. Hence, we recommend limiting the “Use Query Expression” setting when possible (e.g. When defined on the relationship level, these limitations would only apply to the specific relationships instead of the entire template).
- After some internal tests, we cannot verify that creating a 1:N relationship with a virtual table when using SharePoint as an external data source is currently possible. While external articles suggest it is possible (here and here), users should be aware of this potential issue when creating virtual tables for their environments.
- Microsoft Dynamics CRM has a limitation that CRM tables and virtual tables can’t be used together in a FetchXML or QueryExpression. However, a workaround for this limitation is to split the query with the “Split Query” option and fetch each data separately and then merge them together. The workaround uses the existing Deep-Fetch Analyzer feature together with the QueryExpressionV2 feature, and then the split query option tells the Deep-Fetch Analyzer to split the query.
Example (without Split Query):
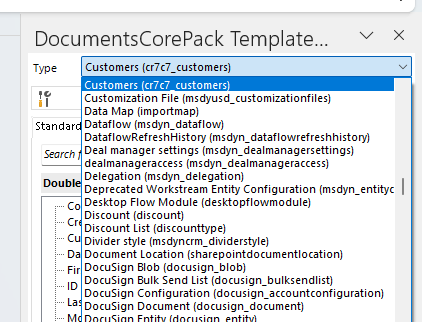
Using a custom virtual table called “Customers” as an example, we can access the base entity from the drop-down like normal.
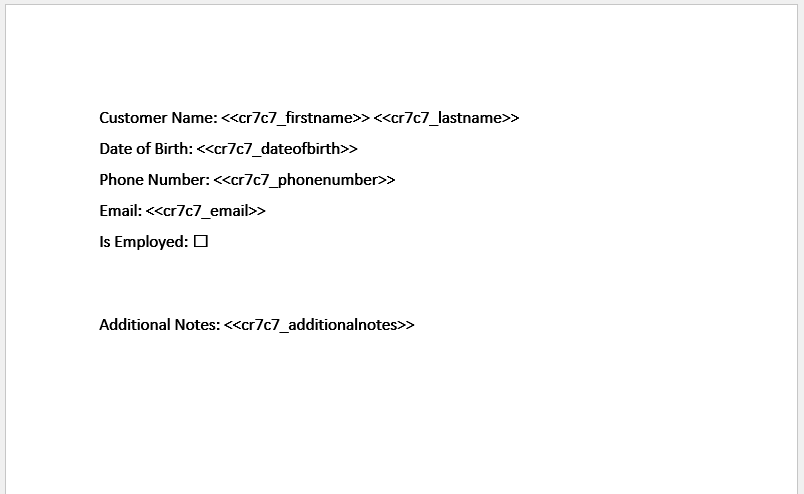
The fields from this entity can then be included in the template as usual.
Additionally, a relationship to your virtual table can be established in the Relationship Designer. Using “Account” as a base entity, we can form a relationship to “Customers” related to the account.
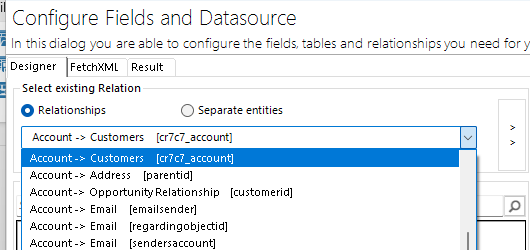
From there, you can select the fields you require from the customer table.
Result
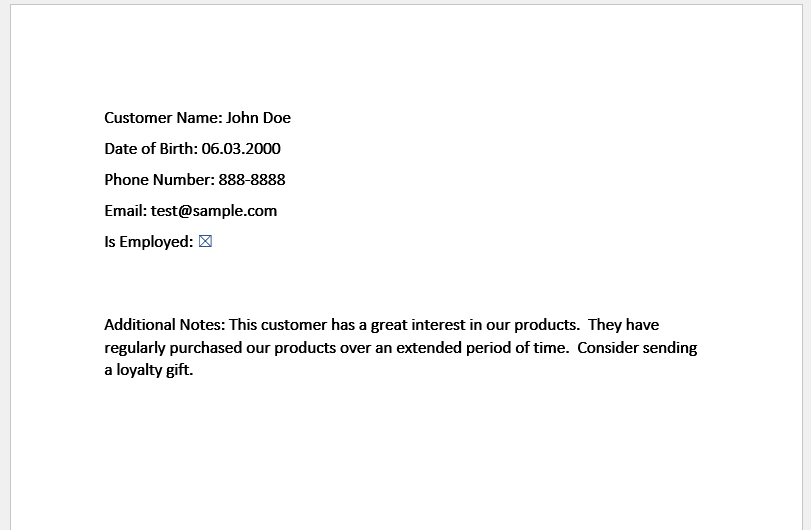
After saving the template to your environment, you can test it out to see if the data is shown in the resulting document.
Example (with Split Query):
Conditions for using the Split Query option:
- The Deep-Fetch Analyzer and QueryExpressionV2 options need to be activated.
- The Split Query option must also be activated. This option is found only in the Template Designer.

That’s it! If you would like to give us any feedback, please contact us by sending an email to support@mscrm-addons.com.