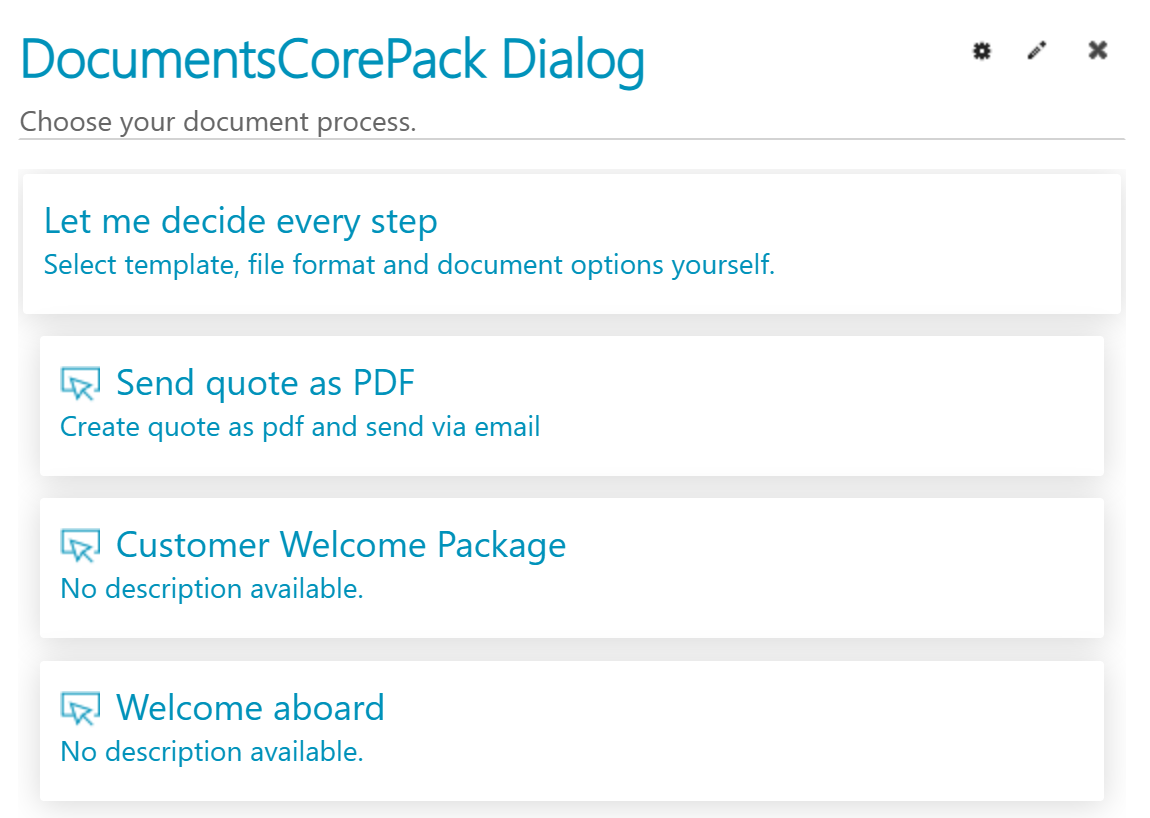
One-Click-Actions (OCAs) are predefined configurations in the DocumentsCorePack (DCP) Dialog designed to simplify and accelerate document creation and distribution in Dynamics 365 and PowerApps.
This guide walks you through the process of creating a One-Click-Action. Once a user selects one or more records within an entity and clicks ‘Create Document’, the configured One-Click-Actions will appear in the DCP Dialog.
Example: Accounting needs to generate PDF invoices, email them to customers, save a copy to SharePoint, and print a physical copy. An administrator can streamline this workflow by configuring a One-Click-Action – a compact automation that users can trigger with a single click.
Step-by-step video
Step-by-step description
This guide walks you through the process of creating a new OCA to email a PDF to a customer and save it in SharePoint.
Step 1: Opening the One-Click-Action Configuration
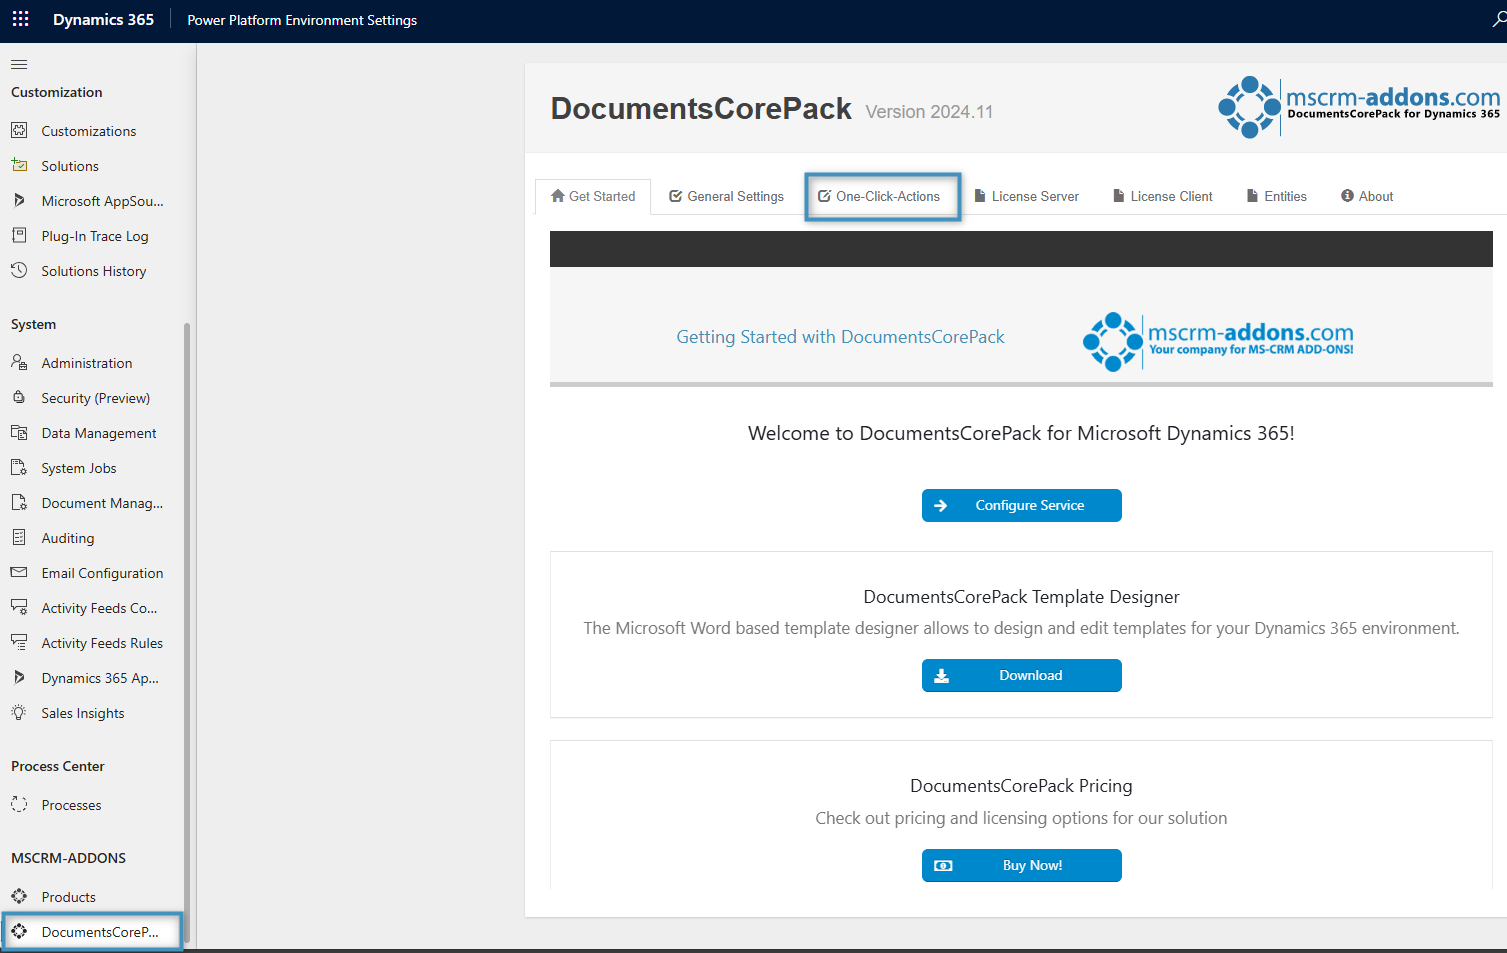
To begin, open your Dynamics 365 settings, go to Settings, select Advanced Settings, and under MSCRM-ADDONS select DocumentsCorePack and then the One-Click-Actions tab.
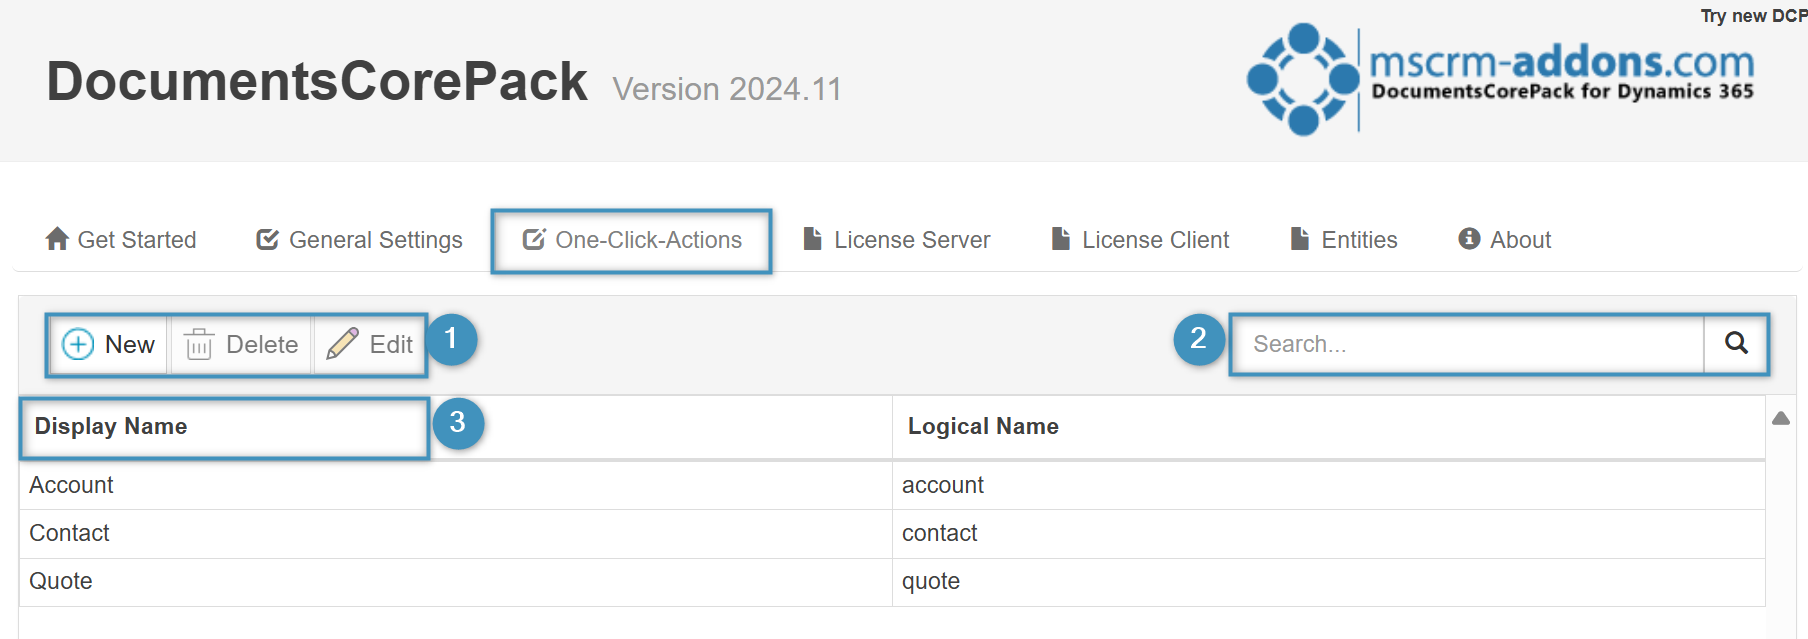
The main configuration window will open, displaying tabs for general DCP setup options.
❶ The buttons in this group allow you to edit, delete, or add an entity to the list.
❷ To find the entity you want to create OCAs for, type its name into the search box. If it does not appear in the list, click the New button to add it.
❸ Click on the entity you want to open. A new dialog will appear where you can create and manage OCAs for the entity. Take note that once an OCA has been created, it can always be edited.
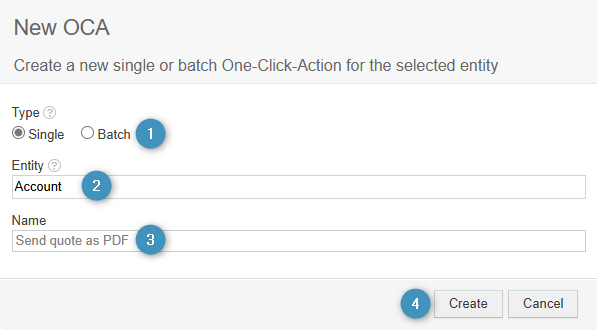
To add an entity, click the New button, and follow the steps below.
❶ In the window that appears, select Single to create a new Single Action OCA.
❷ Use the Entity drop-down menu to select the appropriate entity.
❸ Enter a name for your OCA in the Name field.
❹ Click Create to save your selections.
You will then go through four configuration screens—General Settings, Template Settings, Processing Settings, and Review Settings—to set up your OCA in detail.
Step 2: General Settings of One-Click Actions
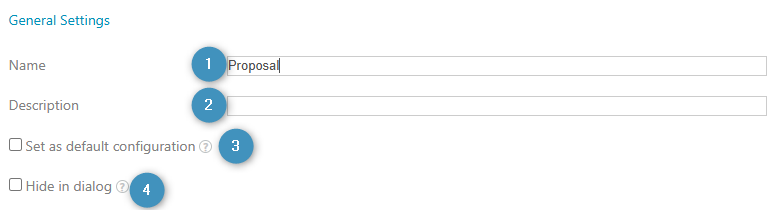
In the General Settings window, you have four sections.
❶ Name: Edit the name you previously entered for your OCA (as shown below).
❷ Description: Add a description to help users understand the purpose of the OCA when they run in.
❸ Set as default configuration: Set this OCA as the default configuration, meaning this OCA will run automatically whenever the user clicks Create Document.
❹ Hide in dialog: Hides the OCA from the user.
Use the buttons in the lower-right corner of the page to perform the following actions as needed:
❺ These buttons let you navigate to the next or previous step. Once you are satisfied with your configuration, proceed to the next step.
❻ Click the Save button to save changes to your OCA.
❼ Click the Delete button to delete your OCA.
❽ Click the + button to configure display rules.
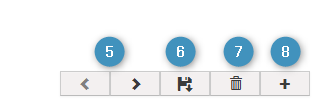
Tip: To learn more about display rules, see here.
Step 3: Template Settings
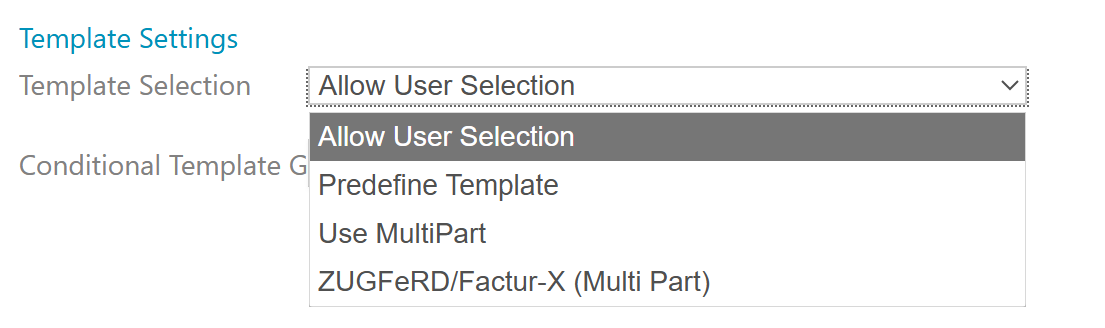
The Template Settings section allows you to configure your template selection in detail. There are multiple template selection options available, each corresponding to a different scenario:
a. Allow User Selection
b. Predefine Template
c. Use MultiPart
d. ZUGFerd/Factur-X (MultiPart)
a) Allow User Selection
The Allow User Selection option defines an OCA that enables users to choose a template themselves in the DocumentsCorePack Dialog when running the OCA.
With this option, you can choose to allow the user to edit the template before the document is generated. Additionally, the Conditional Template Group setting can be used to link entity attributes to template groups, where, if the predefined attributes match those of the selected record, the OCA will present the user with context-specific template groups. This is especially useful when you want to limit available templates to those relevant to a specific department.

b) Predefine Template
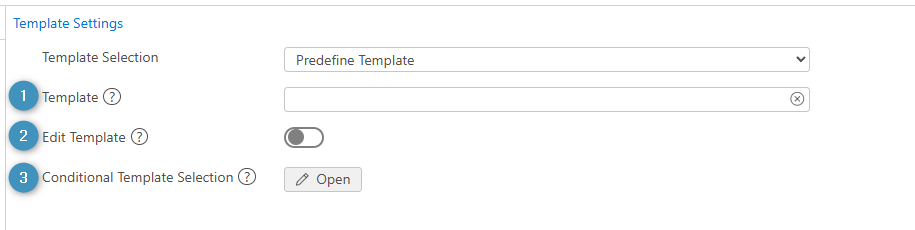
The Predefine Template option allows the user to set a template to be used in advance, skipping the need to choose one later. There are three settings:
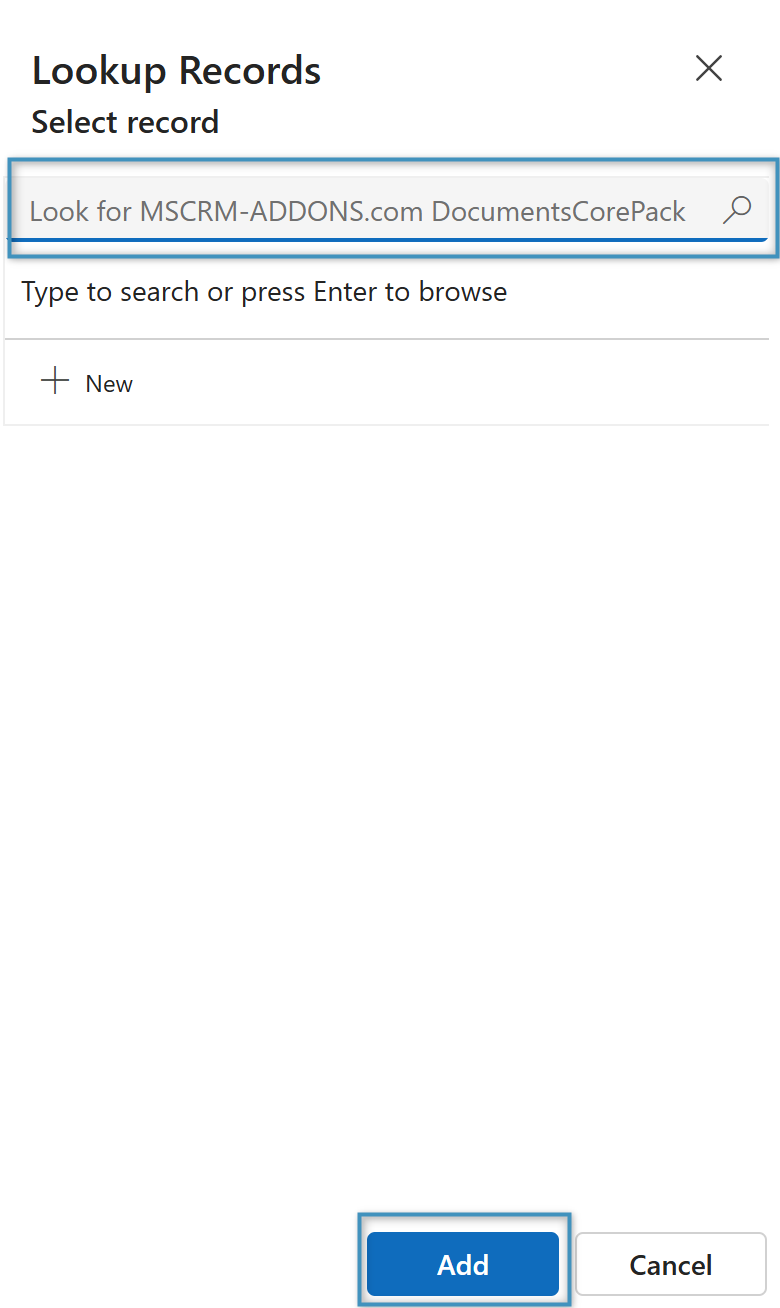
❶ Click in the Template field to open a lookup window to search for a suitable template that you want to set for the OCA and then Add it (see figure 8b).
❷ Selecting the Edit Template checkbox enables you to modify the template before the document is generated.
❸ The Conditional Template Selection allows you to define templates that are conditionally shown to the user, based on attributes that match those of the currently selected record. For instance, depending on a contact record’s location, a template in the appropriate language can be automatically provided when the user initiates the OCA.
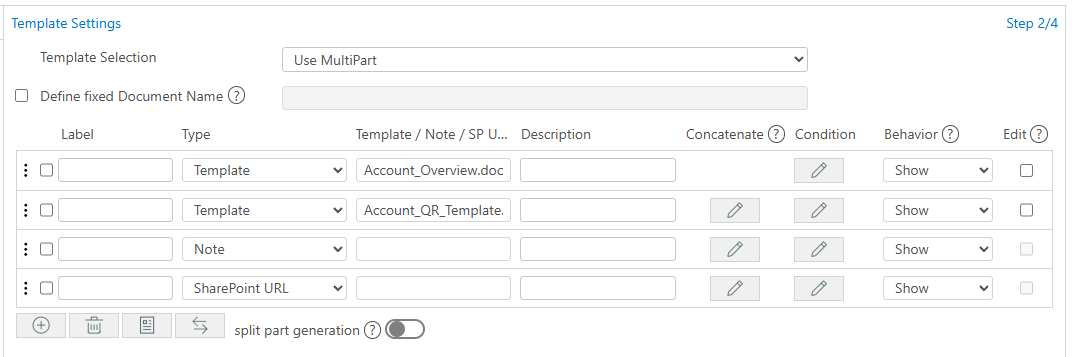
c) Use MultiPart
The third option in the drop-down menu is Use MultiPart. This template enables creation of compound documents—combinations of multiple components such as dynamic DCP templates and static files like PDFs. It supports both predefined and user-selected documents, allowing for flexible document assembly. MultiParts allow users to merge several documents into one single document, streamlining the process of creating comprehensive outputs.
MultiParts are constructed via DocParts (document parts), which are segments of a MultiPart that can be either a Microsoft Word template (docx), a note, or a SharePoint URL pointing to a hosted document. Each DocPart can include a label and description, which are displayed to the user when running the OCA.
Tip: For more information on MultiParts, see here.
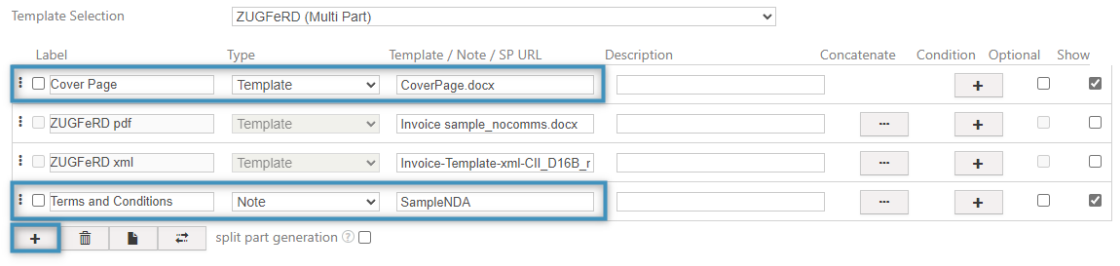
d) ZUGFeRD/Factur-X (MultiPart)
This feature is a version of MultiPart that assists in creating ZUGFeRD/Factur-X-compliant documents. Unlike standard MultiParts – which are typically used for invoice creation and require both a docx and XML template – this version is tailored to meet the unique structure and compliance requirements of these hybrid formats.
Differences to regular OCAs
When you select this setting, a multipart configuration will open, consisting of two parts: “ZUGFeRD pdf” and “ZUGFeRD xml”. Each part requires a template. In the “pdf” row, select a ❶ template that will display the visual contents of the document as a PDF. In the “xml” row, select a ❷ template that will be embedded as an XML file within the final PDF.
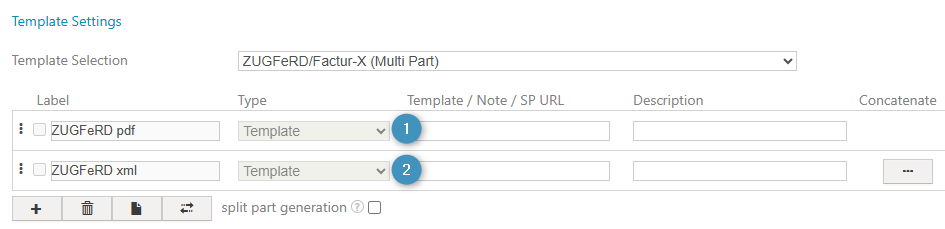
You can easily add optional components to the multipart setup, which will be merged with the final PDF. This is especially useful for including elements like cover pages or terms and conditions. Standard concatenation options are available by default.
Note: For more information on ZUGFeRD/Factur-X, please refer to this article.
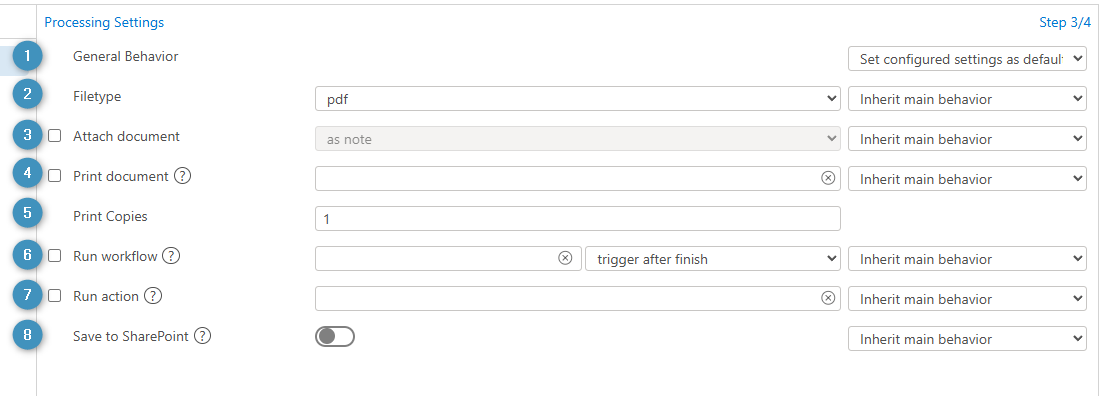
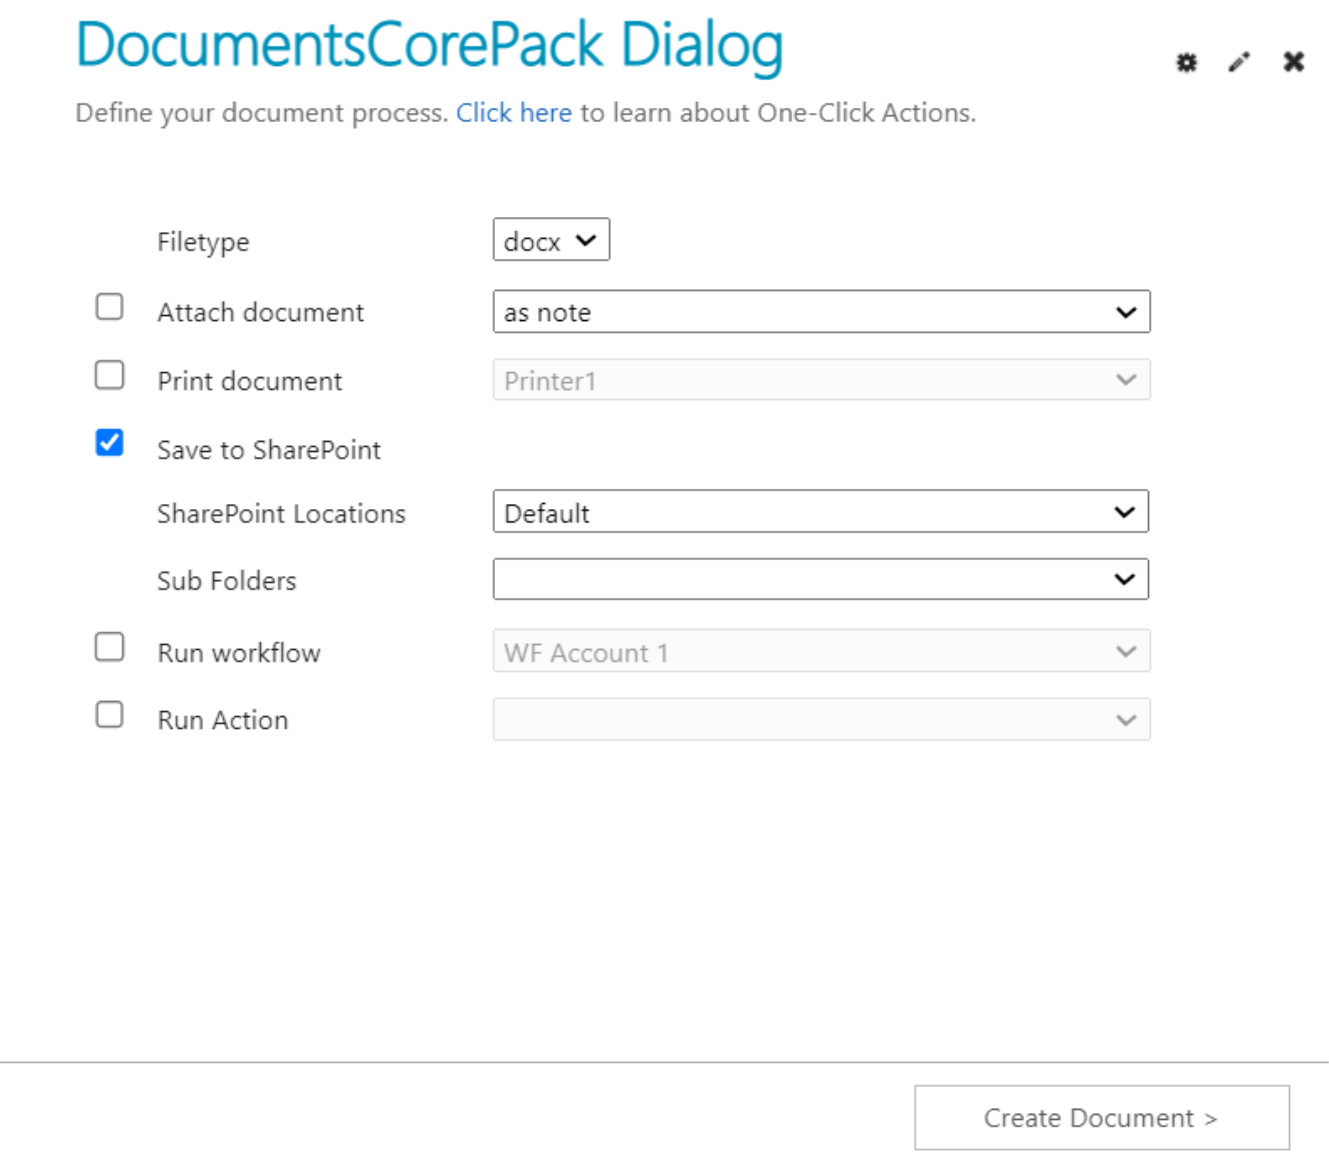
Step 4: Processing Settings
In this step, you can specify various document processing options, such as what the generated document’s file type should be, if it should be printed, or if it should be saved to SharePoint. The options are as follows:
❶ General Behavior: This determines how the processing settings should be displayed in the DCP Dialog. The settings can be either set manually each time, hidden from the user, or disabled.
❷ File type: Determines the file type of the generated document
❸ Attach document: Determines how the document should be attached (see “Attach document options”).
❹ Print document: Determines if the document should be printed and which printer will handle the printing
❺ Print Copies: Determines the number of printed copies
❻ Run workflow: Runs the selected workflow. The second dropdown determines when the workflow triggers
❼ Run action: Runs the selected action
❽ Save to SharePoint: If enabled, saves the generated document to SharePoint
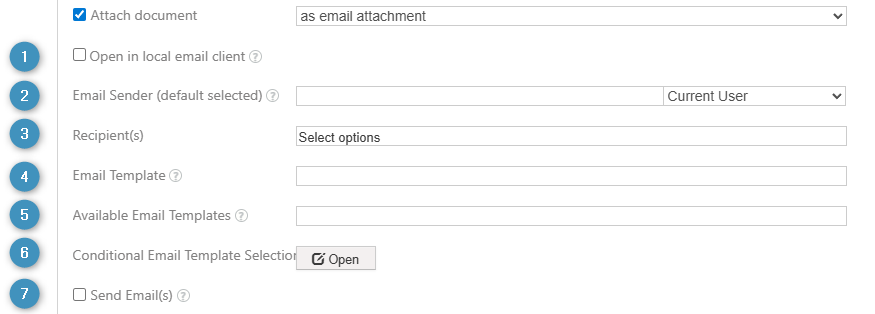
Attach document options
Depending on what option is selected under ❸ Attach document, other settings will appear. By default, Attach document is set to as note, however, the following options exists:
Attach document as email attachment
This option will attach the generated document to an email as an attachment. This created email can be then sent to a specified recipient, if defined. When selected, the following settings are available:
❶ Open in local email client: Opens the email in the user’s local email client after the creation process
❷ Email Sender: Specifies the sender of the email
❸ Recipient(s): Specifies the email recipient(s). The recipient(s) can be related records or static recipients from Contact, System User, or Queue records.
❹ Email Template: Defines the template for the email content.
❺ Available Email Templates: Defines which templates can be selected from ❹ Email Template.
❻ Conditional Email Template Selection: Defines email templates to be used if a defined condition is fulfilled based on the selected record’s fields.
❼ Send Email(s): Sends the created email(s) to the specified recipients.
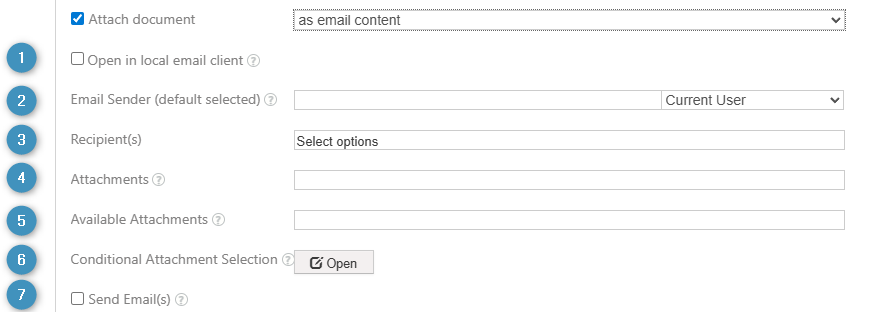
Attach document as email content
This option will generate the document as HTML and insert the document as email content. This created email can be then sent to a specified recipient, if defined. When selected, the following settings are available:
❶ Open in local email client: Opens the email in the user’s local email client after the creation process
❷ Email Sender: Specifies the sender of the email
❸ Recipient(s): Specifies the email recipient(s). The recipient(s) can be related records or static recipients from Contact, System User, or Queue records.
❹ Attachments: Defines the attachments to be added to the email.
❺ Available Attachments: Defines which attachments can be selected from ❹ Attachments.
❻ Conditional Attachment Selection: Defines the attachments to be used if a defined condition is fulfilled based on the selected record’s fields.
❼ Send Email(s): Sends the created email(s) to the specified recipients.
Attach document as other activity
This option will attach the document to an activity. When selected, the following settings are available:
❶ Activity type: Defines the activity the document will be attached to
❷ Set Activity Status: Sets the activity’s status
❸ Recipient(s): Specifies the activity’s recipient

Attach document as electronic signing
This option will attach the generated document as a digital document to be signed. The user can choose their signing provider and specify who the document should be sent to. When selected, the following settings are available:
❶ Signing Provider: Specifies the signing provider to be used
❷ In Person Signing: Enables in-person signing (not available for all signing providers)
❸ Recipient(s): Specifies the email recipient(s). The recipient(s) can be related records or static recipients from Contact, System User, or Queue records.

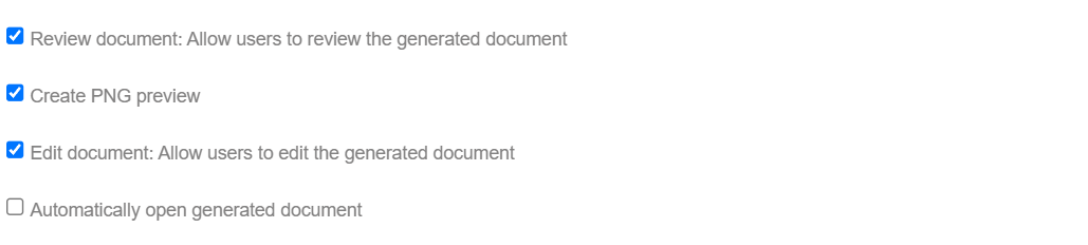
Step 5: Review Settings of the One-Click-Actions
As illustrated in the figure below, you can review your document, generate a PNG preview, and open the file automatically. Once all steps are configured, save your OCA.
Step 6: Test your One-Click-Action
When a Dynamics 365 user clicks on Create Document, they are automatically presented with the available OCAs. Users will only see OCAs for which they meet the predefined display rules.
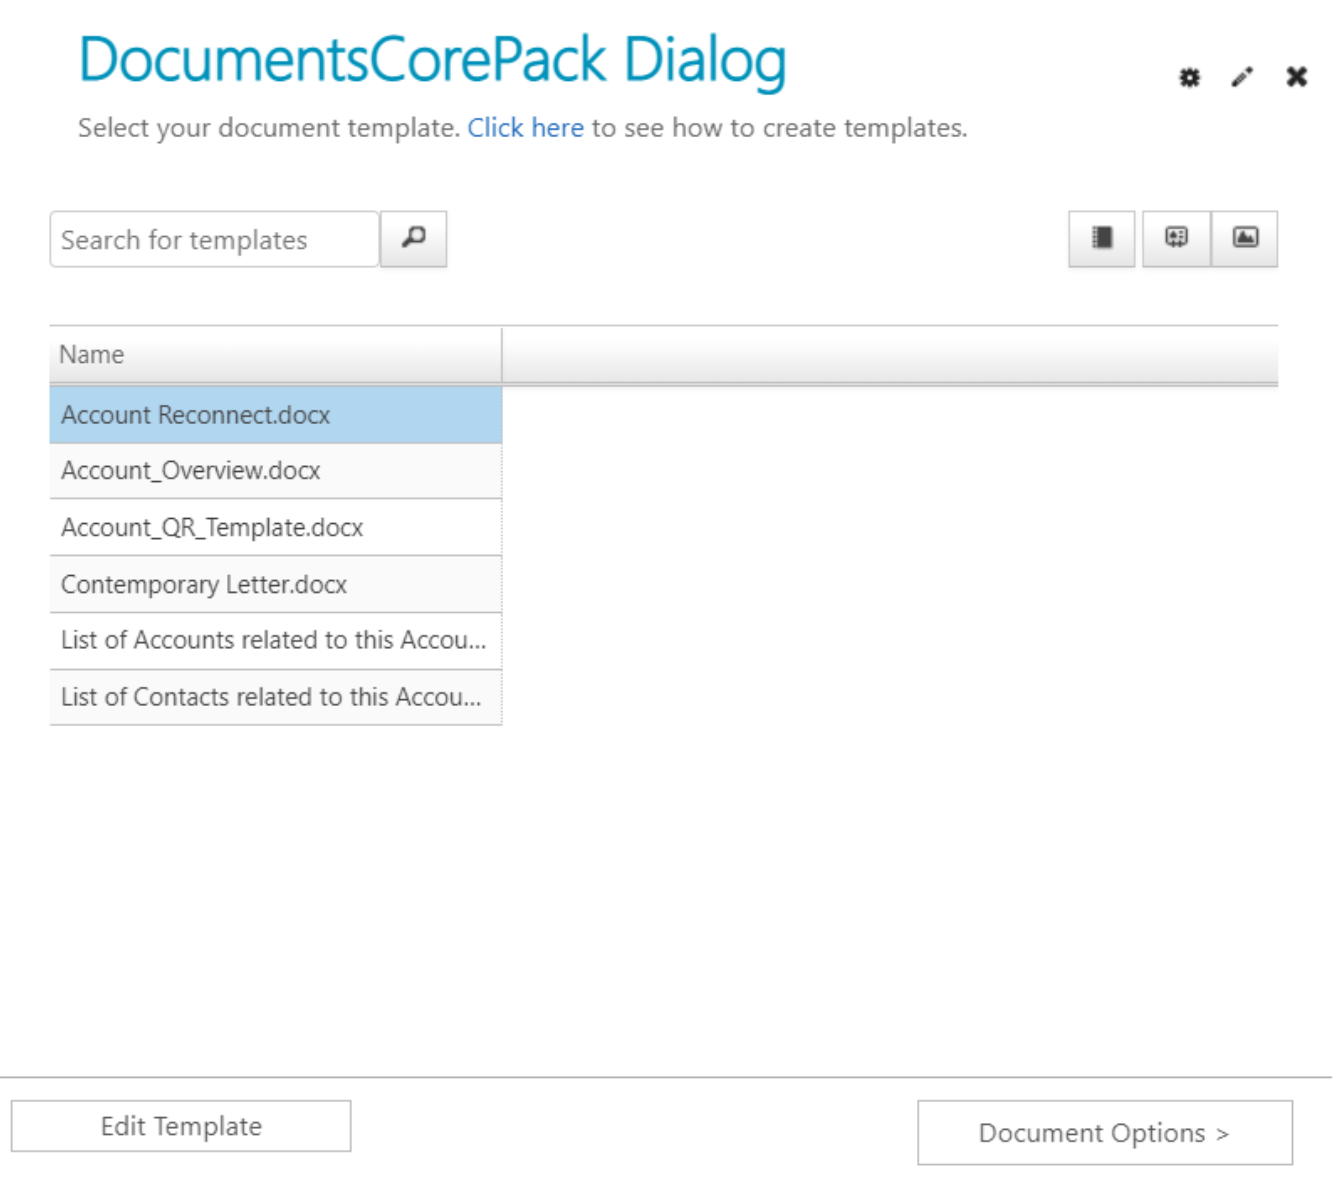
Depending on the Template Selection option you chose, the steps through the Dialog will be different. For instance, if you chose Allow User Selection for your OCA, you will be presented with a list of templates to choose from.
If you configured your OCA to use MultiPart, then you will be presented with a list of all DocParts that will be combined in the final document.
If you did not choose to hide your Processing Settings, then you can configure them as shown below. Otherwise, they are skipped.
The process concludes by showing the user a preview of their document, if they did not choose to hide it as well.
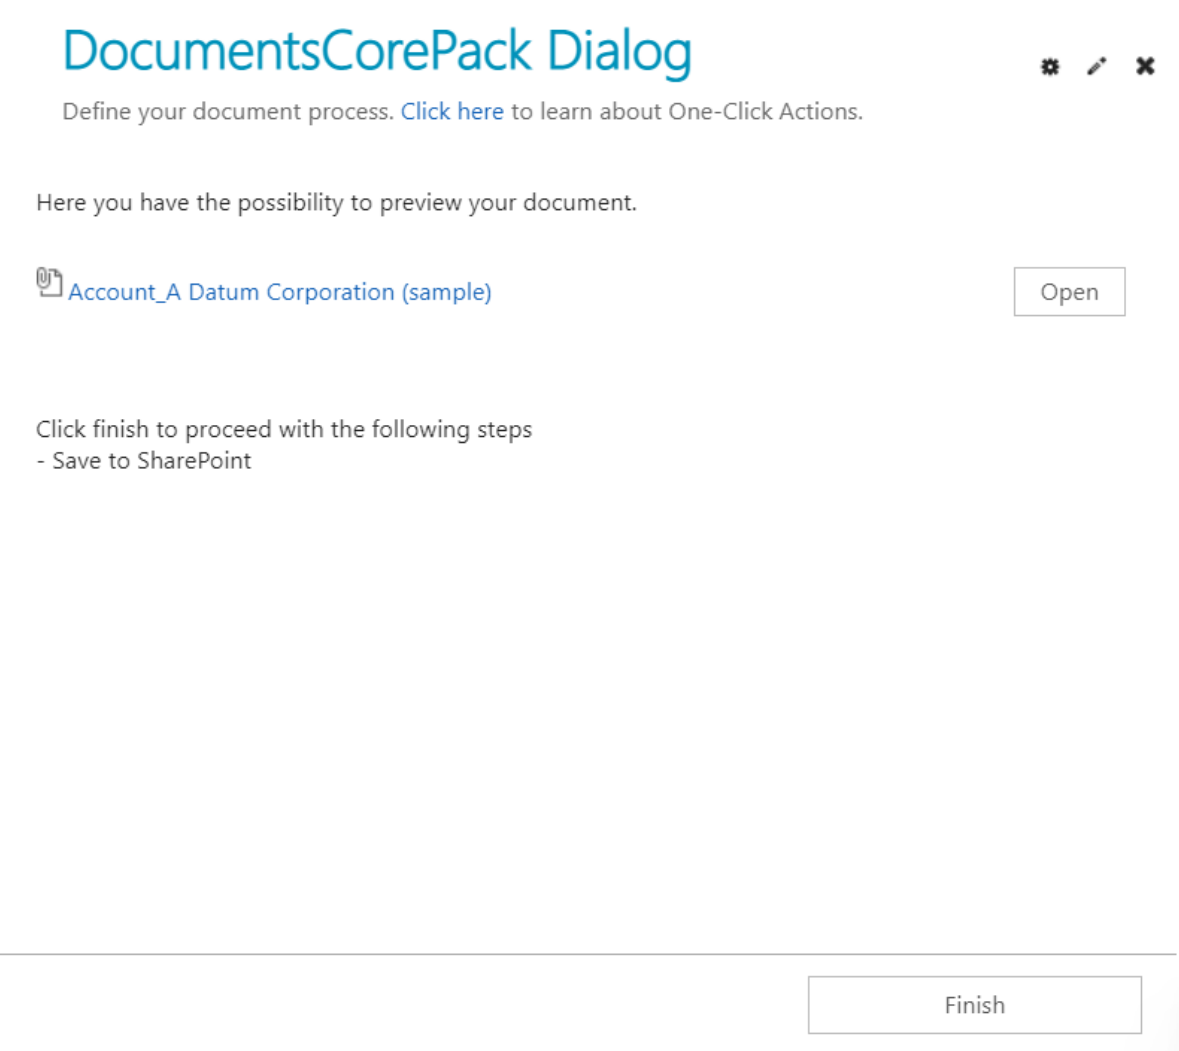
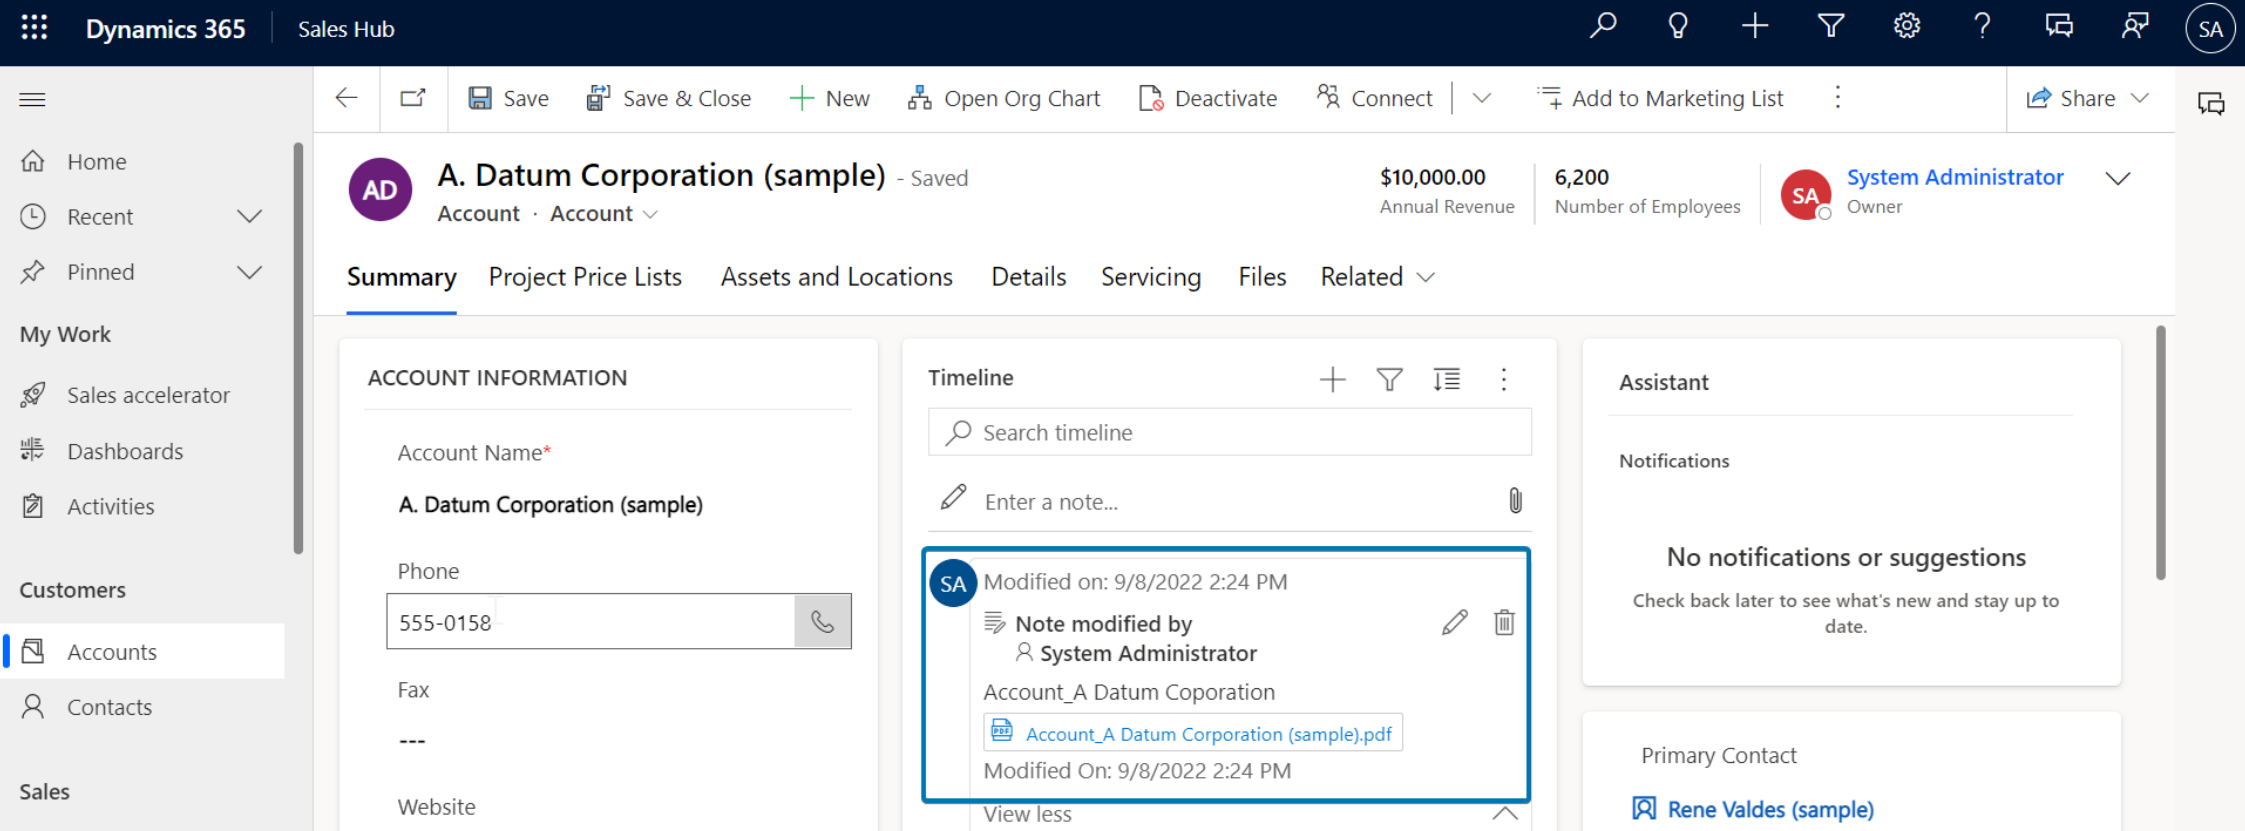
Once the user selects Finish, the OCA will conclude and any document(s) will be generated. In the below example, if the user chose to save the document as a note, it will appear in the corresponding record’s timeline.