mscrm-addons.com logomscrm-addons.com logo
  • Release History
  • Knowledge Base
  • Documentation
  • Contact Support
  • Release History
  • Knowledge Base
  • Documentation
  • Contact Support
home/Knowledge Base/GroupCalendar (GC)/Add Config SiteMap entries manually

Add Config SiteMap entries manually

815 views 2 Updated on October 9, 2024

This blog article outlines how to manually add SiteMap entries linking to our product config pages.

After installing our products you normally get an entry for our product entity “Products” and an entry for each of our products linking to its configuration page. By default, these entries can be found in Dynamics 365 under Settings as you can see in the figure below.

Figure 1A : Default settings: MSCRM-ADDONS Products
Figure 1B : Default settings: MSCRM-ADDONS Products (New Look)

Unfortunately, it can happen that these entries do not appear like the following figure shows.

Missing SiteMap entries

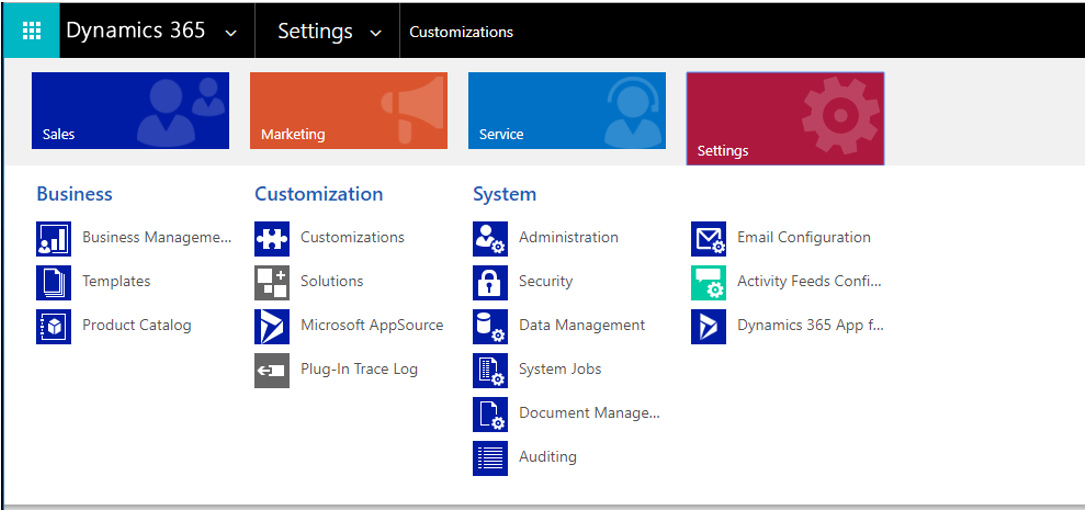
Figure 2: Missing SiteMap entries

A reason for this issue can be a customized SiteMap. In this case, you can add these entries manually bis using the SiteMap editor. The following steps describe you how this can be done for example for DocumentsCorePack. 

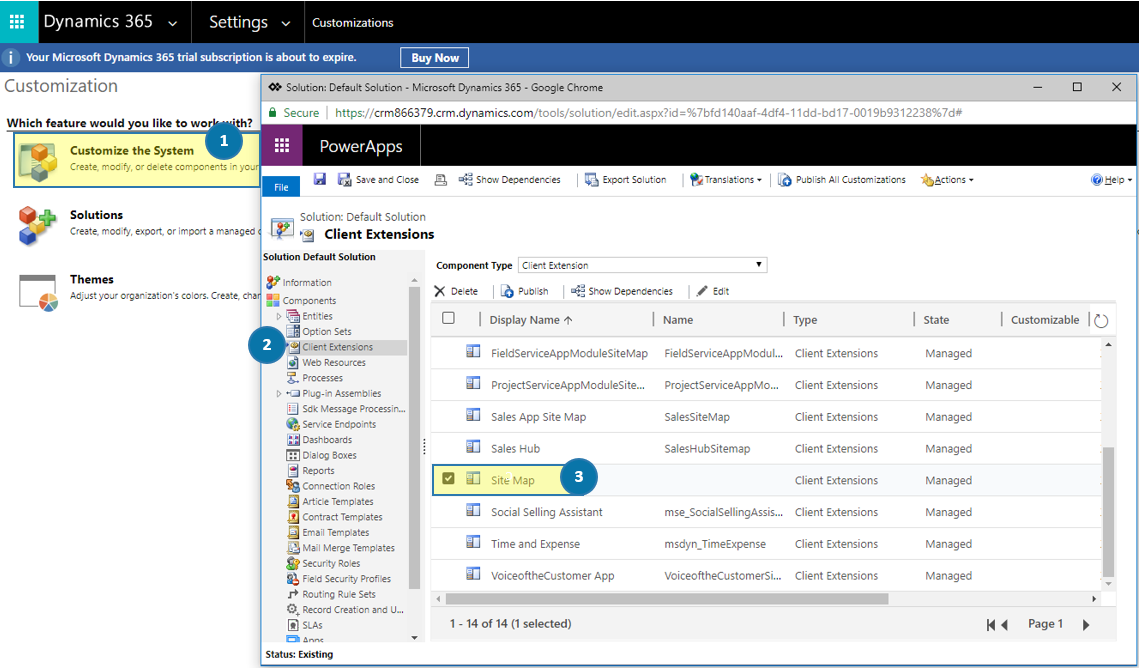
Please click on Customizations in the Settings area and select ❶ Customize the System. In the so opened window, please search for ❷ Client Extensions and choose ❸ Site Map which opens the SiteMap Designer. 

Customize the System
Figure 3: Customize the System

In the SiteMap Designer please select the SiteMap entry you want to customize – in this case, ❶ Settings. Next, hit the ❷ [Add]-button and select ❸ Group.

SiteMap Designer - Add Group

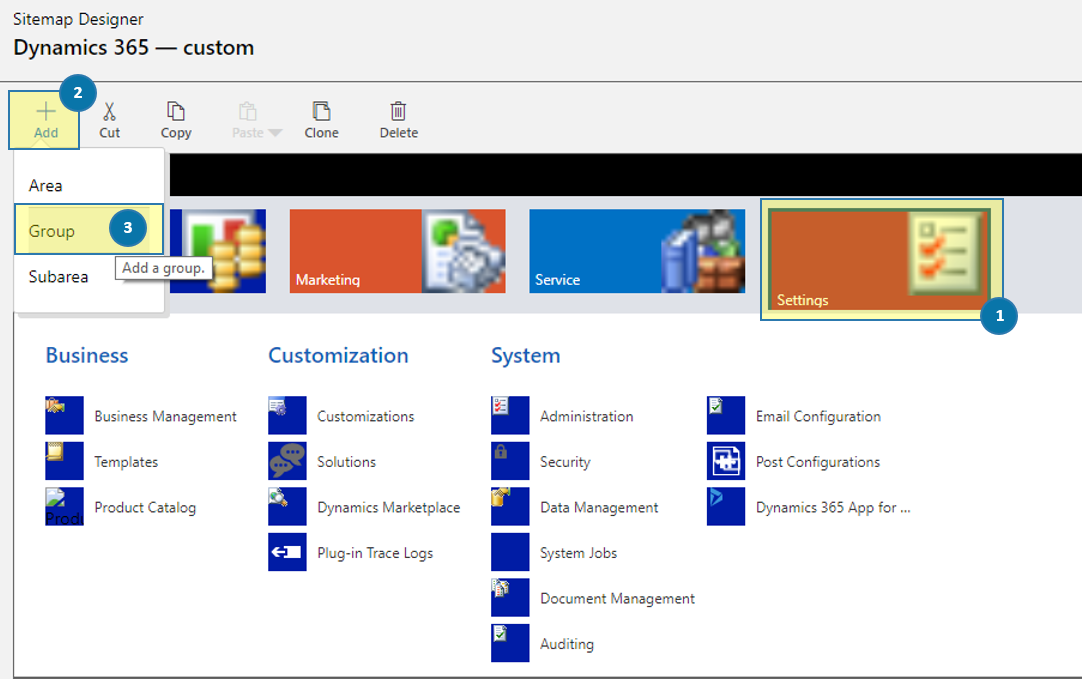
Figure 4: SiteMap Designer – Add Group

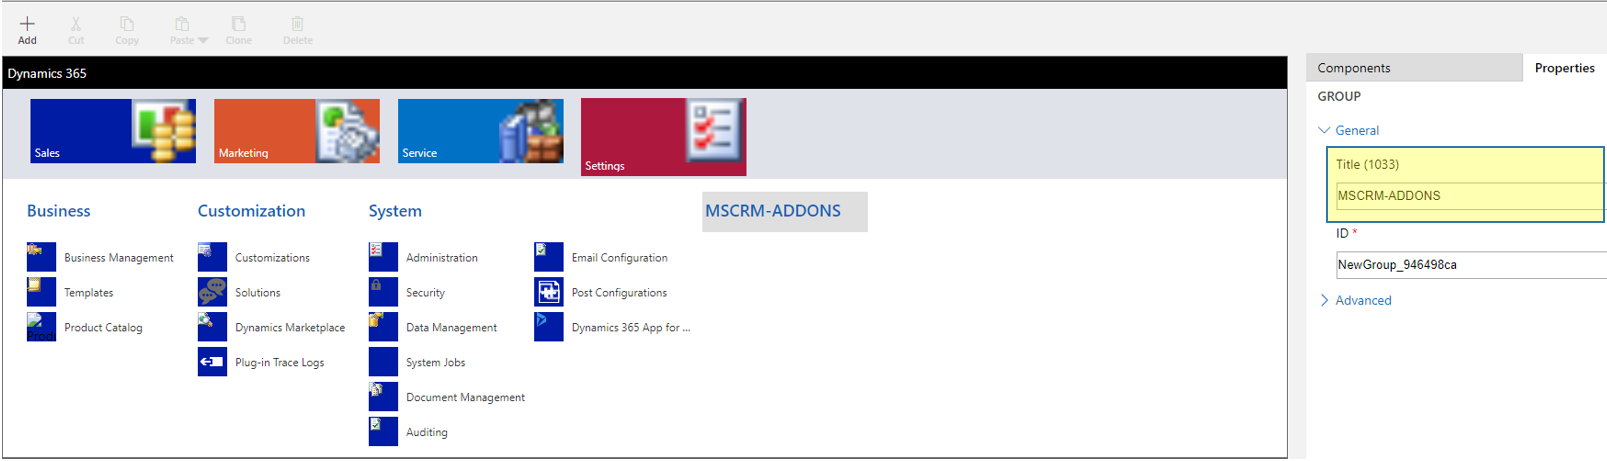
On the right side please enter the Title of your Group – MSCRM-ADDONS in this case (highlighted in yellow). The Id is automatically generated.

Set group title
Figure 5: Set group title

Next, please add a new Subarea as you can see highlighted in yellow in the figure below.

Add new Subarea
Figure 6: Add new Subarea

Arrange your Subarea by setting the values below:
❶ Type = Entity
​❷ Entity = MSCRM-ADDONS.com Products
❸ Title = Products

Configure Subarea

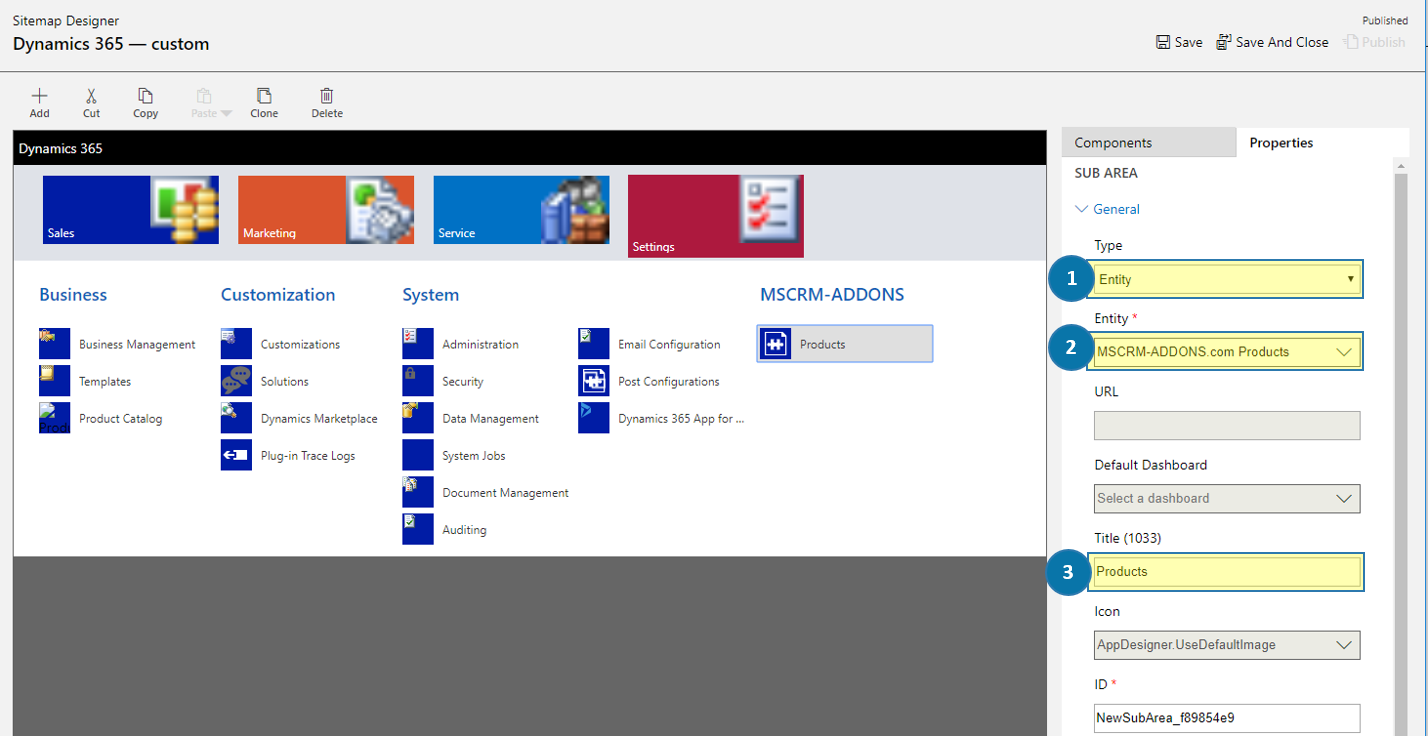
Figure 7: Configure Subarea

As explained before, please add another Subarea and set the values below:

DocumentsCorePack: 

❶ Type = Web Ressource
❷ URL  = AutoMergeConfig (ptm_AutoMerge/AutoMergeConfig.html)
❸ Title = DocumentsCorePack
❹ Icon = ptm_Icon32x32_White.png

Add DocumentsCorePack to the MSCRM-ADDONS area
Figure 8: Add DocumentsCorePack to the MSCRM-ADDONS area

Now you can see your first product in the MSCRM-ADDONS area – in this case DocumentsCorePack. This process is the same for all our other products.

Below please find the right values for each product. As Type always please select Web Resource and the Icon value is always the same: Icon = ptm_Icon32x32_White.png

AttachmentExtractor: 
URL  = ptm_attachmentextractor/solutionconfig/SolutionConfig.html
Title = AttachmentExtractor 

ActivityTools
URL  = 
ptm_ActivityTools/config/Settings.html
Title = ActivityTools

GroupCalendar
URL  = ptm_groupcalendar/solutionconfig/SolutionConfig.html
Title = GroupCalendar

PowerSearch
URL  = ptm_PowerSearch/html/Config.html
Title = PowerSearch

SmartBar
URL  = ptm_SmartBar/solutionconfig/SolutionConfig2.html
Title = SmartBar

TelephoneIntegration
URL  = ptm_telephoneintegration/solutionconfig/SolutionConfig.html 
Title = TelephoneIntegration

That’s it! We appreciate your feedback! Please share your thoughts by sending an email to support@mscrm-addons.com.

Was this helpful?

2 Yes  No
Related Articles
  • What Happens After You Deploy AttachmentExtractor: Storage & Cost Savings in Dynamics 365
  • Deploying DocumentsCorePack: Setup, Automation, and Real Business Impact in Dynamics365
  • Introducing the DocumentsCorePack Template Designer Office Add-In (Beta)
  • How to Eliminate Excess Storage Costs in Microsoft Dynamics 365 Without Losing Access to Emails and Attachments
  • 3 Ways DocumentsCorePack Transforms Proposal, Quote, and Contract Creation
  • DeepSign for DocumentsCorePack 
Latest Articles
  • What Happens After You Deploy AttachmentExtractor: Storage & Cost Savings in Dynamics 365
  • Deploying DocumentsCorePack: Setup, Automation, and Real Business Impact in Dynamics365
  • Introducing the DocumentsCorePack Template Designer Office Add-In (Beta)
  • How to Eliminate Excess Storage Costs in Microsoft Dynamics 365 Without Losing Access to Emails and Attachments
  • 3 Ways DocumentsCorePack Transforms Proposal, Quote, and Contract Creation
Popular Articles
  • DocumentsCorePack Template Designer – Getting Started
  • Step-by-Step: How to configure a One-Click-Action
  • Application Access for Dynamics 365
  • How to find your environment’s unique name in Microsoft Dynamics 365
  • How licenses are counted
Top Rated Articles
  • “Undefined”-labels in Chrome and Edge 114 and higher
  • Important information for Dynamics 365 online customers using DocumentsCorePack and/or AttachmentExtractor
  • How to activate the DocumentsCorePack Connector for PowerApps & Microsoft Flow
  • How to insert Condition Fields in DocumentsCorePack Templates designer
  • How licenses are counted
Categories
  • *News and General Infos* 64
  • Webinars 45
  • Template Designer(DCP 196
  • DocumentsCorePack(DCP 258
  • TelephoneIntegration (TI 65
  • AttachmentExtractor (AE 75
  • PowerSearch (PS 50
  • ActivityTools (AT 61
  • SmartBar (SB 54
  • GroupCalendar (GC 47
Our Vision

“We see it as our purpose to provide products that simplify and speed up our customers’ Microsoft Dynamics 365 experience.”

Knowledgebase
LogIn
mscrm-addons.com
  • Products
  • Online Shop
  • Downloads
  • My Account
About Us
  • About Us
  • Case Studies
  • Newsletter
  • Partner Program
  • Contact
Support
  • Support
  • Terms & Conditions
  • Documentation
  • Webinars
  • Legal Documents
  • Impressum
  • © 2025 www.mscrm-addons.com. All Rights Reserved.