This article explains how to activate the DocumentsCorePack (DCP) Connector for Power Automate. After activation, you can use it to generate and process documents within Microsoft Flows and Canvas Apps.
Prerequisites:
- Your DCP service must be hosted on mscrm-addons.com (Open Service Configuration).
- Your DCP service must use the Online – Server2Server or App Access Connection Type for authentication.
Step-by-step video
Step-by-step description
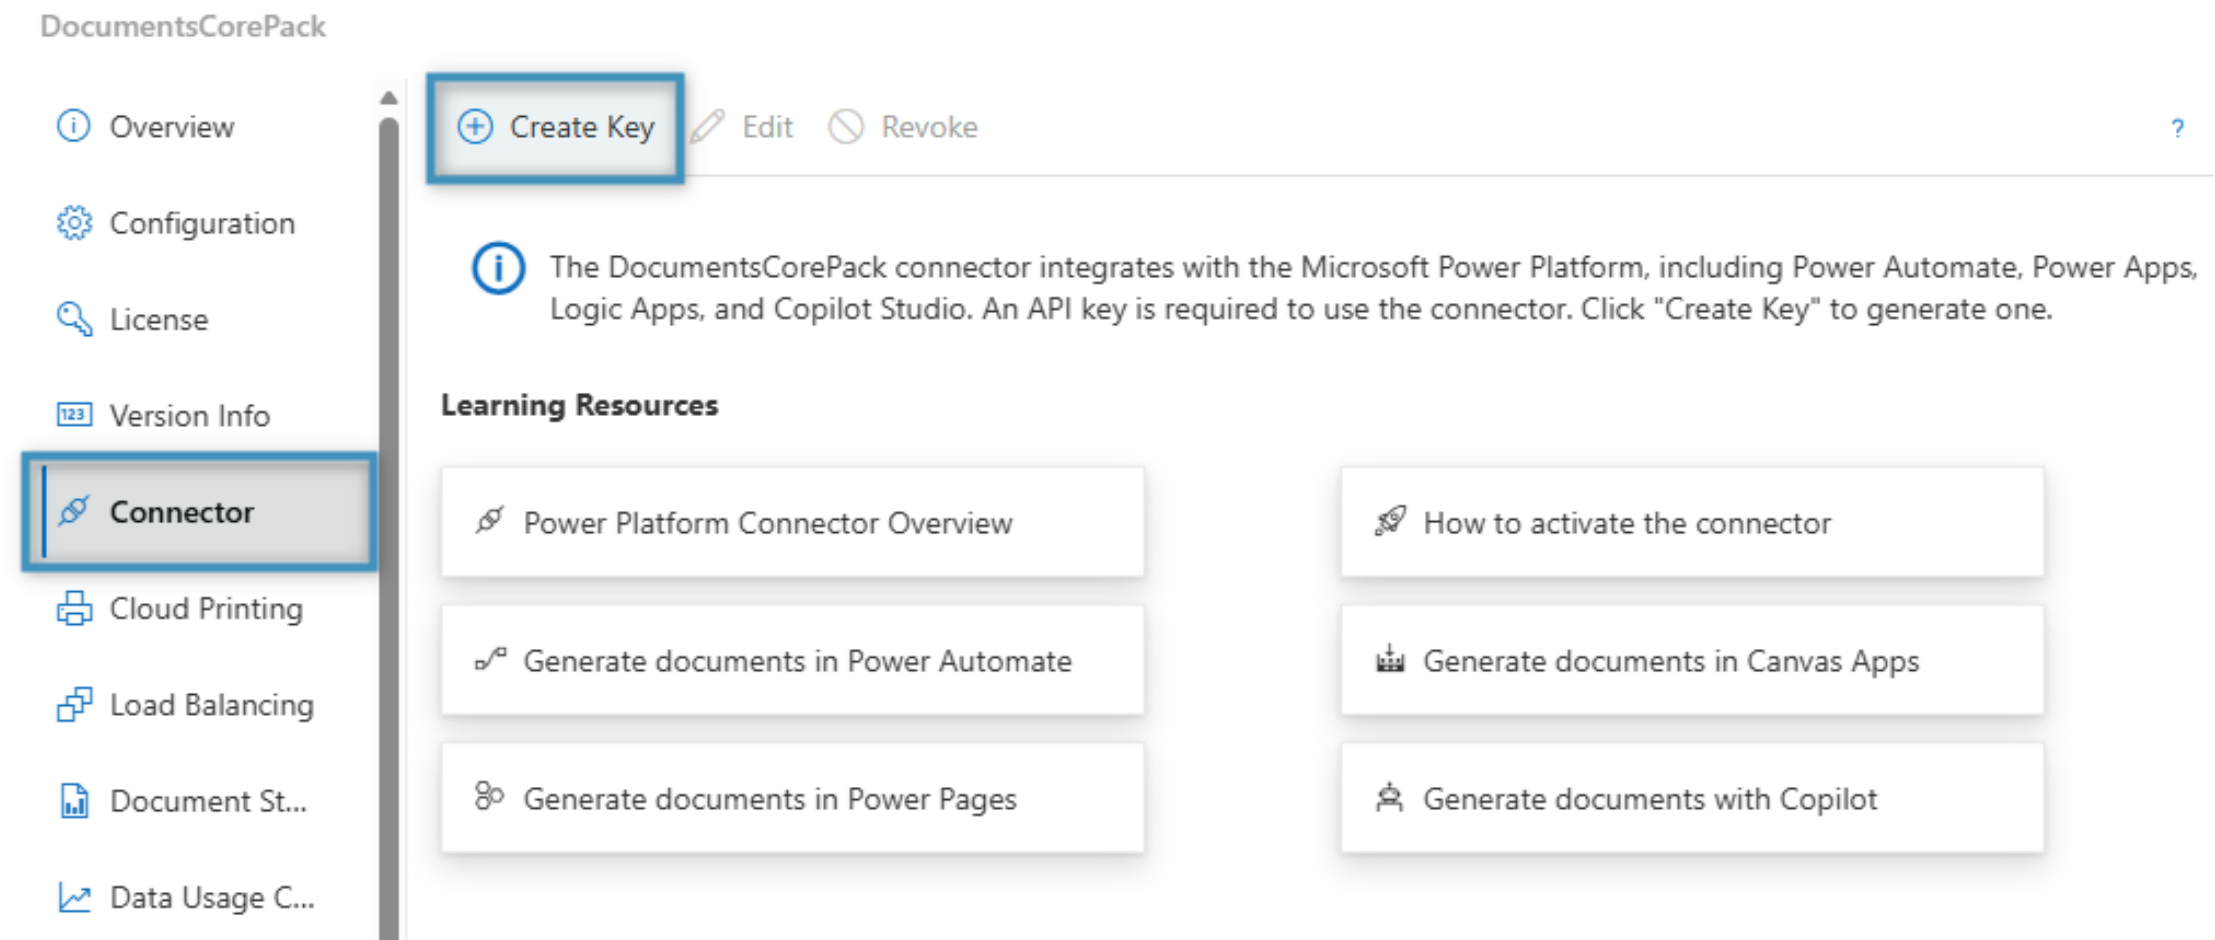
Step 1: Creating an API Key
Open the service configuration here. Choose your service, then go to the Connector tab and click Create Key to generate an API key.
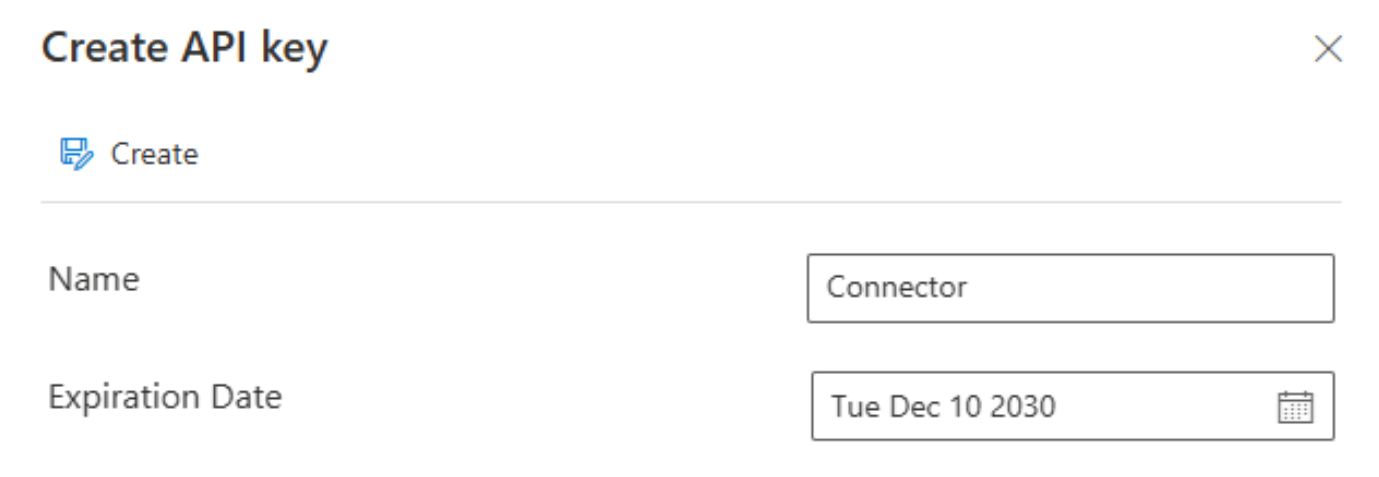
Step 2: Configure key information
Provide a name and an expiration date for the key, then click Create.
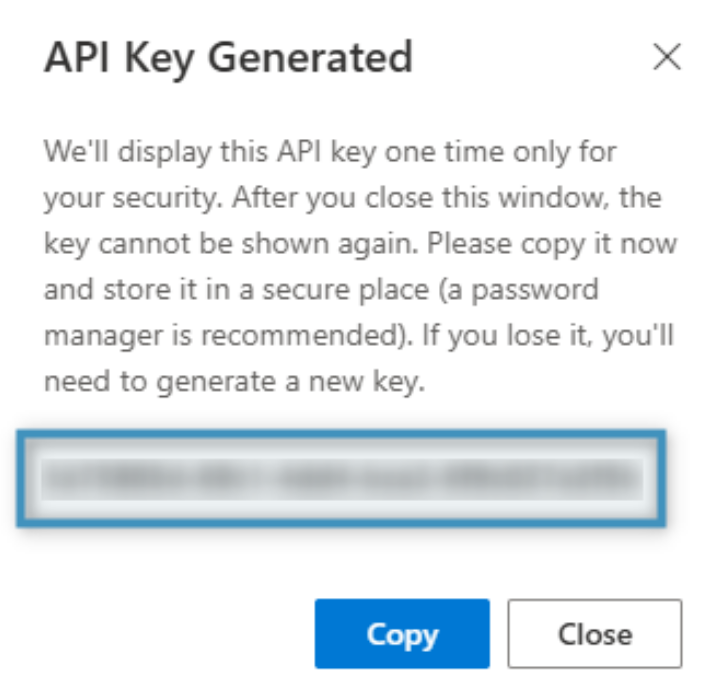
Step 3: Copy the generated key
The API key will be generated. Keep in mind that it is shown only once, so be sure to copy it before closing the window.
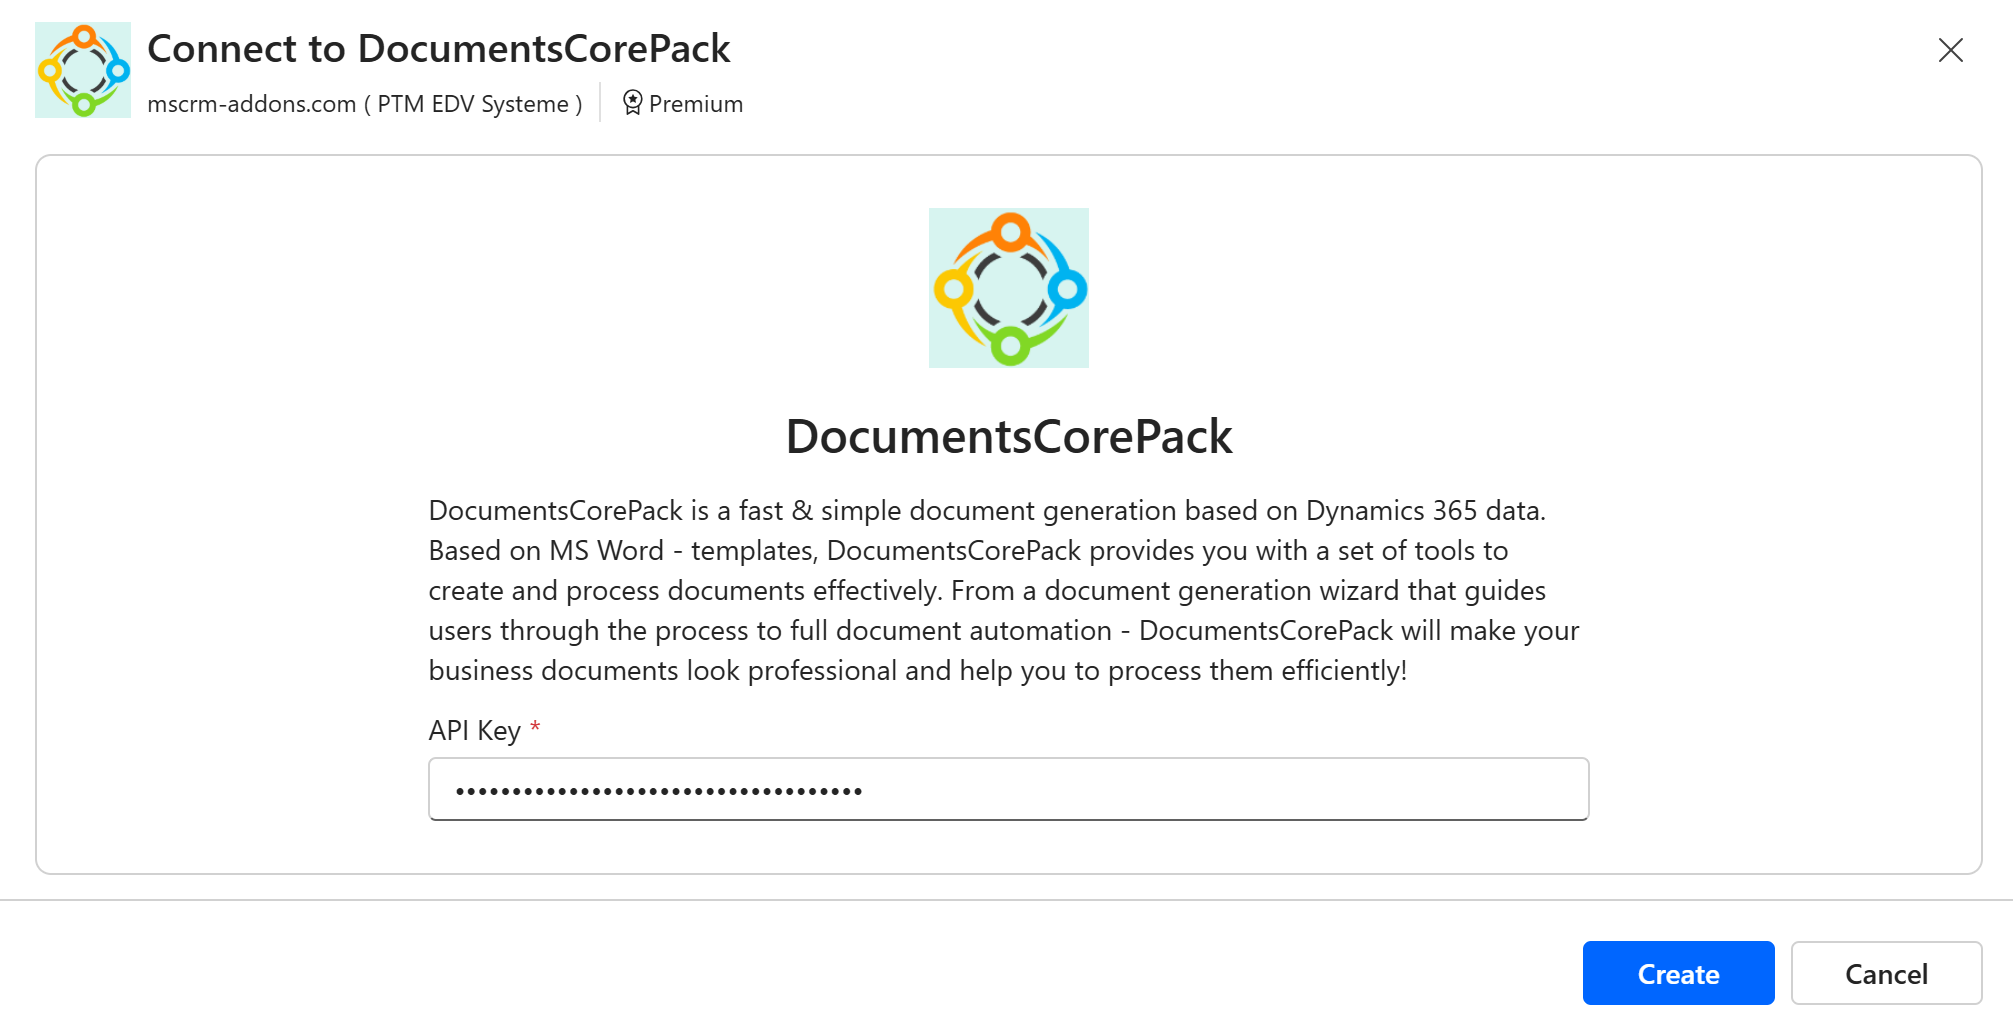
Step 4a: Entering the API Key in Power Automate/Power Apps
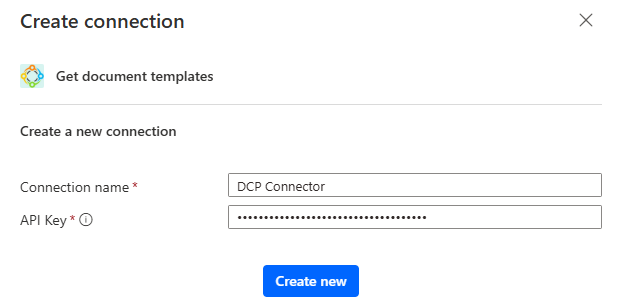
To establish a connection with the DocumentsCorePack Connector, go to the More tab and select Connections. Click on Create connection, then search for DocumentsCorePack and select the + icon. Enter the API key generated in Step 3 and click Create. This will allow you to use the DCP Connector.
Step 4b: Entering the API Key when adding an action
Alternatively, a connection to the DCP Connector can be established when attempting to add an action from the Connector to your flow for the first time.
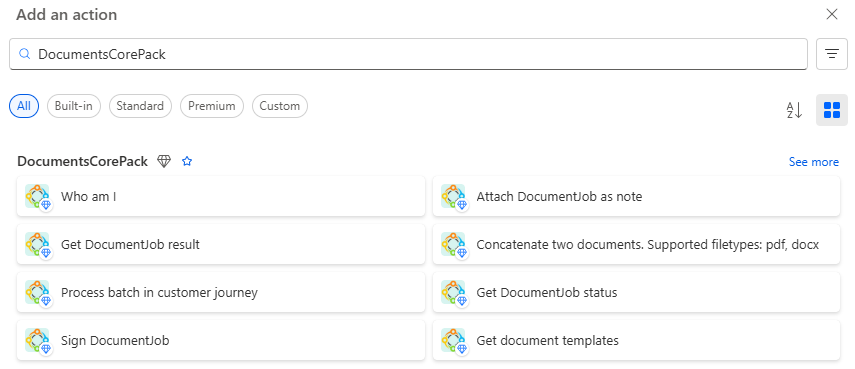
When you add an action from the DCP Connector, you will be prompted to provide a connection name and your API key.
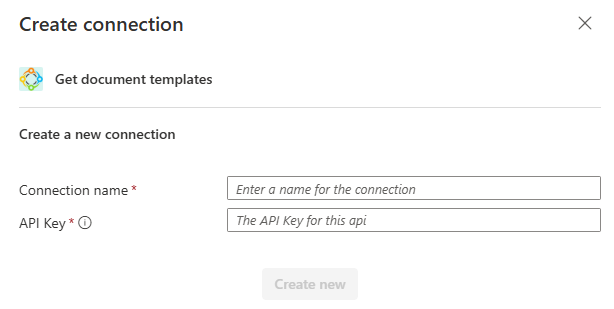
Once you have retrieved your API key from the online service configuration as described above, enter it into the prompt. After clicking Create, you will be able to add actions from the DocumentsCorePack connector.