The table designer is a simple, accessible way to create tables for templates. Designed to improve the classic table tools in the DocumentsCorePack Template Designer for Word, this version increases the power of table building and streamlines visuals to ensure tables come out as they’re supposed to.
Accessing the Table Designer
To use the table designer, navigate to the DocumentsCorePack ribbon and select Settings.
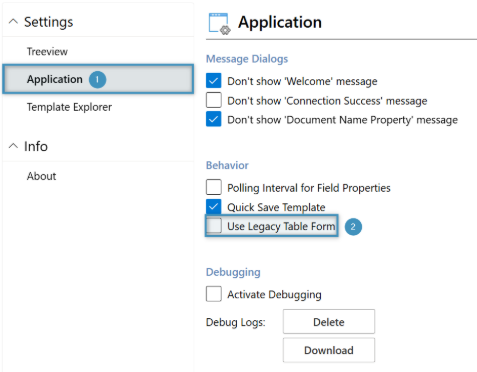
Once selected, select ❶ Application Settings from the menu on the left and make sure to ❷ uncheck the setting titled Use Legacy Table Form. After unchecking this box, select OK in the bottom right-hand corner. Once complete, the dialog will close, and you will now be able to use the table designer.
Navigating the Table Designer
The table designer will appear the next time an attempt is made to insert a table. The table designer appears as follows and contains the following elements:
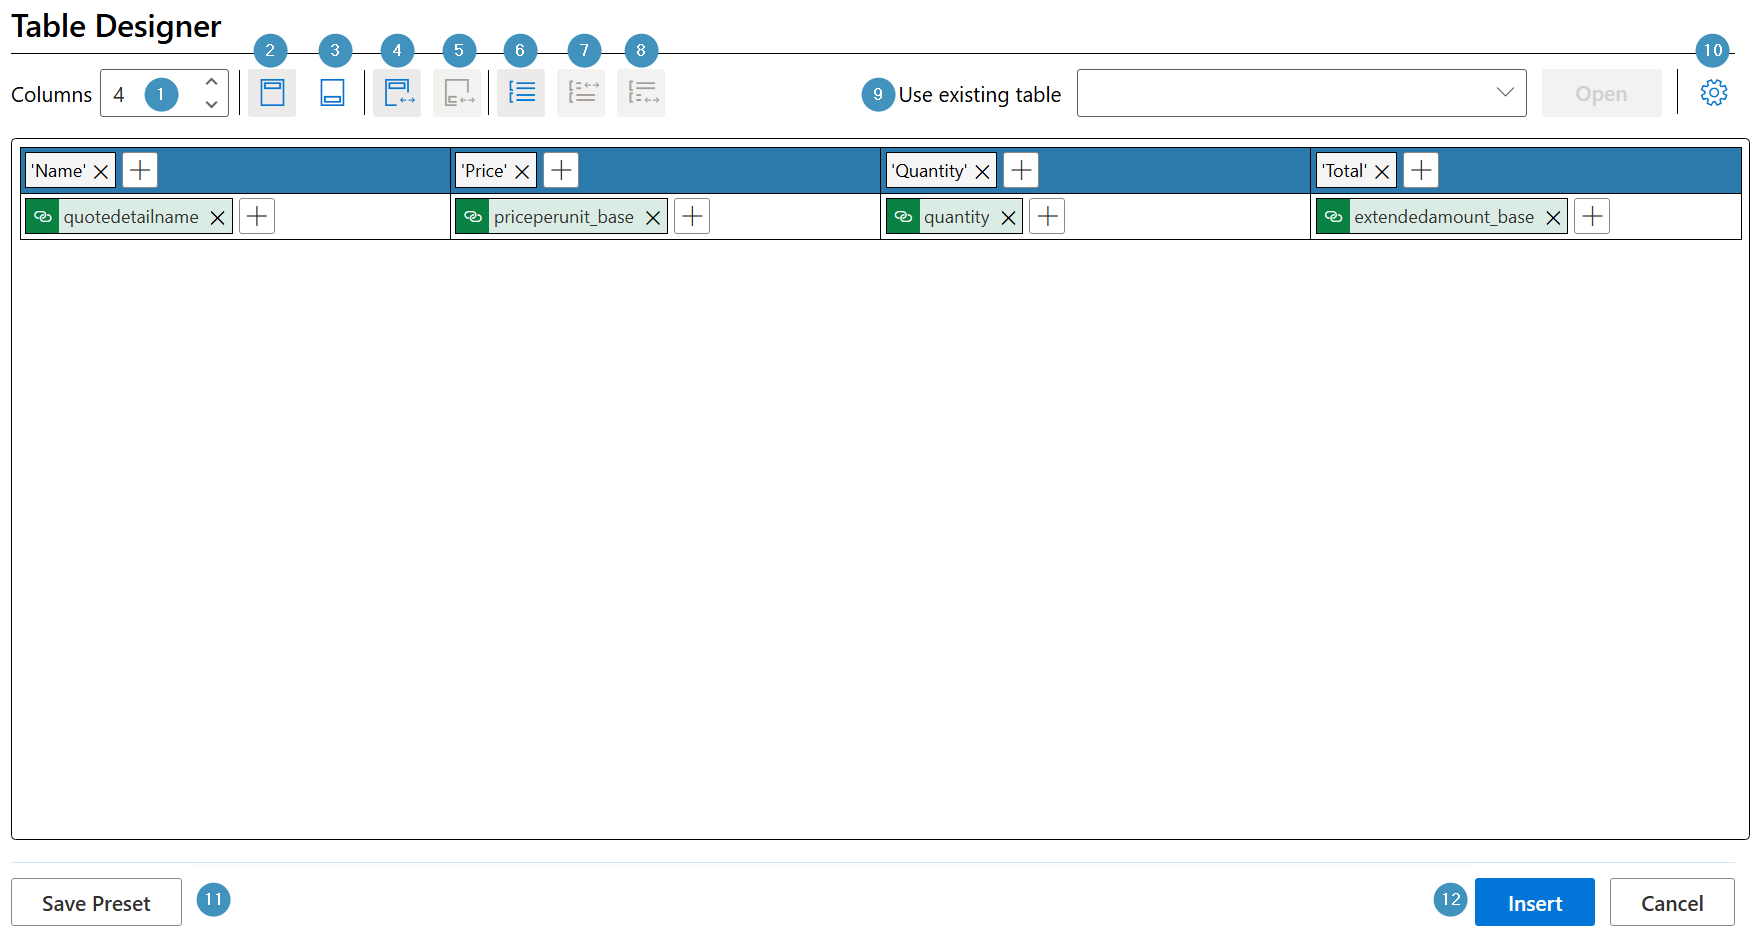
- Columns Selector: Defines the number of columns the table will contain.
- Add Header Row: Adds a header row for displaying column titles.
- Add Footer Row: Adds a footer row for displaying totals, summaries, or other footer information.
- Split Header: Splits the header row into multiple sections.
- Split Footer: Splits the footer row into multiple sections.
- Add Grouping: Adds a grouping section to organize table rows by a selected field or category.
- Split Grouping Header: Splits the grouping header to support more advanced grouped table layouts.
- Split Grouping Footer: Splits the grouping footer to support structured group summaries.
- Use Existing Table: Allows you to load a previously configured table layout.
- Settings Gear Icon: Opens additional table configuration options.
- Save Preset: Saves the current table configuration for future reuse.
- Insert: Inserts the configured table into the template.
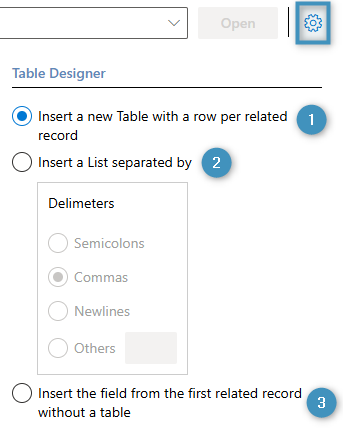
Clicking the Settings icon will open additional table design options, where you can ❶ insert a new table with a row per related record (the default option), ❷ insert a list separated by a delimeter of your choosing, or ❸ insert a field from the first related record without a table.
Example: Creating a Quote Table
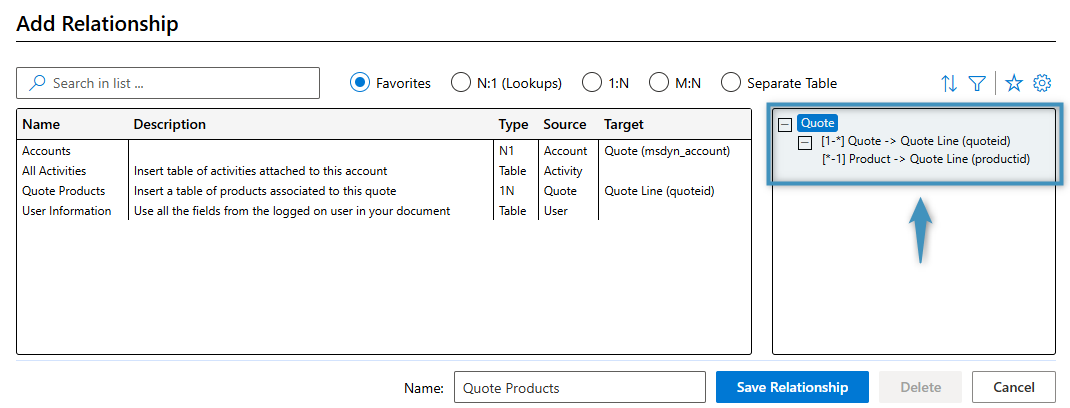
We would like to create a simple table for a quote that lists the quote’s products. We will begin with the following relationship:
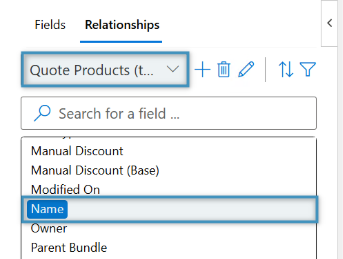
From the field list, select a field that you would like in the table. In this example, we will double click Name, so that the product name appears in the first table column.
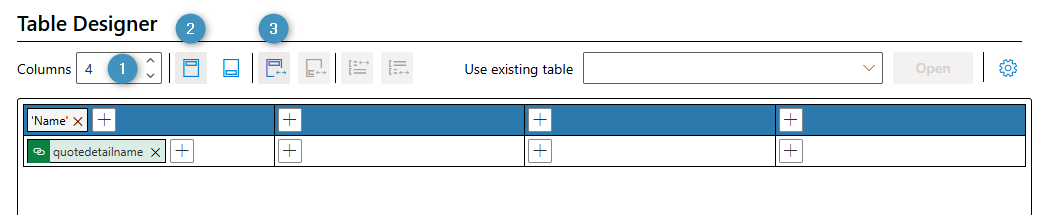
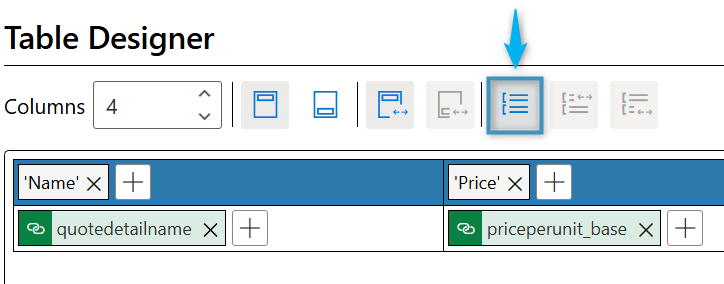
The table designer will open, and we can begin creating the table. We will ❶ increase the column number to 4, ❷ add a header, and ❸ split the header so that new cells appear over each column.
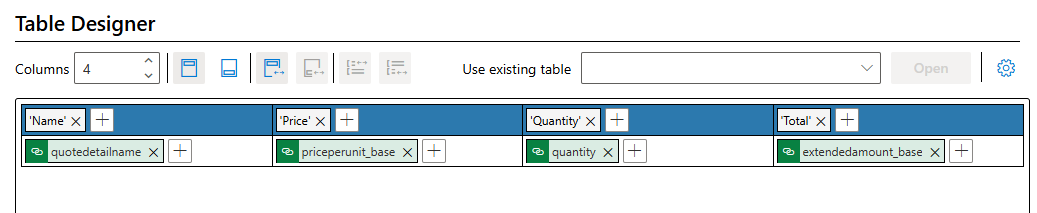
Next, we will add the remaining fields to the table. Simply click the (+) icon in a cell to Add Fields. After the fields are added, editing the header cells works the same way, but rather than selecting Insert field select Insert text. This will allow you to easily name the columns.
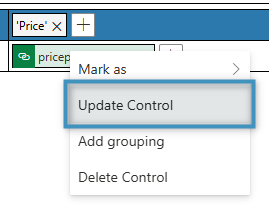
In addition, inserted fields can be formatted by Right Clicking them and selecting Update Control from.
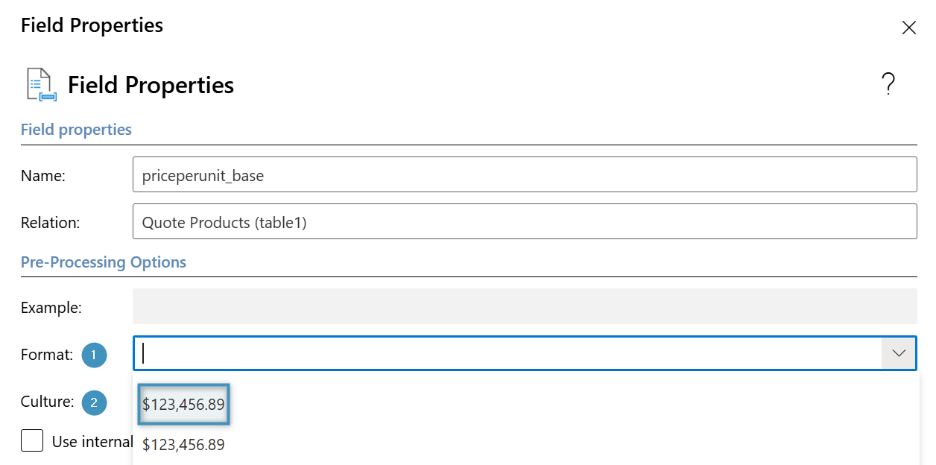
In this case, we can format the Price Per Unit field to properly display the amount in the table as currency, using the ❶ format and ❷ culture settings.
Once the table is inserted into the document, it will look something like this:

Once the table has been inserted, the table can be edited and adjusted in the template as per usual (i.e. clicking into the table and adding a field from the list).
Grouping
Grouping can be done in 2 ways in the designer:
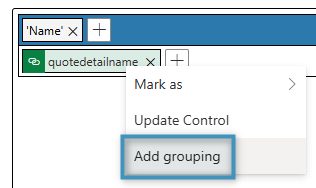
- Selecting Add Grouping in the top ribbon of the Table Designer and then selecting the fields to be grouped
- Right Clicking on an individual field in the Table Designer and selecting Add Grouping from the drop down menu