Sometimes users need to create a single document from multiple documents/parts. This article outlines how to concatenate multiple documents using MultipartXML in a classic workflow.
Create a MultiPartXML
Create a new Workflow and add a step. In the drop-down that opens, select DCPWorkflowSandbox and then select CreateMultiPartXml.
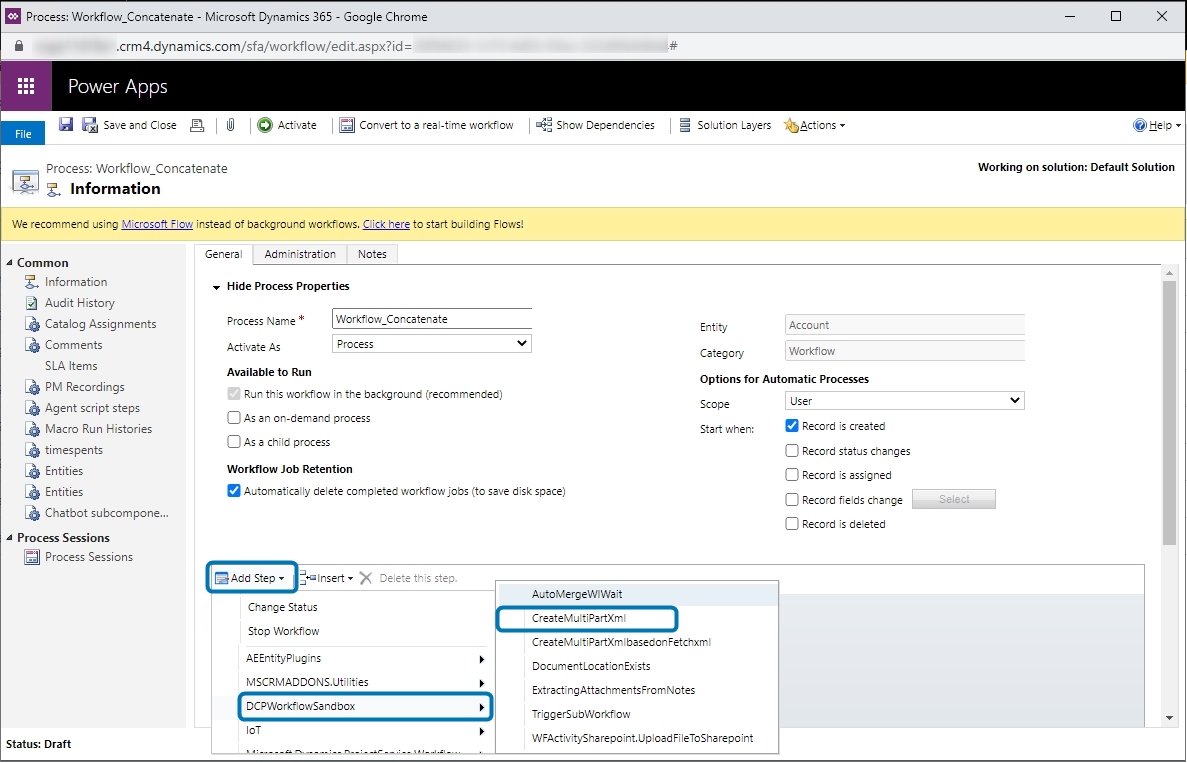
Figure 1: Create workflow
Click the Set Properties button to set up the properties of this step.
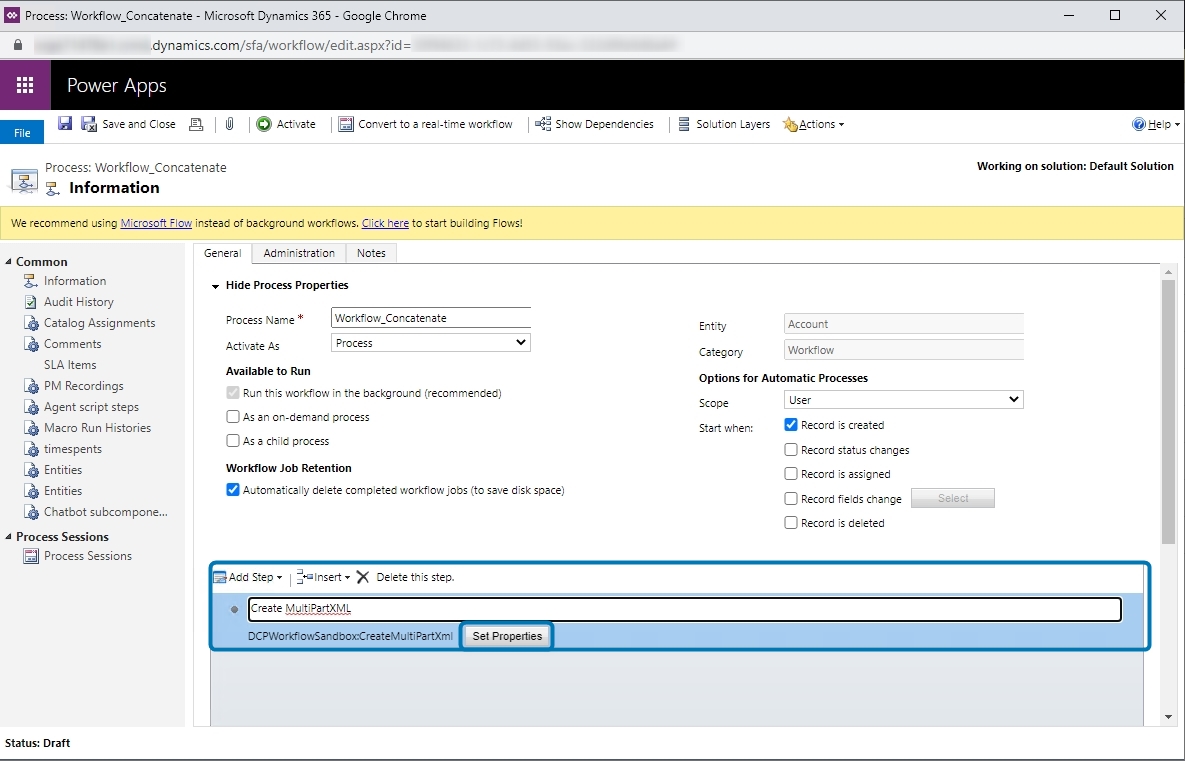
Figure 2: Set Properties
The Set Custom Step Input Properties window will open.
❶ Choose a filename. (Optional)
❷ Set the value to True if you want to convert to a PDF.
❸ You can enable or disable PDF Encryption.
❹ Enable this option if you want to save to SharePoint.
❺ If option 4 is enabled, a SharePoint Location Dynamic Record URL is needed.
You will now be provided with the properties overview.
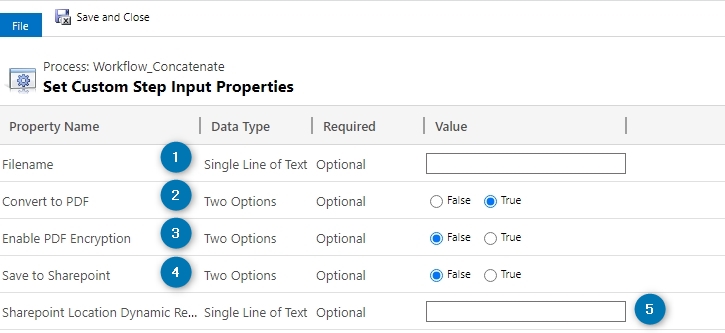
Figure 3: Properties Overview
There are four possible ways to add files that should be concatenated.
1) Create a new file based on a Template
Set the template with a click on the magnifier ❶ to open the template selection. Select the Entity Record URL by placing the cursor in the field and looking for the ❷ Record URL (Dynamic) in the drop down on the right. Click Add and then OK.
Choose the Concatenate Type ❸. Here is a Concatenate Syntax overview. Set the order of the templates ❹ in this field.
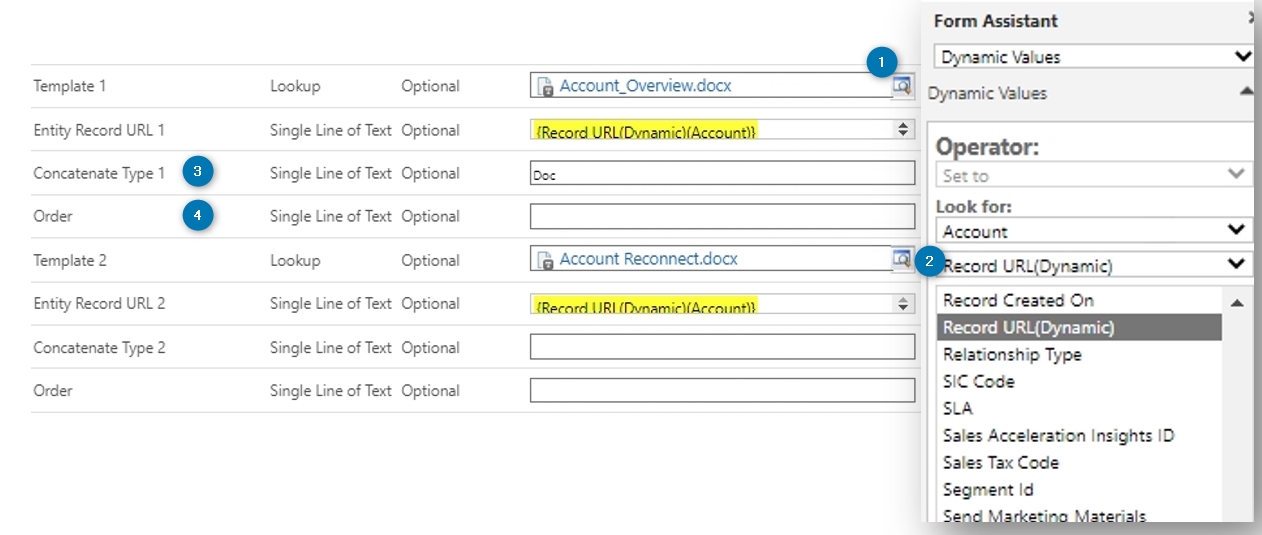
Figure 4: Create a new file based on a Template
2) Create a new file based on a Note
Scroll down in the Set Custom Step Input Properties window. Click on the magnifier to select the note you want to concatenate. You can also set an Order.

Figure 5: Create a new file from an existing note
3) Create a new file based on a SharePoint URL
Specify the URL of the document to concatenate that you have stored in SharePoint. You can also set an order.
![]()
Figure 6: Create a new file from a SharePoint URL
4) Create a new file based on a file you have stored in a Dynamics 365 field
Please note: It is necessary to use the ❶ logical name of the field in Dynamics 365 to get the file you have stored. The ❷ Entity Record URL refers to the record the file is on.

Figure 7: Create a new file based on a file you have stored in a Dynamics 365 field
Create an AutoMergeWorkingItem
The next step is needed to execute the XML you have created.
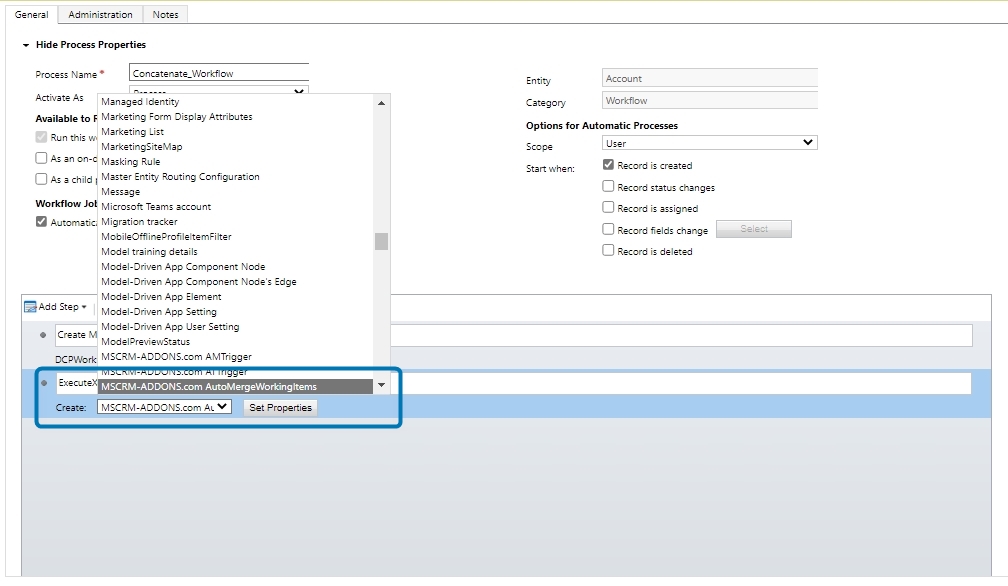
Figure 8: Create AutoMergeWorkingItem
After the creation of an AutoMergeWorkingItem, set the properties.
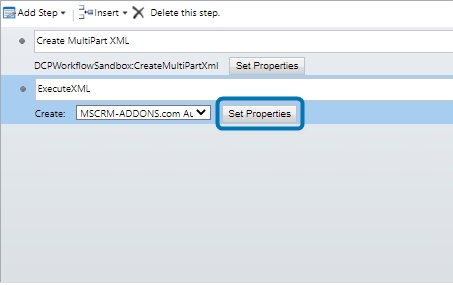
Figure 9: Set properties
Define in the General section the name, the AutoMergeAction and the PrimaryRecordURL.

Figure 10: General section
Scroll down to the Advanced section and select your XML from the previous step for the MultiDocumentXML.

Figure 11: Advanced section
Select Activate after setting up this process.
![]()
Figure 12: Activate the workflow
That’s it! We appreciate your feedback! Please share your thoughts by sending an e-Mail to support@mscrm-addons.com.