mscrm-addons.com logomscrm-addons.com logo
  • Release History
  • Knowledge Base
  • Documentation
  • Contact Support
  • Release History
  • Knowledge Base
  • Documentation
  • Contact Support
home/Knowledge Base/DocumentsCorePack(DCP)/How to use the CreateMultiPartXML based on FetchXML

How to use the CreateMultiPartXML based on FetchXML

1065 views 0 Updated on July 26, 2022

This blog article outlines how to create a document for every contact of an account using the CreateMultiPartXMLbasedonFetchXML step. 

Please note: You have to make sure you first look into the basics of DocumentsCorePack workflow-steps, fetchXML and Dynamics 365 workflows before you start with this. It will make the progress a lot easier.

In this case, we want to create a document for every contact of an account. To achieve this we need the CreateMultiPartXMLbasedonFetchXML step.

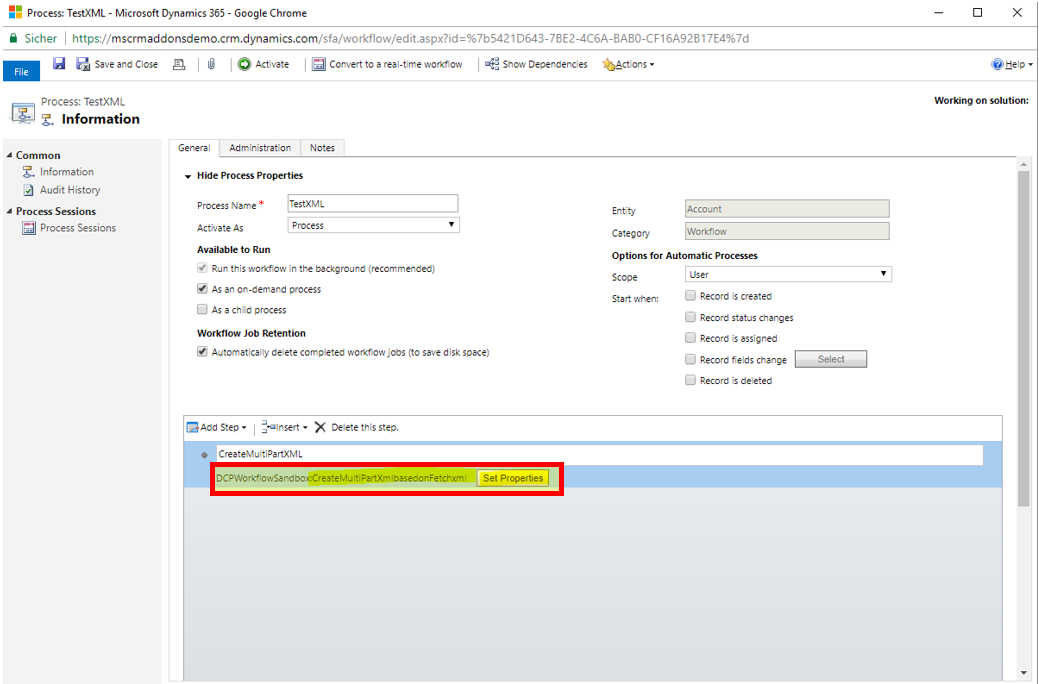
1) Therefore create a new workflow based on  Account. Go to ❶ DCPWorkflowSandbox and select ❷ CreateMultiPartXMLbasedonFetchxml, like you can see below.

Figure 1: Add new workflow step – CreateMultiPartXMLbasedonFetchxml

2) Next define the properties of your new workflow step by clicking the [Set Properties]-button, highlighted below.

Figure 2: Set Properties for CreateMultiPartXMLbasedonFetchxml

3) In the properties of the CreateMultiPartXMLbasedonFetchxml step, we add the values displayed below: 

Figure 3: Set custom properties


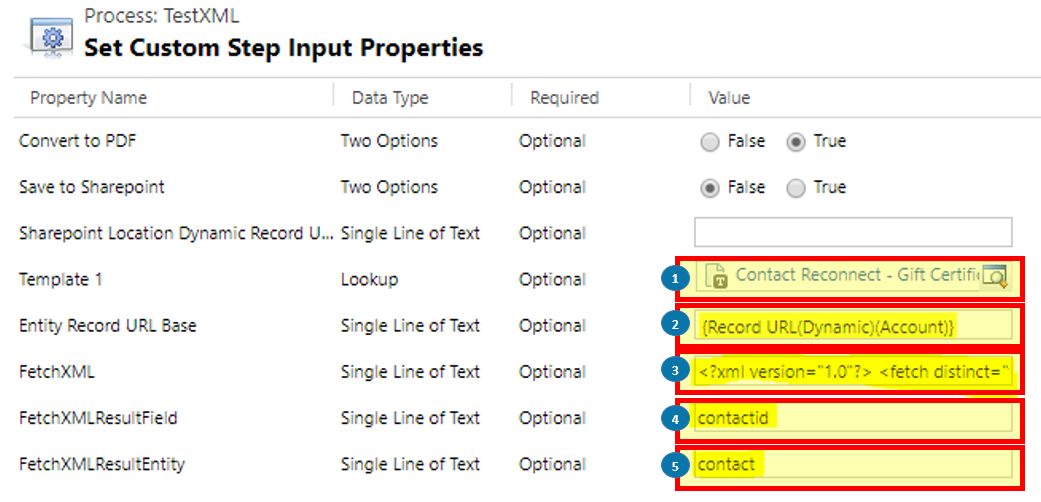
❶ Template1: Our desired Contact Template

❷ Entity Record URL Base: The Record URL of our main entity Account

❸ FetchXML: The XML we want to execute. (How to build such an XML will be explained later in this article)

❹ FechtSMLResultField: The ID-Field of the returned entities – ContactId in this case

❺ FetchXMLResultEntity: The name of the returned entity (contact in our case) 


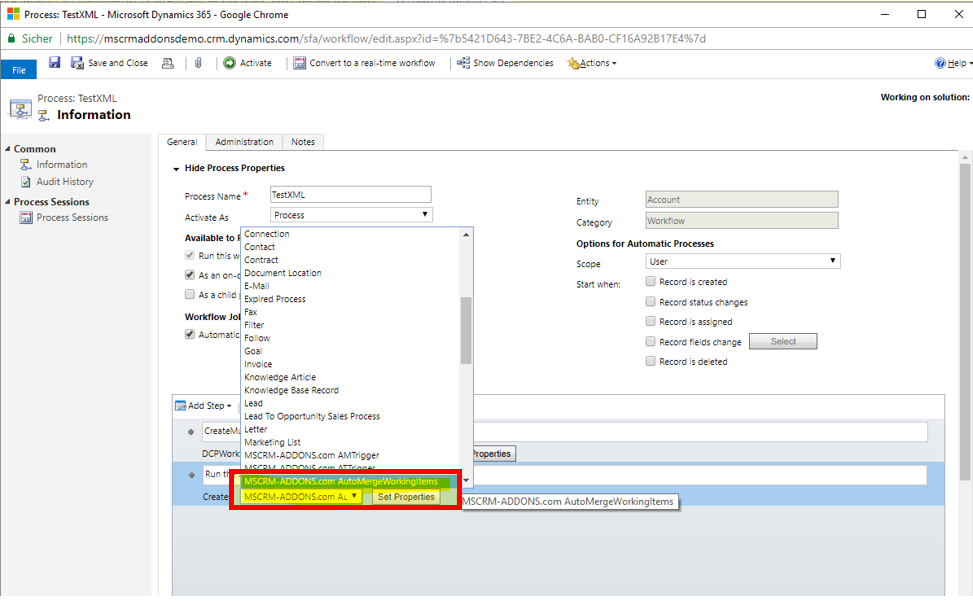
4) Next, add a second step: Create Record – MSCRM-ADDONS.com AutoMergeWorkingItems.

Figure 4: MSCRM-ADDONS.com AutomergeWorkingItem

5) Then define the properties as follows:

Figure 5: Properties for AutoMergeWorkingItems

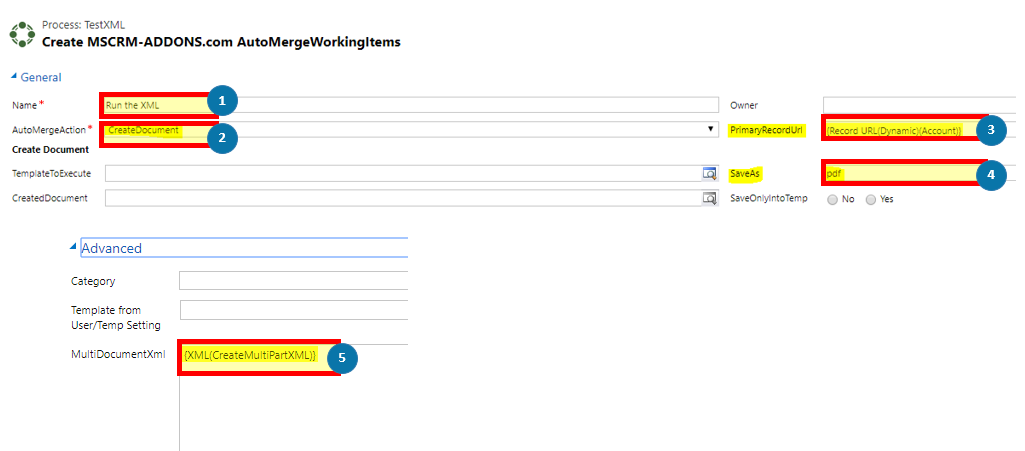
❶ Name: Choose a fitting name

❷ AutoMergeAction: Create Document

❸ PrimaryRecordURLFetchXML: The Record URL of the primary entity (in our example Account)

❹ SaveAs: Your desired output (in this example pdf)

❺ MultiDocumentXML: The XML output of the previous step

How to create the Fetch XML

You can use 3rd party tools like “XRMToolBox” to make the creation of the FechXML easier.
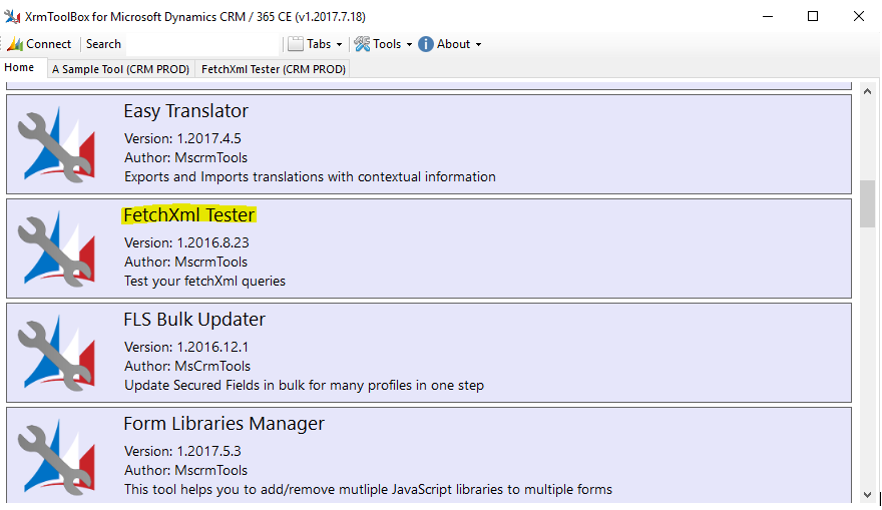
Figure 6: FetchXML

1) Use the Dynamics 365 Advanced Find to get the base structure of the Fetch XML you want,  like you can see below. In this case, we wanted to merge all contacts of a particular Account.

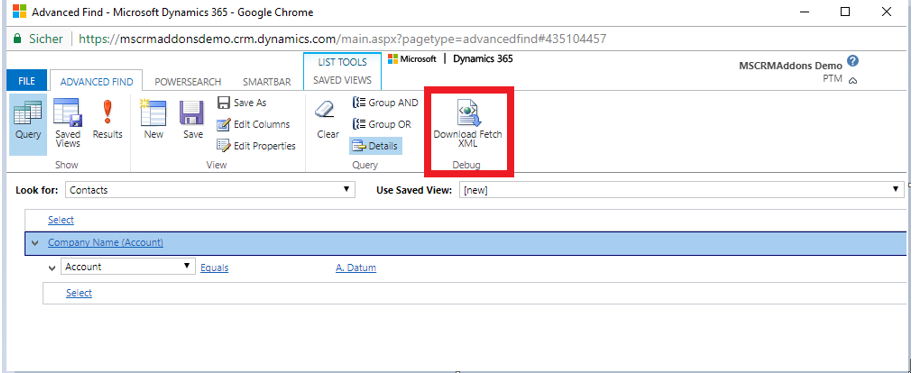
Figure 7: Download FetchXML

2) After building this verifying the result, download the FetchXML and paste it into your XML editor. Adjust the FetchXML so it can be executed correctly and has no syntax errors.

Figure 8: XML Code – Record URL


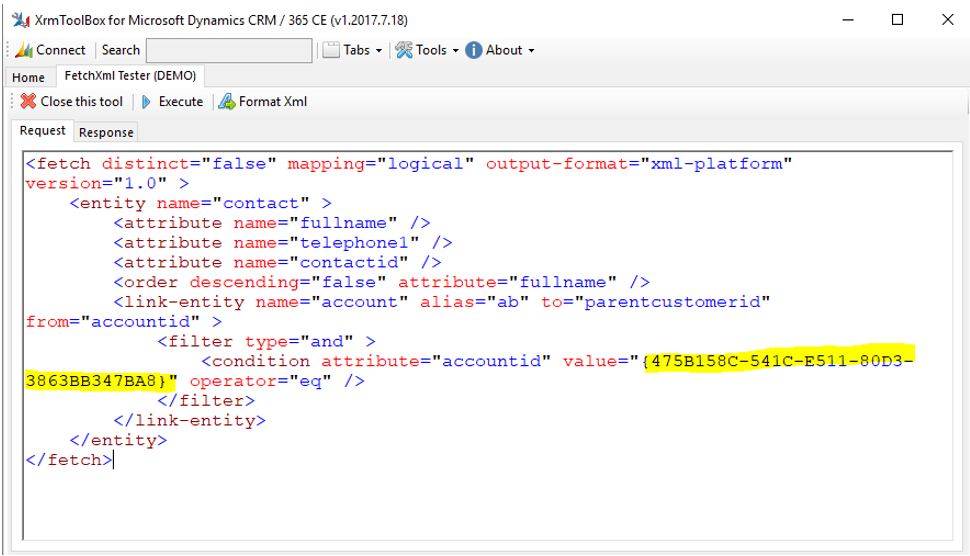
3) Afterwards replace the Record URL, which is the primary record you start from, with the value QID, highlighted in yellow below. This is necessary to make the workflow dynamic.


Figure 9: XML Code – QID

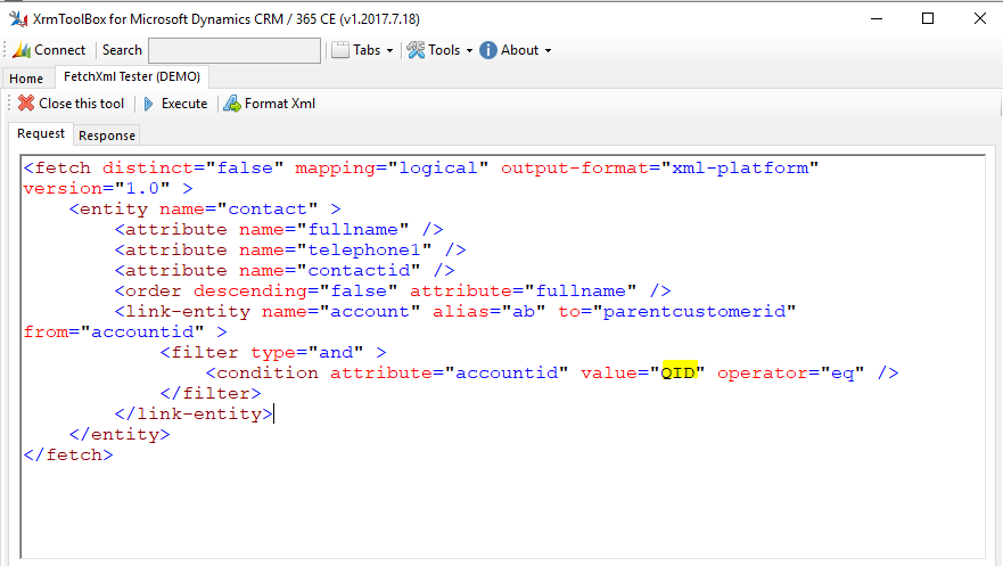
4) Then copy the finished XML and paste it into the CreateMultiPartXMLbasedonFetchXML step into the field FetchXML.

That’s it! We appreciate your feedback! Please share your thoughts by sending an email to support@mscrm-addons.com.

Was this helpful?

Yes  No
Related Articles
  • Deploying DocumentsCorePack: Setup, Automation, and Real Business Impact in Dynamics365
  • Introducing the DocumentsCorePack Template Designer Office Add-In (Beta)
  • 3 Ways DocumentsCorePack Transforms Proposal, Quote, and Contract Creation
  • DeepSign for DocumentsCorePack 
  • Generate and send a document for e-signing using DeepSign
  • How to prepare a document for DeepSign
Latest Articles
  • What Happens After You Deploy AttachmentExtractor: Storage & Cost Savings in Dynamics 365
  • Deploying DocumentsCorePack: Setup, Automation, and Real Business Impact in Dynamics365
  • Introducing the DocumentsCorePack Template Designer Office Add-In (Beta)
  • How to Eliminate Excess Storage Costs in Microsoft Dynamics 365 Without Losing Access to Emails and Attachments
  • 3 Ways DocumentsCorePack Transforms Proposal, Quote, and Contract Creation
Popular Articles
  • DocumentsCorePack Template Designer – Getting Started
  • Step-by-Step: How to configure a One-Click-Action
  • Application Access for Dynamics 365
  • How to find your environment’s unique name in Microsoft Dynamics 365
  • How licenses are counted
Top Rated Articles
  • “Undefined”-labels in Chrome and Edge 114 and higher
  • Important information for Dynamics 365 online customers using DocumentsCorePack and/or AttachmentExtractor
  • How to activate the DocumentsCorePack Connector for PowerApps & Microsoft Flow
  • How to insert Condition Fields in DocumentsCorePack Templates designer
  • How licenses are counted
Categories
  • *News and General Infos* 64
  • Webinars 45
  • Template Designer(DCP 196
  • DocumentsCorePack(DCP 258
  • TelephoneIntegration (TI 65
  • AttachmentExtractor (AE 75
  • PowerSearch (PS 50
  • ActivityTools (AT 61
  • SmartBar (SB 54
  • GroupCalendar (GC 47
Our Vision

“We see it as our purpose to provide products that simplify and speed up our customers’ Microsoft Dynamics 365 experience.”

Knowledgebase
LogIn
mscrm-addons.com
  • Products
  • Online Shop
  • Downloads
  • My Account
About Us
  • About Us
  • Case Studies
  • Newsletter
  • Partner Program
  • Contact
Support
  • Support
  • Terms & Conditions
  • Documentation
  • Webinars
  • Legal Documents
  • Impressum
  • © 2025 www.mscrm-addons.com. All Rights Reserved.