Virtual networks, or VNets, allow you to define a private network boundary in Azure. This can provide an extra layer of security for your DocumentsCorePack (DCP) and AttachmentExtractor(AE) blob storage.
In this setup, the VNet enables private connectivity between Dynamics 365 and Azure Blob Storage using Private Endpoints, while public access is restricted to approved sources such as backend servers or the DCP & AE online service.
Walkthrough (using template to create resources)
This walkthrough is split into three parts: creating and deploying resources, creating an enterprise policy, and applying the policy.
Step 1: Creating the resources
To begin, we will need to first create and deploy the following resources:
- Azure Storage Account (Blob)
- Virtual Network (VNet)
- Subnets
- Power Platform delegated subnet
- Private Endpoint subnet
- Private Endpoint for Blob Storage
- Private DNS Zone for Blob Storage
- DNS link between VNet and Private DNS Zone
- Storage Firewall configuration
This will be done by deploying a custom template in Microsoft Azure Portal. The custom template we will be deploying can be found attached at the bottom of the article (“Resources_tmp.json” in the “CustomTemplates” ZIP).
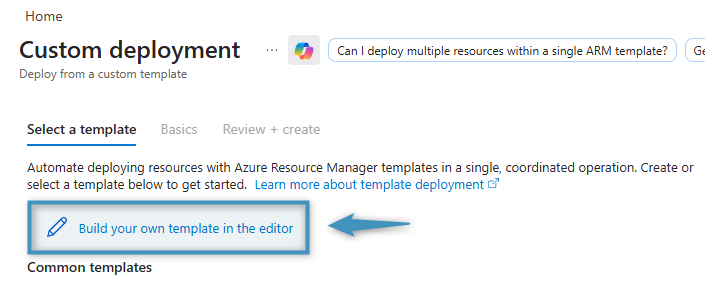
To deploy this template, search for Deploy a custom template in Microsoft Azure Portal and select the corresponding item in the dropdown.

Then, click Build your own template in the editor.
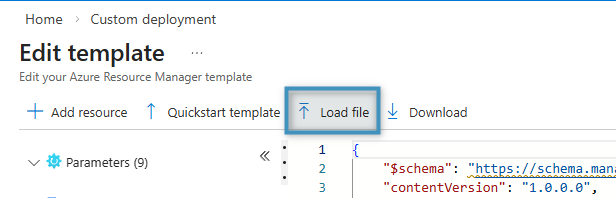
This will redirect you to a code editor. Here, click Load file and upload the custom template (“Resources_tmp.json”).
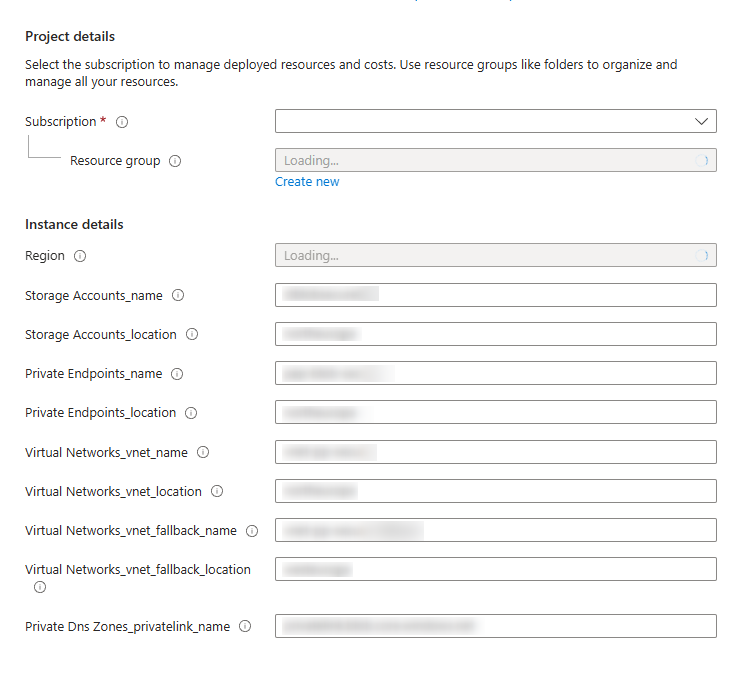
After uploading the file and clicking Save, please enter the following required parameters:
- Subscription
- Resource Group
- Region (must match Power Platform region)
- Storage Account name
- Storage Account location
- Private Endpoint name
- Private Endpoint location
- VNet name
- VNet Location
- Fallback VNet name
- Fallback VNet location
- Private DNS Zone Link
Once the parameters have been entered, click Review + Create and then Create.
Step 2: Creating the enterprise policy
After creating the resources, you will next need to create an enterprise policy, which enables Power Platform Virtual Network support for the selected environment and defines which VNet and subnet Power Platform is allowed to use for outbound communication. This is required so Dataverse plug-ins and other server-side components can securely access private endpoints such as Azure Blob Storage.
Like above, the policy is deployed by using another custom template to ensure consistency and reusability, which can be found attached at the bottom of the article (“Enterprise_policy_tmp.json” in the “CustomTemplates” ZIP). Once again, search for Deploy a custom template and select Build your own template in the editor. Then, click Load file and upload the custom template.
After clicking Save, provide the following required parameters:
- Subscription
- Resource Group
- Region
- Policy Name
- Power Platform Environment Region
- VNet Subnet Name (delegated subnet)
- VNet Resource ID
- (Optional fallback VNet if used)
Once the parameters have been entered, click Review + Create and then Create.
Step 3: Applying the policy
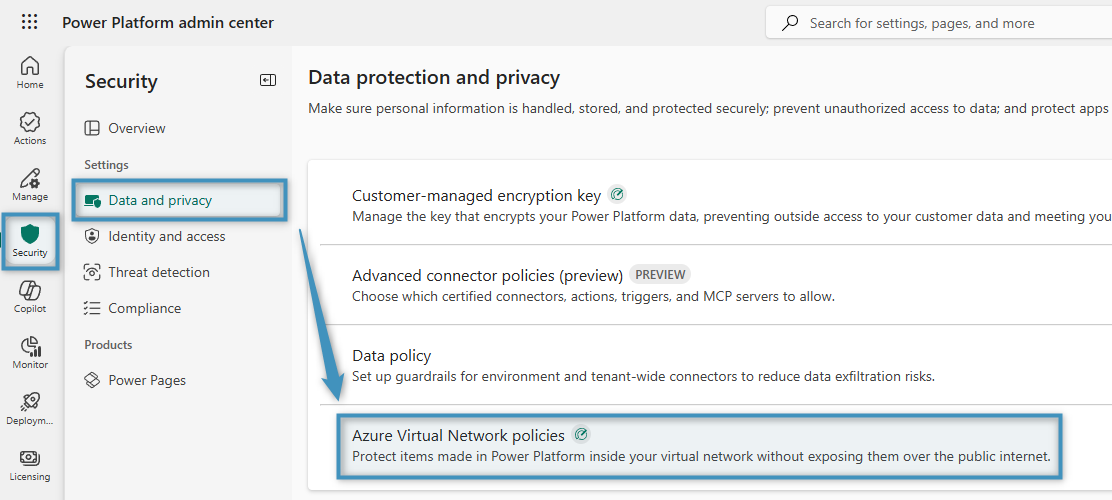
After the enterprise policy has been deployed, go to the Power Platform admin center and navigate to Security -> Data and privacy -> Azure Virtual Network policies.
Then, select your environment and click Next.
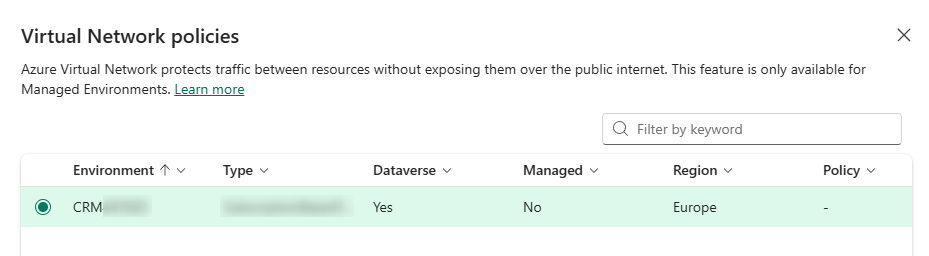
You will then be able to select the created enterprise policy. After selecting it, save your changes. Once enabled, server-side Dynamics components will route outbound traffic through the configured VNet.
Walkthrough (creating resources without template)
This walkthrough demonstrates how to establish a virtual network without using a template to create the required resources.
Step 1: Create the storage account
First, we will need to create a storage account. To do this, open the Azure Portal and navigate to Create a resource > Storage account. Then, select the appropriate subscription and resource group. You will need to configure the required settings, including:
- Storage account name
- Region (should align with the Power Platform environment)
- Performance tier
- Redundancy option
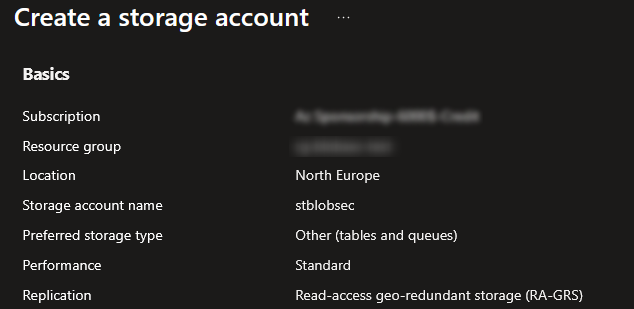
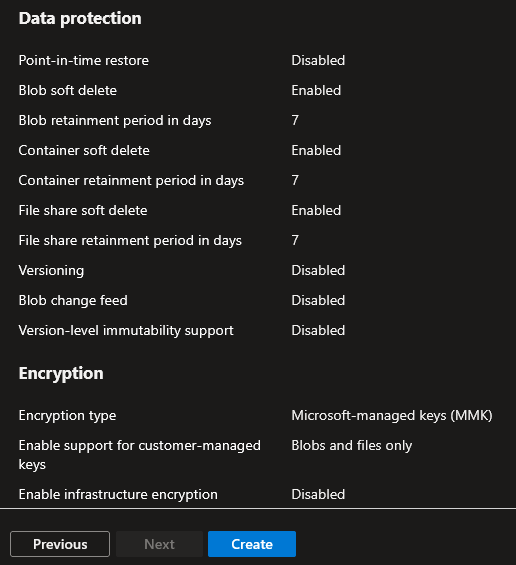
When you have configured the settings, review and create the storage account. After deployment, open the storage account and create a private blob container (no public access).
Step 2: Configure the storage firewall
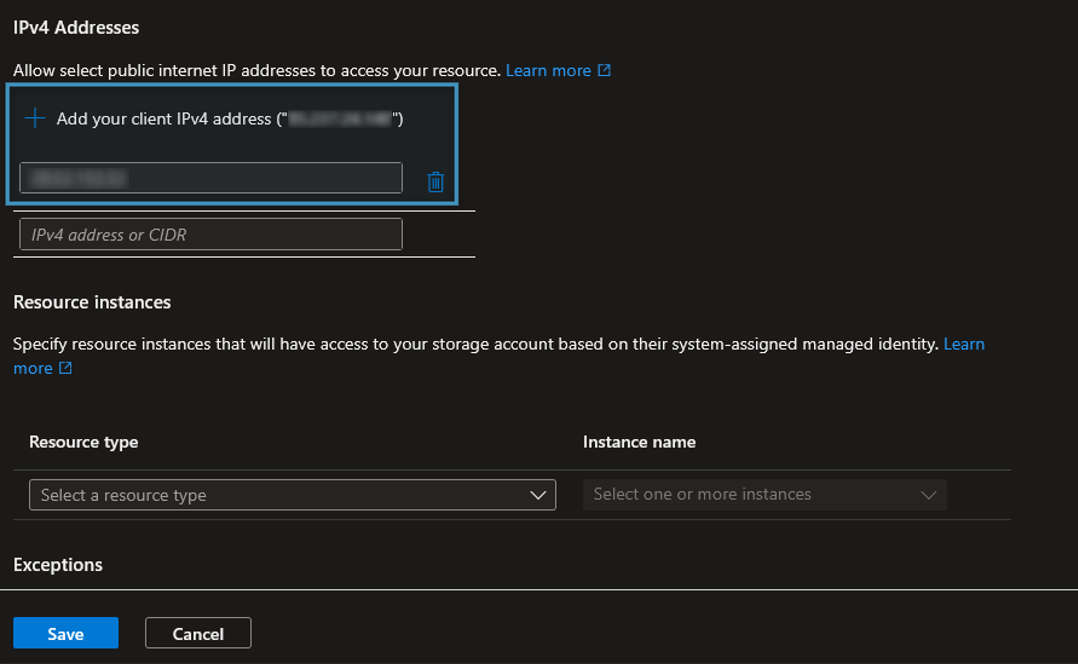
Next, open the Storage account and navigate to Networking. Configure the following settings:
- Set Public network access to Enable.
- Next to Public network access scope, select Enable from selected networks.
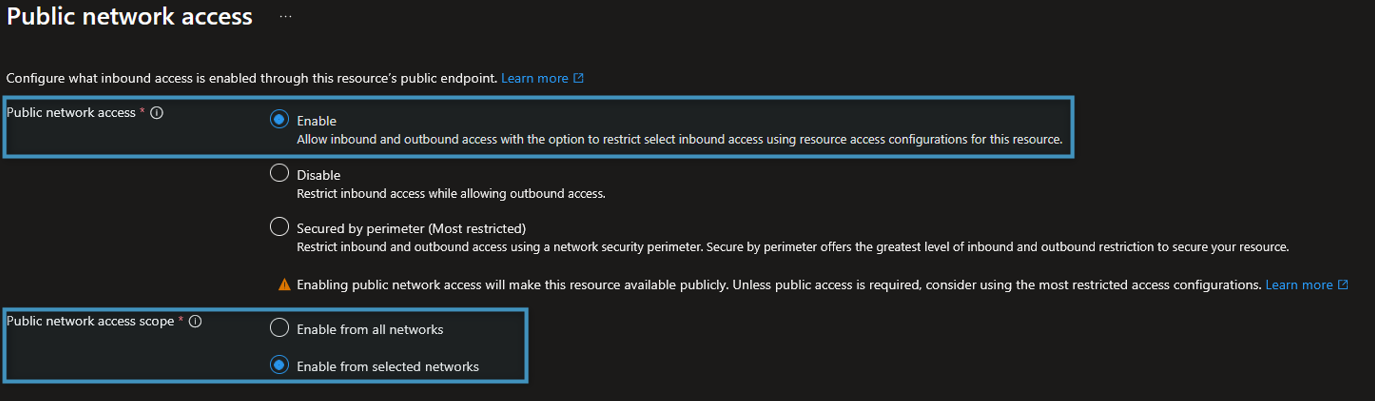
- Add the required public IP addresses under IPv4 Addresses, for example the public IP of the backend server.
- Ensure that access is limited to selected networks only (default action: deny).
Once you are done, save the configuration.
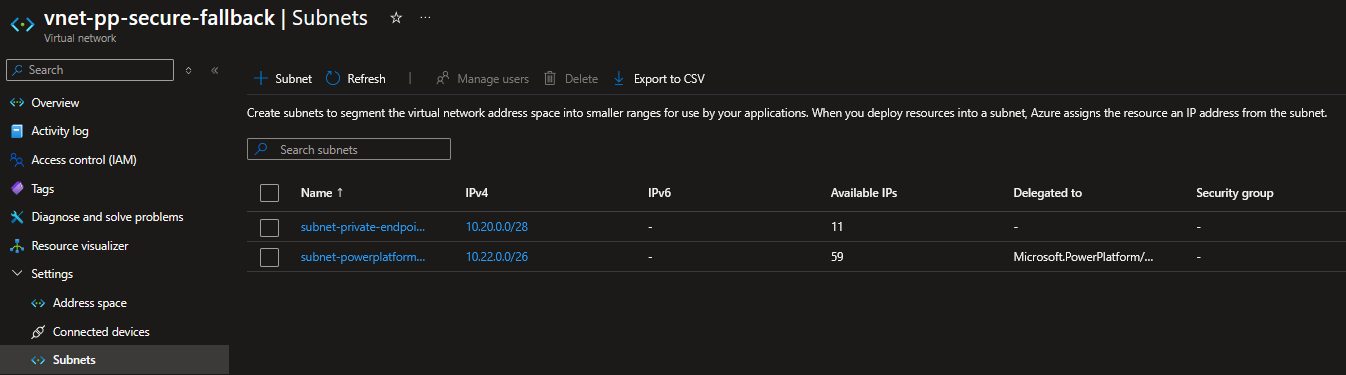
Step 3: Create the virtual network and subnets
Open the Azure Portal again and navigate to Create a resource > Virtual network. Here, create the primary VNet in the Azure region supported by the Power Platform (Dataverse) environment. Then, create a delegated subnet for Power Platform outbound traffic and configure the delegation to
“Microsoft.PowerPlatform/enterprisePolicies” (example configuration shown here).

Afterwards, create a separate subnet for the private endpoint. If your Power Platform region requires a paired-region fallback VNet, create the additional VNet and delegated subnet in the required region.
Note regarding multiple VNets: Some regions require both a primary and a fallback VNet in the Enterprise Policy. Dataverse outbound traffic may originate from either VNet. If you configure two different VNets, ensure the private endpoint is reachable from both (for example via VNet peering) or create a private endpoint per VNet. Additionally, link the Private DNS zone to every VNet that needs name resolution.
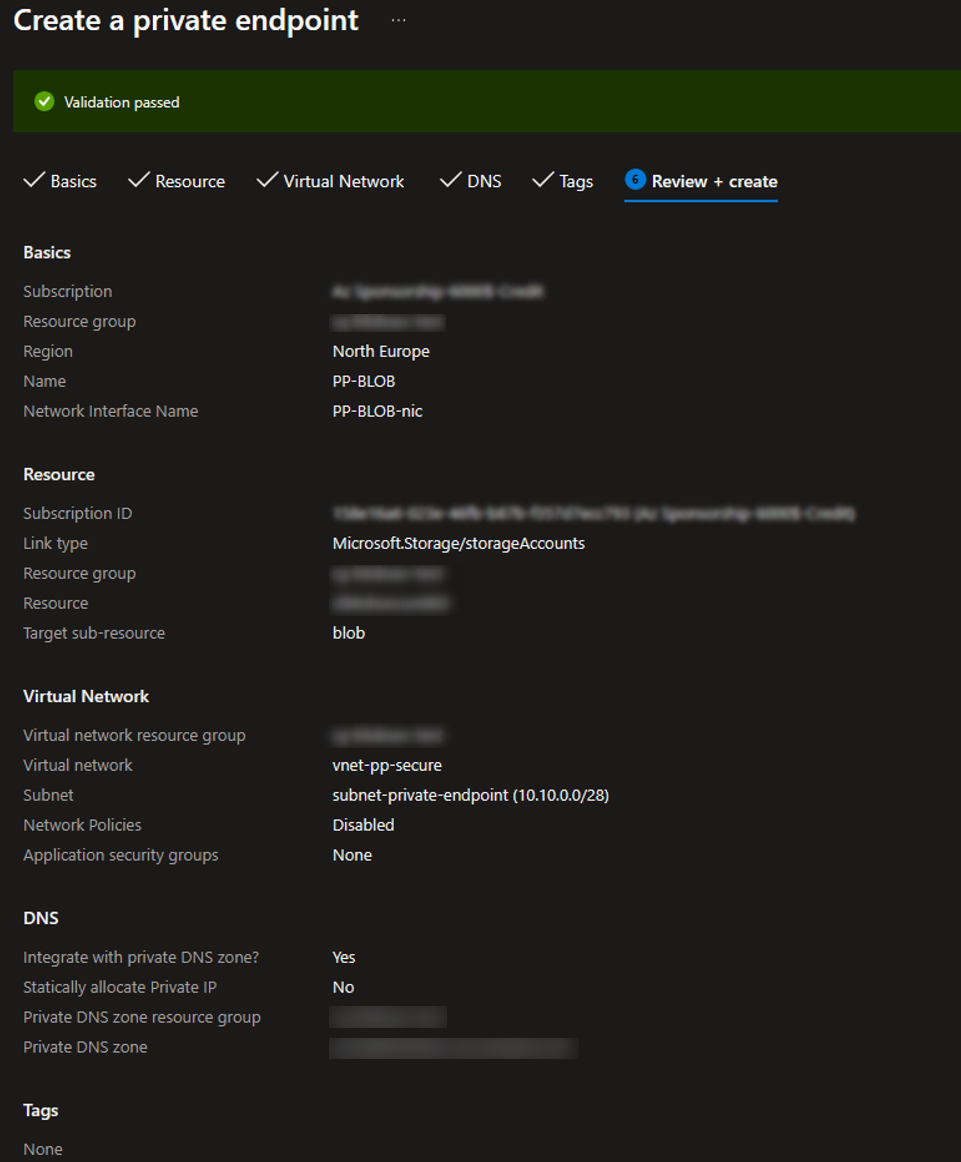
Step 4: Create the private endpoint
To create the private enpoint, open the Storage account and navigate to Networking > Private endpoints > + Create private endpoint.

You will need to configure the following:
- Select the Blob subresource (this ensures the private endpoint is created specifically for Blob Storage access).
- Choose the virtual network and select the private endpoint subnet created in the previous step.
- Enable Private DNS integration during creation to allow Azure to automatically create and configure the required Private DNS zone and DNS zone group.
You can then review and create the private endpoint.
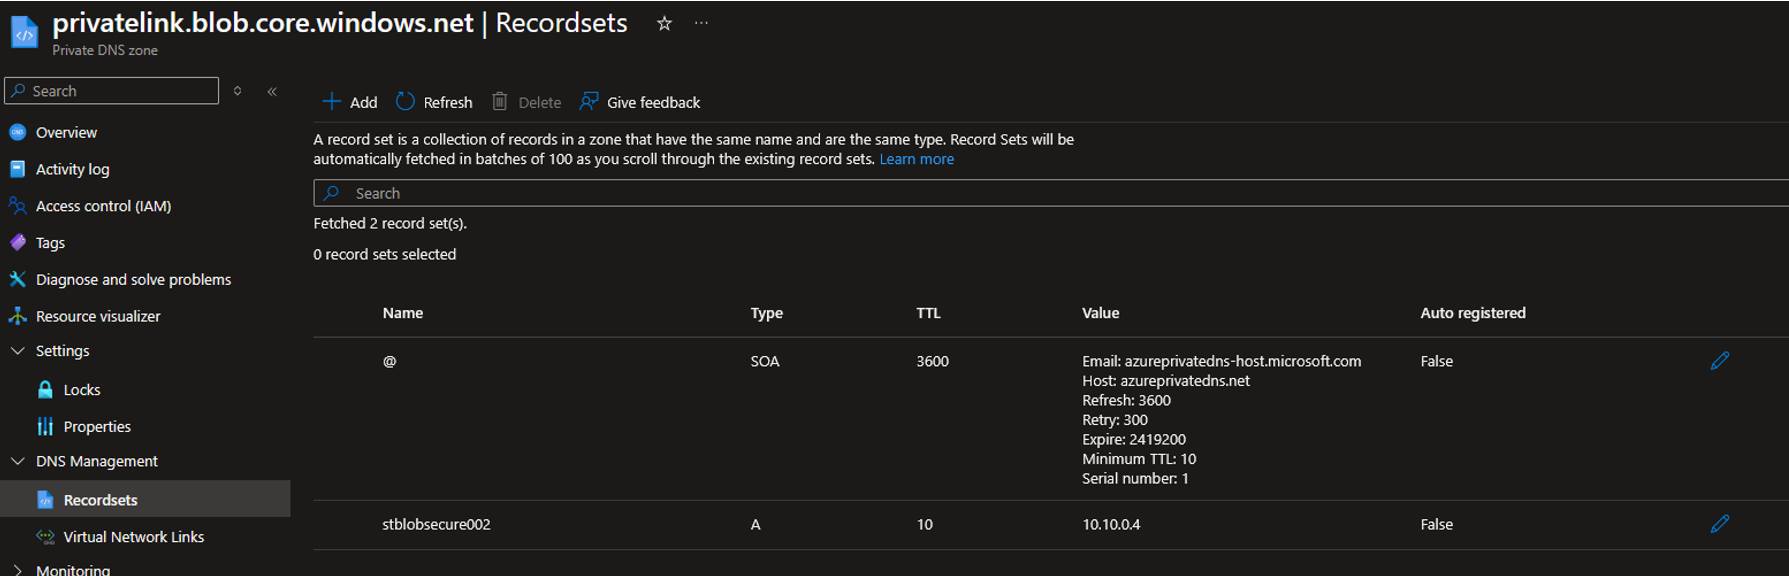
Step 5: Create or confirm the private DNS zone
- If Azure did not create it automatically, open the Azure Portal and navigate to Create a resource > Private DNS zone.
- Create the DNS zone with the name privatelink.blob.core.windows.net
- After creation, open the DNS zone and select Virtual network links > + Add.
- Link the DNS zone to the virtual network created in “Step 3: Create the virtual network and subnets“.
- Confirm that the DNS zone contains a record for the storage account, pointing to the private IP address of the private endpoint.
Note: If multiple VNets are used (primary and fallback), the DNS zone must be linked to all VNets that require access to the private endpoint.
Step 6: Create the Enterprise Policy
The Enterprise Policy enables Power Platform virtual network support and allows server-side components (such as Dataverse plug-ins) to route outbound traffic into the Azure Virtual Network.
Note: The Enterprise Policy cannot be fully created through the Azure Portal and must be deployed using a template (which can be found attached at the bottom of the article as “Enterprise_policy_tmp.json” in the “CustomTemplates” ZIP) or PowerShell.
- Follow the official Power Platform VNet setup process to create the Enterprise Policy using an ARM/Bicep template or PowerShell.
- Configure the policy to reference:
- the delegated subnet in the primary VNet
- and, if required by region or configuration, the delegated subnet in the fallback (paired-region) VNet
- Deploy the policy and ensure that the deployment completes successfully.
Step 7: Apply the Enterprise Policy in Power Platform
To apply the Enterprise Policy:
- Open the Power Platform admin center.
- Navigate to Environments and select the target environment.
- Go to Settings > Data and privacy > Azure Virtual Network policies.
- Select the environment, choose the previously created Enterprise Policy, and save the changes.
After applying the policy, Power Platform VNet Support is enabled for the environment, and server-side components (such as Dataverse plug-ins) will route outbound traffic through the configured VNet.
The technical breakdown
The Azure Blob Storage account is now secured using a combination of network restrictions and private connectivity. Public network access to the storage account is limited through the Azure Storage Firewall, which is configured to allow access only from explicitly approved sources. The firewall is set to Selected networks, meaning all public traffic is denied by default unless it originates from a whitelisted public IP address (for example, the DCP and AE online services responsible for uploading documents).
Note: The IP address of our Online services server needs to be whitelisted depending on the used server.
See: mscrm-addons.com IP-range
For internal access, a private endpoint is configured within the Azure Virtual Network. This assigns a private IP address to the storage account inside the VNet and allows Dynamics 365/Dataverse to access Azure Blob Storage over the Azure backbone network instead of the public internet. The private endpoint is placed in a dedicated subnet, and a private DNS zone ensures that the standard Azure Blob Storage hostname resolves to this private IP when accessed from within the VNet.
As a result, Azure Blob Storage can only be accessed through two controlled paths:
- Internally via the VNet and private endpoint (e.g. access from Dynamics365/Power Platform)
- Externally via explicitly whitelisted public IP addresses (e.g. DCP and AE Online services)
All other public access attempts are blocked by the Storage firewall. This layered approach ensures that data remains protected from unauthorized internet access while still allowing required internal and backend connectivity.
Other links and resources:
- Power Platform VNet Support overview: https://learn.microsoft.com/power-platform/admin/vnet-support-overview
- Supported Regions: https://learn.microsoft.com/en-gb/power-platform/admin/vnet-support-overview#supported-regions
- Setup VNet Support: https://learn.microsoft.com/en-gb/power-platform/admin/vnet-support-setup-configure
- Azure Private Endpoint overview: https://learn.microsoft.com/azure/private-link/private-endpoint-overview
- Azure Storage networking: https://learn.microsoft.com/azure/storage/common/storage-network-security