Microsoft Word provides a built-in font attribute that allows content to be hidden from view. This attribute can also be applied to entire table rows, enabling them to be shown or hidden based on Word’s Show/Hide (¶) option. This approach is useful when designing templates that contain information that may not be required in every document.
One practical example is marking grouping headers as “hidden” so that certain grouping headers can be included or excluded from the final document as needed.
How to hide table rows
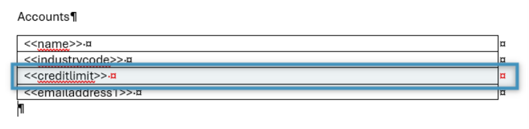
Step 1: Create your table and select your row
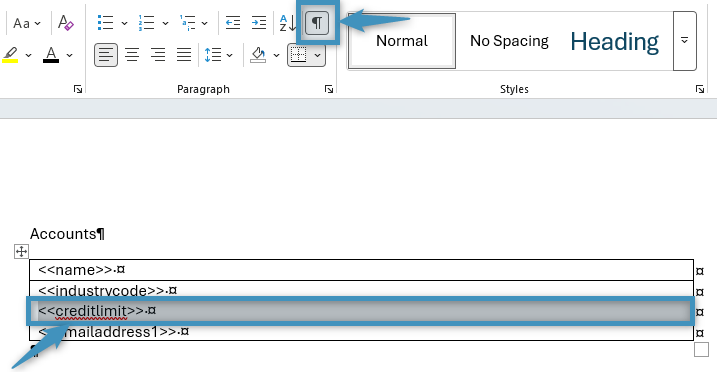
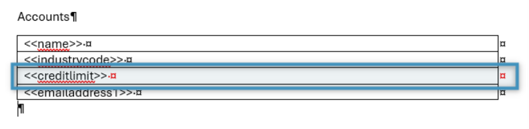
Start by enabling the Show/Hide (¶) button on the Home tab. Then, create or open a table that contains the information you want to display in your document. Select the entire row that you want to hide, as shown below.
Step 2: Apply the “hidden” attribute
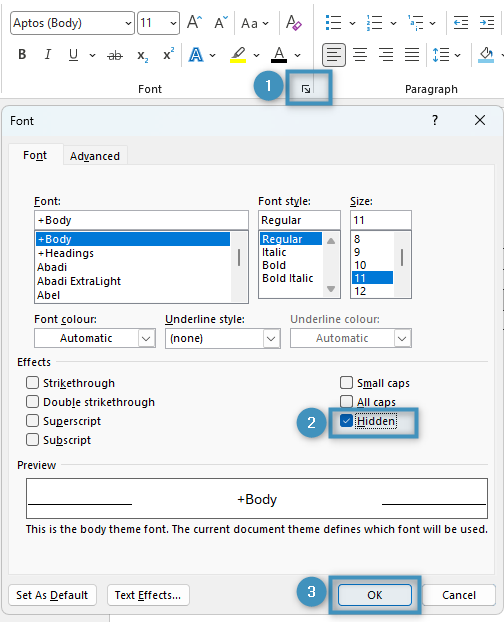
Click the ❶ Font dialog launcher in the lower right-corner of the Font group on the Home tab. In the Font dialog, under Effects, select the ❷ Hidden checkbox and click ❸ OK.
Step 3: Color the hidden rows red
Once the row is hidden, select all content in the hidden row and change the font color to red. This practice helps you quickly identify hidden rows while editing the template. The red formatting will remain hidden in the final document since the row content is marked as hidden text.
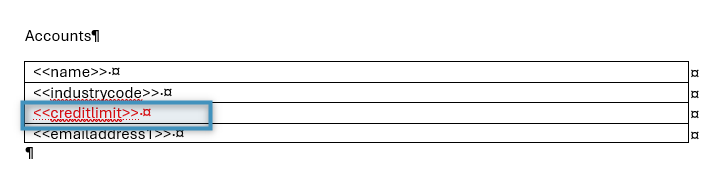
Alternatively, you can color the row red and leave the text within the row black. This can be convenient when the row is only conditionally hidden, ensuring that the text is left untouched in the result document if it ends up displayed.
Viewing the hidden rows
The visibility of hidden rows depends on Word’s Show/Hide (¶) setting. With Show/Hide (¶) enabled, hidden rows are displayed as blank rows in the template for editing purposes, as shown below.

When the document is generated and Show/Hide (¶) is disabled, hidden rows do not appear in the generated document.

Practical use case: Grouping contact fields
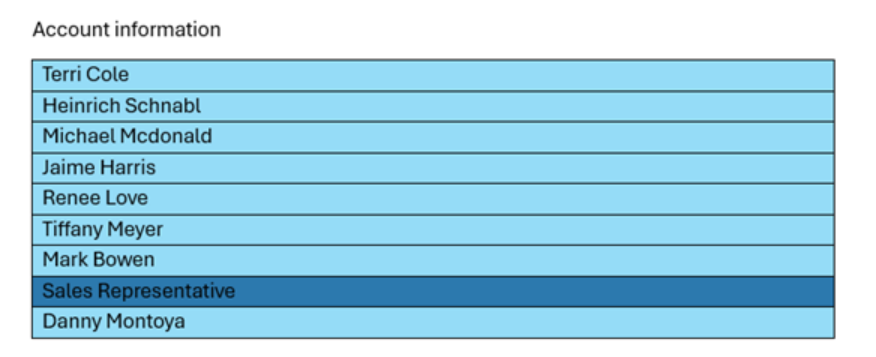
The following example demonstrates how a grouping header can be hidden within a table in a generated document using condition fields. In the following Contact table, we will group the contacts by job title and mark the corresponding grouping header row as “hidden” while keeping the field itself visible. This will give us control over displaying certain headers.
Step 1: Create the contact section with grouping
Create a table that contains the grouping header and the related contact information. In the table below, we are using the Job Title field to group our contacts.
For more information about grouping, see here.

Step 2: Adding a condition field
In the grouping header, add a condition from the contact relation that will only be displayed if the job title is “Sales Representative.” In our example, this is how the condition field is built:
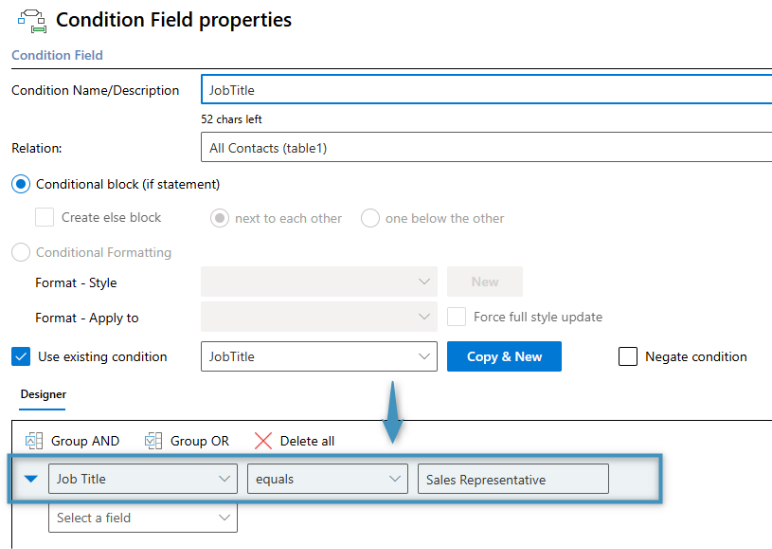
Once the condition field has been added to the grouping header, place the Job Title field into the condition. Note that we have marked the row as red, but the text is still black.


Step 3: Hiding the rows
Next, highlight the entire row and mark it as “hidden,” but mark the field text as not “hidden.” With these options enabled, the row itself will be hidden, but the text within will remain visible as shown in the image below.
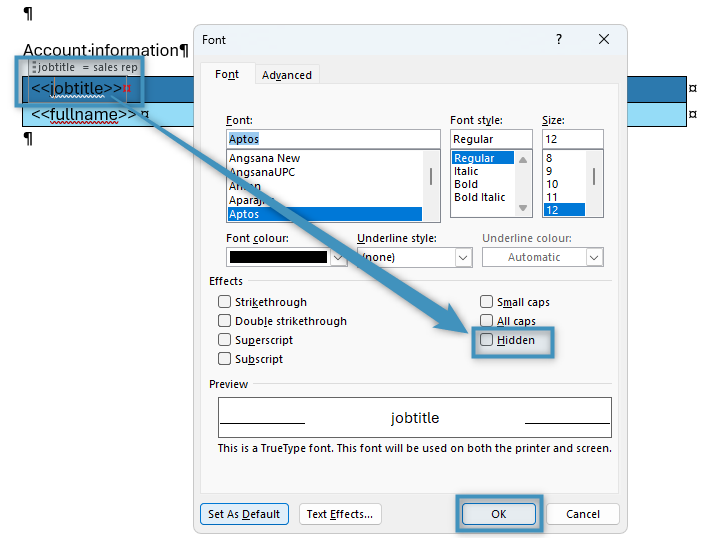
This means that, when the document is generated, the condition is evaluated and the row is displayed only if the contact’s Job Title equals Sales Representative. If the condition is not met, the row remains hidden and does not appear in the generated document.
Step 4: The result
When generating the document, the table initially appears as follows with Word’s Show/Hide (¶) feature enabled:
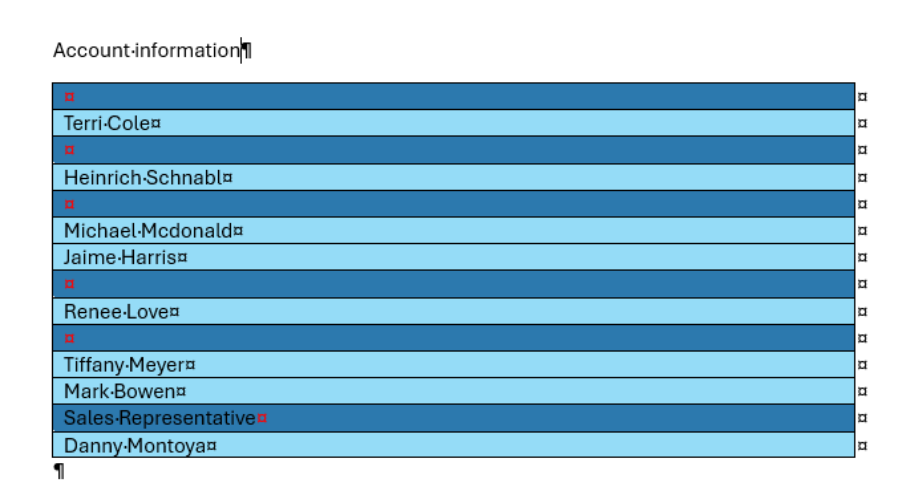
When Word’s Show/Hide (¶) feature disabled, the hidden formatting is not visible, and only the rows that meet the condition are displayed.