mscrm-addons.com logomscrm-addons.com logo
  • Release History
  • Knowledge Base
  • Documentation
  • Contact Support
  • Release History
  • Knowledge Base
  • Documentation
  • Contact Support
home/Knowledge Base/Template Designer(DCP)/How to set partial document editing restrictions in templates

How to set partial document editing restrictions in templates

1388 views 0 Updated on August 8, 2024

This blog article outlines how to use Microsoft Word’s Restrict Editing functionality. It supports restricted editing for the whole document, as well as limiting edits to specific paragraphs. This feature not only works with regular Word documents, but also DocumentsCorePack templates.

Example

For our template, we would like to restrict the sections that contain fields from the template designer to prevent them from being unnecessarily removed or changed. To do this, begin by navigating to the Review tab. In the protect group, select Restrict Editing.

Locating the Restrict Editing button
Figure 1: Locating the Restrict Editing button

In this pane, you can set formatting and editing restrictions, specify which kind of edits are allowed, and determine which users are allowed to edit the template. Highlight the sections of the document that should be restricted, then select which restrictions should be applied to them.
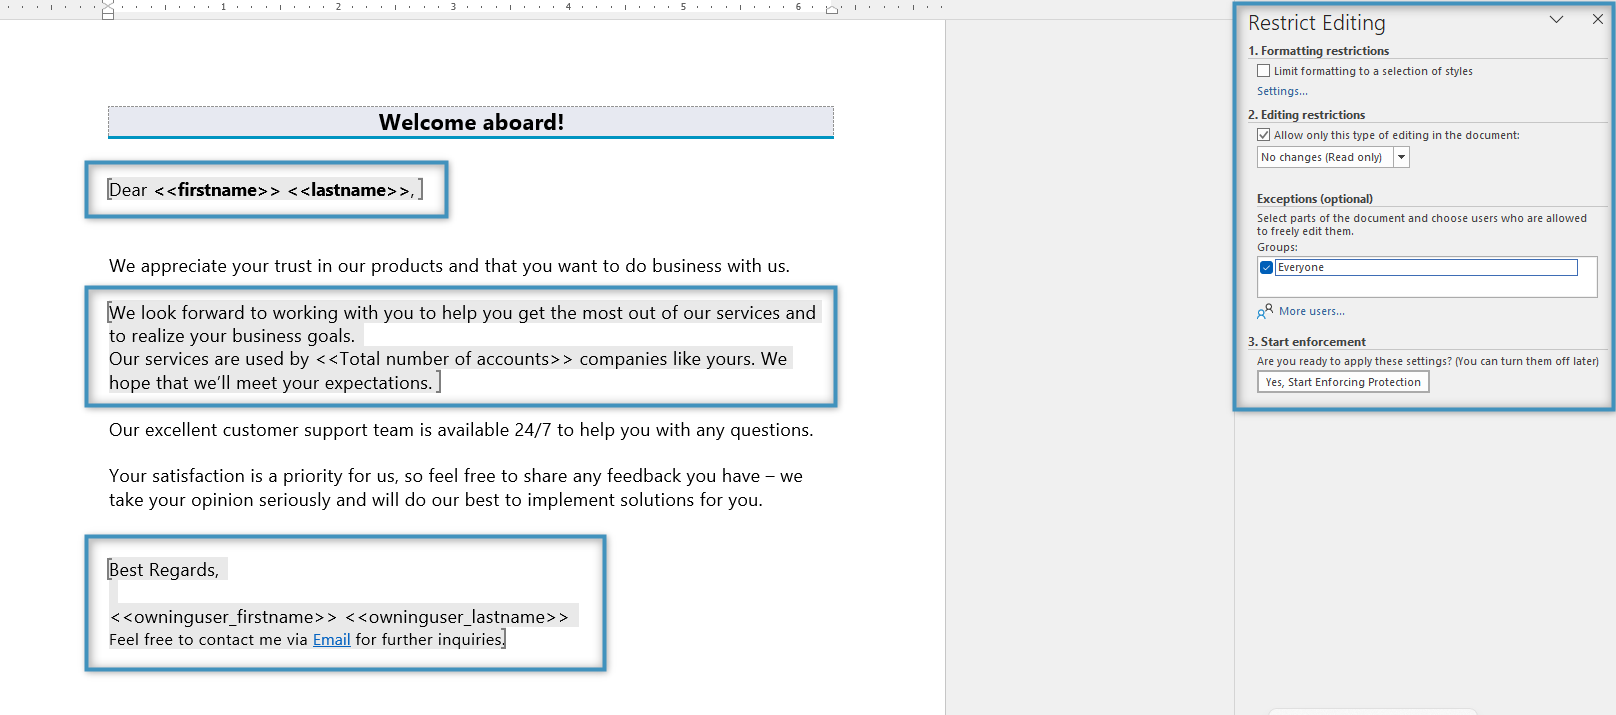
Configuring our restrictions
Figure 2: Configuring our restrictions (see right). The gray sections (left) will have the restrictions applied to them.

Once you are satisfied with your settings, click on the Yes, Start Enforcing Protections button. This will prompt you to set a protection method. You can either protect the document with a password, or via user authentication. After clicking OK, the protections will be applied.
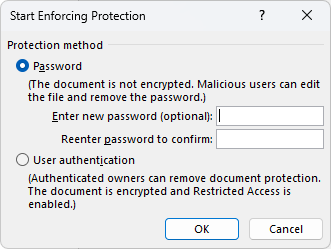
Setting a protection method
Figure 3: Setting a protection method

That’s it! We appreciate your feedback! Please share your thoughts by sending an email to support@mscrm-addons.com.

Was this helpful?

Yes  No
Related Articles
  • Hiding Table Rows in Word Templates
  • Creating a Conditional Row in a Table 
  • Why do companies struggle to automate document processes in Dynamics 365?
  • Debugging the Template Designer Office Add-In 
  • Introducing the DocumentsCorePack Template Designer Office Add-In
  • Ensuring correct time zone display for DateTime fields
Latest Articles
  • Can You Customize Business Central Document Layouts Without RDLC or Developer Support? 
  • Introducing DocumentsCorePack for Business Central
  • Hiding Table Rows in Word Templates
  • Creating a Conditional Row in a Table 
  • Recap: Scottish Summit 2026
Popular Articles
  • DocumentsCorePack Template Designer – Getting Started
  • Step-by-Step: How to configure a One-Click-Action
  • Application Access for Dynamics 365
  • How licenses are counted
  • How to find your environment’s unique name in Microsoft Dynamics 365
Top Rated Articles
  • “Undefined”-labels in Chrome and Edge 114 and higher
  • How to insert Condition Fields in DocumentsCorePack Templates designer
  • Important information for Dynamics 365 online customers using DocumentsCorePack and/or AttachmentExtractor
  • How to activate the DocumentsCorePack Connector for PowerApps & Microsoft Flow
  • Step-by-Step: How to configure a One-Click-Action
Categories
  • DCP for BC 2
  • *News and General Infos* 85
  • Webinars 50
  • Template Designer(DCP 200
  • DocumentsCorePack(DCP 278
  • TelephoneIntegration (TI 65
  • AttachmentExtractor (AE 81
  • PowerSearch (PS 50
  • ActivityTools (AT 61
  • SmartBar (SB 54
  • GroupCalendar (GC 47
Our Vision

“We see it as our purpose to provide products that simplify and speed up our customers’ Microsoft Dynamics 365 experience.”

Knowledgebase
LogIn
mscrm-addons.com
  • Products
  • Online Shop
  • Downloads
  • My Account
About Us
  • About Us
  • Case Studies
  • Newsletter
  • Partner Program
  • Contact
Support
  • Support
  • Terms & Conditions
  • Documentation
  • Webinars
  • Legal Documents
  • Impressum
  • Cookies
  • © 2025 www.mscrm-addons.com. All Rights Reserved.