mscrm-addons.com logomscrm-addons.com logo
  • Release History
  • Knowledge Base
  • Documentation
  • Contact Support
  • Release History
  • Knowledge Base
  • Documentation
  • Contact Support
home/Knowledge Base/Template Designer(DCP)/How to work with the Relationship Manager

How to work with the Relationship Manager

463 views 0 Updated on January 6, 2024

The Relationship Manager in DocumentsCorePack is a feature that can help simplify the creation of templates.  By offering a variety of predefined relationships and allowing for additional predefined relationships to be created, the Relationship Manager can simplify the creation of templates by pre-defining commonly used relationships.

This article outlines how to use the Relationship Manager within DocumentsCorePack.

Step-by-step description

Step 1: In Microsoft Word navigate to ❶ DocumentsCorePack Template Designer by simply clicking on mscrm-addons.com and then opening the ❷ Insert MailMerge Fields.

How to open DocumentsCorePack Template Designer
Figure 1: Open DocumentsCorePack Template Designer

Step 2: The Insert MailMerge Fields opens on the right side of the template. Select the ❶ Additonal-tab and click the ❷ drop-down of the Add Relationship/Entity to get to the ❸ Manage Relationships (See Figure 2).

Open the Manage Predefined Relationships window

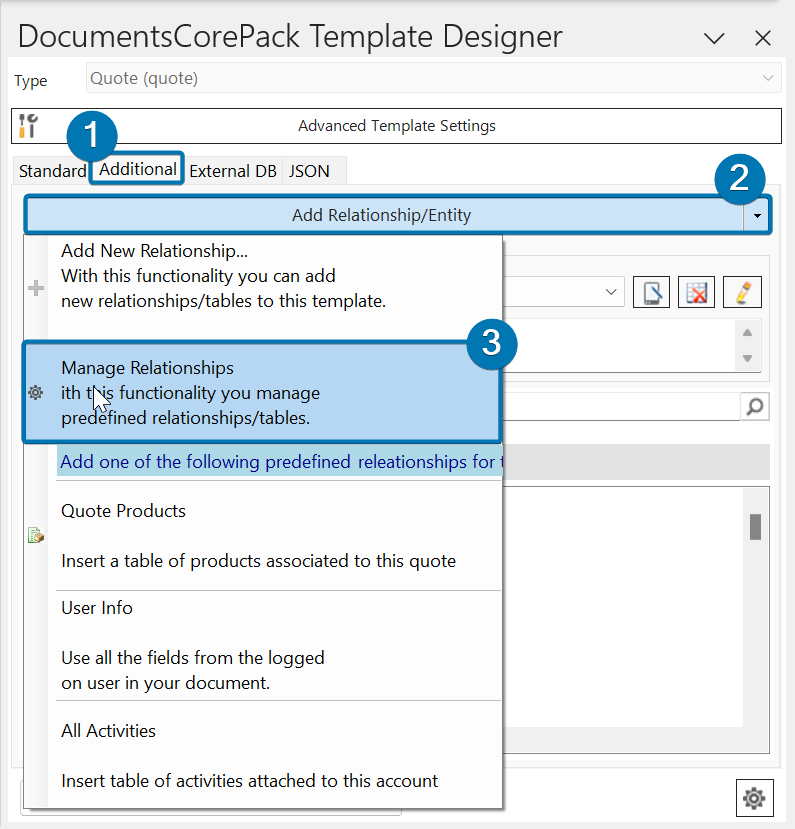
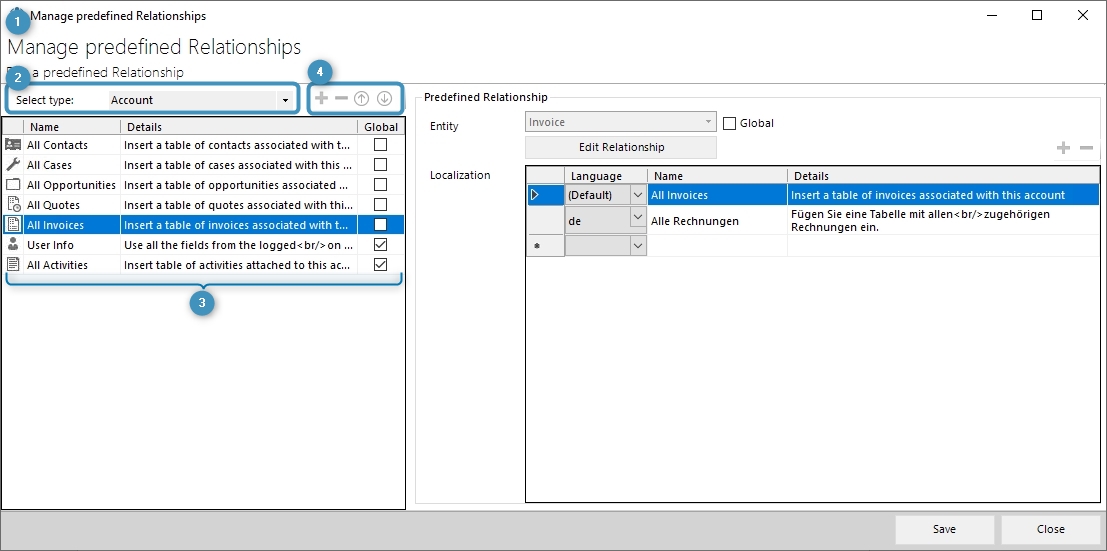
Figure 2: Open the Manage Predefined Relationships window

Step 3: The ❶ Manage predefined Relationships window opens where you can edit existing or define new relationships.

On the left side of the settings window start by selecting the table (entity) you want to work with in the ❷ Select type drop-down.

❸ The DocumentsCorePack Template Designer already has a variety of different predefined relationships for standard tables (entities) and with the ❹ Settings, additional predefined relationships can be created (+), deleted (-), and determined, in which (↑,↓) order the relationships should appear.

Manage predefined Relationships Settings - left side
Figure 3: Manage predefined Relationships Settings – left side

Step 4: You can modify or define the relationship on the right side. With the ❶ Entity setting specifies the entity you want to define a relationship for. If the checkbox next to ❷ Global is checked means that all DocumentsCorePack Template Designers have access to this predefined relationship.

The ❸ Localization list allows you to define a name and description for the predefined relationship for every language available in Dynamics 365.

❹ Add or delete a new field to the Localization list.

Manage predefined Relationships Settings - right side
Figure 4: Manage predefined Relationships Settings – right side

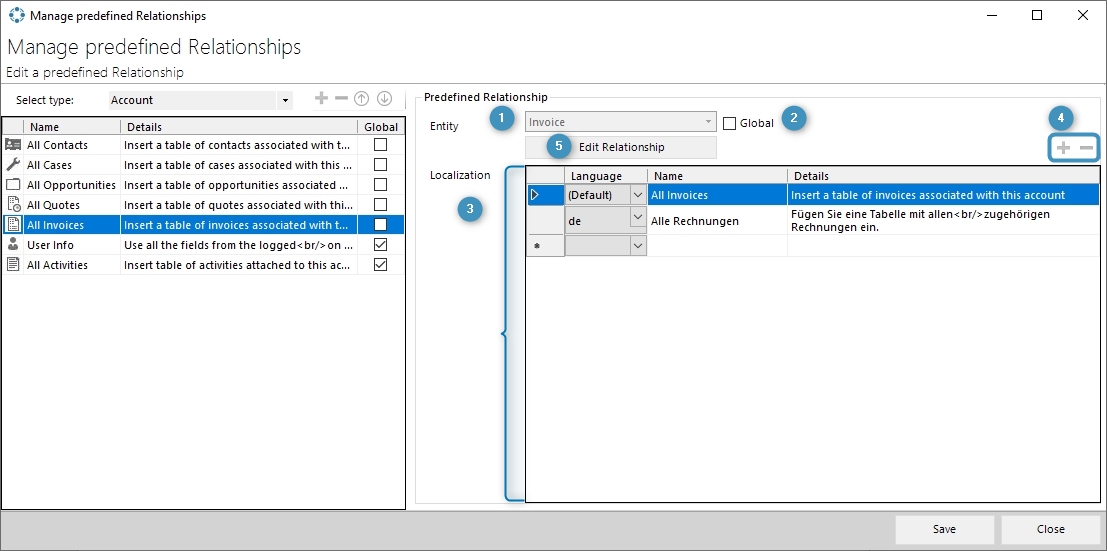
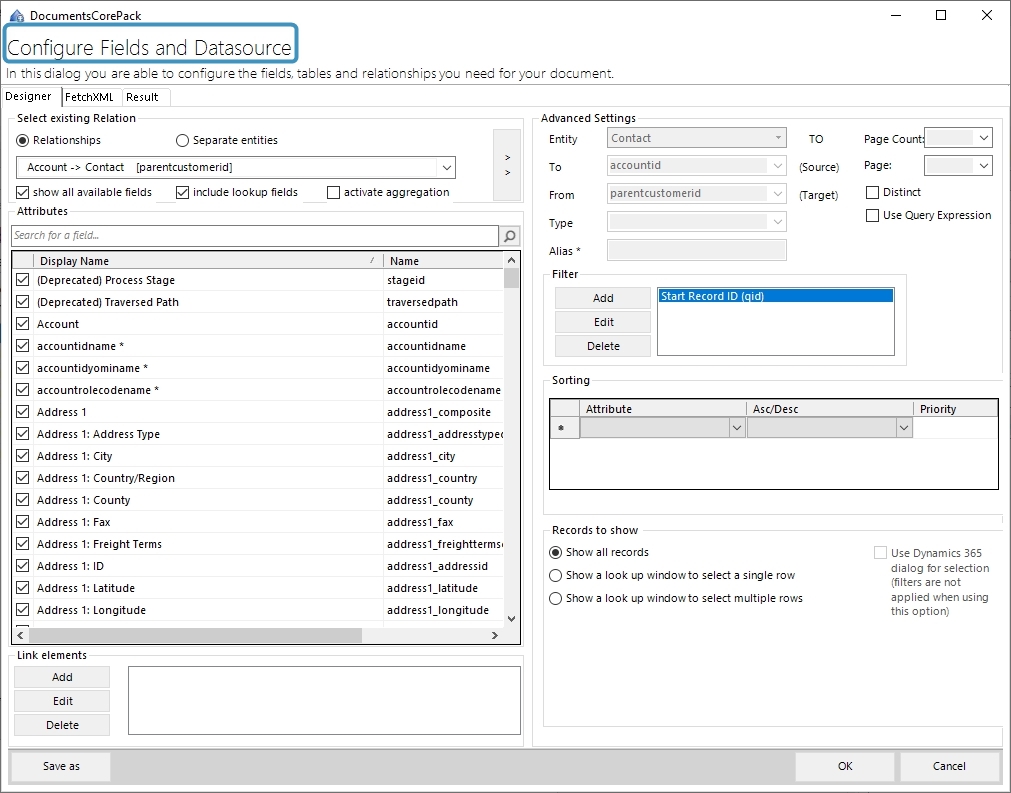
Step 5: The  ❺ [Edit Relationship]-button (see Fig. 4) allows us to specify all details of the relationship (what fields should be retrieved, sorting filtering…). Once clicked, the Configure Fields and Datasource window opens. For details on how to resolve relationships, have a look at this article.

Configure Fields and Datasource window
Figure 5: Configure Fields and Datasource window

That’s it! We appreciate your feedback! Please share your thoughts by sending an email to support@mscrm-addons.com.

Was this helpful?

Yes  No
Related Articles
  • Debugging the Template Design Office Add-In 
  • Introducing the DocumentsCorePack Template Designer Office Add-In
  • Ensuring correct time zone display for DateTime fields
  • How to compare a date-fields with the current date 
  • Create a template for XML or plain text
  • E-Invoicing with DocumentsCorePack
Latest Articles
  • Locating Raw Inputs and Outputs in Power Automate
  • Step by Step: How to execute an OCA in a Power Automate flow 
  • The Hidden Cost of CRM Storage — And How to Eliminate It 
  • Recap: Nordic Summit 2025
  • The new Template Designer Office Add-In
Popular Articles
  • DocumentsCorePack Template Designer – Getting Started
  • Step-by-Step: How to configure a One-Click-Action
  • Application Access for Dynamics 365
  • How to find your environment’s unique name in Microsoft Dynamics 365
  • How licenses are counted
Top Rated Articles
  • “Undefined”-labels in Chrome and Edge 114 and higher
  • How to insert Condition Fields in DocumentsCorePack Templates designer
  • Important information for Dynamics 365 online customers using DocumentsCorePack and/or AttachmentExtractor
  • How to activate the DocumentsCorePack Connector for PowerApps & Microsoft Flow
  • How licenses are counted
Categories
  • *News and General Infos* 65
  • Webinars 46
  • Template Designer(DCP 197
  • DocumentsCorePack(DCP 262
  • TelephoneIntegration (TI 65
  • AttachmentExtractor (AE 76
  • PowerSearch (PS 50
  • ActivityTools (AT 61
  • SmartBar (SB 54
  • GroupCalendar (GC 47
Our Vision

“We see it as our purpose to provide products that simplify and speed up our customers’ Microsoft Dynamics 365 experience.”

Knowledgebase
LogIn
mscrm-addons.com
  • Products
  • Online Shop
  • Downloads
  • My Account
About Us
  • About Us
  • Case Studies
  • Newsletter
  • Partner Program
  • Contact
Support
  • Support
  • Terms & Conditions
  • Documentation
  • Webinars
  • Legal Documents
  • Impressum
  • © 2025 www.mscrm-addons.com. All Rights Reserved.