Using the DocumentsCorePack Connector, it is possible to utilize its document generation and delivery options within Canvas apps. This can be useful in a variety of circumstances, such as conference sign-up apps, field service sign-off apps, or a quoting app for the sales division to quickly generate documents based on a quote.
This article will demonstrate how to equip a Canvas app with document creation capabilities. Our goal is to allow users to select a template, generate a document based on a quote from our Dataverse environment, and open the document right from the app. To do that, we’ll be creating an app through Power Apps.
Note: SharePoint must be configured in order to view generated documents through the app. To set up SharePoint, see here. Additionally, this article assumes an understanding of how to work with Power Apps.
Step 1: Setting up the app
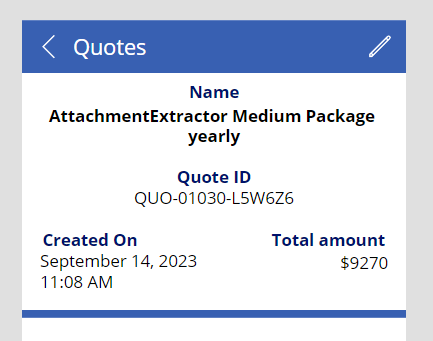
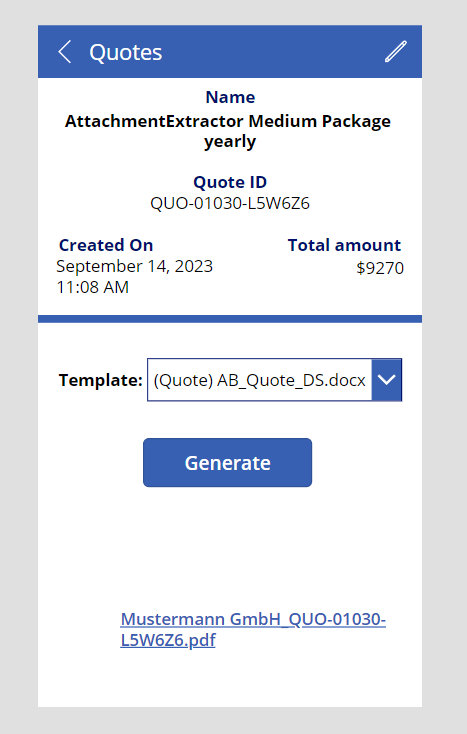
For this example, we have already created a simple app that displays the information of a quote within our system on the details page. Right now, it displays the Name, Quote ID, Created On and Total amount fields of the quote.
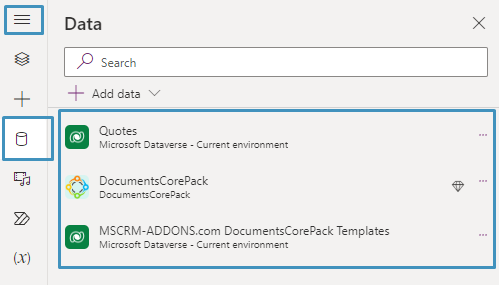
For our data sources, the Quotes table should already be added, but we’ll need to also add two other data sources: the MSCRM-ADDONS.com DocumentsCorePack Templates table and the DocumentsCorePack Connector.
Then, to generate a document, we’ll need to add a few suitable controls:
- a dropdown that will list our available templates for the users to choose
- a button that will generate a document based on the selected template, and
- labels: The label will display a link to our generated document later.

With these added, now we will add some code to our controls.
Step 2: Adding code
We’re going to start with our dropdow. This control should list all of our quote templates in our system
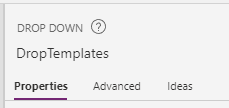
We will begin by giving the dropdown a better name. For our example, we will name it DropTemplates.
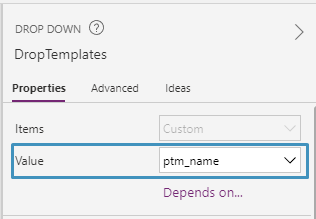
Then, with the dropdown selected, select the left dropdown and select Items. In the fx bar, enter the following code:
SortByColumns(DocumentsCorePack.GetAllTemplatesV3({ EntityName:"quote" }), "ptm_name", SortOrder.Ascending) What is happening here? We are calling the GetAllTemplatesV3 action of the DocumentsCorePack Connector to load all templates created for the Entity Quote. In addition, we will sort based on the name of the template so they show up properly in our dropdown.

Once the code has been added, you should now be able to change the value dropdown to ptm_name.
The dropdown should now display the names of all quote-related templates.

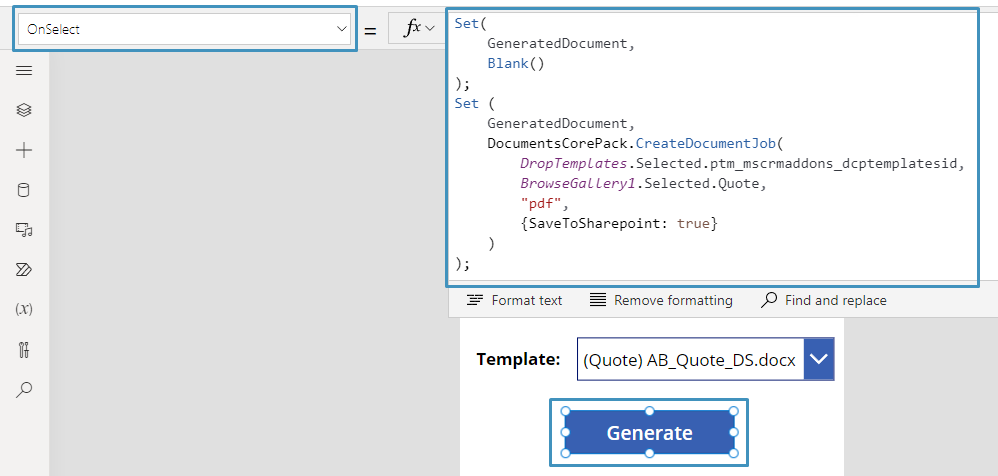
Next is our Generate button. We’ll need to add code to this button that accomplishes the following tasks:
- Retrieves the selected template from the dropdown control
- Retrieves the quote currently selected in the app
- Generates a document
- Saves the document to SharePoint
The code that can do this is as follows:
Set (
   GeneratedDocument,
   DocumentsCorePack.CreateDocumentJob(
        DDTemplate.Selected.ptm_mscrmaddons_dcptemplatesid,
        BrowseGallery1.Selected.Quote,
        "pdf",
        {SaveToSharepoint: true}
    )
);
What is happening here? GeneratedDocument is a variable that saves the output parameters of the CreateDocumentJob action, which is later used to access the generated document. The CreateDocumentJob action creates a document based on the template, the selected quote, and the designated filetype. The document may also be saved to SharePoint depending on if SaveToSharepoint is set to true or false. If it is set to true, then the SharePoint link can be accessed through the GeneratedDocument variable through the Return value 2 parameter. The filename of the document can be accessed through the File name parameter.
To add this code, select the button and navigate to the toolbar. Select the OnSelect action from the dropdown list in the upper left, then paste the code into the function textbox. Once added, the button should now generate a document when clicked.
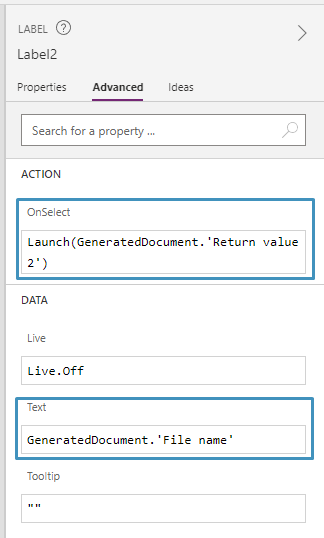
However, we’re not done yet. We still need to display the link to the created document once the document has finished generating. That is where our bottom label comes into play.
For our bottom label, we want the label to be blank while generating the document. Then, once it’s done, we want the link to be displayed. To do this, we will need to add code to both the OnSelect action and Text data fields. We can take advantage of the return values of GeneratedDocument to accomplish this.
The code for these is as follows:
OnSelect:
Launch(GeneratedDocument.'Return value 2') Text:
GeneratedDocument.'File name' You can see how this looks down below:
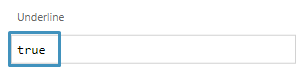
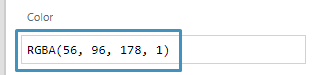
We’ll also add an underline to the link and some color.
Now, when a link is generated, it will be clickable, and it should look something like this:

Step 3: Adding feedback
This is what our app currently looks like.
As it stands, this app should now do what we want it to do. It should be able to generate a document based on the template and selected quote. But, there are a few things we can add to give feedback to the user.
We will add a few additional labels and icons to our app. These will be included to inform the user when their document is generating and when it is finished generating.
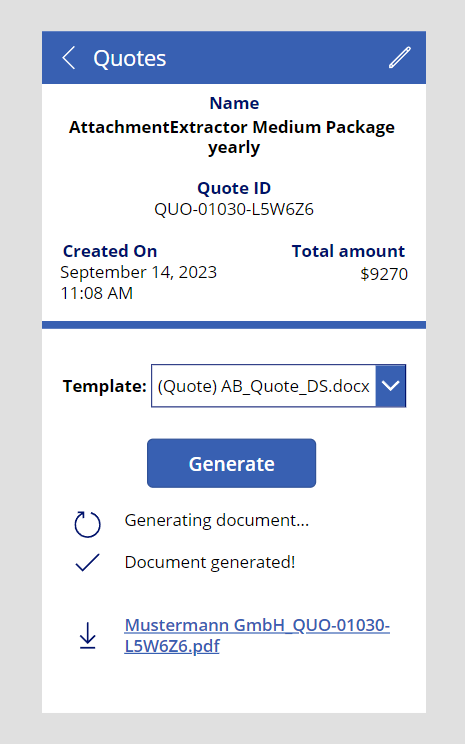
We only want these to appear in their respective relevant situations. This means we’ll need to add some more code.
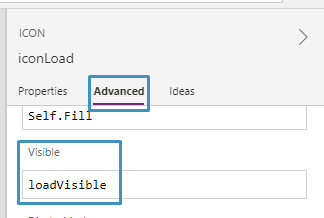
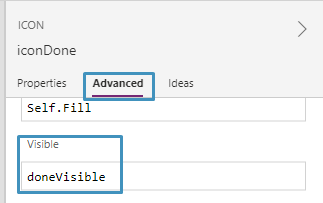
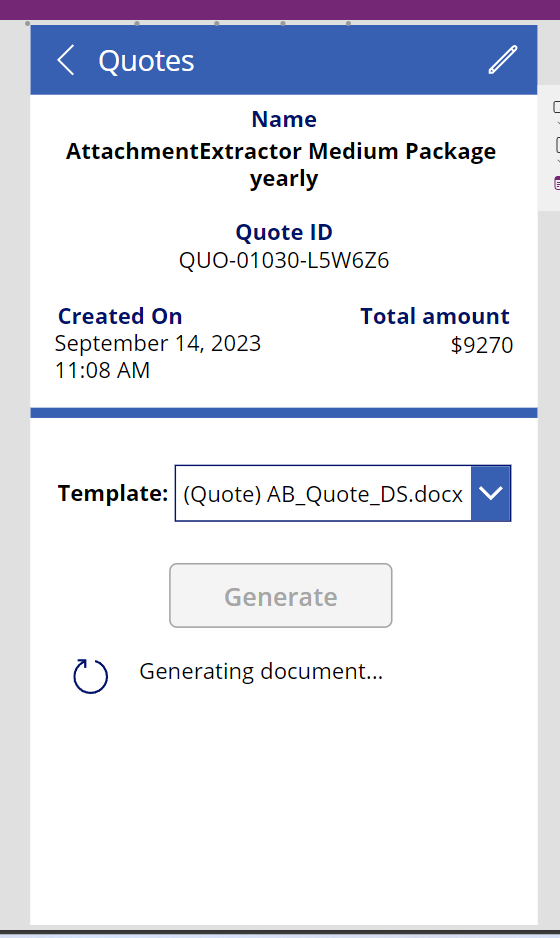
First, we’ll need to add some more code to the Generate button. We will need to set and initialize two variables, loadVisible and doneVisible. These two variables will be used for our labels and icons. These variables will be set to true and false respectively once the button is clicked, but they will be reversed once the document generation process is done. You can see what this looks like below.
Updated OnSelect code for Generate button:
Set(
    loadVisible,
    true
);
Set(
    doneVisible,
    false
);
Set(
    GeneratedDocument,
    Blank()
);
Set (
    GeneratedDocument,
    DocumentsCorePack.CreateDocumentJob(
        DropTemplates.Selected.ptm_mscrmaddons_dcptemplatesid,
        BrowseGallery1.Selected.Quote,
        "pdf",
        {SaveToSharepoint: true}
    )
);
Set(
    loadVisible,
    false
);
Set(
    doneVisible,
    true
);
With this code, we can now assign the variables to our labels and icons. For the icon and label we want to display when the document is generating, we will enter the loadVisible variable into the Visible textbox in the Advanced tab of the control.
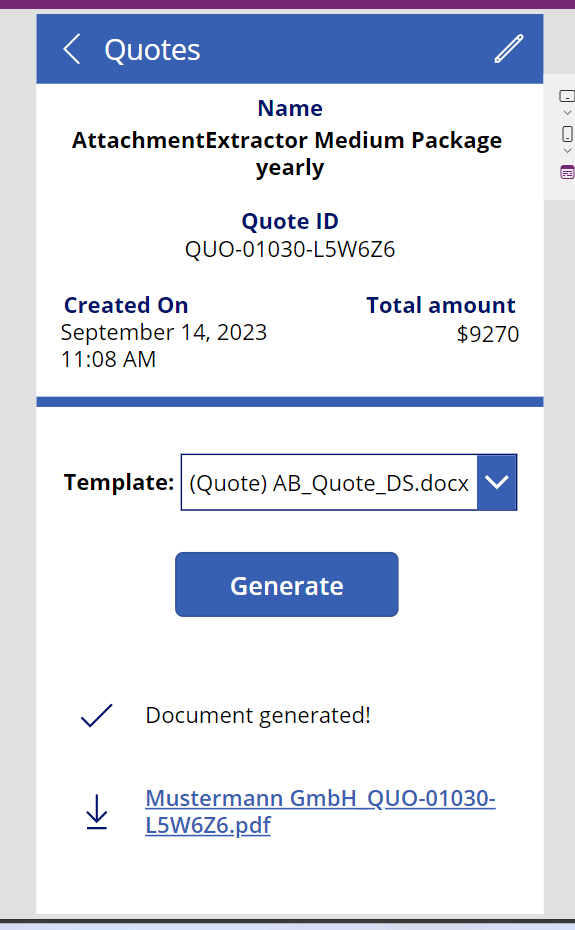
For the icons and label we want to display when the document is finished, we will enter the doneVisible variable into their respective Visible textboxes.
Step 4: Running our app
At this point, the app should now look something like the following.
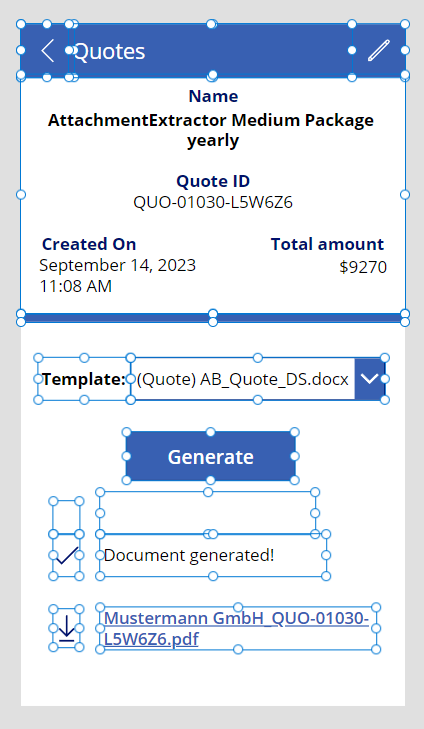
When we run the app, we can select a quote from the first screen. When we select a template a select the Generate button, we will see that the respective load icon and message will appear.
Then, once the document is finished generating, the checkmark and ‘Document generated!’ message will appear, along with the download icon and the link to our generated document.
That’s it! We appreciate your feedback! Please share your thoughts by sending an email to support@mscrm-addons.com.