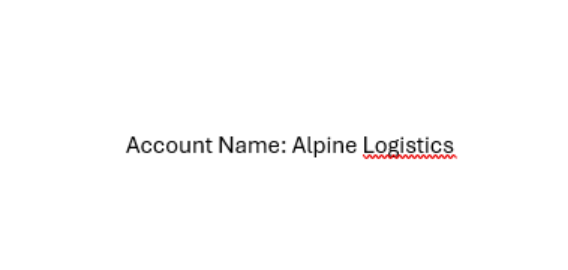
The Advanced String feature allows users to combine Dataverse fields, static text, line breaks, and supported functions into a single dynamic value. It is useful when a standard merge field does not provide enough flexibility like when creating compound values, reference labels, or dynamically generated dates.
Inserting an Advanced String field
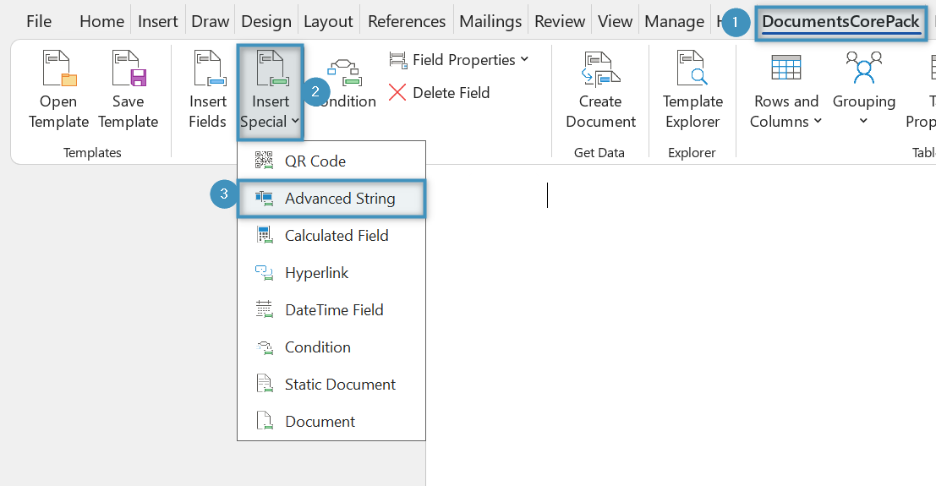
To start, place your cursor in the Word document where the generated value should appear. Then, follow these steps:
- Open the DocumentsCorePack ribbon.
- Select Insert Special.
- Select Advanced String.
This will open the Advanced String Properties window.
The Advanced String Property Designer
The Advanced String Properties window contains a field list and a pattern designer. Every field, piece of static text, function, or line break is represented as a component in the pattern.
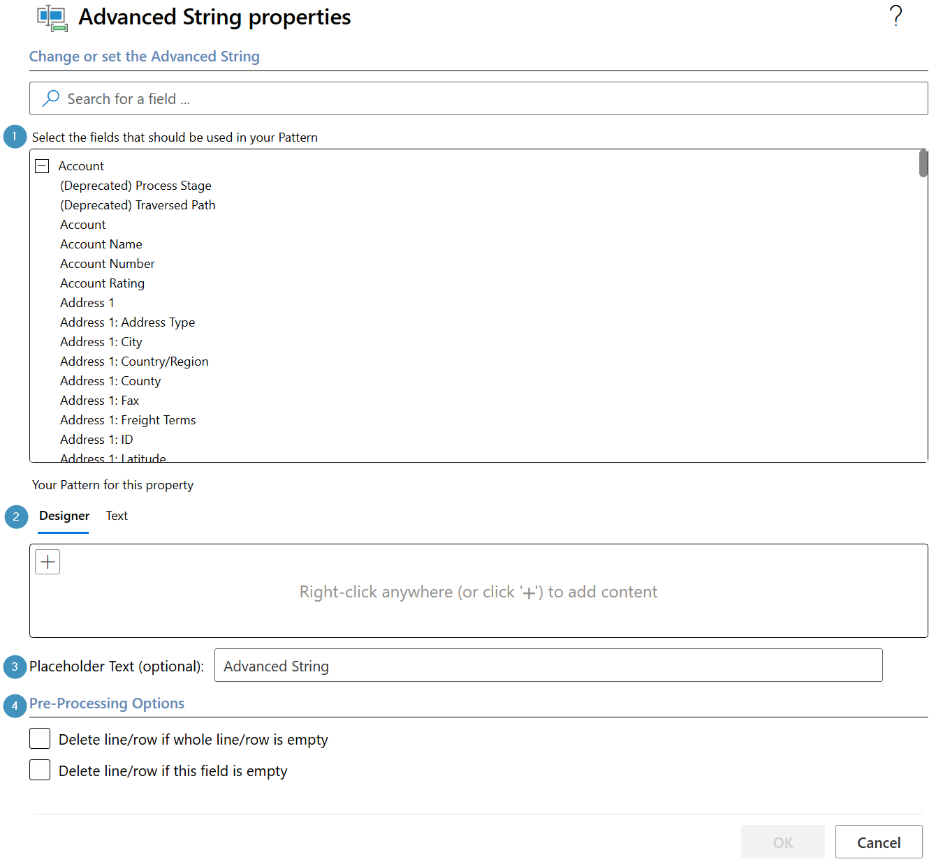
The Designer view provides a visual way to construct the pattern. The following options are available in the designer view:
- Field selection: Browse or search for the fields to include in your Advanced String pattern.
- Pattern editor: Build your pattern using the Designer tab, or edit it directly in the Text tab. Click + or right-click in the designer to add content.
- Placeholder Text (optional): Enter the text used to identify the Advanced String field in your template.
- Pre-Processing Options: Choose whether to delete a line or row when the entire line or row is empty, or when this specific field is empty.
How to add a field
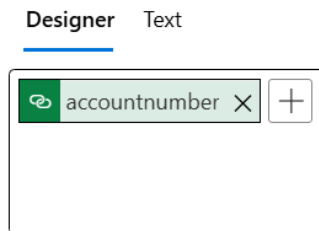
To add a field to your Advanced String pattern, search for it using the search bar or locate it in the field list. Double-click the desired field to insert it into your pattern.
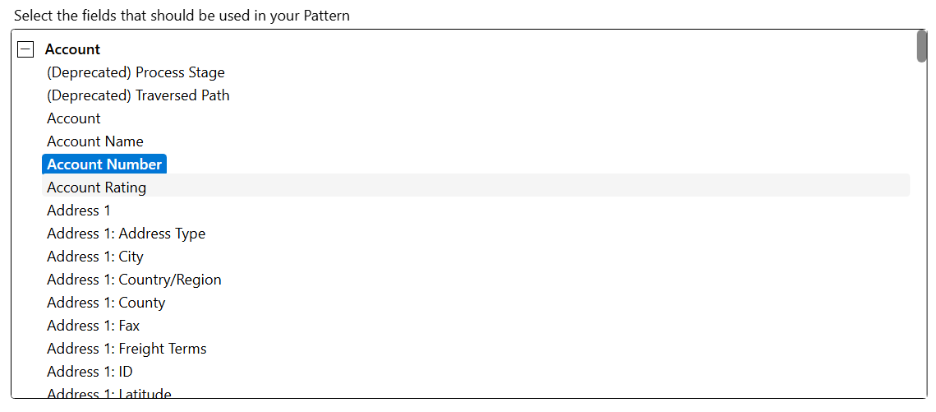
The field will be inserted into the pattern designer.
Add static text
Static text remains the same in every generated document. It can be used for labels, separators, punctuation, and explanatory wording.
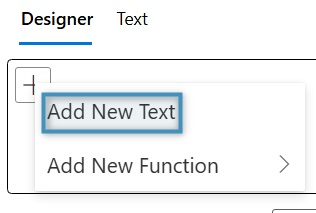
To add static text, select the plus (+) button or right-click an empty area of the Designer and select Add New Text. Enter the text exactly as it should appear, including any required spaces or punctuation.
For example:

would produce:
Sent to John Doe at 123 Main Street Spaces should normally be included in the static text components. If a space is missing, two neighboring values may run together.
Add DateTime Fields
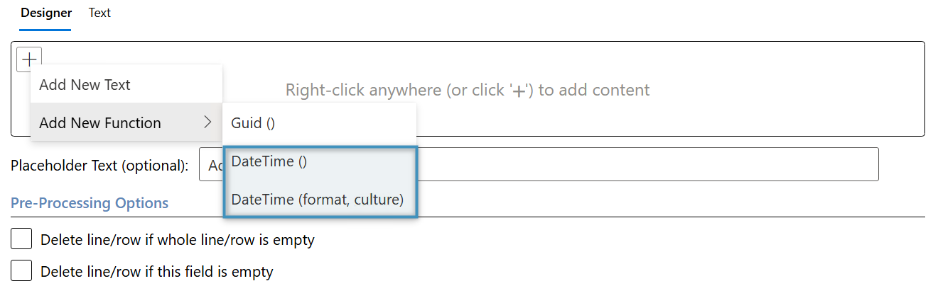
To add DateTime fields through the Property Designer, click the Plus (+) sign in the designer, and select either DateTime() or DateTime(format, culture). The latter is used to format the resulting date according to the specified format strings.

After selecting the DateTime (format, culture) option, users have the ability to change the format and culture of the DateTime field based on their needs. It’s important to note that there are many ways to configure a DateTime field in the property designer. For more information on configuring the date of a DateTime field, please see here.
Creating a pattern
To walk through an example, we will demonstrate how to create an Advanced String field that displays an Account Name when a document is created. To do so, we will click the (+) button and add ❶ static text. Then, we will add the ❷ Account Name field to the pattern from the field list. Lastly, we will adjust the ❸ placeholder text.
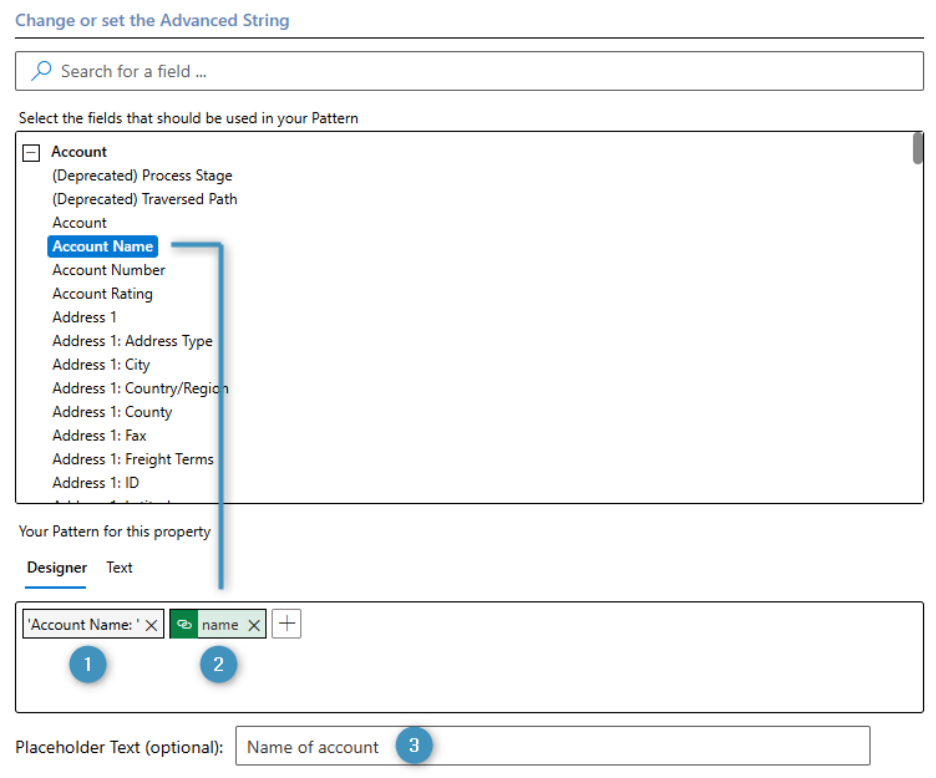
When finished, click OK and the Advanced String will be displayed in the document. Clicking into the Advanced String allows users to see the pattern that the Advanced String follows without having to go back into the designer.
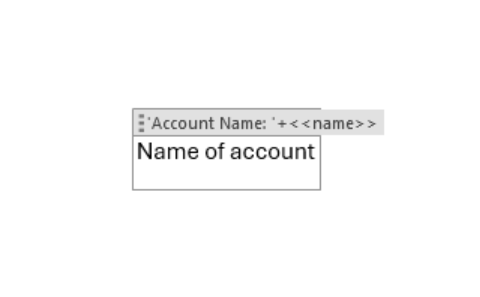
After generating the document, the field will be replaced with data from your environment.