Conditional Formatting is an enhanced component of the Condition feature within DocumentsCorePack. While the regular Condition functionality determines whether to include or exclude a field in your document, the conditional formatting preserves the existing format or applies an alternative format based on a Word style sheet. A further description of the standard Condition functionality can be found here.
Requirements:
Available from version
- DocumentsCorePack: 2017.169
- DocumentsCorePack Template Designer: 9.24
Step-by-step description
Step 1: Insert a new Condition Field. If you are unsure how to access the insert fields option, look at this article first.

Step 2: Give your condition a descriptive name. A descriptive name makes it easy to locate and reuse existing conditions in a template.
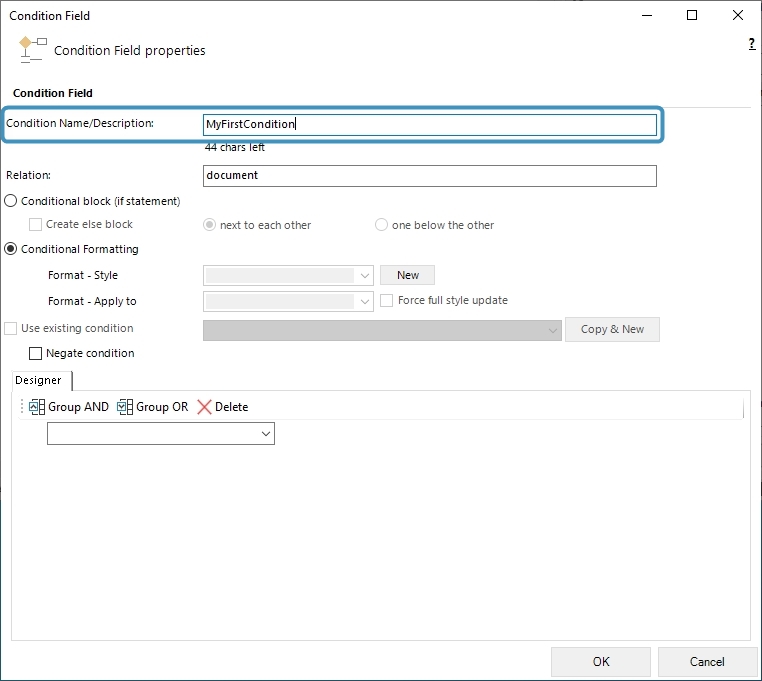
Step 3: Select Conditional Formatting. You have to switch the condition type from the Conditional block (if statement) to Conditional Formatting.
Please note: If you do not see this option, ensure that you have the required version installed. How to check your current version is described here.
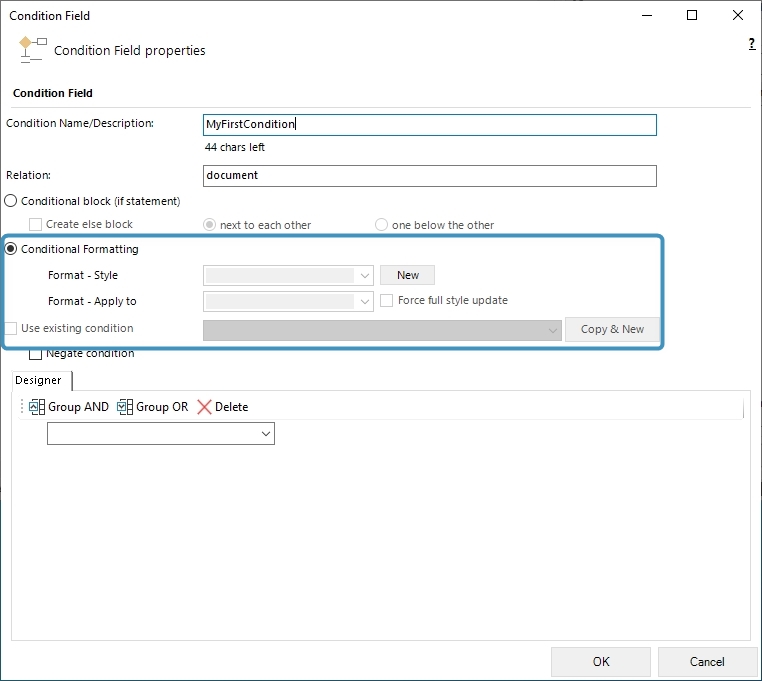
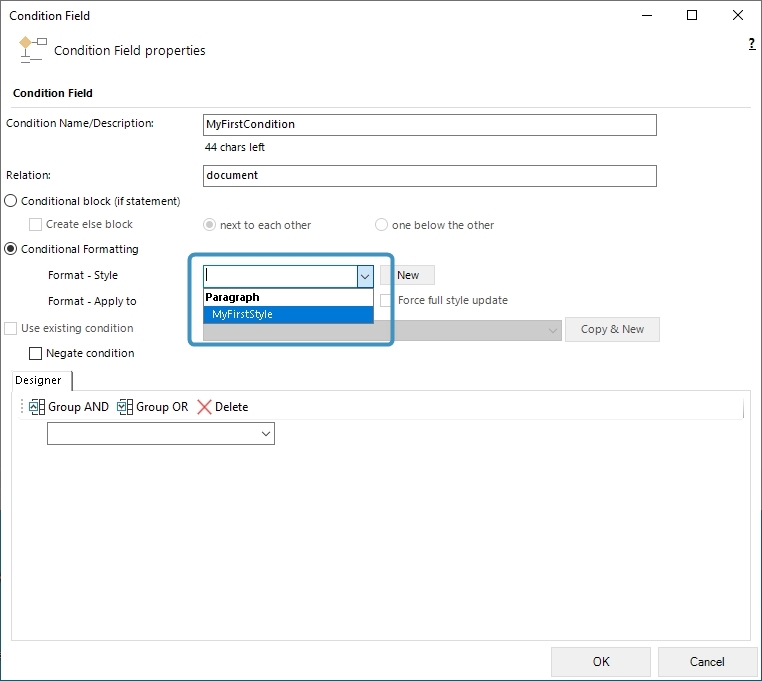
Step 4: After you have selected Conditional Formatting, you can use the style selection. You can only use custom styles in this selection, so if the drop-down is not enabled, you must create at least one new style. How to do so is described in the next step.
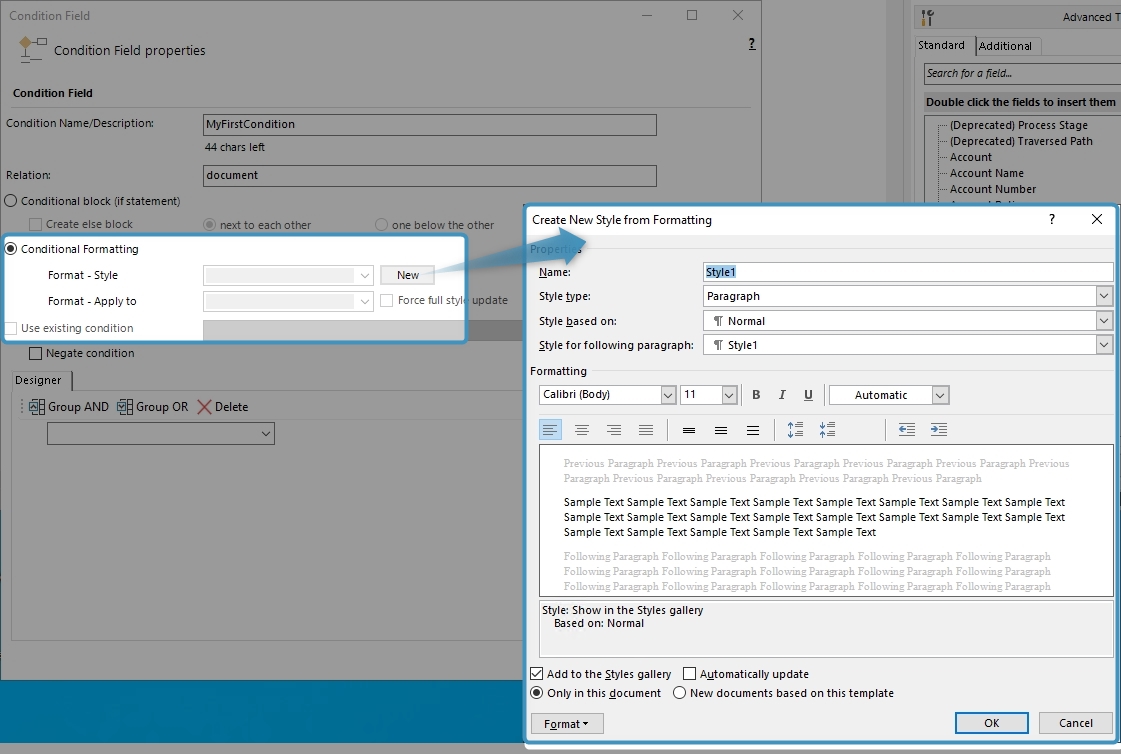
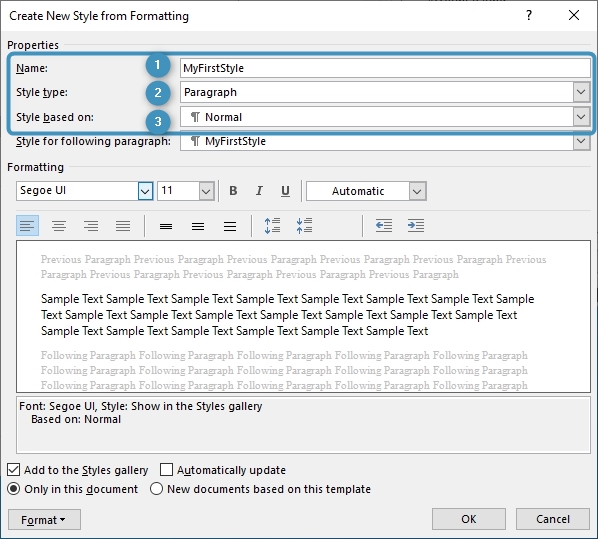
Step 5: Create a new style. This will bring up the standard Word Create New Style from Formatting dialog.
❶ Name: Please define a name that will indicate what this style is used for. (You can reuse styles for all your conditions, and defining a name for each will make it easier to reuse them.)
❷ Style type: This is one of the most important steps during the creation of a style. Within this selection field, you have 5 options to choose from, but we support the following 3.
– Paragraph: The style will be applied to the whole paragraph that contains this condition field.
– Character: The style will be applied to the content within this condition field.
– Table: This style type will enable the second selected field [Format – Apply to], where you can decide how it should be applied.
❸ Style based on: A base style template can be selected to begin creating the custom style. You can use the three settings as well as all of the given options to create your desired output style. After you have selected your desired style, click OK to save it.
Please note:
- Do not change the Stylename. We have no option to identify a change of the name and the condition will no longer be able to find the style.
- Not all options available in the standard style sheet configuration of Word are applicable and may not be applied, depending on the used style and the context.
Step 6: Select your Style. Once you have created your style, the Format – Style selection is now enabled.
Choose your style, and your conditional formatting field is ready to use. A character should be used when you want to apply the format to a single word in a paragraph, while a Paragraph should be used when you want to apply the formatting to the whole paragraph.
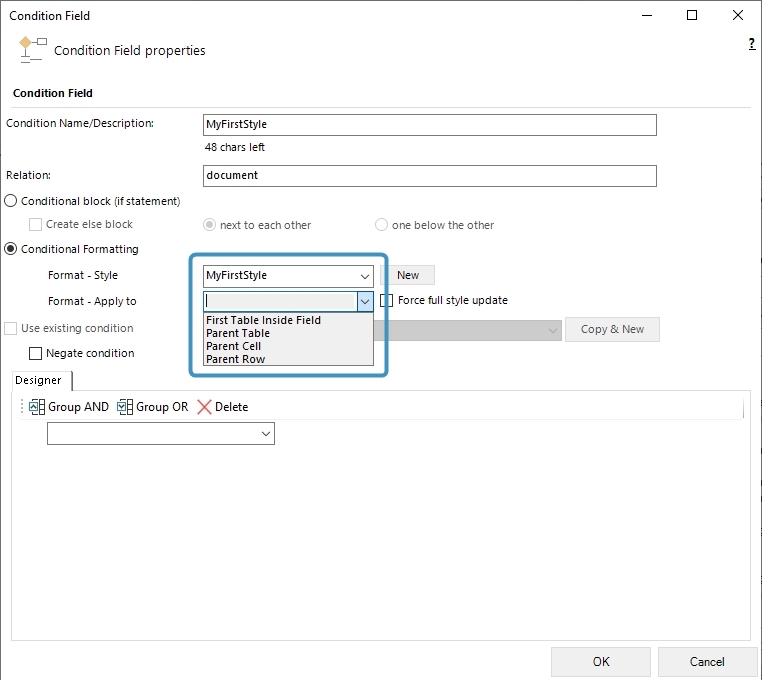
Step 7: Apply table format
If your selected style is a table style the Format – Apply to field is enabled. This provides you with the option to pick one out of four ways for how your table style should be applied.
- First Table Inside Field: This option will apply your style to the first table within your condition field.
- Parent Table: When your condition field is within a table, this option will apply the style to this table.
- Parent Cell: The selected style will be applied to the cell which contains your condition field.
- Parent Row: The selected style will be applied to the row which contains your condition field.
Step 8: Please click on OK to insert the condition field. If you want to know more about the conditional formatting feature, take a look here at a step-by-step description.
That’s it! We appreciate your feedback! Please share your thoughts by sending an email to support@mscrm-addons.com.