Conditional formatting can help make patterns and trends in your data more apparent. With the DocumentsCorePack condition fields, it is possible to apply different table styles based on conditions.
Follow this step-by-step description:
Step 1. For adding conditional formatting to an existing table, you have to first click in the table cell where you want to change the formatting. If you want to create a new dynamic table and need help, have a look at this article.

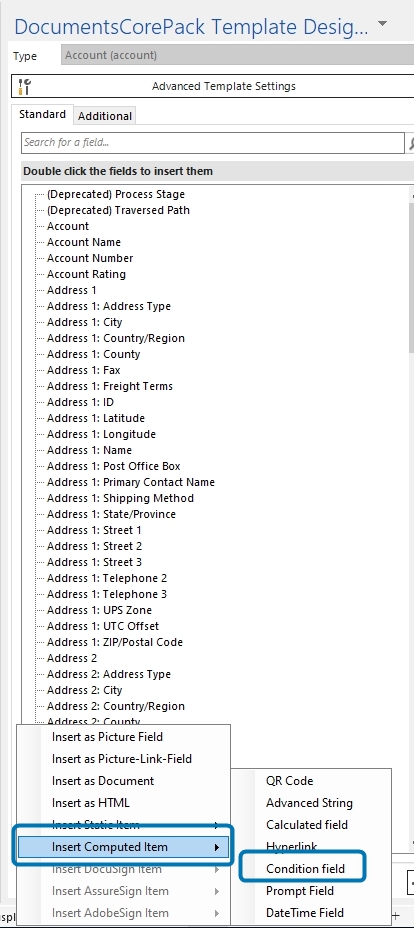
Step 2. Then in the dialog for the condition field, select the option Conditional Formatting and press the New button.
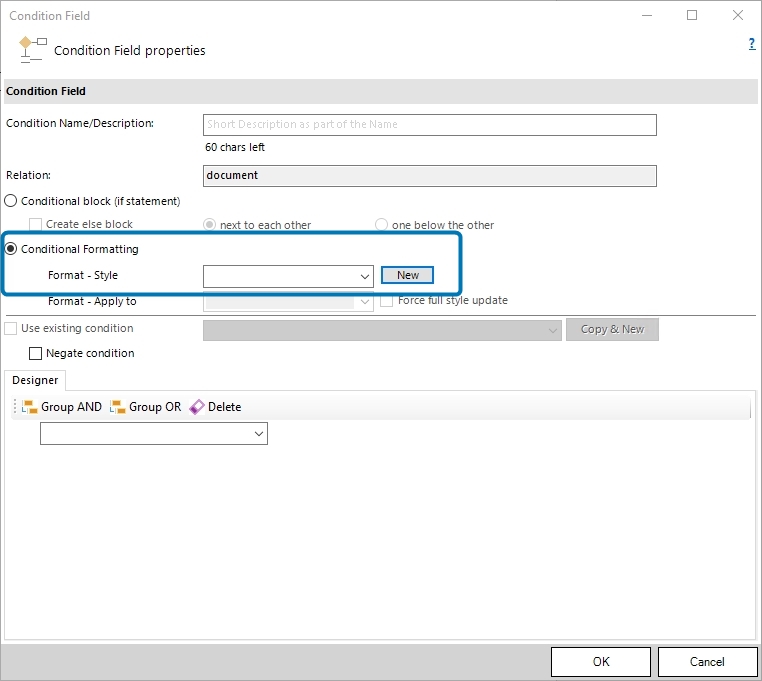
Step 3. Next, create a new table style or select one of the already existing table styles.
Please note: If you want to change only the row or the cell formatting, please make the changes on the whole table style.
Step 4. There are four options to apply to the selected table style:
- First Table Inside Field
- Parent Table
- Parent Cell
- Parent Row
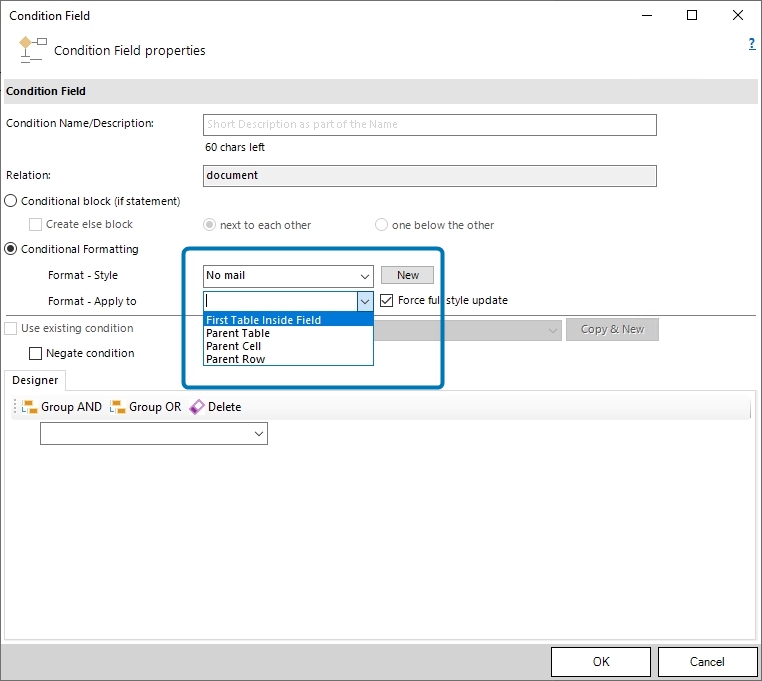
1 Apply to First Table Inside Field
This option only allows you to format the whole table.
2 Apply to Parent Table
The whole table style will be applied to your table. Each of the example styles will work with this option.
3 Apply to Parent Row
This option allows to change the formatting of the row, where the condition field is placed. For example, coloring a row to red or changing the text font to highlight the row.
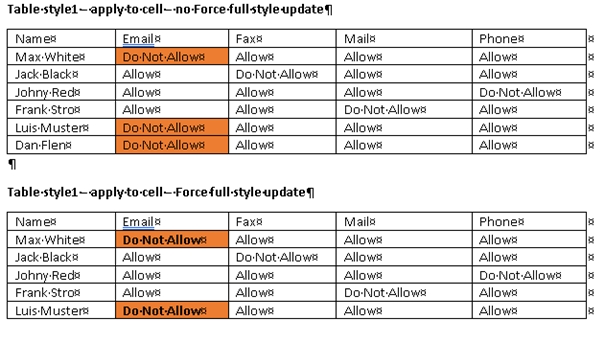
Without the option Force Full style update, the header cell style and table style 2 will not work because only the style applied to the whole table will work. With the option Force Full style update, all formatting changes set in the table style will apply to the current row.
You can see the difference in Figure 5: The text formatting and other style details are missing without the option.

4 Apply to Parent Cell
This option allows to change the cell formatting.
Without the option Force Full style update, the header cell style and table style 2 will not work because only the style applied to the whole table will work. With the option Force Full style update, all formatting changes set in the table style will apply to the current cell.
That’s it! We appreciate your feedback! Please share your thoughts by sending an email to support@mscrm-addons.com.