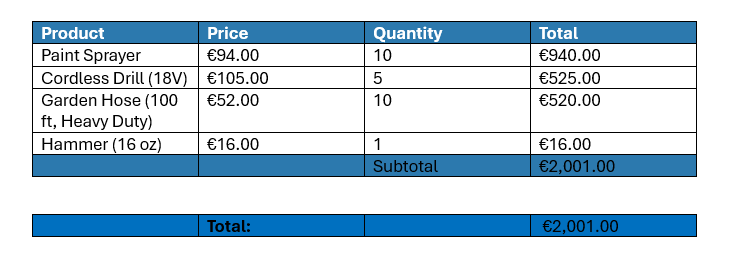
In some document generation scenarios, it may be necessary to display or hide an entire table row based on the data contained in a Microsoft Dynamics 365 record. A common example is a discount row in a quote template that should only be displayed when a discount has been applied. This can be achieved by using Condition Fields together with table structures in the DocumentsCorePack (DCP) Template Designer.
This article explains how to create a quote template in which a discount row is only displayed when discount information is available. When no discount exists, the generated document will automatically use an alternative table layout without the discount row.
Step 1: Set the base table
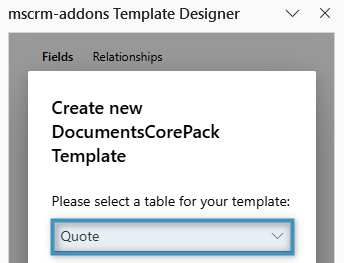
Before you start designing your template, you first need to define the base table. This selection determines which fields are available in the Template Designer. Keep in mind that once a field has been inserted into the template, the base table cannot be changed. For this walkthrough, click Insert Fields in the Fields group on the DocumentsCorePack tab. When DCP Template Designer opens, select Quote as the base table.
Step 2: Create the product table
For our table, we will use the related Quote Line entity as the foundation. To configure this, we will open the Relationship Designer and locate the Quote->Quote Product relationship. Here we also resolve the Quote Product -> Product relationship, to include product details, such as product name etc., as shown below.
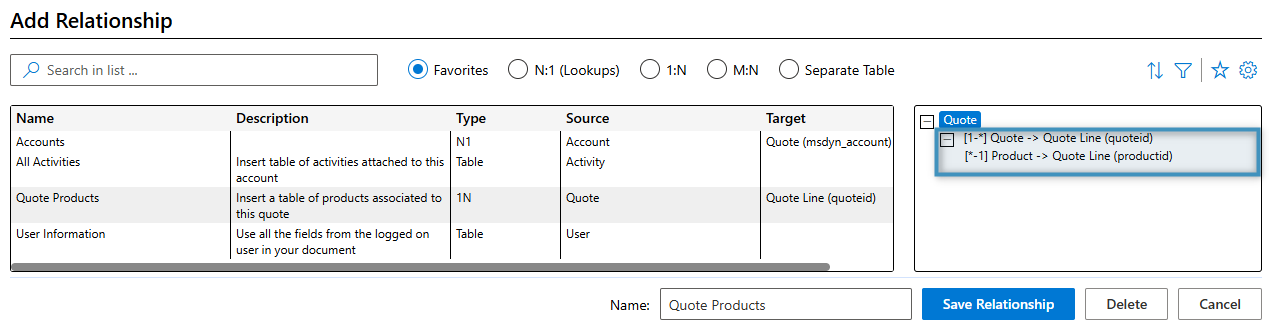
After saving the relationship, the corresponding fields appear in the Template Designer. Your Relationships list will then look like this:
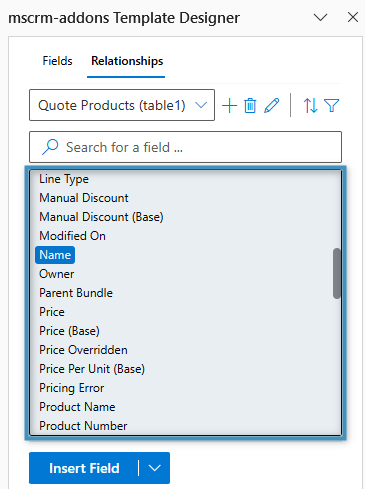
To create the table, double-click the field you want to add to the table. In our case, this is the Name field. This opens the Table Designer, where we will structure our table as follows:
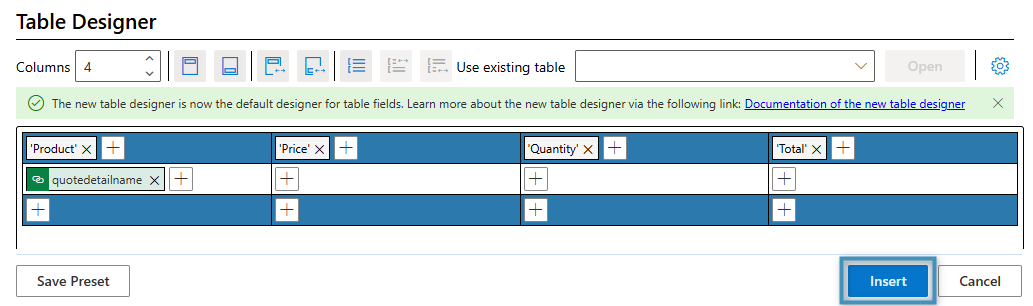
Next, we will insert the required fields into the table. Then, we will add the Total Detail Amount field from the Standard tab into the footer. Once completed, the table should look similar to the example below:
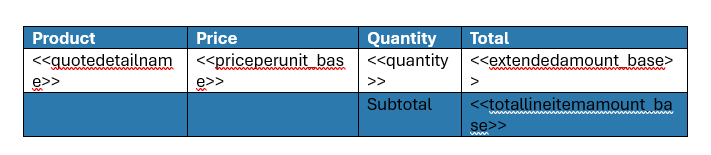
Step 3: Insert a condition field
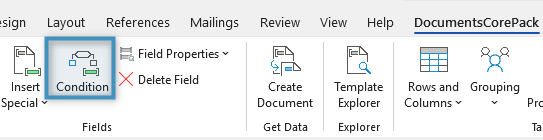
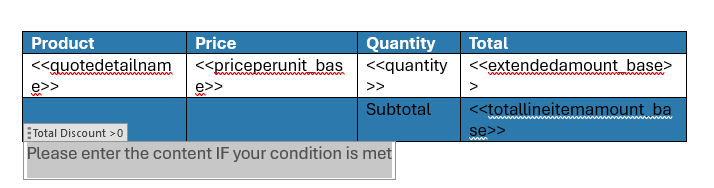
To control whether the discount row is displayed, we will insert a Condition Field beneath the product table using the Condition button in the Fields group in the DocumentsCorePack tab.
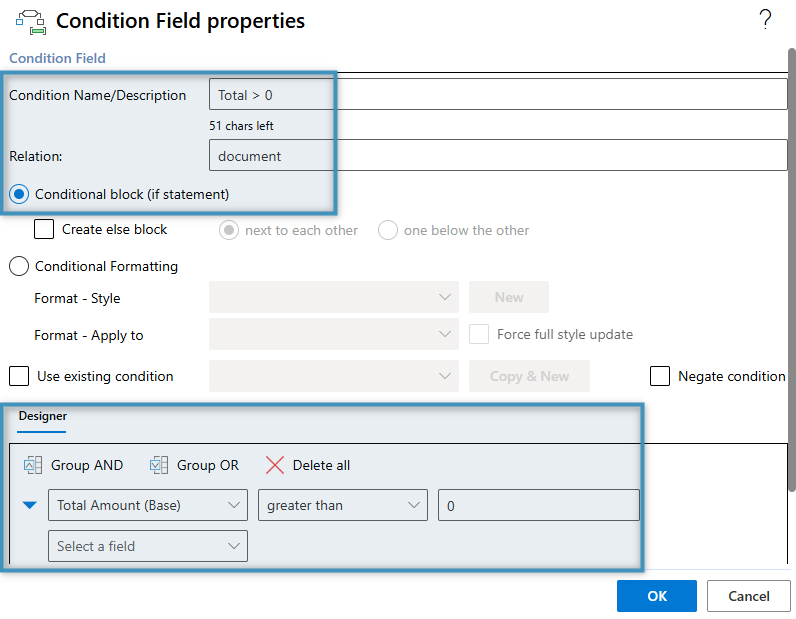
In the Condition Field properties window, fill in the Condition Name/Description. In the Condition Field Designer, we will configure the condition to evaluate the Total Discount Amount field. Select greater than as the operator and enter 0 as the comparison value. This ensures the condition is met only when the quote contains a discount.
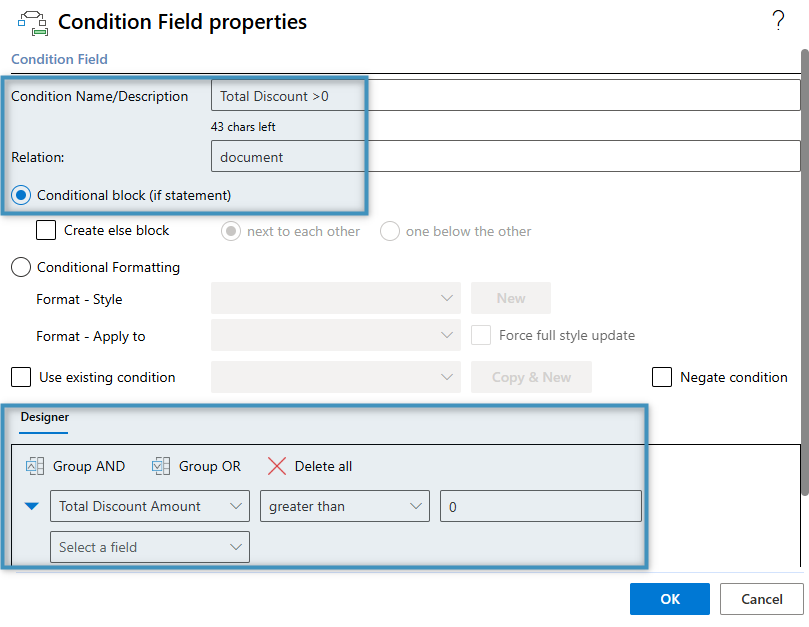
The condition field is now inserted into the template as shown below.
Below this condition, we want to create another Condition Field for the Total row. Configure this condition in the same way as the previous one, as shown in the image below.
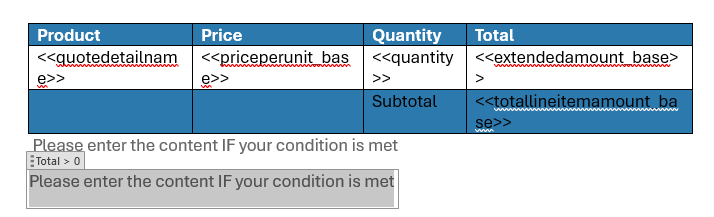
After adding both condition fields, your template should look similar to the example below.
To keep our data well-organized, we will insert standard 4×1 Word tables into each condition field.
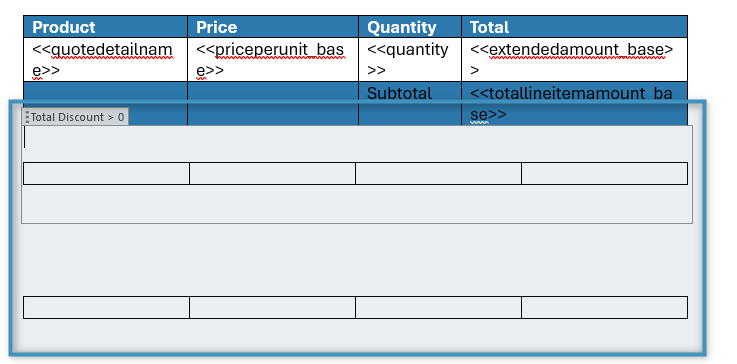
In each table, we will add text labels for the discount and total values, making sure these elements are within the condition fields. We will also add a Join Tables field to combine the table above with the one below it. In our template, we want to include this field to create a cleaner and more organized table layout. You can add this field from the Insert Field menu.
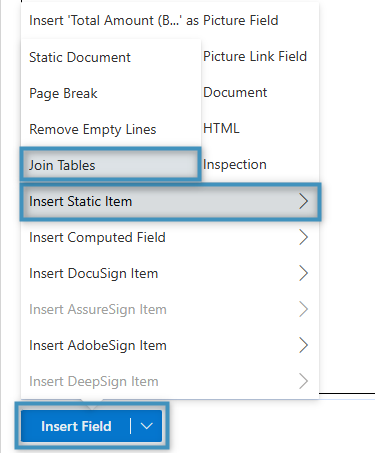
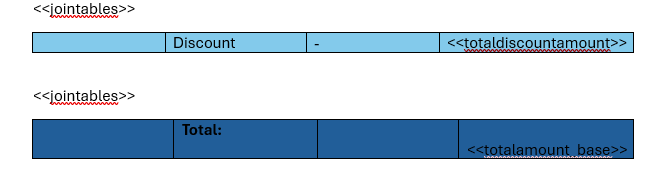
We will add the Join Tables field above the discount and total, making sure it is placed within the condition fields section. Then, we will add our relevant fields Total Discount Amount and Total Amount.
Step 4: Generate the document
The completed template should now resemble the following layout.
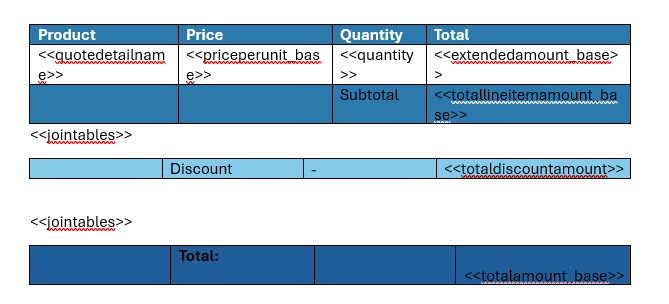
After merging the template with a quote record that contains a discount from our environment, the following result is produced.
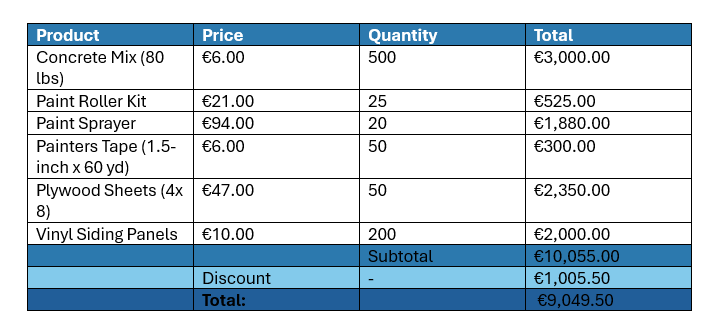
If the quote record instead contained no discount (a discount amount of 0), the condition field containing the discount is removed, ensuring the discount information is only displayed when a valid discount value exists.