Custom pages combine the power and capabilities of canvas apps with the form of full pages, panes, and dialogs inside Dynamics 365 and model driven apps. These pages can be summoned directly from your records and, with the right preparations, can be used to generate documents. The following article demonstrates how to configure DocumentsCorePack within custom pages.
Table of contents
Our example
We would like to create a custom page that can be opened using a custom command from a quote record. This page will allow us to choose a template via dropdown, then generate a document based upon our selection.
Setting up our page
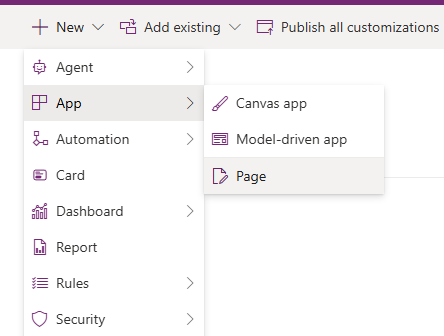
To create this custom page, we’ll need to access Power Apps. In Power Apps, navigate to Solutions. Select a solution and create a new page by going to New -> App -> Page.
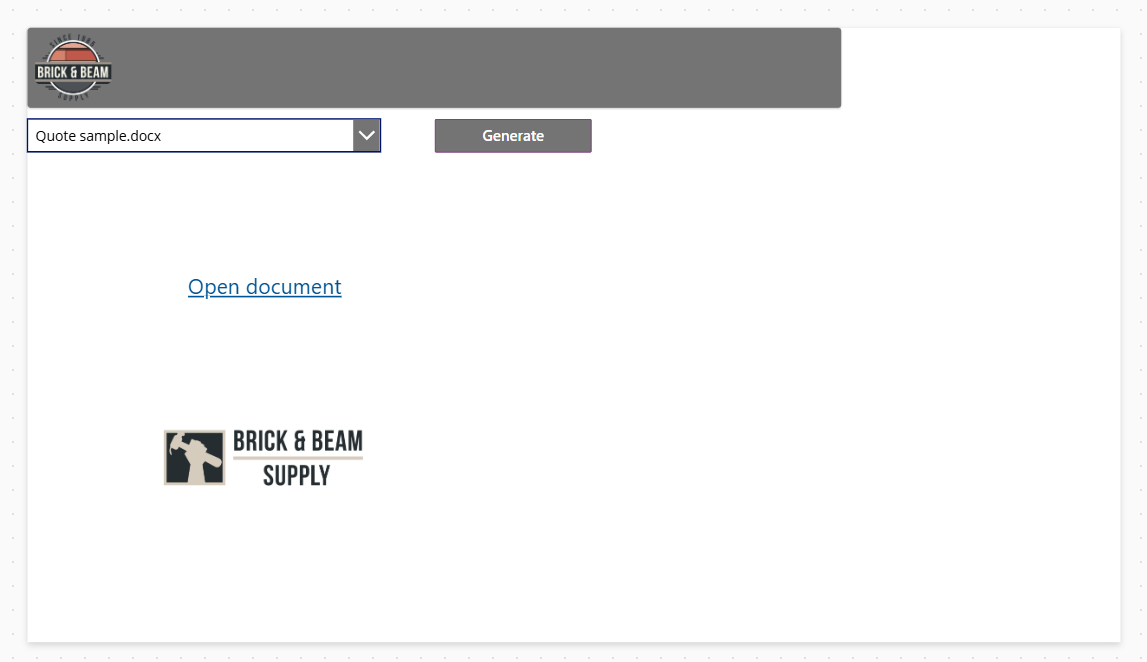
We will design our page as shown below:
To create a custom page that can generate documents, we will add code to the page controls and the app itself. This code requires us to add the Quote table, MSCRM-ADDONS.com DocumentsCorePack Templates table, and DocumentsCorePack Connector to our app under Add Data.

Firstly, we’ll need to add parameters to our app. These ❶ parameters will be used to pass information about our record to our custom page. The parameters should be set under ❷ App in the ❸ OnStart action.

The code can be copied here:
Set(SelectedItem, GUID(Mid(Param("recordId"),2, Len(Param("recordId"))-2)));
Set(SelectedQuote, LookUp(Quotes,Quote=SelectedItem));
Next, we will add code to our dropdown and upper label. Our dropdown will display all templates filtered by our entity to display the relevant templates. This code should be added to the Items action of the control.

The code for that is as follows:
Filter('MSCRM-ADDONS.com DocumentsCorePack Templates', Status=0,'Entity Type'="quote")The upper label will retrieve the selected entity and display some general information. The code for this control should be added to the Text action of the control.

The code for that is as follows:
""&SelectedQuote.'Quote ID'&""& Char(10) & SelectedQuote.Name For our document generation button, this code should be added to the OnSelect action:
UpdateContext({GeneratedDocument2: CustomPage_Quoting_Flow.Run(SelectedQuote.Quote, DROPDOWNNAMEHERE.Selected.'DocumentsCorePack Template')});
Notify(
    "Document Successfully Generated",NotificationType.Success,4000
);
However, this code requires a flow from Power Automate to be configured to trigger the document generation process. We will detail that later.
Adding our custom page to our app
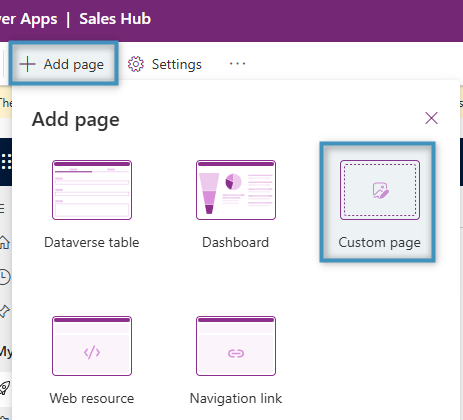
With the general design of our page finished, we’ll need to add our custom page to our app. Select your app under Apps and click Edit. Then, click on Add page -> Custom page to add the page.
Once the page has been added, we will need to ensure the page can be displayed from a quote record. To do this, we will have to edit the command bar of our quote.
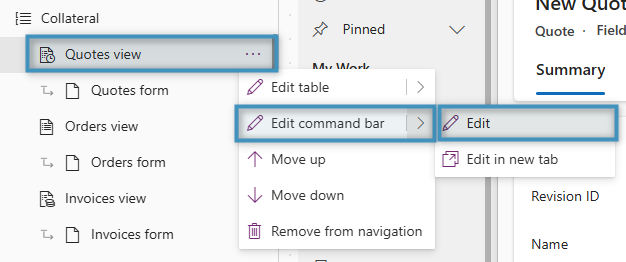
Note: Custom pages can be called from any of the entity’s command bars. For this example, we will be adding it to our quote’s main form command bar.
Add a new command and select JavaScript when prompted. This command will be used to call the custom page from the quote record, but only once the button has been properly configured.
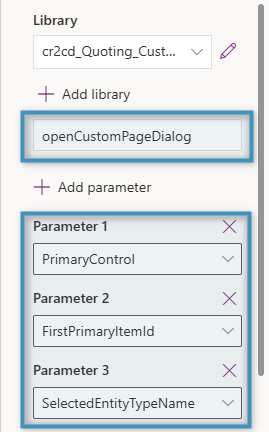
We will be adding a custom JavaScript library to this command. With the command selected, navigate to the right-hand side of the page and click Add Library.
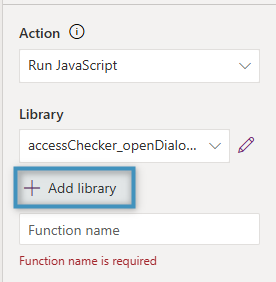
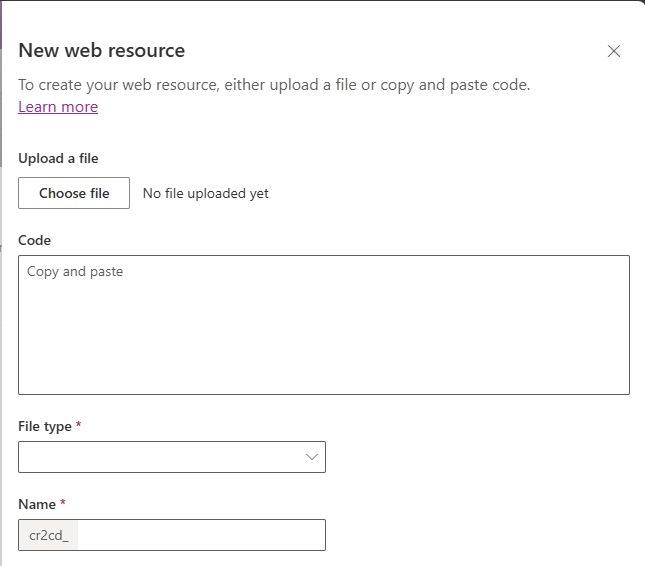
In the subsequent dialog, click on New web resource. Here, you can either upload a JavaScript file containing your code, or you enter the code in the provided window.
For this example, we will be using code based on the side dialog code shown in this article.
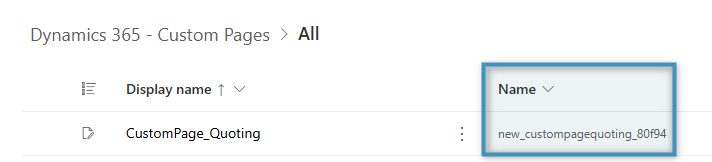
Note: The “name” field will require the logical name of the custom page from the solution.
Afterwards, write in the name of the function from the code and configure three parameters as shown below.
Save and publish your changes once you are finished. The command will now appear on your quote record.
Configuring the flow
With the app configured and the command set, there’s one last thing to configure: a flow. This flow is needed to trigger the DocumentsCorePack Connector for the purposes of generating documents.
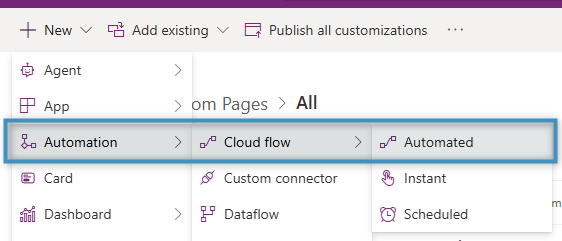
Return to the solution that contains your custom page. Under New, go to Automation -> Cloud flow -> Automated. For your trigger, select When Power Apps calls a flow (V2).
The trigger should contain two inputs: one for the entity ID and one for the template ID.
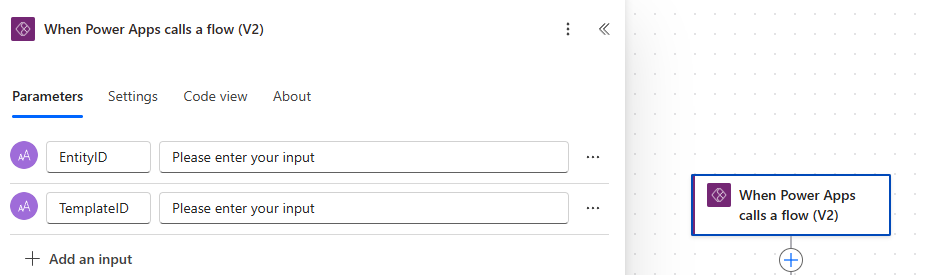
These inputs will be required for the next step, the Create document (sync) action, which will come from the DocumentsCorePack Connector. This action will take the inputs from the previous step to generate the document. Make sure to set the file type to PDF and Save to SharePoint to Yes.

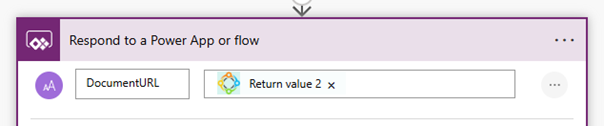
Then, add a Respond to a Power App or flow action. This action can be used to return the document content to the app. In this case, we can return Return value 2 to the app as a URL.
Once finished, save your flow.
The result
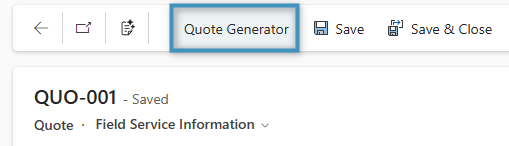
Our app has now been finished. We can check to see how our custom page looks by navigating to a record within the app the page was created for. In our example, we can find our custom command at the top of our quote record.
Clicking the custom command will open the custom page as a side dialog. When we click the “Generate” button, a link to our document will be created.
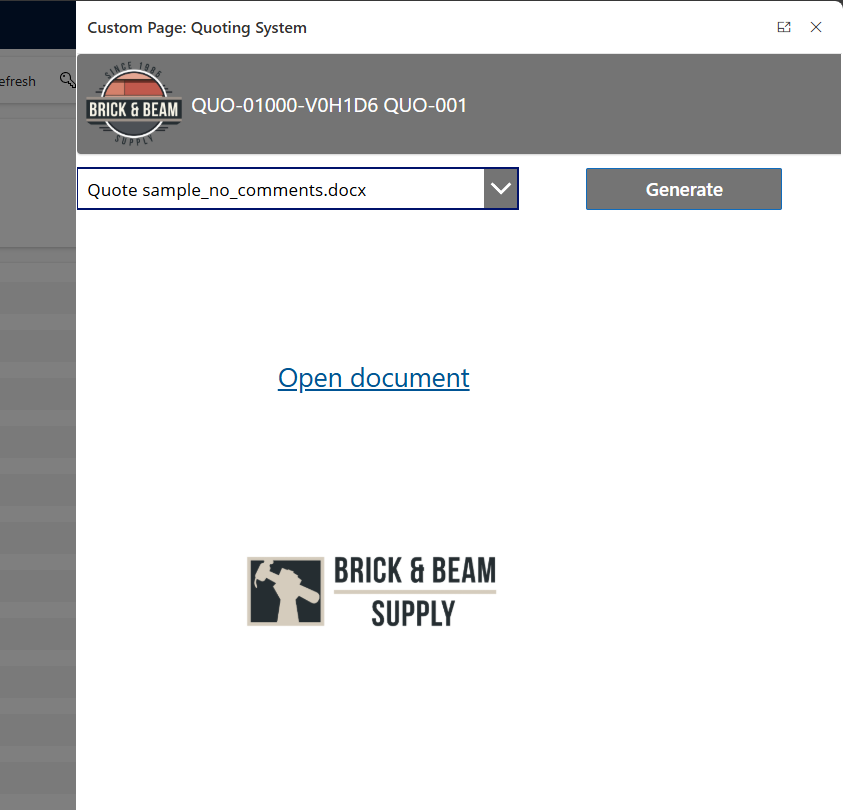
Clicking on the hyperlink will open the generated document in a new window.

That’s it! We appreciate your feedback! Please share your thoughts by sending an email to support@mscrm-addons.com.