If you have multiple Save-Locations configured for an entity, you need a way to specify which one should be used by DocumentsCorePack (DCP) to save documents. This can be done with a little customization of your entity in Dynamics 365.
Follow the Step-by-Step description.
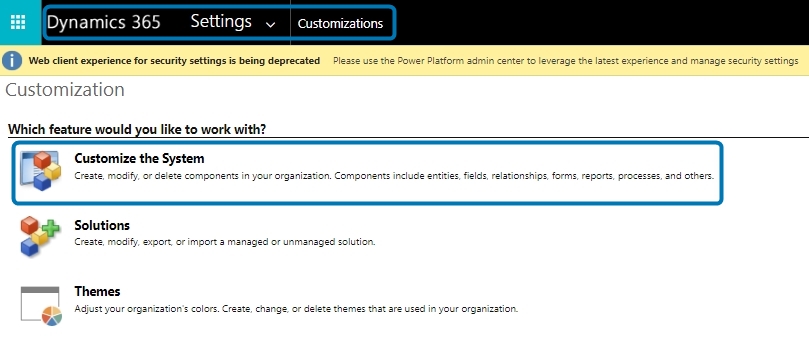
Step 1: In your Dynamics 365 navigate to Customization via the Advanced Settings and then select Customize the System.
Step 2: This window opens. Open Entities > the Entity you want to customize (in this example it is Account) > Fields > press New.

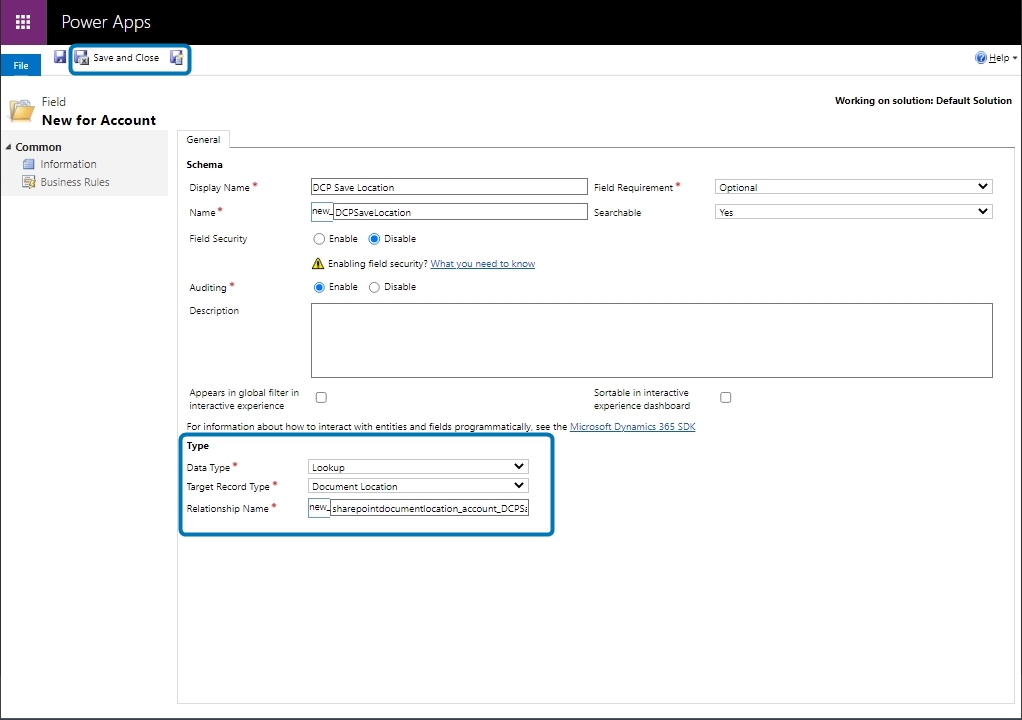
Step 3: When this window opens, add a new Field to your Entity with the Data Type Lookup and the Target Record Type Document Location. Save the new field.
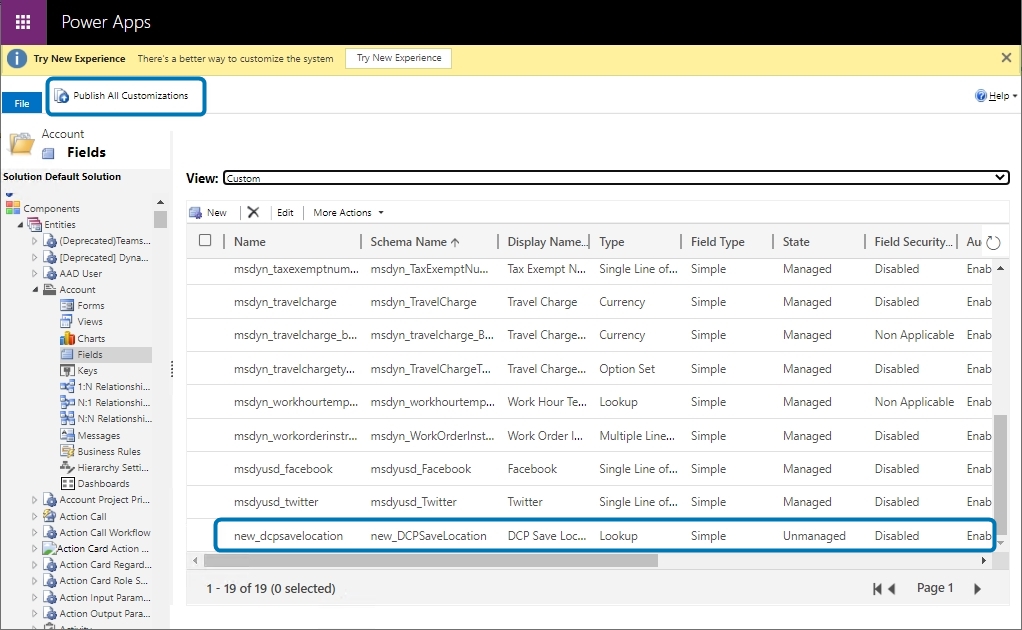
Step 4: In the Account – Field overview you can see your newly created field. The next step is Publish All Customizations.
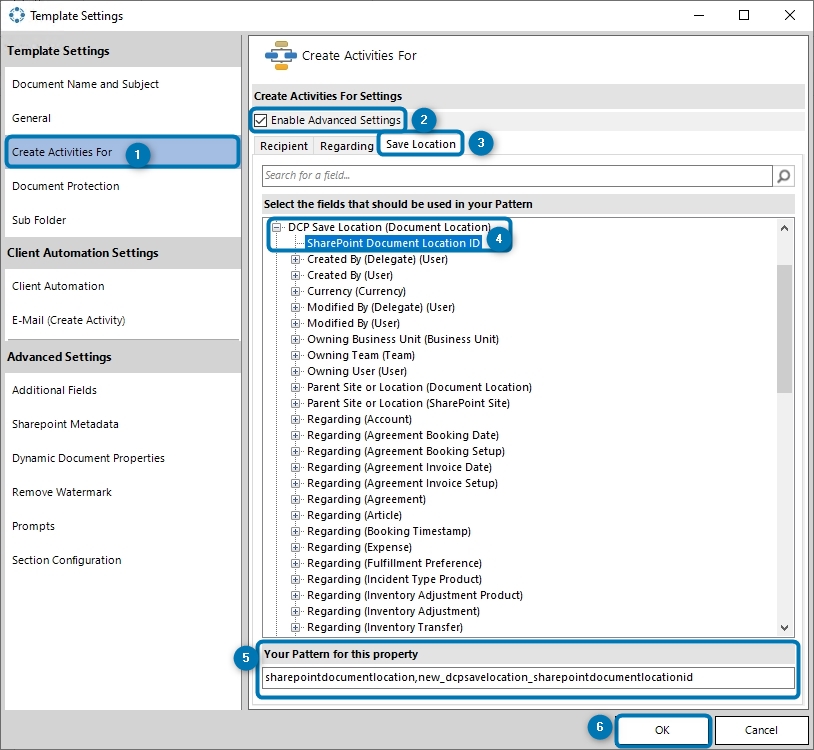
Step 5: Now open your DCP TemplateDesigner and open the Advanced Template Settings.
Select the section ❶ Create Activities For and check on the left side ❷ Enable Advanced Settings. Navigate to the tab ❸ Save Location and look for your created field (in this example we named it ❹ DCP Save Location). Make a double click and ❺ Your Pattern for this property is filled out automatically. Confirm with ❻ OK.
Your generated document will now be saved into the specified document location.
That’s it! We appreciate your feedback! Please share your thoughts by sending an email to support@mscrm-addons.com.