Sometimes documents made of multiple parts need to be created. This step-by-step description outlines how to create custom One-Click-Actions (OCAs) using Multipart to create such documents. In this example, we want to create a proposal that consists of several DocParts: a cover letter, a company profile, the proposal, terms, conditions (in different languages), and the appendix.
Usually, you create a document from a single template. But with the Multipart-function, you have the possibility to create a single document from several different elements, which can be dynamic (a template) or static (a document stored as a note or on SharePoint). For more information, access corresponding documentation here.
To start the configuration, open your Dynamics 365 Advanced Settings, and then navigate to the Settings drop-down menu. From here, navigate to the MSCRM-ADDONS-section, and select DocumentsCorePack (DCP), as you can see in the figure below.


Please Note: The main configuration window will provide you with a few tabs that allow you to configure your Dynamics 365 DocumentsCorePack in general.
❶ Press the One-Click-Actions tab
❷ Navigate to the entity that you would like to create, in this example below, we will be using Quote
❸ Select Edit to open the AI Builder Dataset File One-Click-Actions
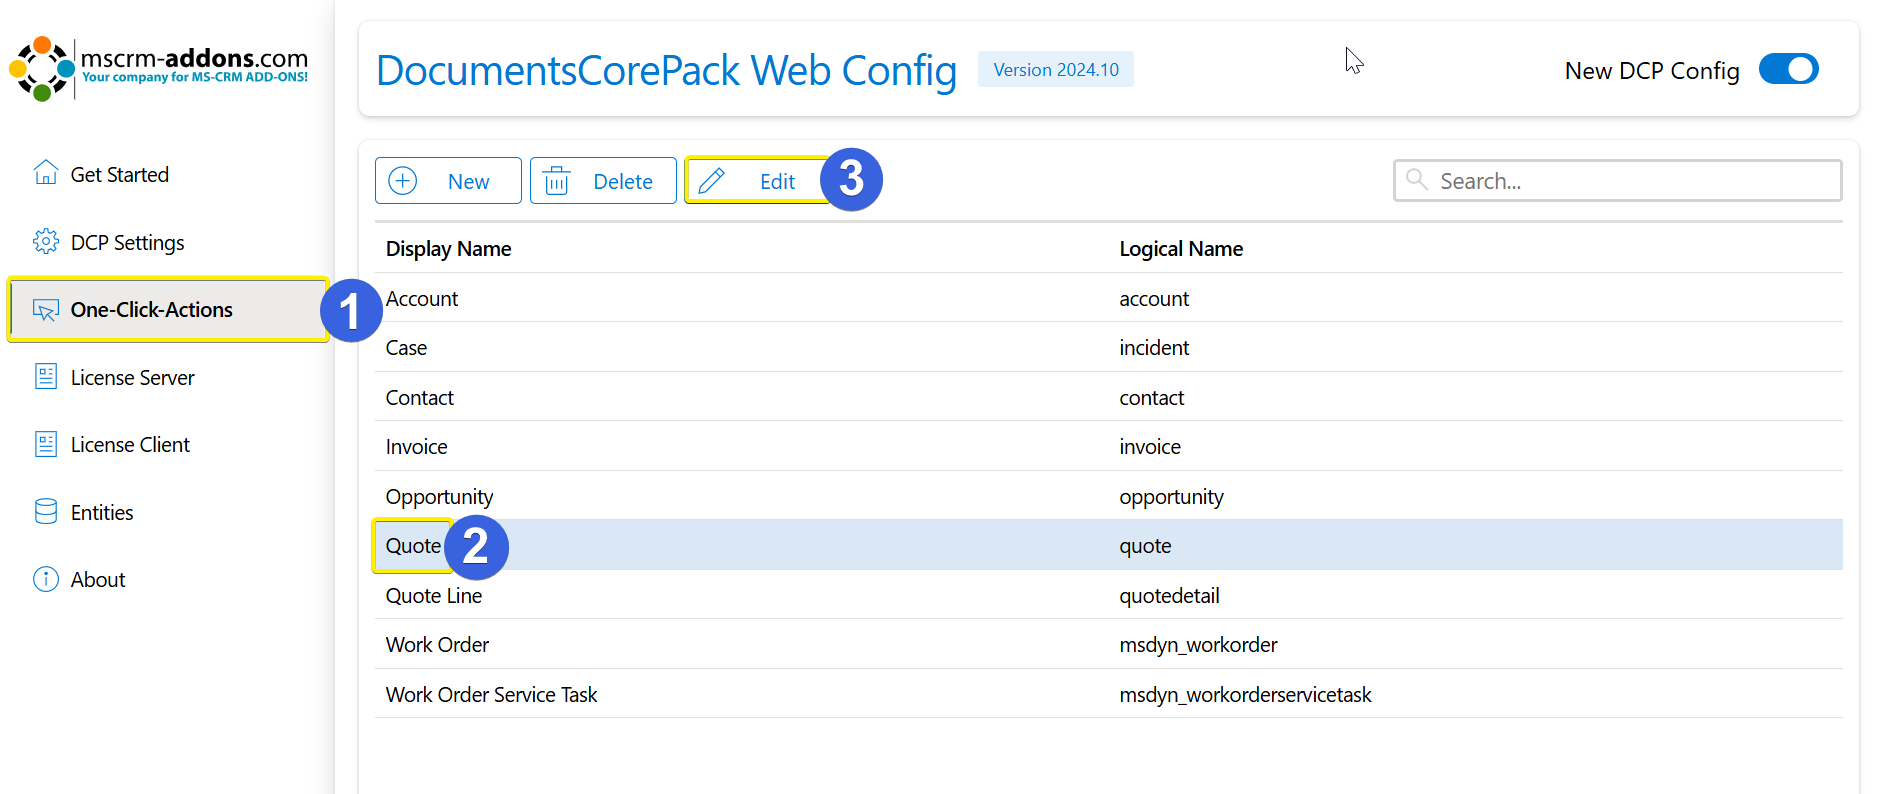
Figure 2: One-Click-Actions – available entities
❶After pressing Edit, select the One Click Action tab under Single -> New (+)
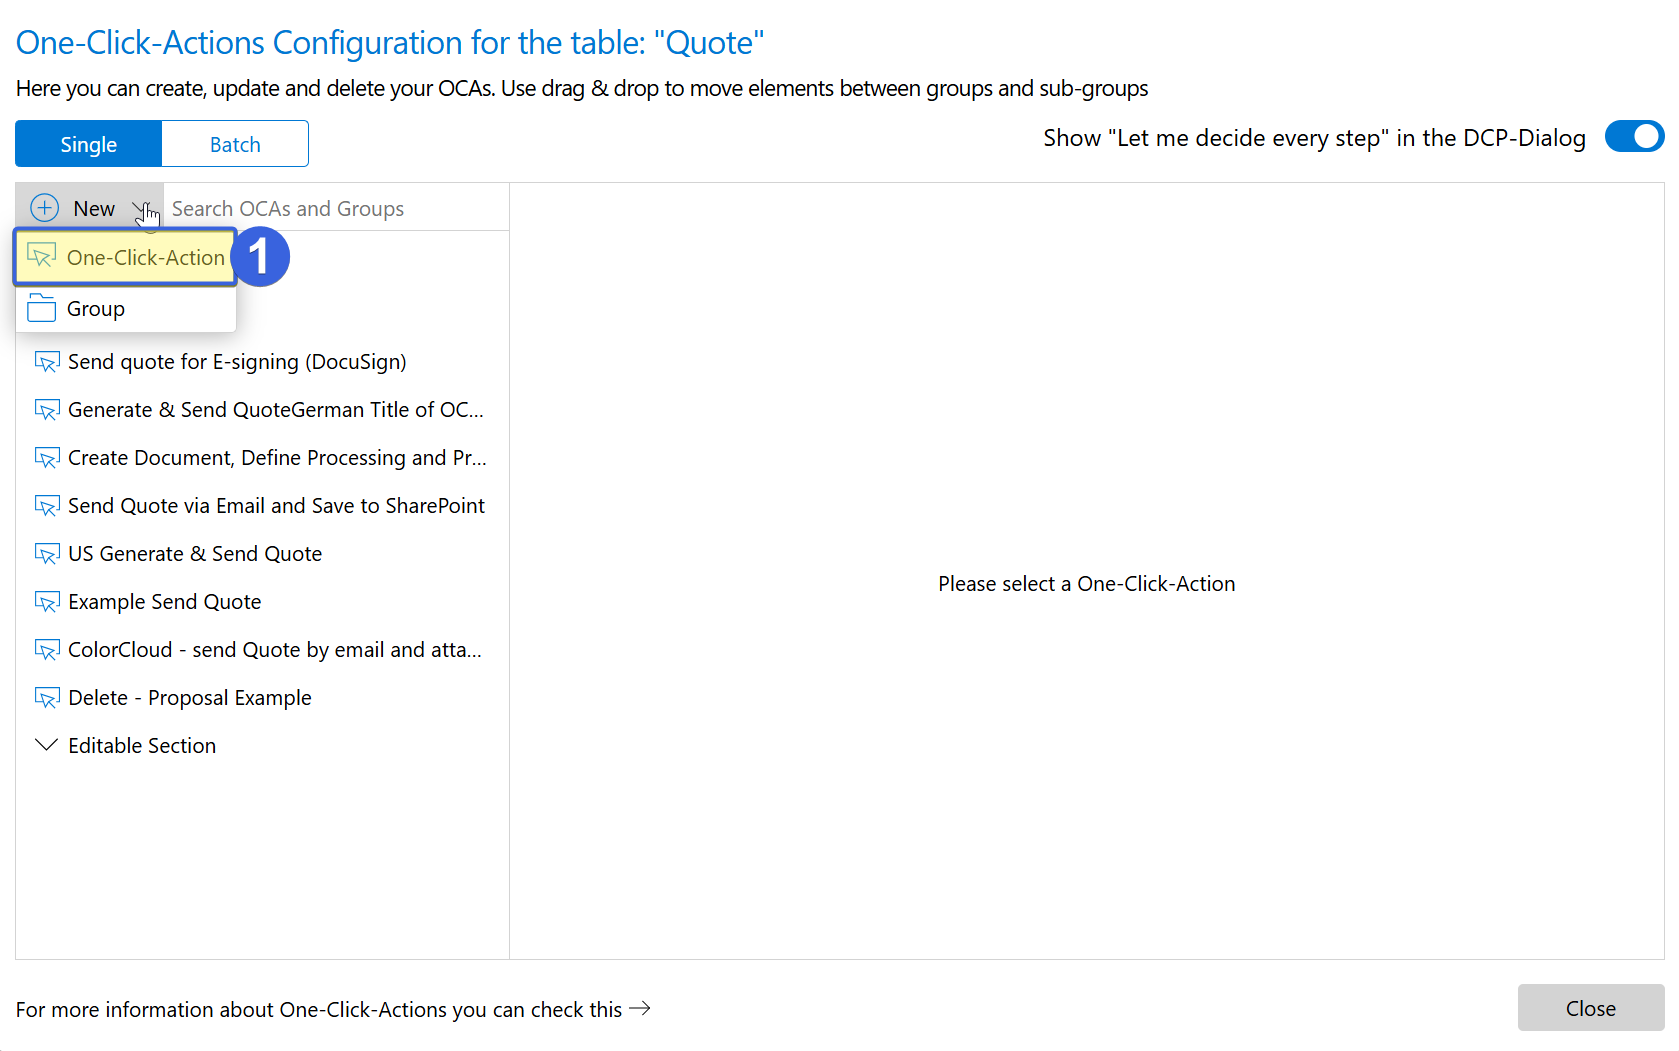
Figure 3: AI Builder Dataset File One-Click-Actions
Hit the New Single button and this dialog will open:
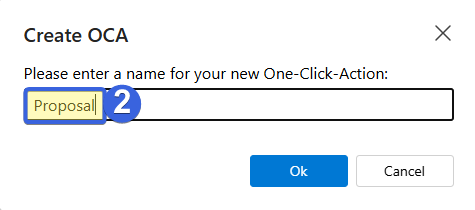
Figure 4: Dialog for naming your One-Click-Actions
❷ Enter the name of your action and press OK. You will be provided with the configuration window for Single Record Actions. Follow the next steps to configure your action in detail.
Step 1: General Settings
You have the option to:
❶ Change the Name of your OCA.
❷ Add a Description.
❸ Set this action as the default configuration.
❹ Continue to the next step.
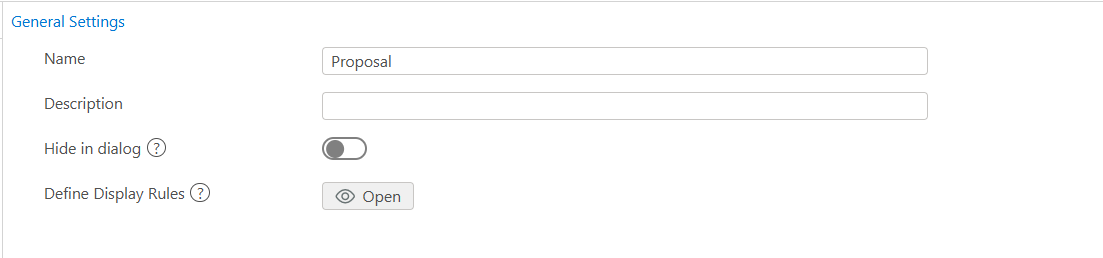
Figure 4: General Settings
Step 2: Template Settings
After you continue to the next step, the Template Settings will be displayed. Here you can configure your Multipart-document.
❶ Select the Use Multipart option in the drop-down list
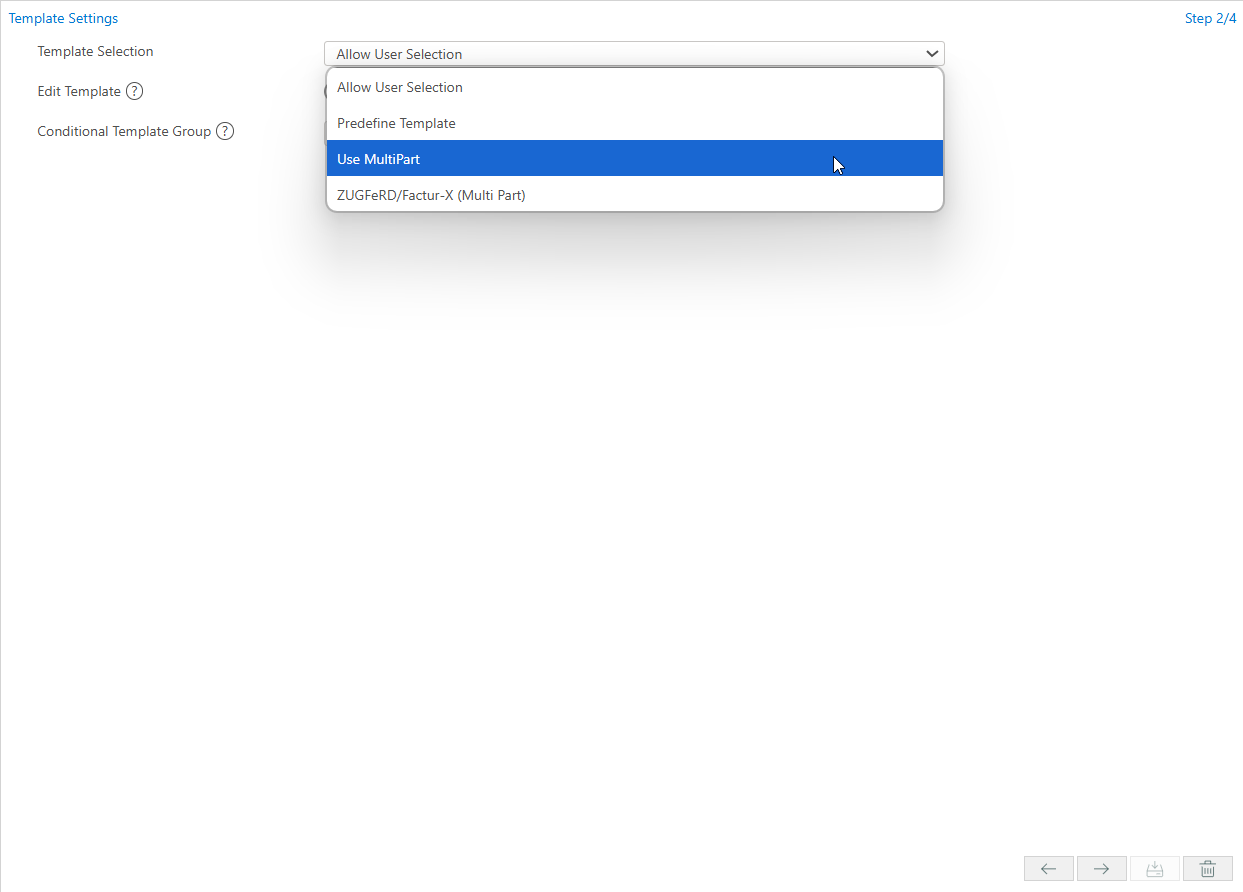
Figure 5: Template Settings Overview
❷Add your DocParts by pressing the + button.
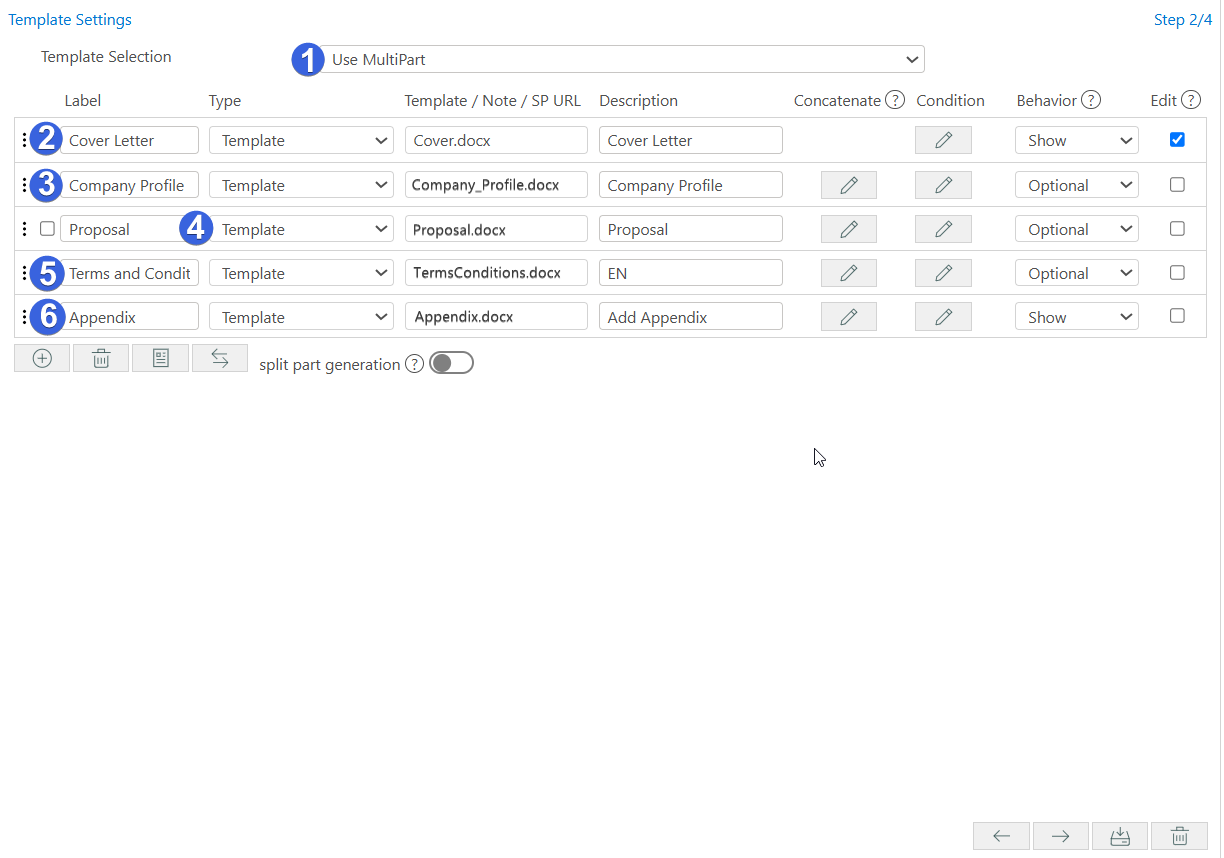
Next, define your DocParts. Select Template for all under Type.
❷ Cover letter
When you select Template under Type, the Look-Up Record window will open. Here, you can choose your template, which in the example is Cover.docx. It is very helpful to enter a description for your DocPart to identify it easily in the DCP Dialog. We want this DocPart to be shown, so please select the checkbox Show.
❸ Company profile
Next, click on the + button to add the next DocPart that you want to define. This DocPart has to be defined as the cover letter. The only difference is that the company profile in our example is optional.
❹ Proposal
❺ Terms and Conditions
This DocPart has been set to optional in the example.
❻ Appendix
Define the appendix like the other DocParts before, and set it to optional.
Note: Labels can be formatted using basic HTML tags. For more information, see here.
Step 3: Processing Settings
In this step, you can define the actions that should be done. In the example below, we have made the following selections for sending our document.
❶ Save as a pdf.
❷ Send as an e-mail attachment
❸ Send to potential customers.
❹ Save it to SharePoint.

Figure 7: Processing Settings
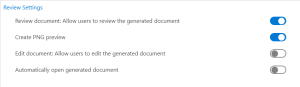
Step 4: Review Settings
You have the possibility to review your document, create a PNG preview, and/or automatically open your document, as you can see in the figure below.
After configuring all steps, you have to save your OCA.

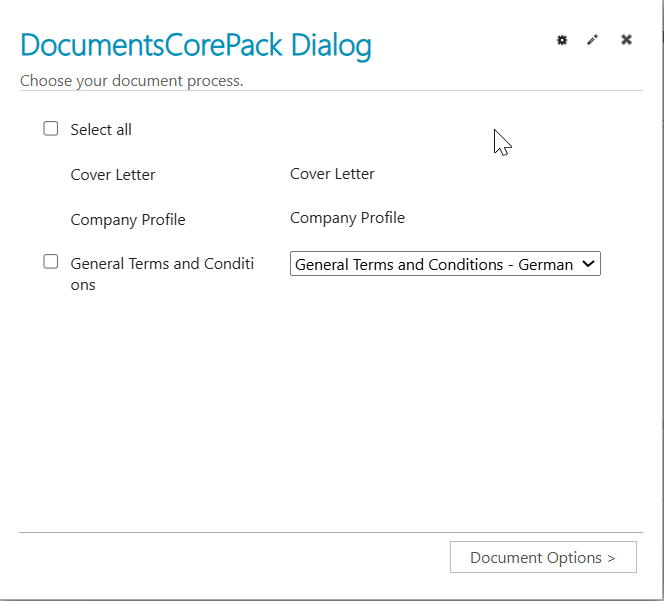
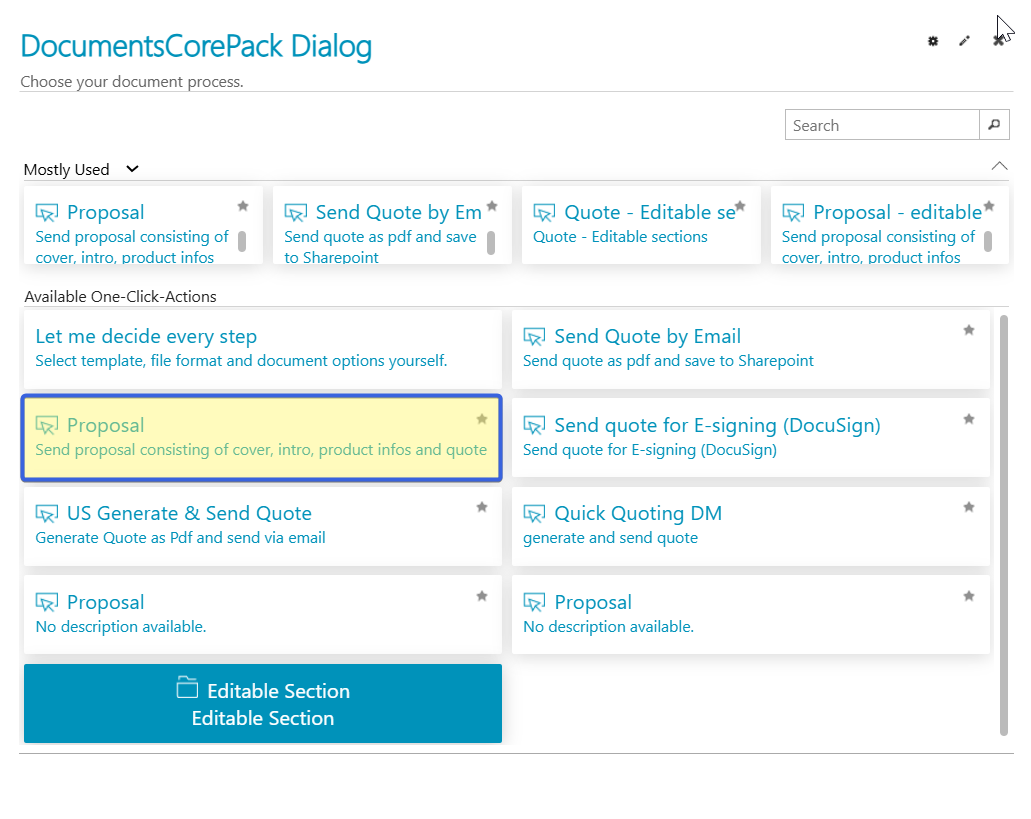
Now, when a Dynamics 365 user clicks on the Create Document button, he will automatically be provided with the new OCAs. In the example, you can see the available OCA named Proposal.
Select the Next button to see the result of your proposal, which contains the elements you defined before. As configured above, some DocParts are optional, where the user can decide if he wants to add these to his document by checking the checkboxes. The combined DocParts, like you can see below Terms and Conditions, allow users to select between the different DocParts by opening the drop-down menu.