This article will walk you through how to enable Dynamics 365 Plugin Tracing.
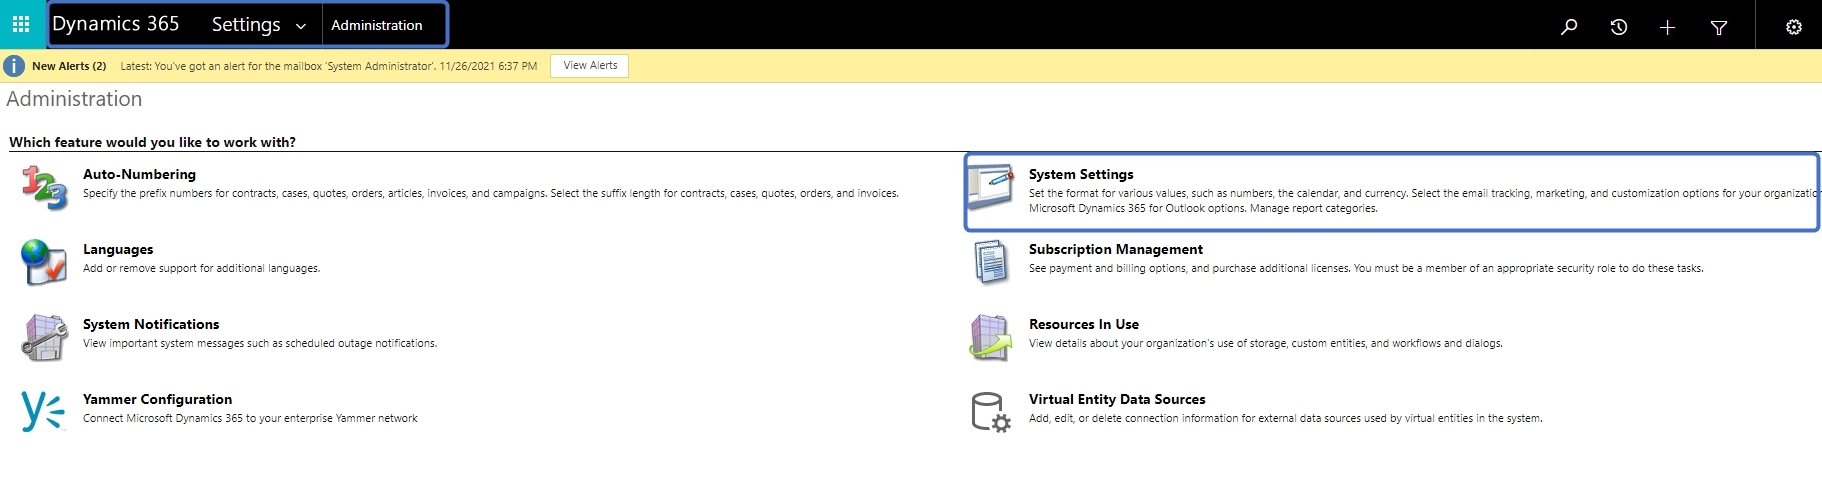
Step 1: Open “Dynamics 365”, navigate to “Settings” > “Administration” and select “System Settings” as you can see in Figure
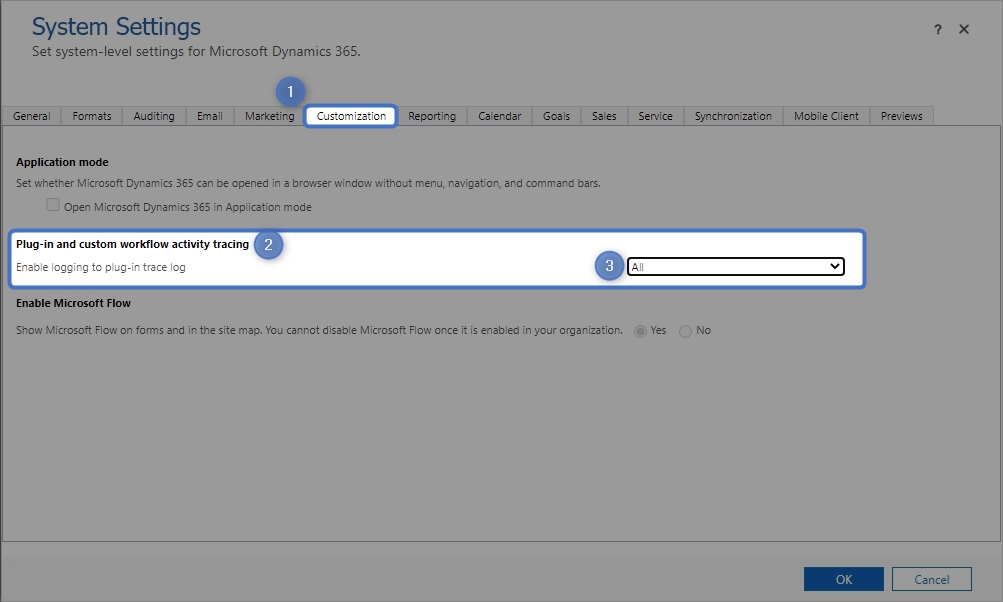
Step 2: After clicking System Settings, navigate to the ❶ “Customization”-tab and enable the ❷ “Plugin and custom workflow activity tracing” option by setting it to trace ❸“All”.
Confirm with [OK].
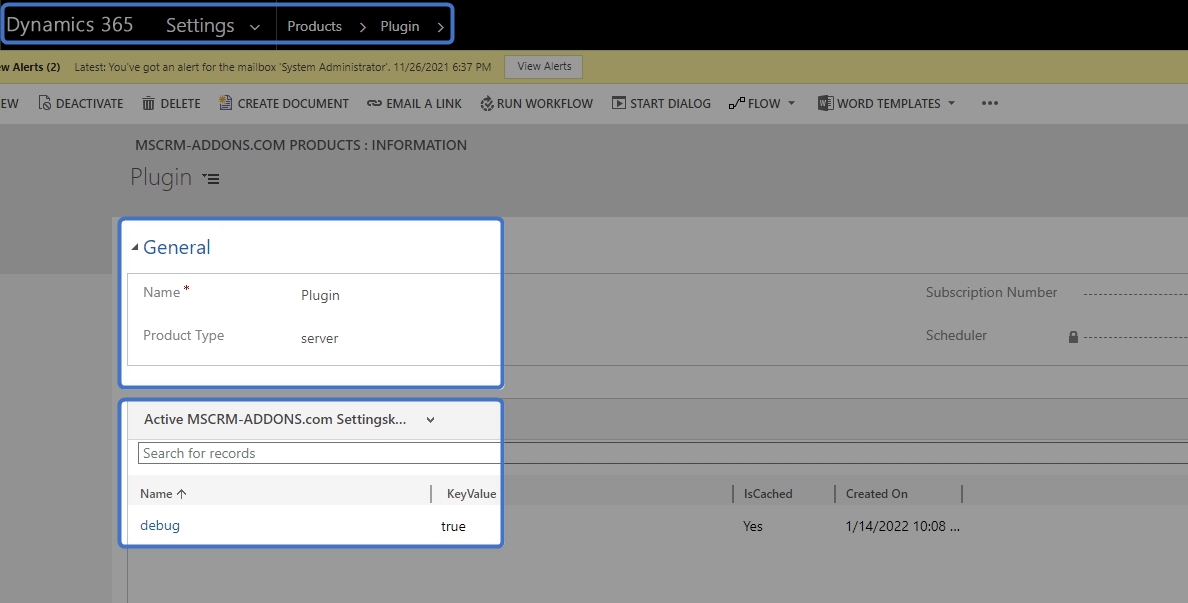
Step 3: Next, go to “Dynamics 365” > “Settings” > “Products” and check if a record named “Plugin” already exists. If not create a new one by hitting the [NEW]-button.
- Name: Plugin
- Product Type: server
In the subgrid’s body, ensure that a SettingsKey with the following information exists:
- Name: debug
- KeyValue: true
The result will look like in the figure below:
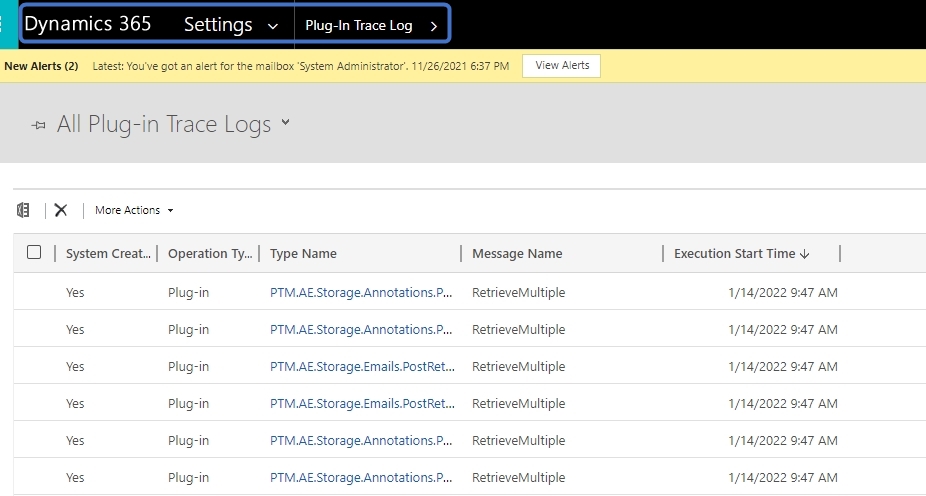
Step 4: Reproduce the problem, navigate to “Dynamics 365“ > “Settings” > “Plugin Trace Log” and search for the logfiles that are created by your action.