This article describes how to export and import the PowerSearch Configuration records.
It is useful if you
a) want to create a backup or
b) migrate your configuration from one organization to another one.
Please note: For the data management the “Configuration Migration tool” of Microsoft is used.
When you open the “Configuration Migration Tool” you have 3 options:
❶ “Create schema“,
❷ “Export data” and
❸ “Import data”
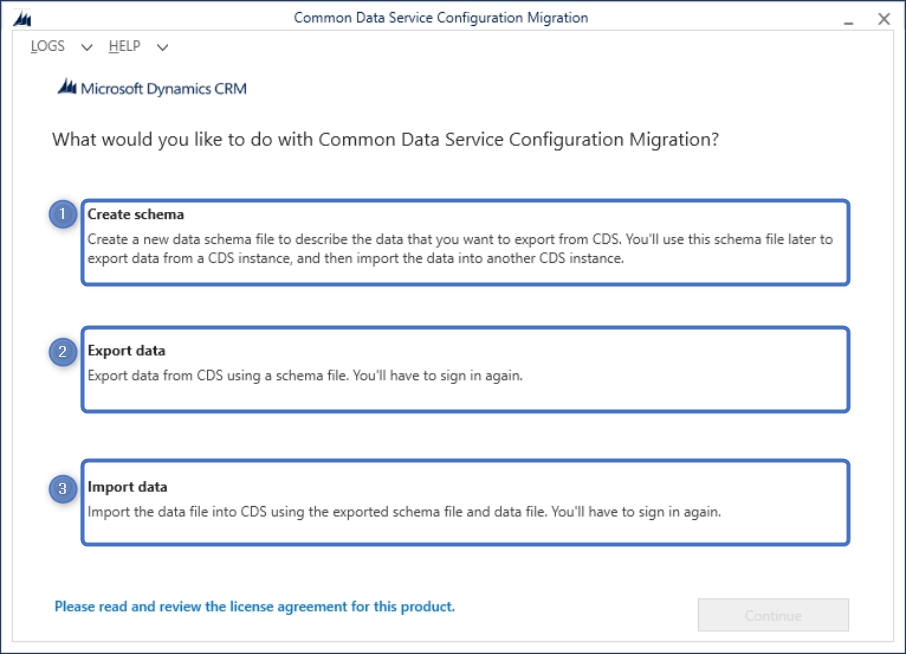
Figure 1:Data Service Configuration Migration
1. Create schema
We have prepared schema files for common scenarios so that you can download them and do not have to create your own schema.
-
PS_ConfigMigrationSchema_All
It can be used to export all existing PowerSearch configurations (including Search and Result fields). Download xml.
-
PS_ConfigMigrationSchema_Account
It can be used to ONLY export PowerSearch configurations for the entity “Account” (including Search and Result fields). Search configurations of other entities will not be included. Download xml.
If the search configuration of one other specific entity only (not “Account”) should be migrated, the schema can be modified manually.
Therefore open the schema file in an XML editor and replace all 3 “condition” of “Account” with your wished entity name (e.g. “Opportunity”):
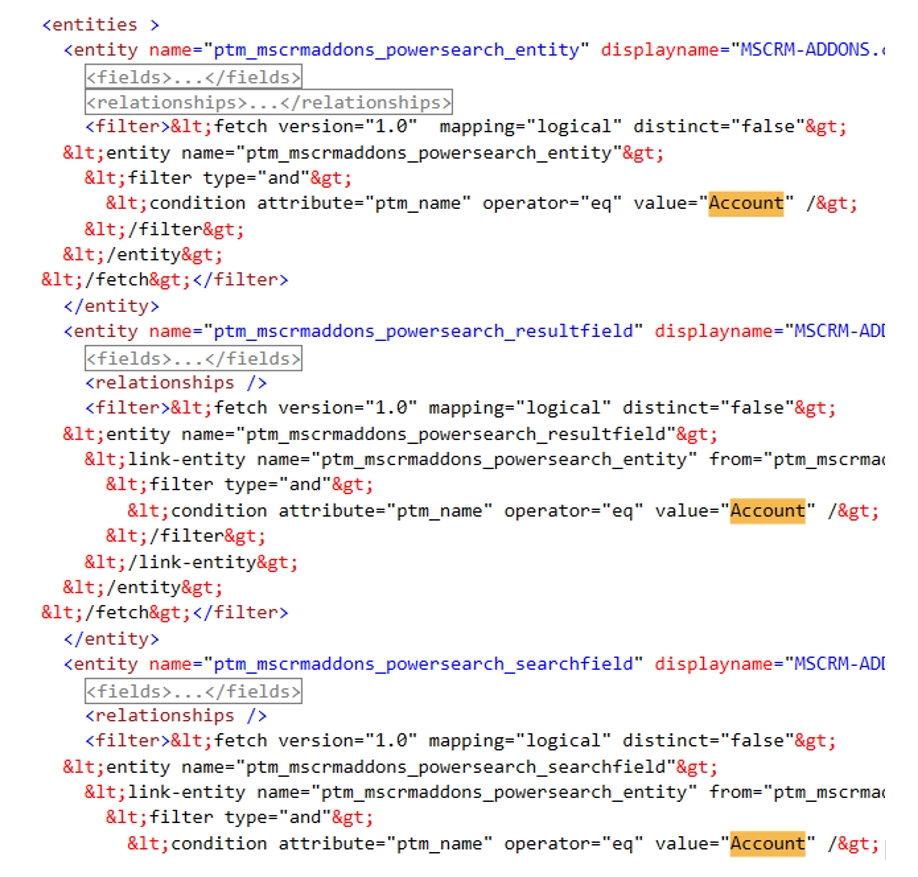
Figure 2: Example what to modify manually for another entity
2. Export data
Use this step to export existing PowerSearch configurations. First you have to connect to your source organization:

Figure 3: Common Data Service Configuration Migration – Login
After a successful connection, select the previously downloaded schema file and define a file directory and a name for the export data file:

Figure 3:Common Data Service Configuration Migration – Connection
Click on the [Export Data]-button and you will find the .zip file in the defined directory:
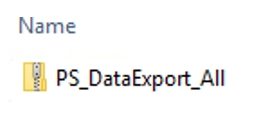
Figure 4: Generated .zip file
3. Import data
Use this step to import the before exported data into the target organization.
Create Backup
Before importing new data, it is recommended to create a backup of the current configurations on the target organization first.
This can be done as described in the above step “Export data” (but connect to your target organization).
Remove related “PowerSearch Search Fields” and “PowerSearch Result Fields”
In the target organization: Before you start with the Import-process, it is recommended to remove related “PowerSearch Search Fields” and “PowerSearch Result Fields”. This must ONLY be done for search configurations which will be updated with the data-zip-file.
Why is this necessary?
The data-import does only create new records or update existing ones if the record IDs do match.
But imagine that search or result fields have been removed in the source organization, or fields have been replaced with new ones. These fields are not part of the import-zip-file and will stay in the target organization.
So, what could happen if existing “PowerSearch Search Fields” and “PowerSearch Result Fields” are not removed before importing:
-
- Already removed fields will still exist
- It can lead to duplicated records if the record IDs do not match
How to remove related “Search” and “Result” fields:
In this example the existing search configuration for “Account” should be update with data-import.
In the PowerSearch config hit on “Open Search Configuration”:
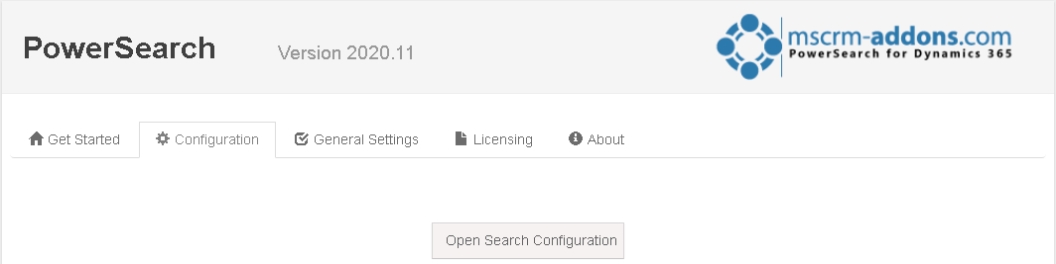
Figure 5: Open search configuration
Then open the PowerSearch configuration for the entity “Account”:
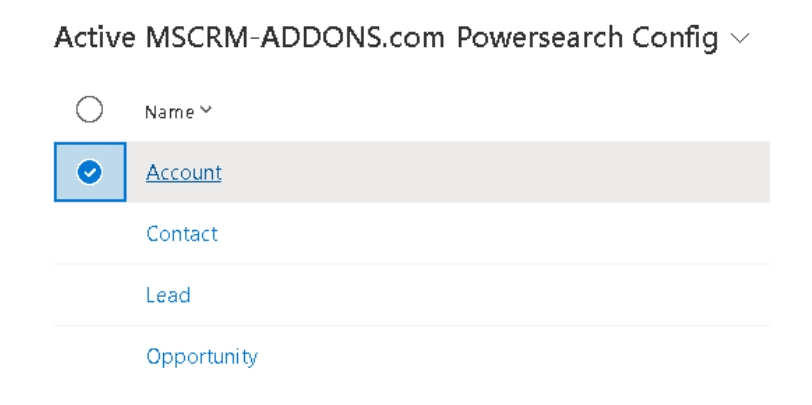
Figure 6: PowerSearch configuration for account
Go to related “MSCRM-ADDONS.com Powersearch Search Fields” and delete them:
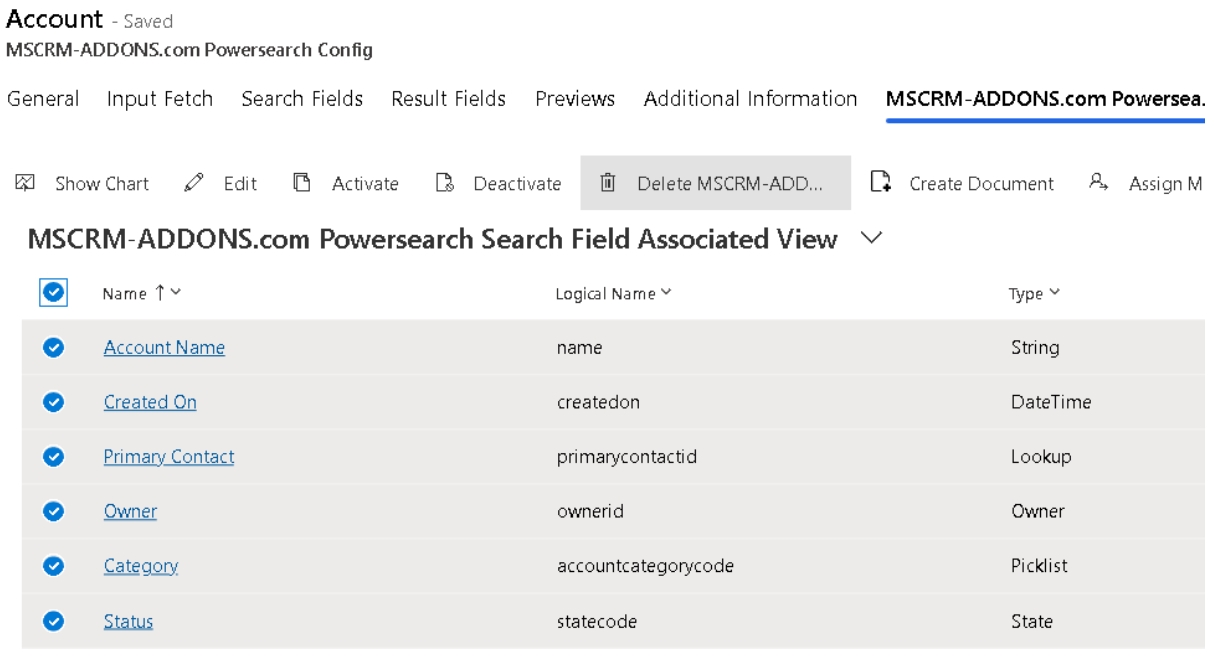
Figure 7: MSCRM-ADDONS.com Powersearch Search Fields
Then repeat this step for all related “MSCRM-ADDONS.com Powersearch Result Fields”.
Start with import:
First you have to connect to your target organization:
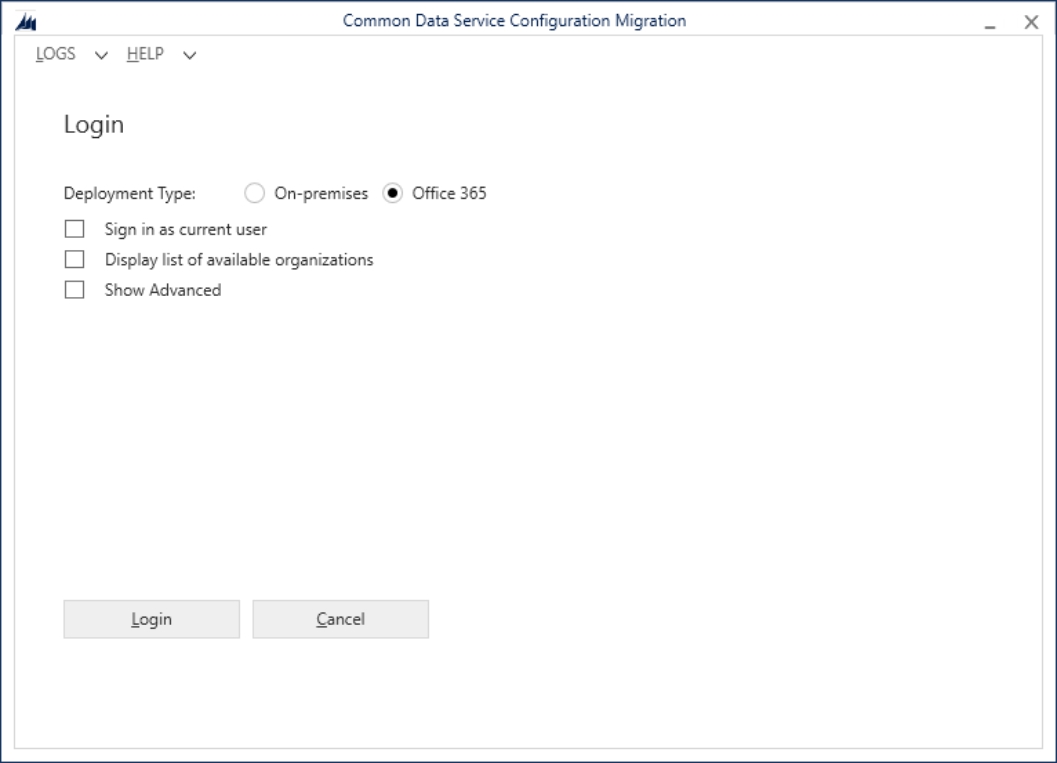
Figure 8: Connect to your target organization
After successfully connected, select the before downloaded schema file and the exported data file from the source organization:
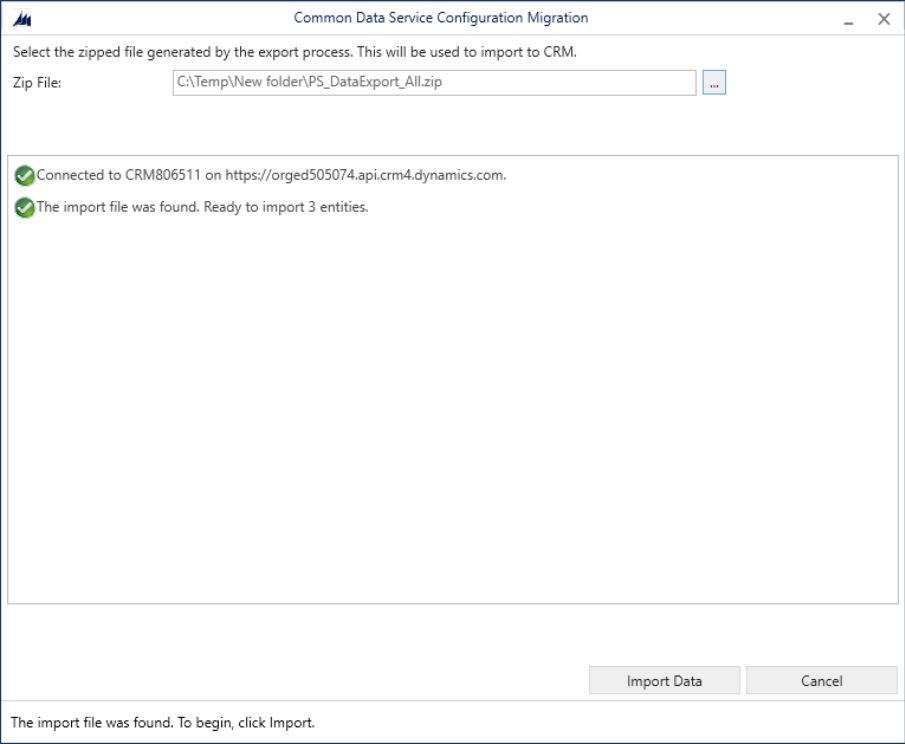
Figure 9: Select .zip file
Hit the [Import Data]-button. After the import has been finished, all new and updated PowerSearch configurations should be available.
Share new PowerSearch configurations
Newly created configuration needs to be shared with “Teams” or “User”. Otherwise, only system admins will be able to use them. Here is further information.
That’s it! We appreciate your feedback! Please share your thoughts by sending an email to support@mscrm-addons.com.