Microsoft Power Pages enables customers to create professional websites at a fast and low cost. Power Pages is often used to create customer service portals, partner management portals, or event management sites.
DocumentsCorePack functionalities can be integrated within Microsoft Power Pages to enable users to generate documents from their own webpages and surface them back for users to download.
In this article, we will walk through an example that demonstrates how input into a “donation page” can be equipped with document generation capabilities.
Prerequisites
To complete the following example, you will need:
- A Power Pages environment
- A Power Automate environment
- An activated DocumentsCorePack connector
It is also recommended to have a good understanding of generating documents within Power Automate.
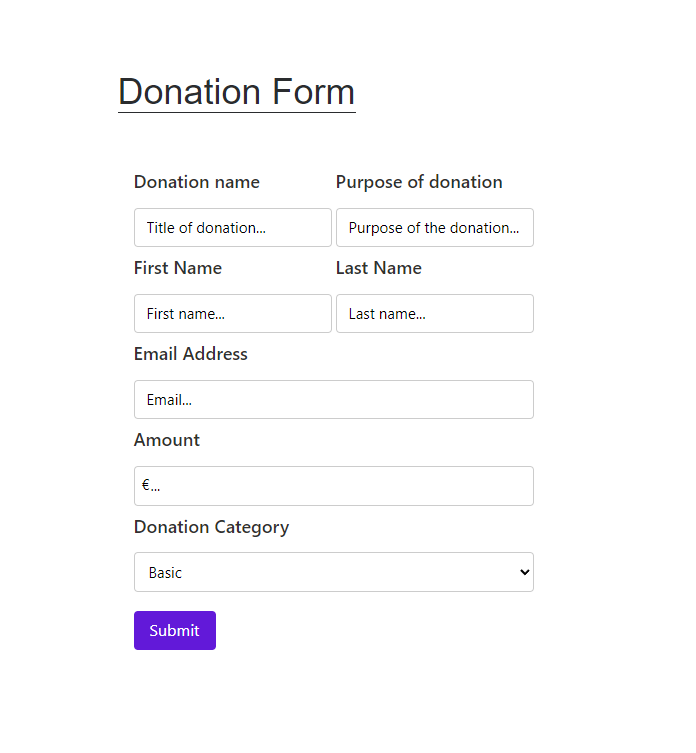
Our goal: A simple donation form
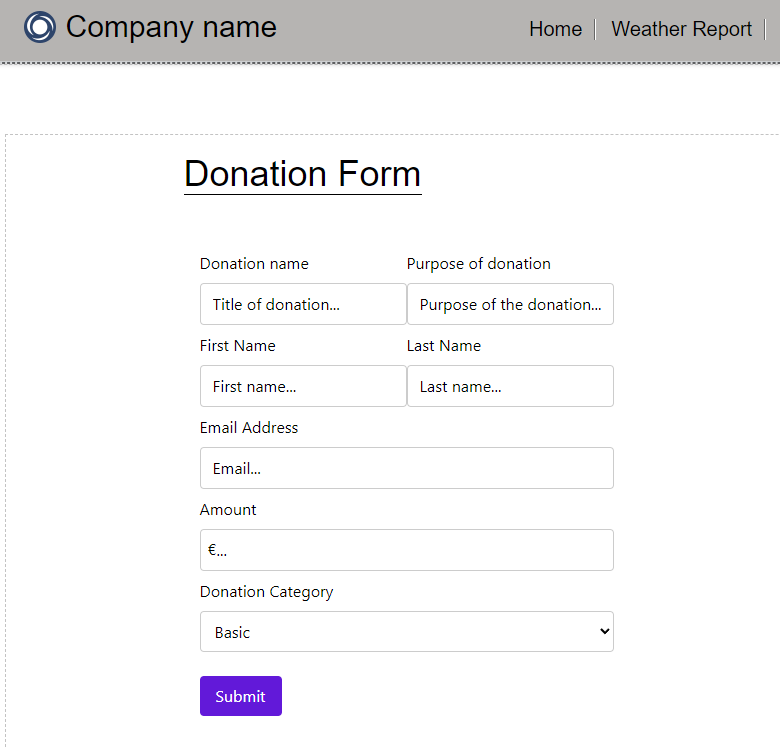
Our goal is to create a donation form where users can enter their name, email, and donation information. Upon submitting the information, a document will be generated and presented to the user. The form will look similar to the following:
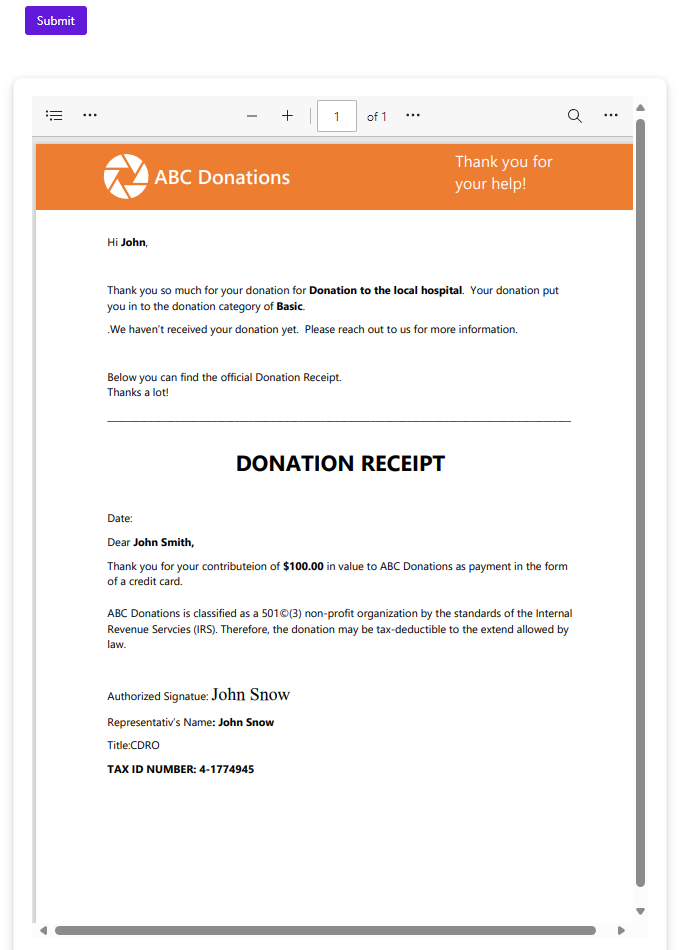
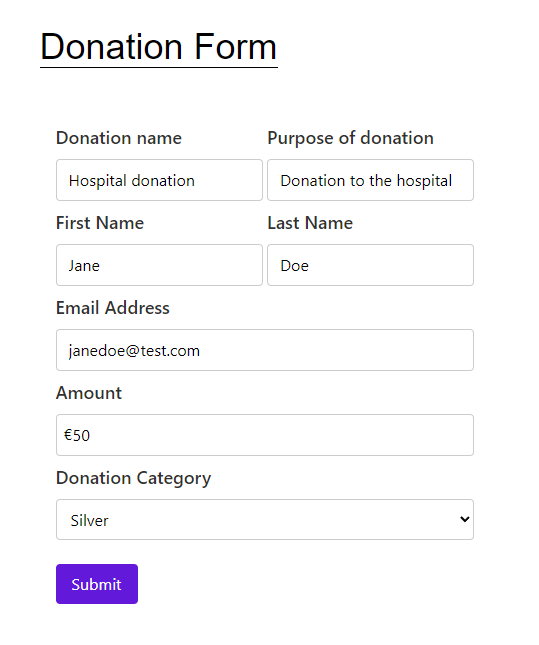
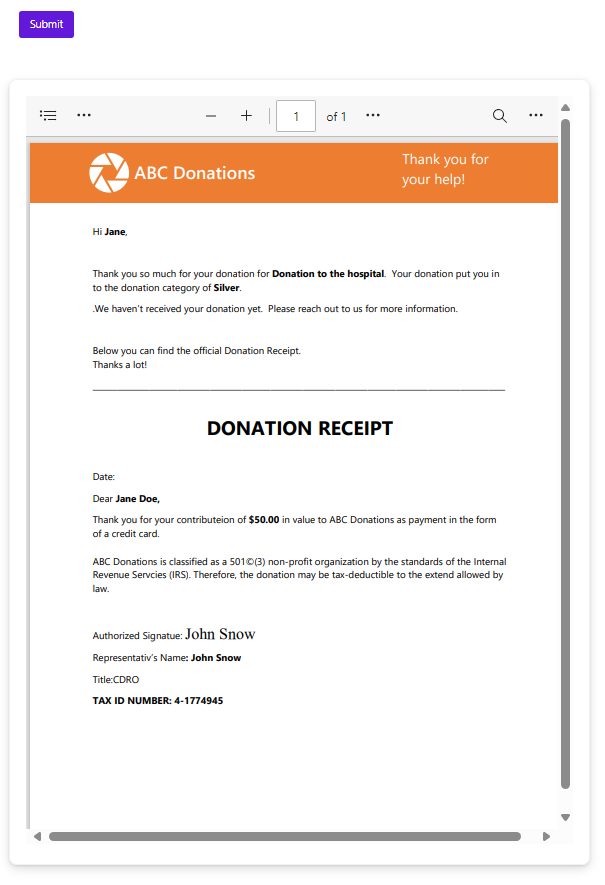
The resulting generated PDF will be displayed underneath the form:
Step-by-Step Video & Tutorial
Step 1: Creating the flow
Before we even create the form, we will first create the cloud flow for our website.
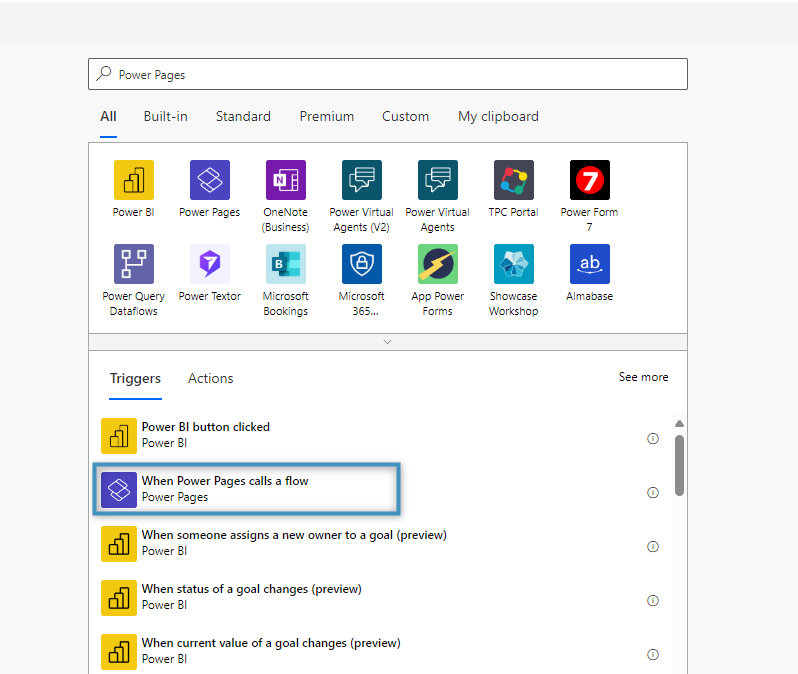
Sign into Power Pages. Choose a website to edit and click on the ❶ Set up button on the left side. Under Integrations, select ❷ Cloud flows and click on ❸ Create new flow.

Search for Power Pages, then select When Power Pages calls a flow. This will create a flow with the selcted trigger.
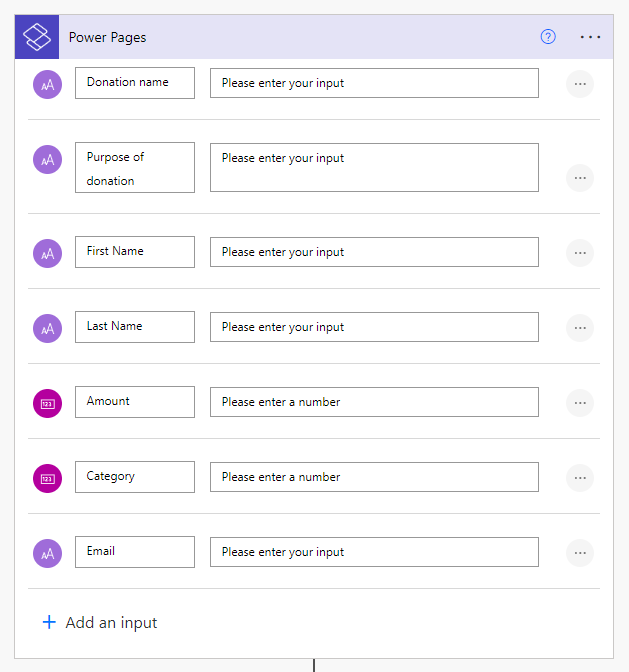
The inputs to be added to this step should correspond to the inputs we want to include in our form. For example, if we want to include a “First Name” textbox, then we should also include a “First Name” input to this step.
Please Note:
Note 1: The input type should match the value entered by the user. For example, if a textbox accepts only a number value, then the input type in the flow step should be “number.”
Note 2: Dropdown and/or picklist fields, like the “Category” input shown above, should be added as a number input. Since the items of these fields are stored internally as a number, they must also be passed in as a number.
In our example, we want to generate documents based on the entered information, but prevent duplicate contacts from being created if the email is the same. This way, if a donation is submitted, but the email already exists within the system, we will prevent a new contact record from being created. In the case the email does not exist, then a new contact record is generated alongside the donation record.
To do this, we will check if the contact exists via the submitted email. If it does exist, then we get the contact’s ID and the number of rows.
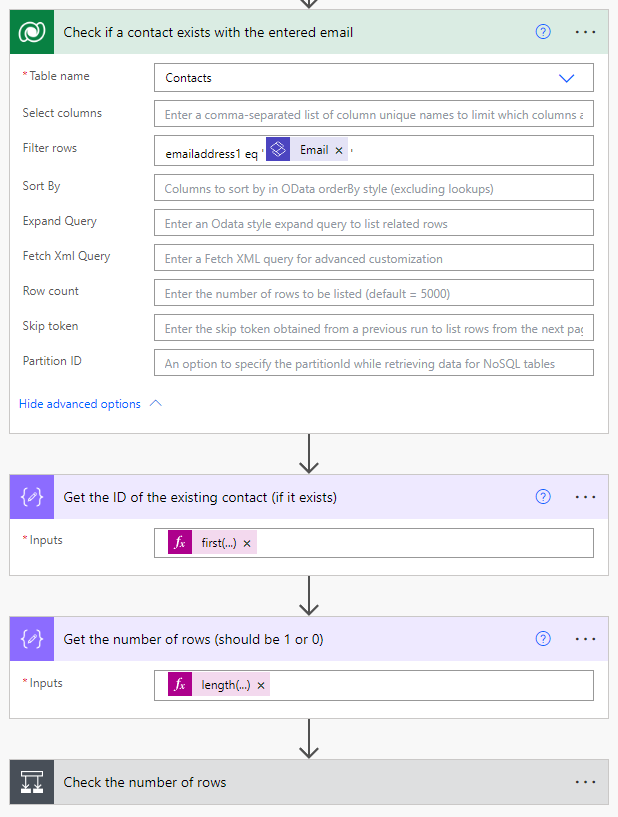
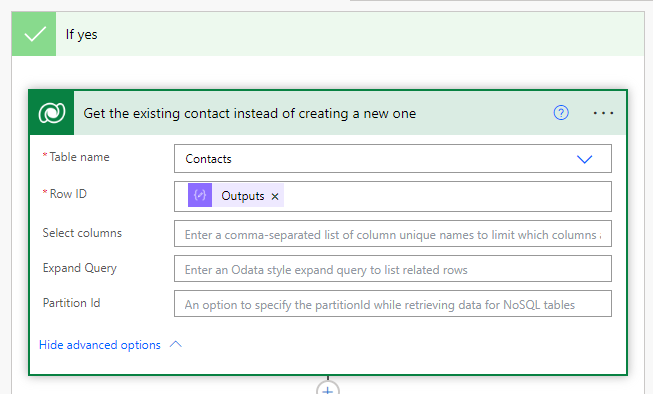
If there indeed exists a contact with the matching email, then we retrieve the contact’s information based on the retrieved ID and proceed.
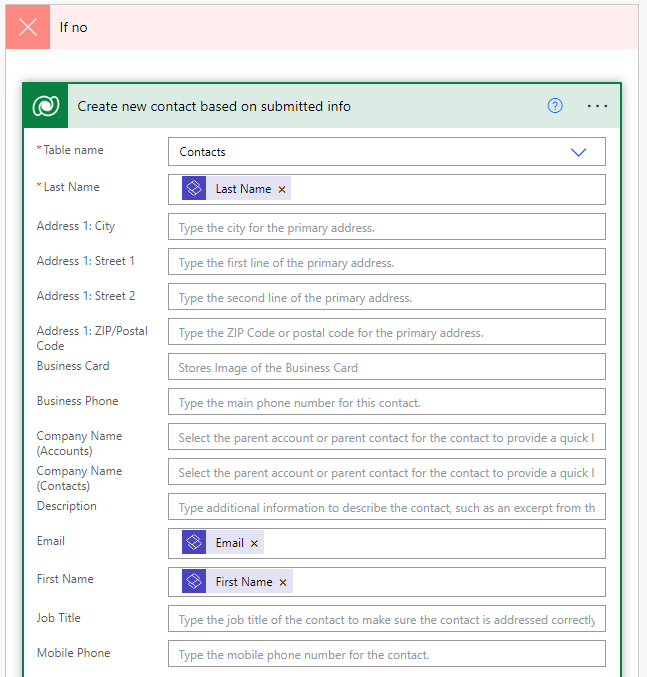
Otherwise, if there is no existing contact with the matching email, we create a new one with the submitted info.
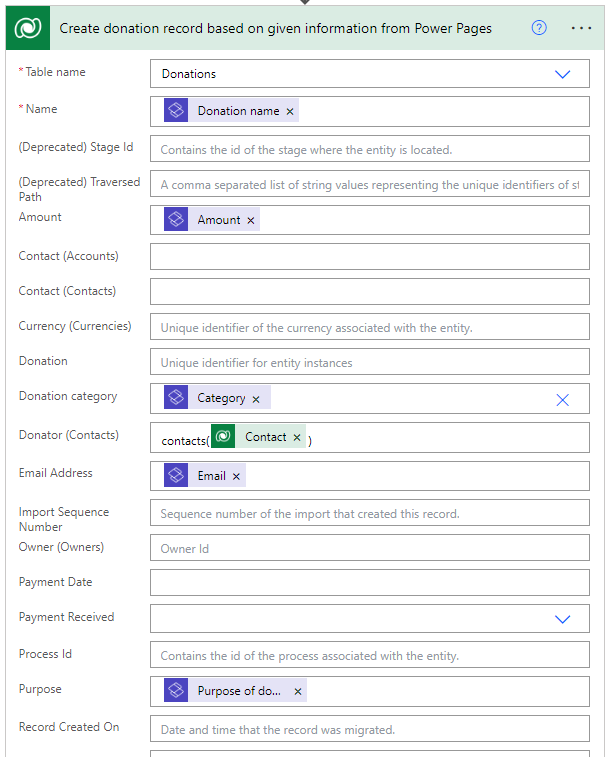
Regardless of either case, the donation record is then created in our Dataverse after using the values from our trigger/web-page ´:
Then, we add a step to create a document based on the donation record using the “Create document (sync)”-action of the DocumentsCorePack Connector. We use the newly created donation record as the input for our document and choose “PDF” as the output file type.

At the end of our flow, we add one final step to return the Document content of the generated document encoded as a string within the “Return value() to Power Pages” action.

Note 3:
When editing the flow after saving, the value for document content may lose the string() encoding. Please double-check this value before saving the flow again.
Once you finish, name the flow and save it.
Step 2: Adding the flow to your site
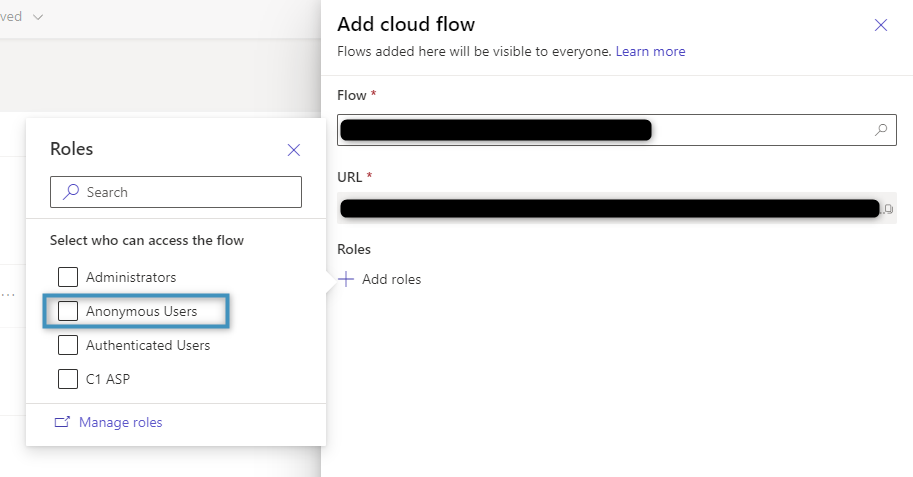
After creating the flow, we will need to add it to our website to use it for our form. The system will prompt you to add it to your site after you save it. Under Add roles, select Anonymous Users(in our example also unauthenticated users should be able to donate. Then, add the flow.
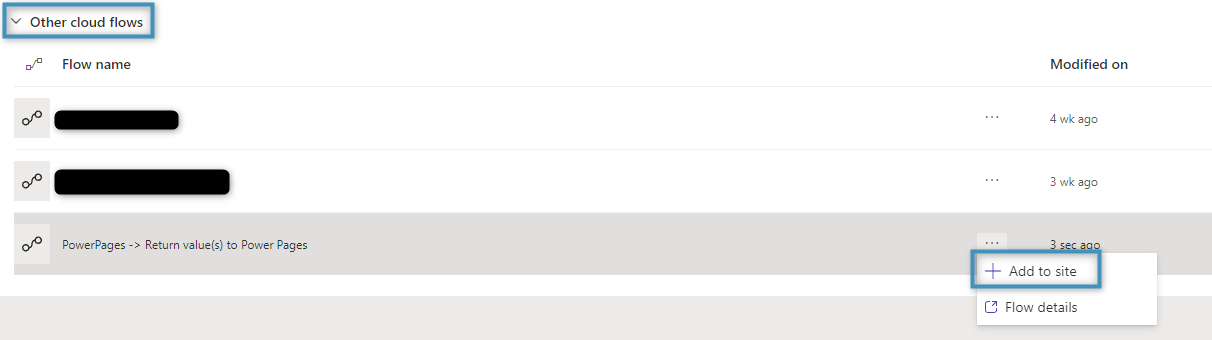
Alternatively, if you have already created a flow for Power Pages, you can add the flow under Other cloud flows.
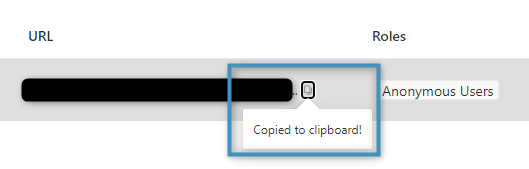
Copy the flow’s URL. We will need this for our website later.
Step 3: Creating the form
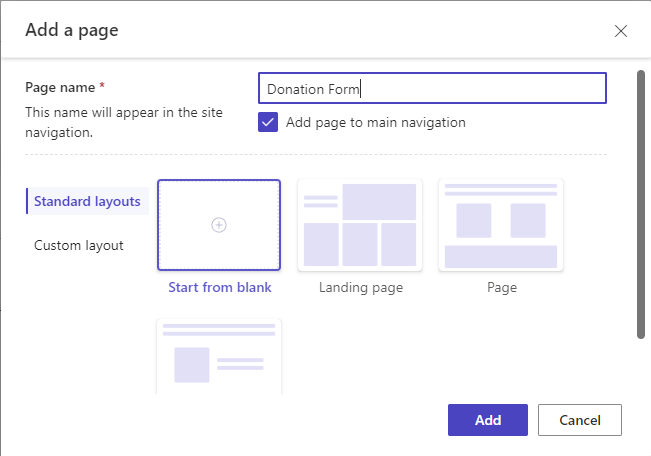
To create the form, begin by creating a blank page for your website.
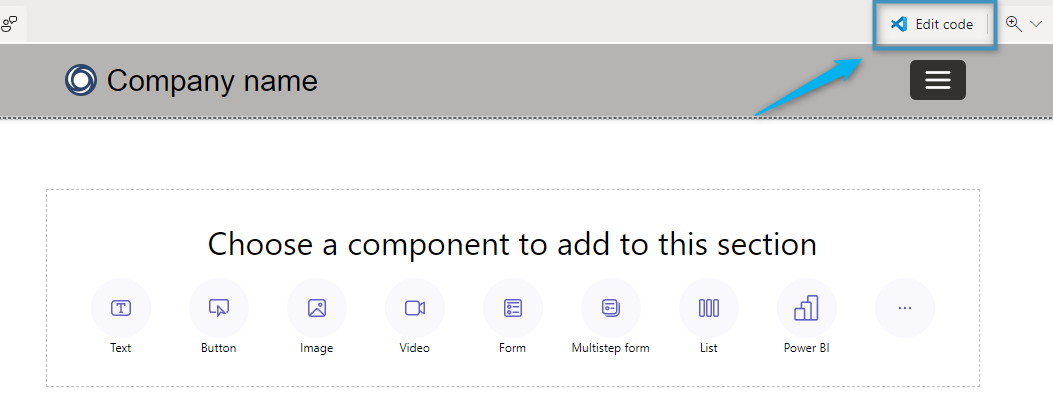
After creating the page, select Edit code to open Visual Studio Code.
In the Visual Studio editor, we will be adding our own custom code. This code contains the labels and inputs for our donation form.
You can find the full HTML file at the bottom of this article (under “Attachments”) and copy and paste it into the editor. You can see the JavaScript here:
<script>
    document.getElementById("donateForm").addEventListener("submit", function (event) {
        event.preventDefault(); // Prevent form submission

        //Get the relevant divs
        var loadDiv = document.getElementById("loader");
        var viewDiv = document.getElementById("donationView");

        //Get the user's input
        var donation = document.getElementById("donationInput").value;
        var purpose = document.getElementById("purposeInput").value;
        var amount = document.getElementById("amountInput").value;
        var fName = document.getElementById("firstnameInput").value;
        var lName = document.getElementById("lastnameInput").value;
        var category = document.getElementById("donateCategory").value;
        var email = document.getElementById("emailInput").value;

        //Disable or enable divs as needed.  Load wheel is enabled after form submission
        loadDiv.style.display = "block";
        viewDiv.style.display = "none";

        //Create object and store the user's input in it.
        var data = {};
        data["Donation name"] = donation;
        data["Purpose of donation"] = purpose;
        data["First Name"] = fName;
        data["Last Name"] = lName;
        data["Amount"] = Number(amount);
        data["Category"] = Number(category);
        data["Email"] = email;

        //Include the URL to the cloud flow.  This URL should be found under "Set up -> Cloud Flows" in your Power Pages environment.
        var _url = "ENTER YOUR URL HERE";

        //Create payload based on the user input
        var payload = {};
        payload.eventData = JSON.stringify(data);

        //Pass in the payload and URL to the server
        shell
            .ajaxSafePost({
                type: "POST",
                contentType: "application/json",
                url: _url,
                data: JSON.stringify(payload),
                processData: false,
                global: false,
            })
            .done(function (response) {
                //Get response from server
                const result = JSON.parse(response);

                //Create and configure the PDF viewer
                var pdfImg = document.createElement("object");
                pdfImg.style.width = "100%";
                pdfImg.style.height = "842pt";
                pdfImg.type = "application/pdf";
                pdfImg.data = "data:application/pdf;base64," + result["document_content"];  //add base64 string

                //Get the PDF div
                var newPDF = document.getElementById("donationPDF");

                //Clear PDF div if submit button is used again to prevent multiple PDFs from appearing
                if (newPDF.firstChild) {
                    newPDF.removeChild(newPDF.firstChild);
                    newPDF.appendChild(pdfImg);
                }
                else
                    newPDF.appendChild(pdfImg);

                //Remove the loader and display the link and PDF
                loadDiv.style.display = "none";
                viewDiv.style.display = "block";

            })
            .fail(function () {
                loadDiv.style.display = "none";
                alert("An error occurred.");
            });
  });
</script>
Within the script, Change the value of the _url variable to the URL of your own cloud flow, and align all the parameters passed to your input form.

After you have added your own cloud flow URL, save the code. Then return to Power Pages and select Sync. The page will update and display the donation form.
Step 4: Testing the form
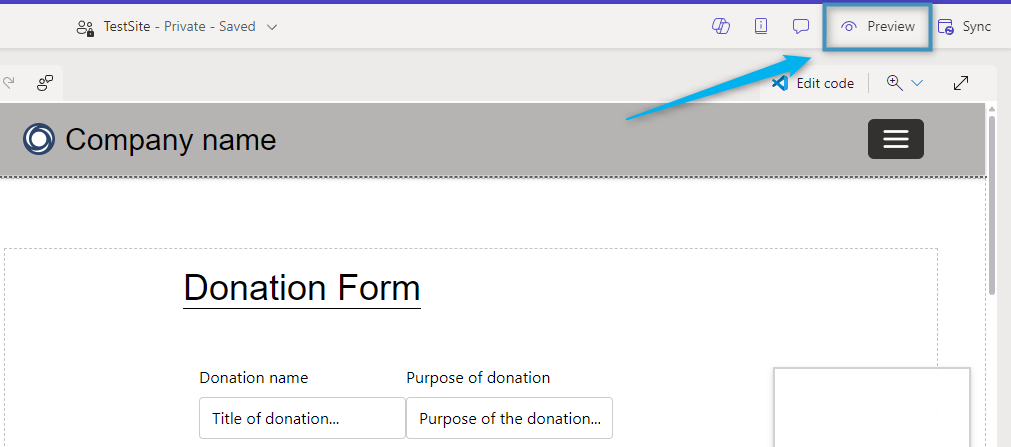
To test the page, select Preview.
Enter your data and click Submit. The system will display the generated document as a PDF below the form after a short time.
That’s it! We appreciate your feedback! Please share your thoughts by sending an email to support@mscrm-addons.com.