mscrm-addons.com logomscrm-addons.com logo
  • Release History
  • Knowledge Base
  • Documentation
  • Contact Support
  • Release History
  • Knowledge Base
  • Documentation
  • Contact Support
home/Knowledge Base/DocumentsCorePack(DCP)/How to access the DocumentsCorePack Server Based General Settings for Microsoft Dynamics 365

How to access the DocumentsCorePack Server Based General Settings for Microsoft Dynamics 365

1590 views 0 Updated on December 12, 2024

Once you have installed DocumentsCorePack successfully, you are provided with the DocumentsCorePack Configuration. This article covers how to access the DocumentsCorePack Server Based General Settings for Microsoft Dynamics 365.

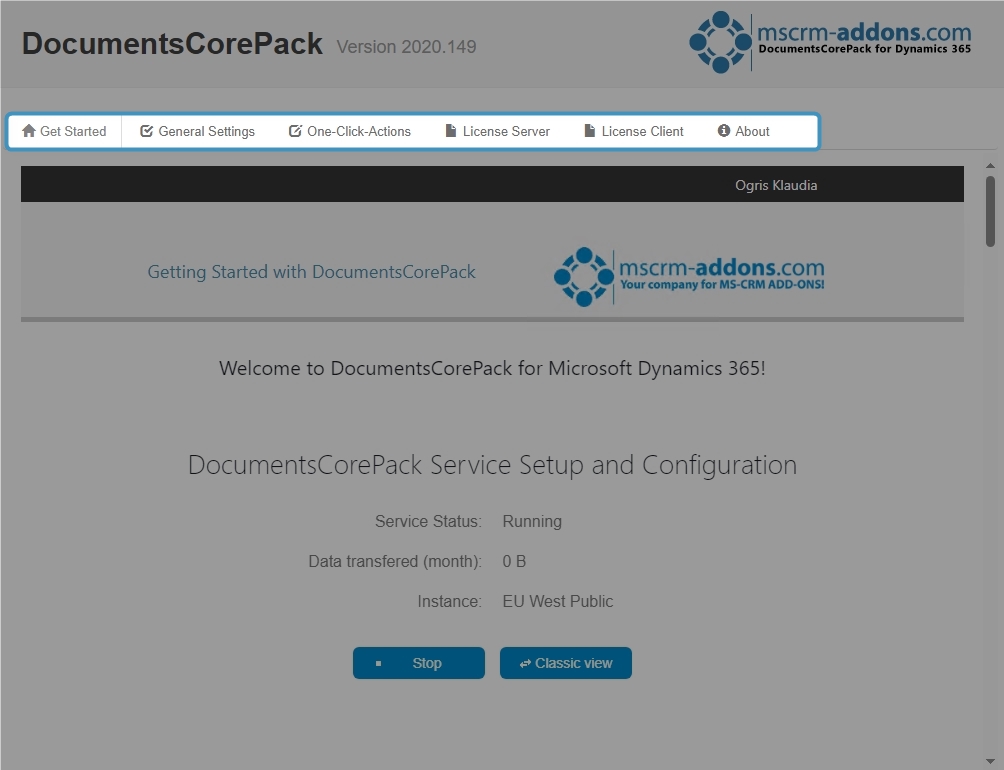
To open the configuration navigate to Settings > MSCRM-ADDONS > DocumentsCorePack.

Figure 1A : Dynamics 365 Settings Overview
Figure 1B : Dynamics 365 Settings Overview (New Look)

The Get Started with DocumentsCorePack page opens and the configuration tabs are marked. If you want to configure the service, you must log in with your admin credentials. Learn more about the Service Configuration of your DocumentsCorePack.

 DCP Server-Based Configuration Overview
Figure 2: DCP Server-Based Configuration Overview

General Settings

The configuration consists of five tabs:
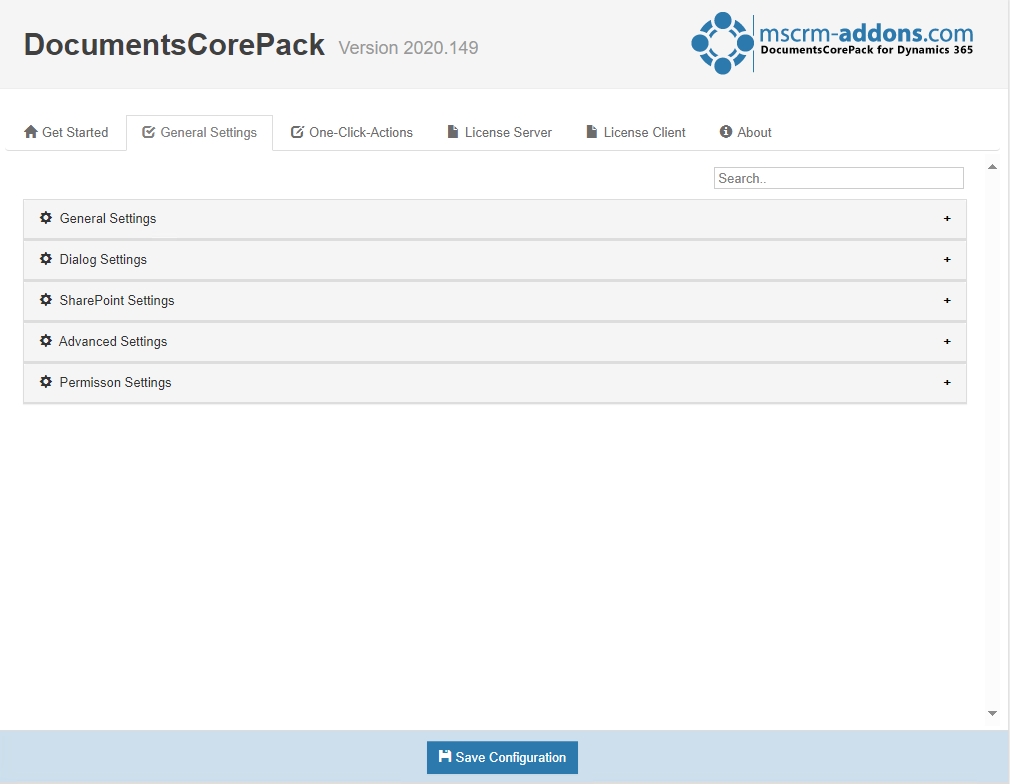
5 tabs of the DCP Configuration
Figure 3: 5 tabs of the DCP Configuration
  • General Settings

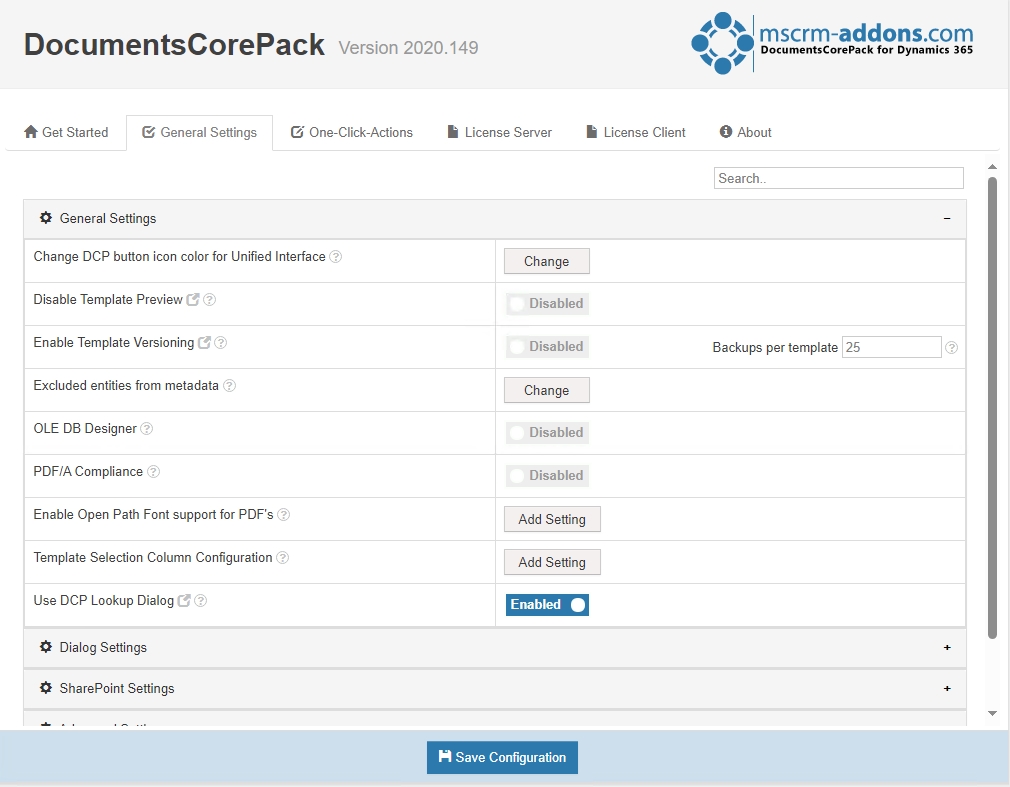
This area contains all regularly used, general settings. It will probably be the one you will use the most. Learn more about the details here.

DCP General Settings
Figure 4: DCP General Settings
  • SharePoint Settings

You can find all SharePoint settings here.

  • Dialog Settings

Most of the settings are self-explained. You mostly need to enable or disable them or add a setting. Learn more here.

  • Advanced Settings

This area contains special settings that are usually only to be set for special instances.

  • Permission Settings

Configure the access permissions here.


One-Click-Actions

The next tab in the configuration bar is for One-Click-Actions (OCAs). There are different OCAs for single records and for batch document creation. The tool that enables you to create OCAs is the DocumentsCorePack Dialog. Every administrator in your Dynamics 365 system is able to create and delete OCAs. Learn more about OCAs here.
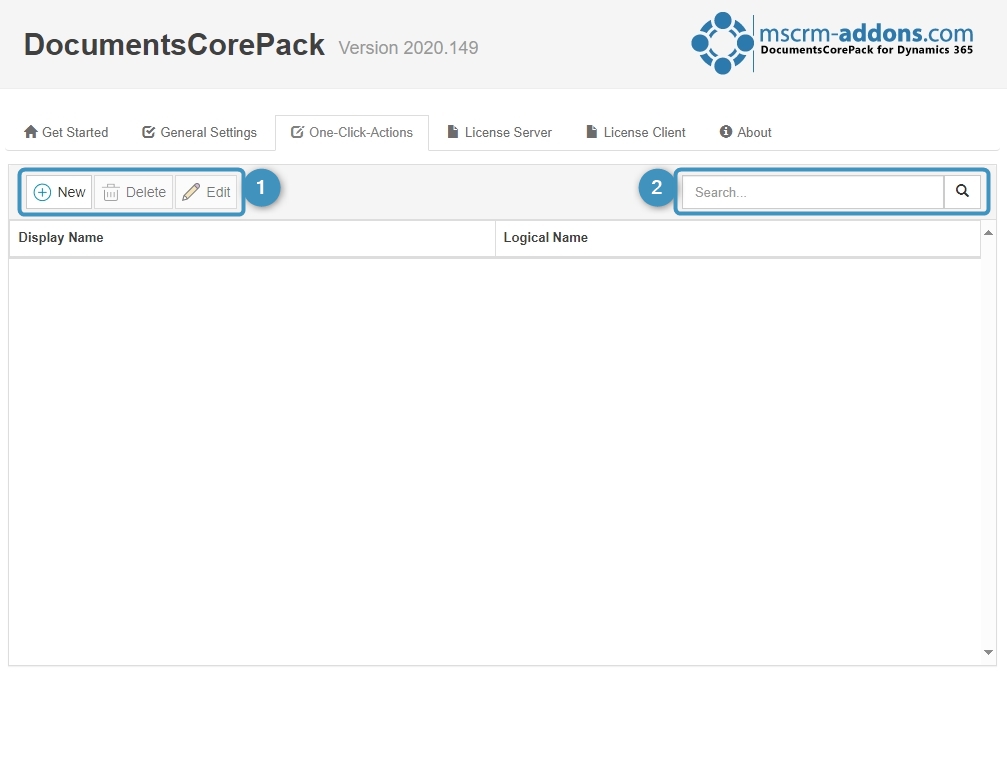
One-Click-Actions
Figure 5: One-Click-Actions

❶ Status bar:

  • New: Create a new OCA
  • Delete: Delete an OCA
  • Edit: Edit an OCA

❷ Search bar: Where you can look for a certain OCA
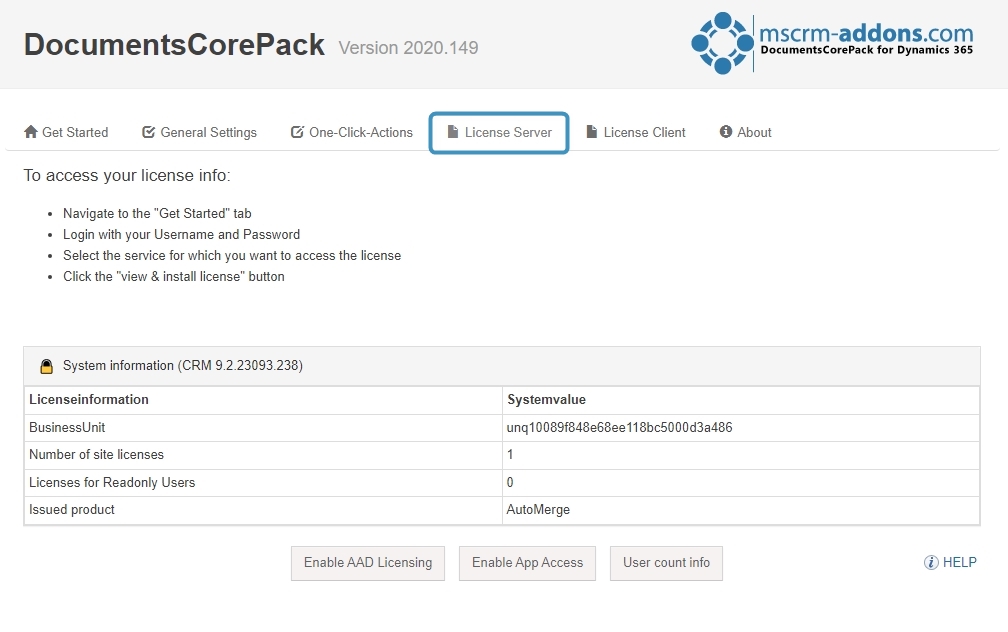
 

License Server

In this tab, you get information about your License Server info. For further information, have a closer look here.

Please note: If you have a DocumentsCorePack Online Service for Dynamics 365 Online, the license will be maintained by MSCRM-ADDONS Support.
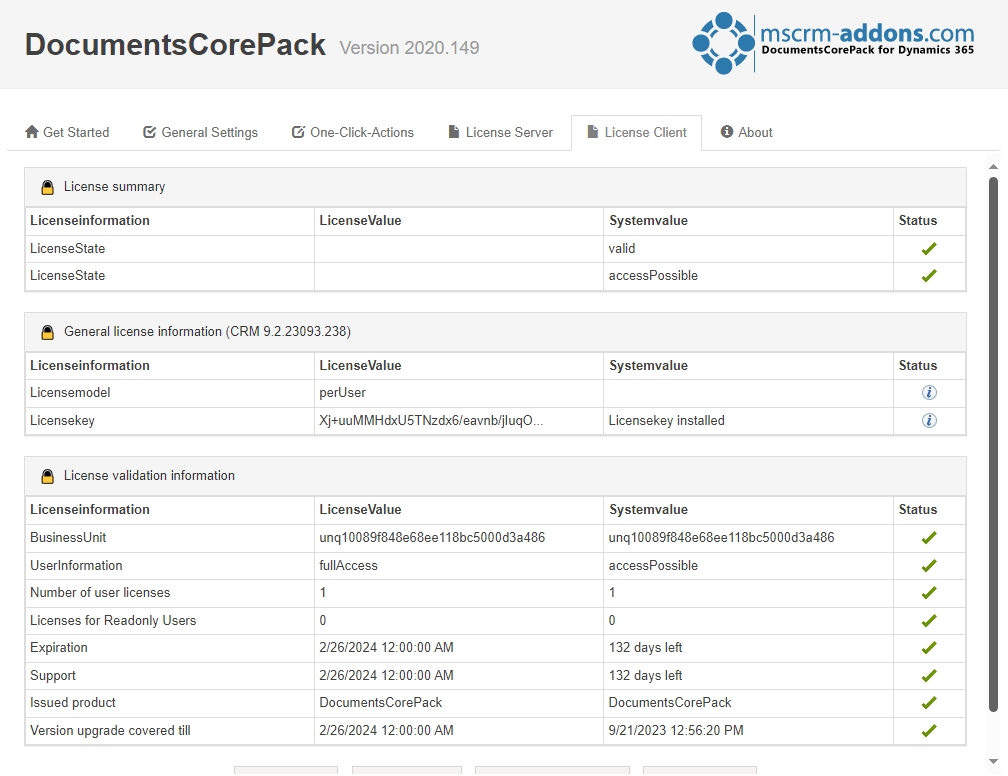
Tab "License Server"
Figure 6: Tab “License Server”


License Client

In this tab, view information about your License Client / DocumentsCorePack TemplateDesigner. For further information, have a closer look here.
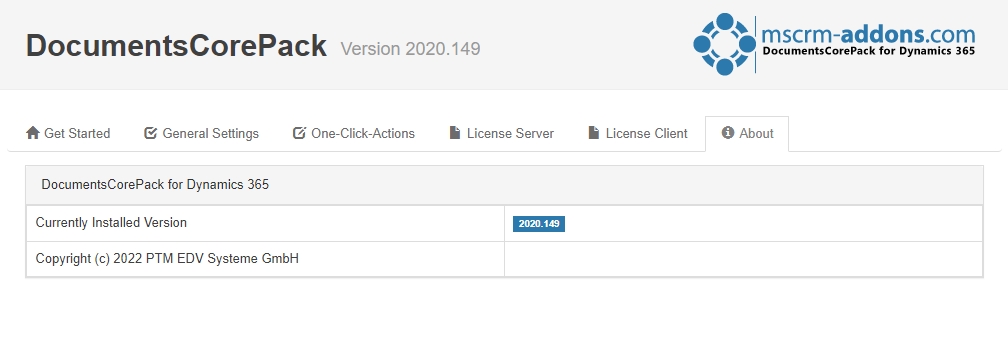
License Client tab
Figure 7: License Client tab
his area contains all regularly used, general settings. It will be probably the one you will use most of the three provided areas.
This area contains all regularly used, general settings. It will be probably the one you will use most of the three provided areas.


About

The last tab gives version and copyright information about your DocumentsCorePack for Dynamics 365.

Tab "About"
Figure 8: About Tab

Now you know how to access the DocumentsCorePack Server Based General Settings for Microsoft Dynamics 365.

That’s it! We appreciate your feedback! Please share your thoughts by sending an email to support@mscrm-addons.com.

Was this helpful?

Yes  No
Related Articles
  • Deploying DocumentsCorePack: Setup, Automation, and Real Business Impact in Dynamics365
  • Introducing the DocumentsCorePack Template Designer Office Add-In (Beta)
  • 3 Ways DocumentsCorePack Transforms Proposal, Quote, and Contract Creation
  • DeepSign for DocumentsCorePack 
  • Generate and send a document for e-signing using DeepSign
  • How to prepare a document for DeepSign
Latest Articles
  • What Happens After You Deploy AttachmentExtractor: Storage & Cost Savings in Dynamics 365
  • Deploying DocumentsCorePack: Setup, Automation, and Real Business Impact in Dynamics365
  • Introducing the DocumentsCorePack Template Designer Office Add-In (Beta)
  • How to Eliminate Excess Storage Costs in Microsoft Dynamics 365 Without Losing Access to Emails and Attachments
  • 3 Ways DocumentsCorePack Transforms Proposal, Quote, and Contract Creation
Popular Articles
  • DocumentsCorePack Template Designer – Getting Started
  • Step-by-Step: How to configure a One-Click-Action
  • Application Access for Dynamics 365
  • How to find your environment’s unique name in Microsoft Dynamics 365
  • How licenses are counted
Top Rated Articles
  • “Undefined”-labels in Chrome and Edge 114 and higher
  • Important information for Dynamics 365 online customers using DocumentsCorePack and/or AttachmentExtractor
  • How to activate the DocumentsCorePack Connector for PowerApps & Microsoft Flow
  • How to insert Condition Fields in DocumentsCorePack Templates designer
  • How licenses are counted
Categories
  • *News and General Infos* 64
  • Webinars 45
  • Template Designer(DCP 196
  • DocumentsCorePack(DCP 258
  • TelephoneIntegration (TI 65
  • AttachmentExtractor (AE 75
  • PowerSearch (PS 50
  • ActivityTools (AT 61
  • SmartBar (SB 54
  • GroupCalendar (GC 47
Our Vision

“We see it as our purpose to provide products that simplify and speed up our customers’ Microsoft Dynamics 365 experience.”

Knowledgebase
LogIn
mscrm-addons.com
  • Products
  • Online Shop
  • Downloads
  • My Account
About Us
  • About Us
  • Case Studies
  • Newsletter
  • Partner Program
  • Contact
Support
  • Support
  • Terms & Conditions
  • Documentation
  • Webinars
  • Legal Documents
  • Impressum
  • © 2025 www.mscrm-addons.com. All Rights Reserved.