mscrm-addons.com logomscrm-addons.com logo
  • Release History
  • Knowledge Base
  • Documentation
  • Contact Support
  • Release History
  • Knowledge Base
  • Documentation
  • Contact Support
home/Knowledge Base/Template Designer(DCP)/How to set a filename with user input (prompts)

How to set a filename with user input (prompts)

1232 views 0 Updated on March 12, 2024

This short overview explains how to use prompts to easily set the filename of a document generated from the DocumentsCorePack (DCP) dialog. For more information on how to set up user-prompts and the different types available, see here. 

Step-by-Step Description

Step 1: Open the template of your choice, which users will generate a document with and then set the filename for. Then navigate to the DCP TemplateDesigner and click on the Advanced Template Settings.

Step 2: The Template Settings window opens. Navigate to Prompts and then press the Add Prompt button.

The Prompts tab of the Advanced Template Settings
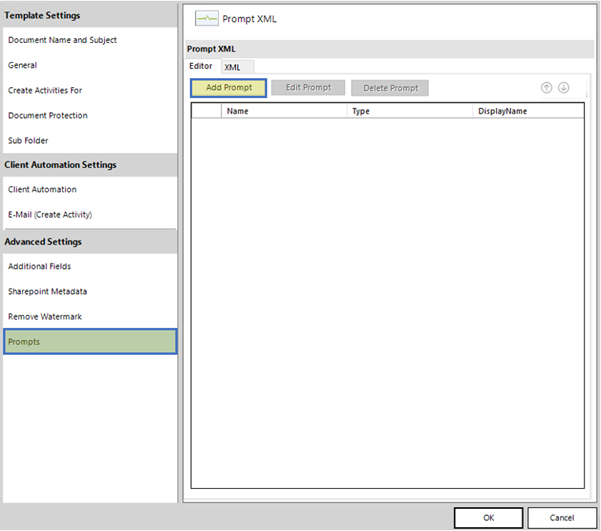
Figure 1: Template Settings/ Prompt XML

Step 3: The Prompt Setup opens. Please check the following steps:

  1. Display Name (Please Note: it is necessary that all characters are in lower case like in this screen “filename”)
  2. If a Display Name is required, then check the corresponding Required box
  3. Labels (Select the language and add a label, which will show in the DCP dialog)
  4. Press the OK button to save the prompt

The Prompt Setup window
Figure 2: Prompt Setup

After the setup, it should look like this.

Saved prompt
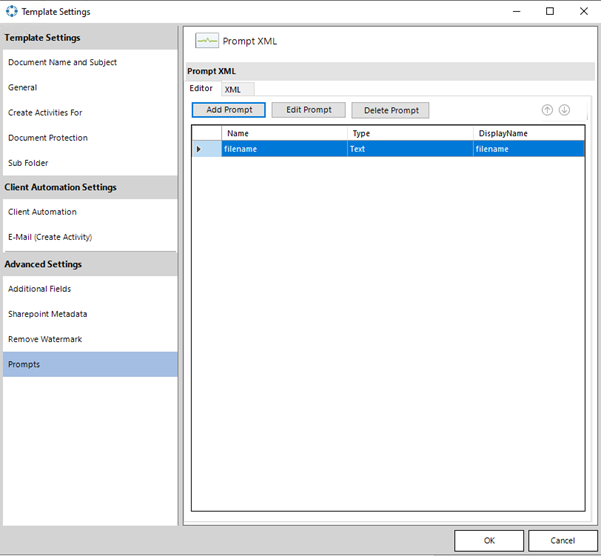
Figure 3: Prompt Setup

Step 4: Next, in the Template Settings, navigate to the Document Name and Subject tab and enter the name of the prompt like this:

<< filename >>

Please Note: Angle brackets are required.

Press the OK button and then save the template.

The Document Name and Subject tab of the Advanced Template Settings
Figure 4: Template Settings – Document Name and Subject

Step 5: Test your template.

1. Open the DCP dialog via the Create Document button of a record in your Dynamics 365.

2. Select your template that you added the prompt to and then click the Next button.

3. The prompt will appear. Insert the filename here. (Please Note: It is possible, that special characters cannot be displayed)

The filename prompt in the DCP dialog
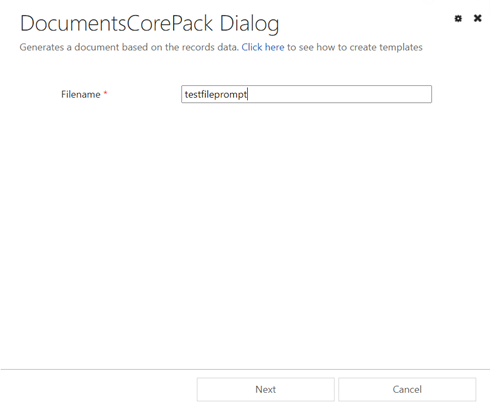
Figure 5: Choose a filename

4. Proceed through the DCP dialog as normal and then press the Finish button.

5. Once the document has finished generating, you will be able to preview it and view the filename.

Preview of the generated document and its filename
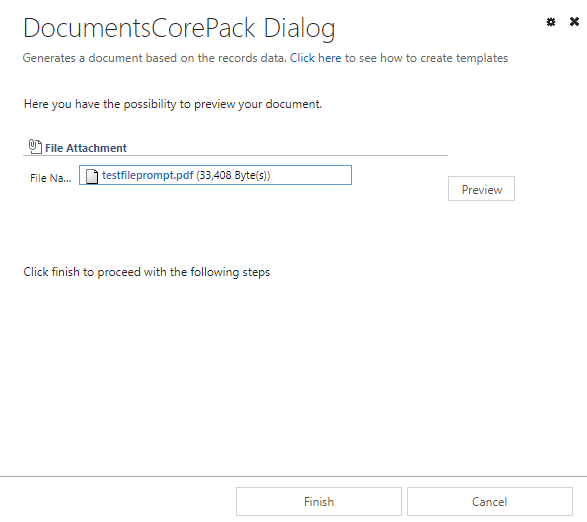
Figure 6: Finish your template

8. This is what it should look like:

A sample finished document with its filename
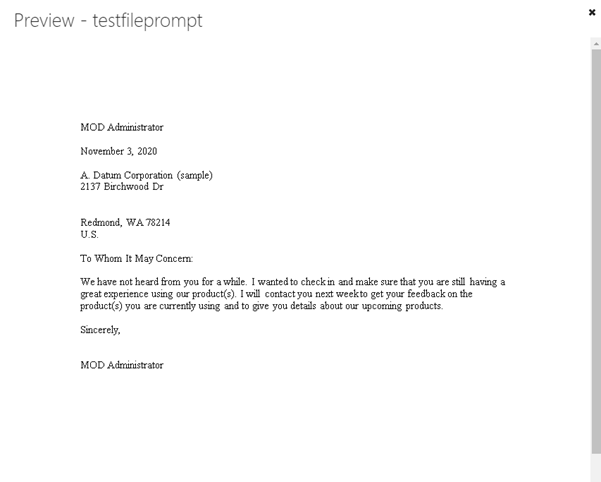
Figure 7: Finished template

That’s it! We appreciate your feedback! Please share your thoughts by sending an email to support@mscrm-addons.com.

Was this helpful?

Yes  1 No
Related Articles
  • Debugging the Template Design Office Add-In 
  • Introducing the DocumentsCorePack Template Designer Office Add-In
  • Ensuring correct time zone display for DateTime fields
  • How to compare a date-fields with the current date 
  • Create a template for XML or plain text
  • E-Invoicing with DocumentsCorePack
Leave A Comment Cancel reply

You must be logged in to post a comment.

Latest Articles
  • Locating Raw Inputs and Outputs in Power Automate
  • Step by Step: How to execute an OCA in a Power Automate flow 
  • The Hidden Cost of CRM Storage — And How to Eliminate It 
  • Recap: Nordic Summit 2025
  • The new Template Designer Office Add-In
Popular Articles
  • DocumentsCorePack Template Designer – Getting Started
  • Step-by-Step: How to configure a One-Click-Action
  • Application Access for Dynamics 365
  • How to find your environment’s unique name in Microsoft Dynamics 365
  • How licenses are counted
Top Rated Articles
  • “Undefined”-labels in Chrome and Edge 114 and higher
  • How to insert Condition Fields in DocumentsCorePack Templates designer
  • Important information for Dynamics 365 online customers using DocumentsCorePack and/or AttachmentExtractor
  • How to activate the DocumentsCorePack Connector for PowerApps & Microsoft Flow
  • How licenses are counted
Categories
  • *News and General Infos* 65
  • Webinars 46
  • Template Designer(DCP 197
  • DocumentsCorePack(DCP 262
  • TelephoneIntegration (TI 65
  • AttachmentExtractor (AE 76
  • PowerSearch (PS 50
  • ActivityTools (AT 61
  • SmartBar (SB 54
  • GroupCalendar (GC 47
Our Vision

“We see it as our purpose to provide products that simplify and speed up our customers’ Microsoft Dynamics 365 experience.”

Knowledgebase
LogIn
mscrm-addons.com
  • Products
  • Online Shop
  • Downloads
  • My Account
About Us
  • About Us
  • Case Studies
  • Newsletter
  • Partner Program
  • Contact
Support
  • Support
  • Terms & Conditions
  • Documentation
  • Webinars
  • Legal Documents
  • Impressum
  • © 2025 www.mscrm-addons.com. All Rights Reserved.