mscrm-addons.com logomscrm-addons.com logo
  • Release History
  • Knowledge Base
  • Documentation
  • Contact Support
  • Release History
  • Knowledge Base
  • Documentation
  • Contact Support
home/Knowledge Base/Template Designer(DCP)/Insert Hyperlink with DocumentsCorePack TemplateDesigner

Insert Hyperlink with DocumentsCorePack TemplateDesigner

3085 views 0 Updated on January 25, 2024

This article describes how to configure dynamic elements inside a hyperlink using the DocumentsCorePack TemplateDesigner. This allows you to add data from your Dataverse into links placed inside a document.

Please note: Currently, only base types are supported. Taxonomy properties are not supported.

Step 1: Navigate to the Hyperlink option

Open the Insert Field dropdown and select the Insert Computed Item option. In the following drop-down, select Hyperlink. If you need some support on how to access the Insert Field option, have a look at this article first.

Select "Insert Computed Item" and then "Hyperlink".
Figure 1: Select “Insert Computed Item” and then “Hyperlink”

Note that a hyperlink consists of a:

  • Link (address to a website) and
  • Displayname (name to be displayed in the document)

With a click on the Display Name, the Link will be activated in the background. To keep track of the hyperlink elements in a template, users can define an individual name which will be displayed in the template.

Step 2: Compose your Link

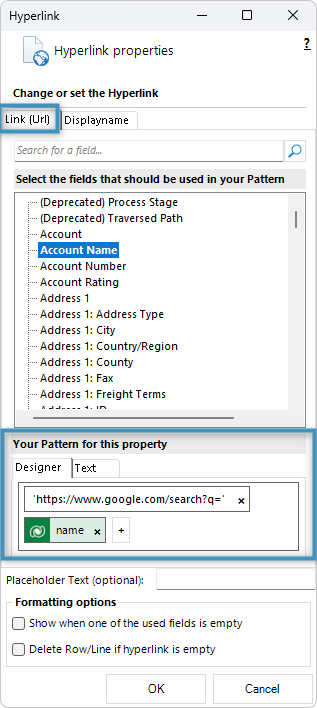
To define the link pattern, navigate to the Link (Url) tab.

Defining the hyperlink
Figure 2: Defining the hyperlink

Step 3: Compose your Displayname

To set a name for the link, select the Displayname tab.

Defining the display name
Figure 3: Defining the display name

The syntax for both the Link and Displayname tabs is described here.

Step 4: Additional options

Additional options in the hyperlink properties
Figure 4: Additional options in the hyperlink properties

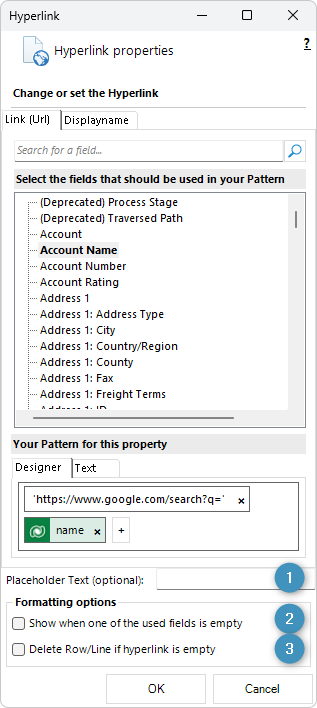
Under the pattern designer, you can (1) set placeholder text that will appear within the field as it is displayed in the template, (2) show the link in the result document even if the fields return no data, or (3) remove the hyperlink entirely if it is empty.

Step 5: The result

Once the hyperlink has been configured, you can save and test your template to see the result. Based on the above example, our result will be displayed as shown below:

Result
Figure 5: Result

If you need to format your hyperlink, learn how with this article.

That’s it! We appreciate your feedback! Please share your thoughts by sending an email to support@mscrm-addons.com.

Was this helpful?

Yes  2 No
Related Articles
  • Debugging the Template Design Office Add-In 
  • Introducing the DocumentsCorePack Template Designer Office Add-In
  • Ensuring correct time zone display for DateTime fields
  • How to compare a date-fields with the current date 
  • Create a template for XML or plain text
  • E-Invoicing with DocumentsCorePack
Latest Articles
  • Recap: Nordic Summit 2025
  • The new Template Designer Office Add-In
  • Debugging the Template Design Office Add-In 
  • Updating Legacy SharePoint Connections 
  • What Happens After You Deploy AttachmentExtractor: Storage & Cost Savings in Dynamics 365
Popular Articles
  • DocumentsCorePack Template Designer – Getting Started
  • Step-by-Step: How to configure a One-Click-Action
  • Application Access for Dynamics 365
  • How to find your environment’s unique name in Microsoft Dynamics 365
  • How licenses are counted
Top Rated Articles
  • “Undefined”-labels in Chrome and Edge 114 and higher
  • Important information for Dynamics 365 online customers using DocumentsCorePack and/or AttachmentExtractor
  • How to activate the DocumentsCorePack Connector for PowerApps & Microsoft Flow
  • How to insert Condition Fields in DocumentsCorePack Templates designer
  • How licenses are counted
Categories
  • *News and General Infos* 65
  • Webinars 46
  • Template Designer(DCP 197
  • DocumentsCorePack(DCP 260
  • TelephoneIntegration (TI 65
  • AttachmentExtractor (AE 75
  • PowerSearch (PS 50
  • ActivityTools (AT 61
  • SmartBar (SB 54
  • GroupCalendar (GC 47
Our Vision

“We see it as our purpose to provide products that simplify and speed up our customers’ Microsoft Dynamics 365 experience.”

Knowledgebase
LogIn
mscrm-addons.com
  • Products
  • Online Shop
  • Downloads
  • My Account
About Us
  • About Us
  • Case Studies
  • Newsletter
  • Partner Program
  • Contact
Support
  • Support
  • Terms & Conditions
  • Documentation
  • Webinars
  • Legal Documents
  • Impressum
  • © 2025 www.mscrm-addons.com. All Rights Reserved.