The DocumentsCorePack Server offers a service-based printing option that is available in addition to the already known plugin-based printing option. This additional DocumentsCorePack Print Service Configuration option is based on a service that is running in the background.
DocumentsCorePack service-based printing installation
First you must install DocumentsCorePack for Microsoft Dynamics 365. For further installation information, have a look here.
Go through the prompted steps of the wizard and create a new port. Type in a simple name for the printer without using spaces. This makes it easier for you to retype the printer name in the different workflows of the DCP Server. Once finished, try printing a test page to ensure it works correctly.
DocumentsCorePack service-based printing configuration
Start the service configuration
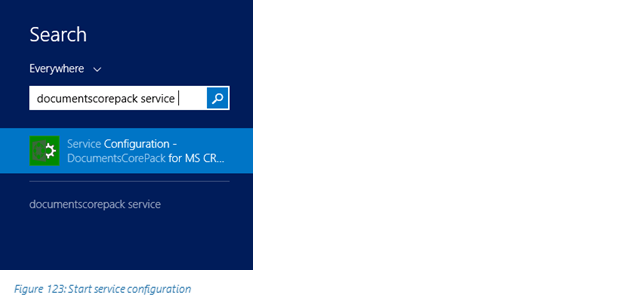
Figure 1: Start service configuration
Start the Service Configuration DocumentsCorePack for Dynamics 365 from within the Windows start menu.
Create a new service or select an existing one

Figure 2: Create a new service or select an existing one
Navigate to the general tab. If you want to create a new service, type in the name of the service and click on the Verify button.
Select the print jobs
Now you have to define which type of jobs the service should work on. Check only printjobs. Furthermore, you have the option to set a filter for the printer to be used. Setting this filter is essential for a variety of instances, such as the situation below.
If you have offices in two different countries (example: America and Austria), you can type in the name of the printer located at your site (example: at your Austrian office) in order to avoid your documents being printed by the printer located at the other site (example: at your American office).

Figure 3: Create a new service or select an existing one
Select the CRM type
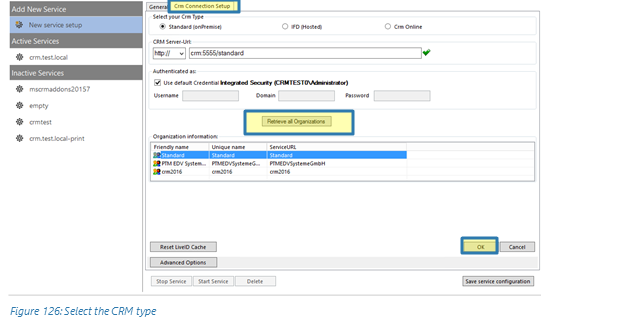
Figure 4: Select the CRM type
Now switch to the CRM Connection Setup tab, select your CRM type, type in the CRM Server URL, and click on the Retrieve all Organizations button. Then click on the OK button to confirm. This window opens:

Figure 5: Connection success
Now click on the Save Service Configuration button. In case the below message box appears, simply click on the OK button.
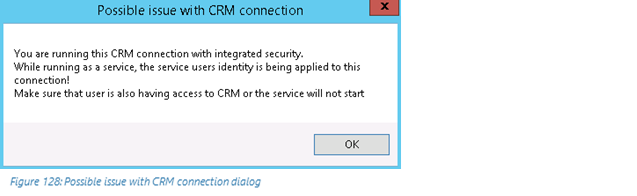
Figure 6: Possible issue with CRM connection dialog
Open the CRM Connection Advanced Options
Within the CRM Connection Setup tab, click on the Advanced Options button.
![The [Advanced Options] button in the CRM Connection Setup tab.](https://cdn.mscrm-addons.com/wp-content/uploads/2015/08/pw9.png)
Figure 7: Possible issue with CRM connection dialog
This action opens the Connection Dialog. Within the Advanced Settings of the Connection Dialog, you can set your CRM online option, enable your proxy settings, define the credentials, etc. Return to the CRM Connection tab to save your settings. For further information on the Connection Dialog, please have a look at our Connection Dialog Documentation.

Figure 8: CRM connection setup
Start the service
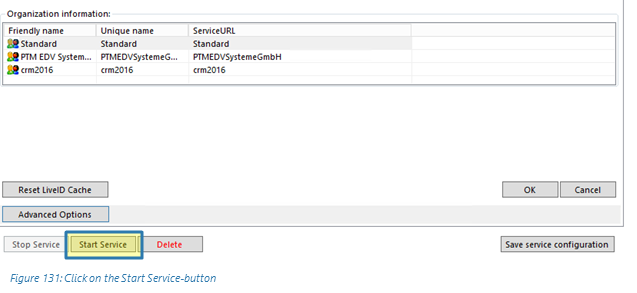
Figure 9: Click on the start service button
Click on the Start Service button and the service will start to run in the background.
To continue, go to the newly added service called DCPServerPrinting ❶ and switch to the Printer Tab ❷. Select your printer there.
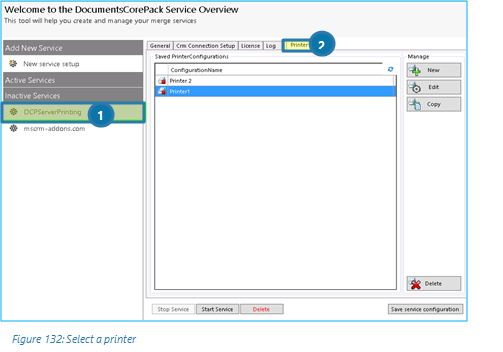
Figure 10: Select a printer
How to create a Printer Configuration
In order to create a new configuration, click on the New button in the DocumentsCorePack ServerBased Printing tab.
This action will open the following dialog where you must type in a Configuration name before you can continue.
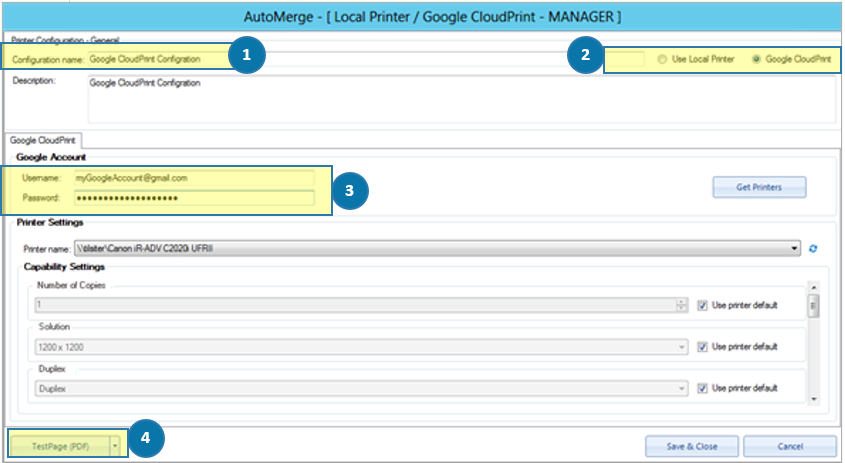
Figure 11: Configure a printer
❶ You must specify a configuration name to be able to create a printer configuration.
❷ Google CloudPrint Mode is enabled as default.
❸ Supply your Google account credentials to retrieve the list of available printers for that account.
❹ Click on the drop-down button or open a saved document to print a Test-page.
Please note: Modifying the printer type will discard all changes you have done in the current setting!
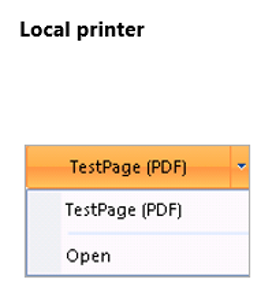
Figure 12: Local printer test pages
After configuring and starting the service for printing, you can start to configure a workflow including the service-based printing option.
Troubleshooting:
If the Service-based printing does not work, please check the following:
- Make sure the service is running and configured for both document generation and printing jobs.
- Specify a service user on the first configuration tab (General).
- Make sure that the specified user is the same as the user that is configuring the printer.
- Make sure the printer is added to the server as a local printer and that it has been added by the same user which is running the service.
- Make sure that the printer has been added to the service and that it is possible to print a test page with it from the service.
That’s it! We appreciate your feedback! Please share your thoughts by sending an email to support@mscrm-addons.com.