mscrm-addons.com logo displayed here.mscrm-addons.com logo displayed here.
  • Release History
  • Documentation
  • Back to www.mscrm-addons.com
  • Release History
  • Documentation
  • Back to www.mscrm-addons.com
home/Knowledge Base/Template Designer(DCP)/The “Insert PageBreak” button in DocumentsCorePack templates

The “Insert PageBreak” button in DocumentsCorePack templates

652 views 0 Updated on September 5, 2023

This article describes how to use the Insert PageBreak button within the Insert Field button in DocumentsCorePack (DCP) templates. This feature allows you to insert a dynamic PageBreak into your document.

The Insert PageBreak functionality also works in tables. For example, if you have a table with product information and you insert a PageBreak, you can have an extra page for each product as a result.

Click here to read more about the functionalities of the Insert Field button.

To utilize the Insert PageBreak button, follow this step-by-step description.

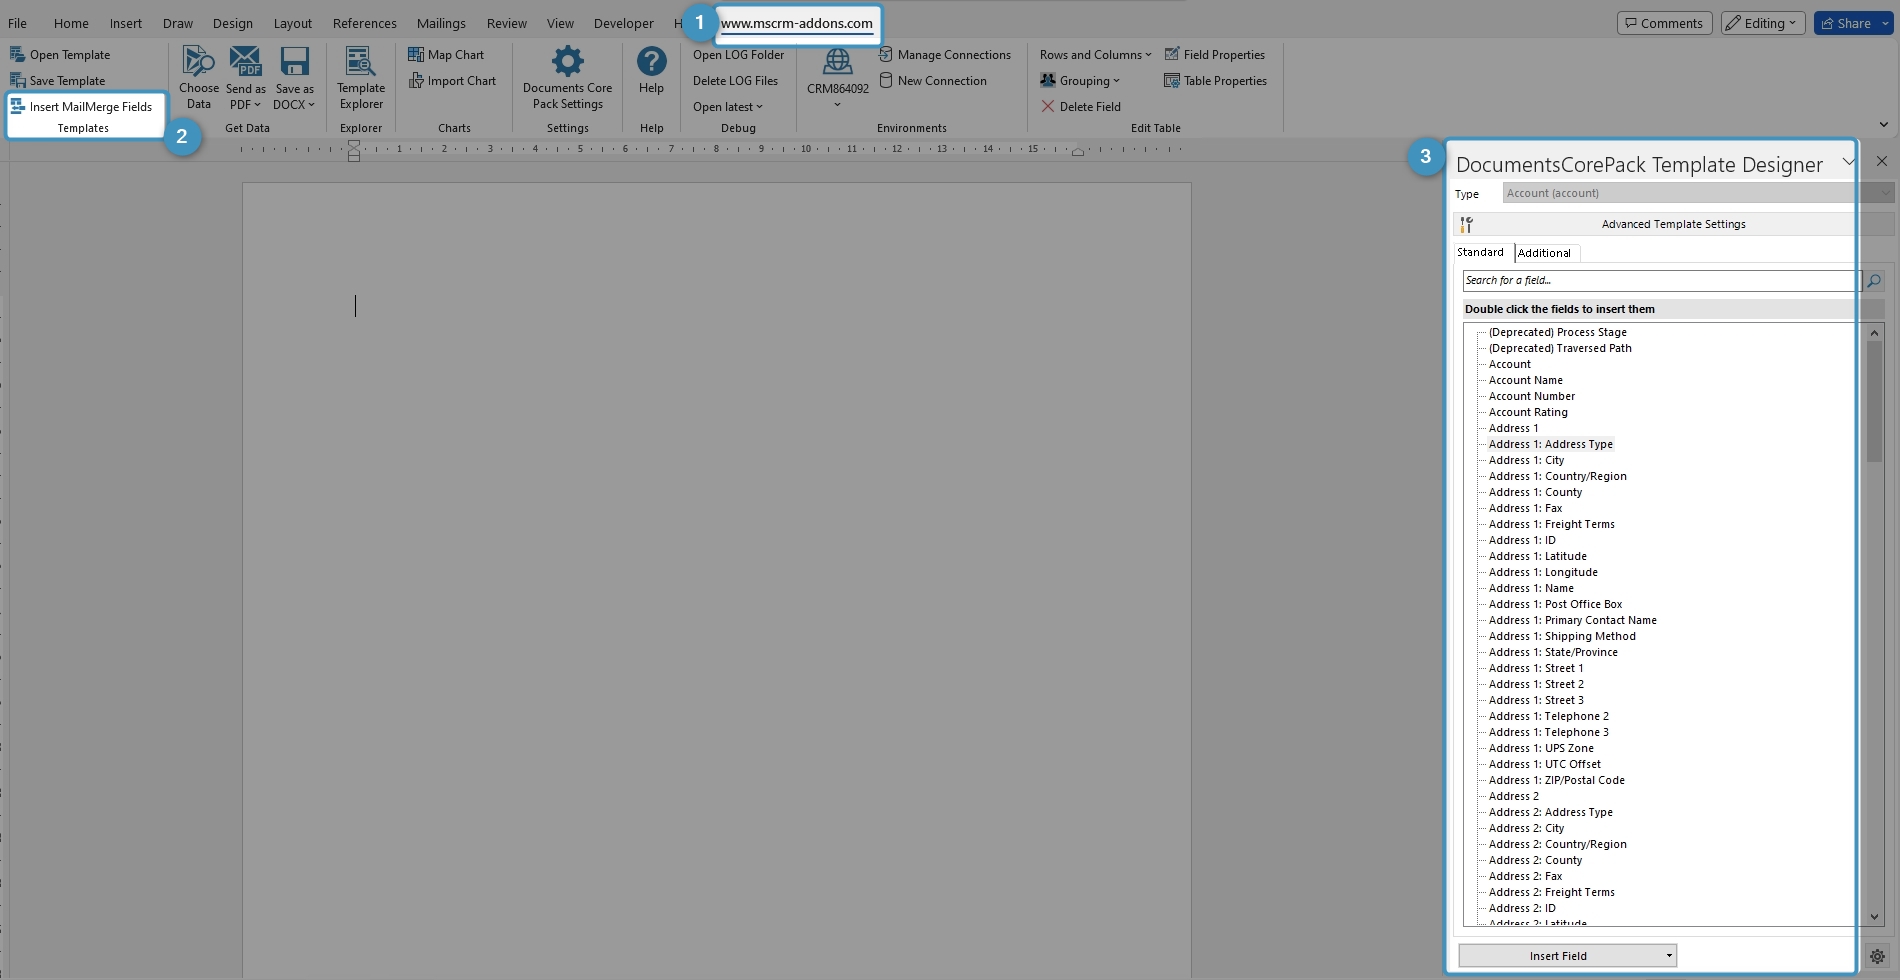
Step 1: Open a DocumentsCorePack template or create a new one. Navigate to the ❷ Insert MailMerge Fields within the ❶ www.mscrm-addons.com tab. The ❸ DCP task pane will open.

Open DCP template
Figure 1: Open DCP template

Step 2: Navigate to the ❶ DCP task pane, click on the Insert Field button, choose ❷ Insert static Item and then select ❸ PageBreak.

DCP task pane - PageBreak
Figure 2: DCP task pane – PageBreak

Step 3: Place the PageBreak field in your DCP template. A ❶ placeholder will be displayed.

Placeholder
Figure 3: Placeholder

After merging the template, you can see the inserted Page Break is working.

Working Page Break
Figure 4: Working Page Break

That’s it! We appreciate your feedback! Please share your thoughts by sending an email to support@mscrm-addons.com.

Was this helpful?

Yes  No
Related Articles
  • Introducing the DocumentsCorePack Template Designer Office Add-In (Beta)
  • Ensuring correct time zone display for DateTime fields
  • How to compare a date-fields with the current date 
  • Create a template for XML or plain text
  • E-Invoicing with DocumentsCorePack
  • How to add content from SharePoint to a document
Latest Articles
  • What Happens After You Deploy AttachmentExtractor: Storage & Cost Savings in Dynamics 365
  • Deploying DocumentsCorePack: Setup, Automation, and Real Business Impact in Dynamics365
  • Introducing the DocumentsCorePack Template Designer Office Add-In (Beta)
  • How to Eliminate Excess Storage Costs in Microsoft Dynamics 365 Without Losing Access to Emails and Attachments
  • 3 Ways DocumentsCorePack Transforms Proposal, Quote, and Contract Creation
Popular Articles
  • DocumentsCorePack Template Designer – Getting Started
  • Step-by-Step: How to configure a One-Click-Action
  • Application Access for Dynamics 365
  • How to find your environment’s unique name in Microsoft Dynamics 365
  • How licenses are counted
Top Rated Articles
  • “Undefined”-labels in Chrome and Edge 114 and higher
  • Important information for Dynamics 365 online customers using DocumentsCorePack and/or AttachmentExtractor
  • How to activate the DocumentsCorePack Connector for PowerApps & Microsoft Flow
  • How to insert Condition Fields in DocumentsCorePack Templates designer
  • How licenses are counted
Categories
  • *News and General Infos* 64
  • Webinars 45
  • Template Designer(DCP 196
  • DocumentsCorePack(DCP 258
  • TelephoneIntegration (TI 65
  • AttachmentExtractor (AE 75
  • PowerSearch (PS 50
  • ActivityTools (AT 61
  • SmartBar (SB 54
  • GroupCalendar (GC 47
Our Vision

“We see it as our purpose to provide products that simplify and speed up our customers’ Microsoft Dynamics 365 experience.”

Knowledgebase
LogIn
mscrm-addons.com
  • Products
  • Online Shop
  • Downloads
  • My Account
About Us
  • About Us
  • Case Studies
  • Newsletter
  • Partner Program
  • Contact
Support
  • Support
  • Terms & Conditions
  • Documentation
  • Webinars
  • Legal Documents
  • Impressum
  • © 2022 www.mscrm-addons.com. All Rights Reserved.