mscrm-addons.com logomscrm-addons.com logo
  • Release History
  • Knowledge Base
  • Documentation
  • Contact Support
  • Release History
  • Knowledge Base
  • Documentation
  • Contact Support
home/Knowledge Base/DocumentsCorePack(DCP)/Assign printers to users or teams

Assign printers to users or teams

583 views 1 Updated on October 9, 2024

Figure 1A : DocumentsCorePack in Dynamics 365
 
Figure 1B : DocumentsCorePack in Dynamics 365 (New Look)
 

This article describes how to assign printers to a user or team. This is helpful to ensure users only see the printers they need within the DocumentsCorePack (DCP) dialog.

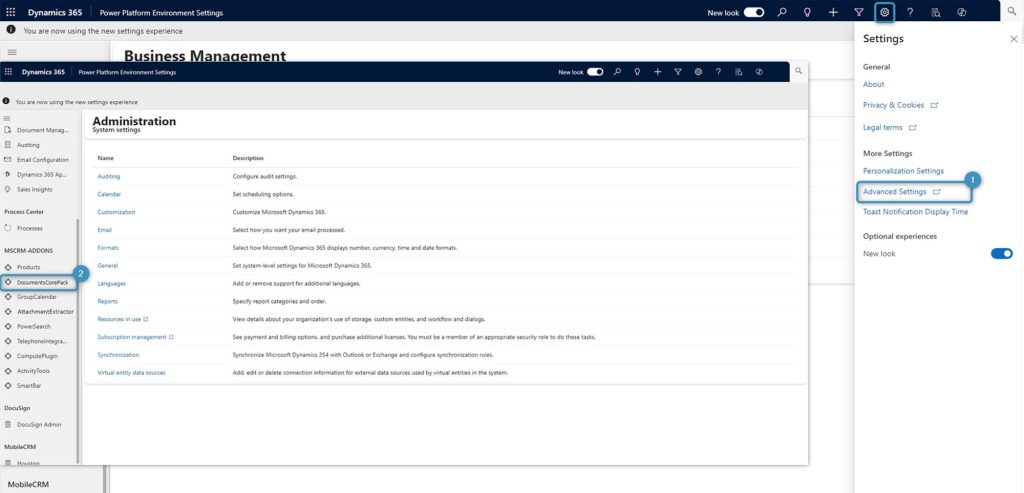
First, open the DCP settings in Dynamics 365.

The DCP settings in Dynamics 365. 
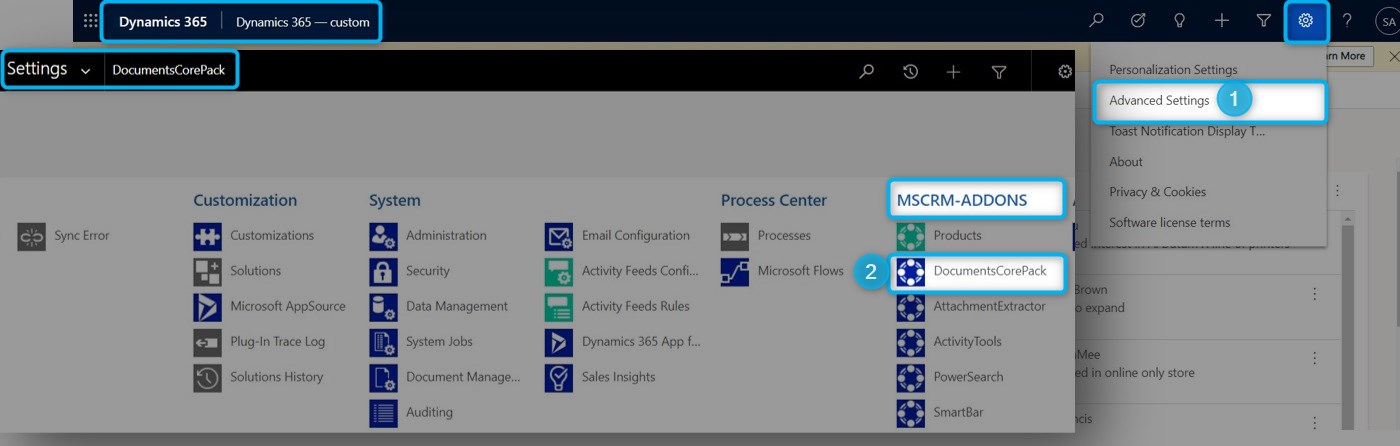
Figure 1: DocumentsCorePack in Dynamics 365

When the Getting Started with DocumentsCorePack page opens, select the General Settings tab and scroll down to the Dialog Settings. Enlarge the Dialog Settings and look for Assign printers to teams or users. Click the [Change] button.

The "Assign printers to teams or users" option in the Dialog Settings.
Figure 2: General Settings > Dialog Settings > Assign printers to teams or users

This Printer Mapping window pops up. All available printers are shown on the left.

Please note: You have to configure your printers first in order to see the available printers.

Select the printer you want to assign in the left box ❶. In the right box, select the ❷ [Users] button to choose whether you want to add a single user or a team to your printer. With the ❸ [Add] button, the Look up Records opens (see Figure 4 below). With the ❹ [Remove] button, you can undo your actions.

Assign available printers to specific users/teams.
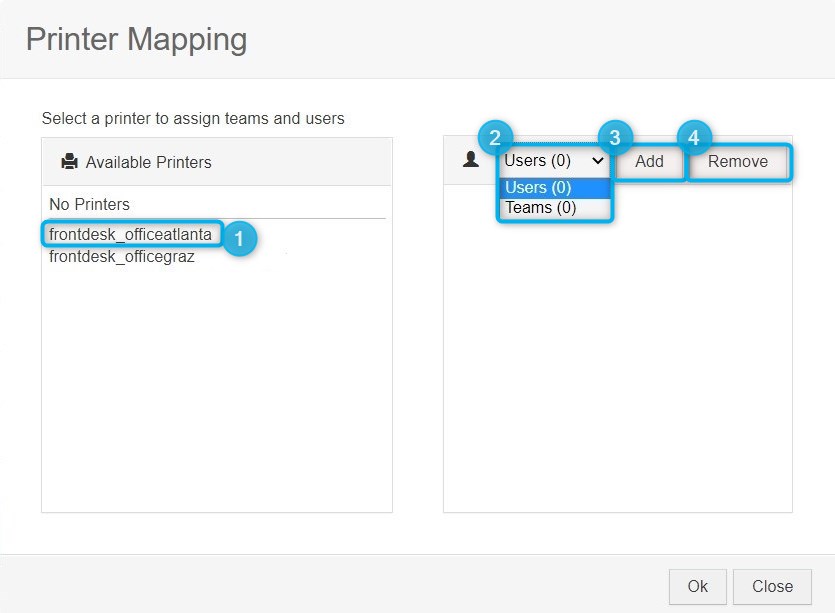
Figure 3: Printer Mapping

The [Add] button opens the Look Up Records to enter your search criteria.

❶ Select a user or a team.
❷ Choose where to look for your records.
❸ Press the Magnifier for searching the records.
❹ Select the users or team you want to add.
❺ Press the [Select] button.
❻ Click the Remove button if you want to undo your selection.
❼ Confirm with the [Add] button.

Use Lookup Records to assign available printers.
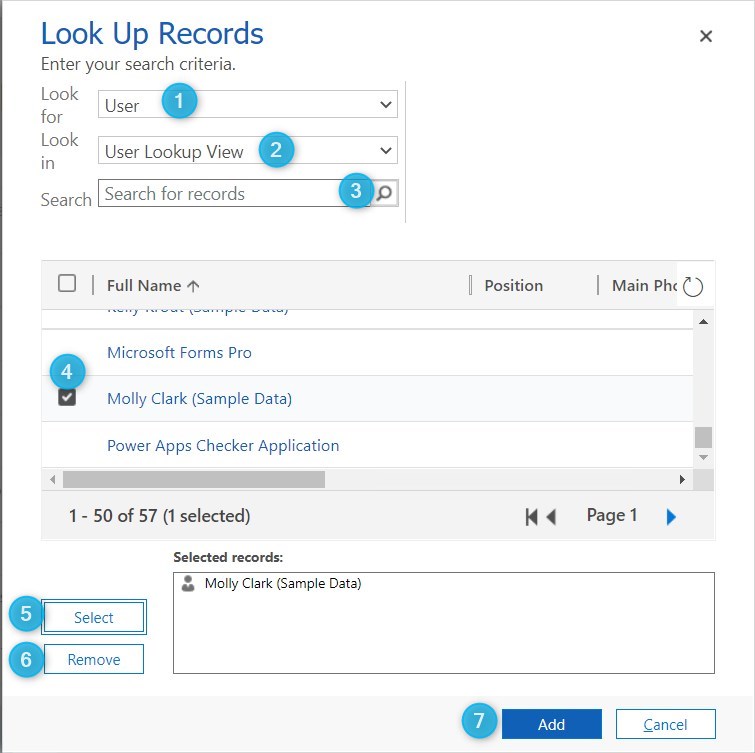
Figure 4: Look up records

Your users are now added to that specific printer. You now know how to map the printers, which is especially important if an office is on another continent, so that the members are using the printer right for their location.

View the users added to specific printers.
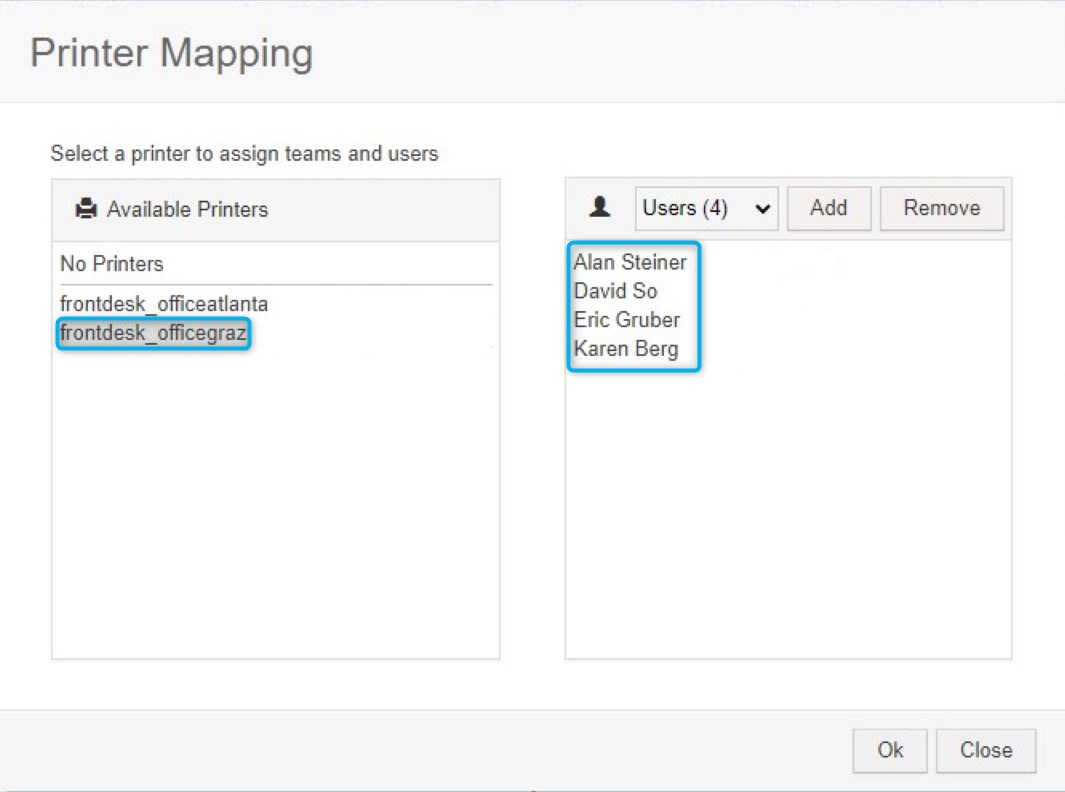
Figure 5: Added users to printer.

That´s it! We appreciate your feedback. Please share your thoughts by sending an email to support@mscrm-addons.com.

Was this helpful?

1 Yes  No
Related Articles
  • Deploying DocumentsCorePack: Setup, Automation, and Real Business Impact in Dynamics365
  • Introducing the DocumentsCorePack Template Designer Office Add-In (Beta)
  • 3 Ways DocumentsCorePack Transforms Proposal, Quote, and Contract Creation
  • DeepSign for DocumentsCorePack 
  • Generate and send a document for e-signing using DeepSign
  • How to prepare a document for DeepSign
Leave A Comment Cancel reply

You must be logged in to post a comment.

Latest Articles
  • What Happens After You Deploy AttachmentExtractor: Storage & Cost Savings in Dynamics 365
  • Deploying DocumentsCorePack: Setup, Automation, and Real Business Impact in Dynamics365
  • Introducing the DocumentsCorePack Template Designer Office Add-In (Beta)
  • How to Eliminate Excess Storage Costs in Microsoft Dynamics 365 Without Losing Access to Emails and Attachments
  • 3 Ways DocumentsCorePack Transforms Proposal, Quote, and Contract Creation
Popular Articles
  • DocumentsCorePack Template Designer – Getting Started
  • Step-by-Step: How to configure a One-Click-Action
  • Application Access for Dynamics 365
  • How to find your environment’s unique name in Microsoft Dynamics 365
  • How licenses are counted
Top Rated Articles
  • “Undefined”-labels in Chrome and Edge 114 and higher
  • Important information for Dynamics 365 online customers using DocumentsCorePack and/or AttachmentExtractor
  • How to activate the DocumentsCorePack Connector for PowerApps & Microsoft Flow
  • How to insert Condition Fields in DocumentsCorePack Templates designer
  • How licenses are counted
Categories
  • *News and General Infos* 64
  • Webinars 45
  • Template Designer(DCP 196
  • DocumentsCorePack(DCP 258
  • TelephoneIntegration (TI 65
  • AttachmentExtractor (AE 75
  • PowerSearch (PS 50
  • ActivityTools (AT 61
  • SmartBar (SB 54
  • GroupCalendar (GC 47
Our Vision

“We see it as our purpose to provide products that simplify and speed up our customers’ Microsoft Dynamics 365 experience.”

Knowledgebase
LogIn
mscrm-addons.com
  • Products
  • Online Shop
  • Downloads
  • My Account
About Us
  • About Us
  • Case Studies
  • Newsletter
  • Partner Program
  • Contact
Support
  • Support
  • Terms & Conditions
  • Documentation
  • Webinars
  • Legal Documents
  • Impressum
  • © 2025 www.mscrm-addons.com. All Rights Reserved.