The “Create Document” button will always trigger the DocumentsCorePack Dialog to generate a document based on the current record. If, for example, the button is clicked on an account record, then the resulting document will be based on that account record’s data.
However, it is also possible to create a separate button that can be used to call the DocumentsCorePack Dialog for related records. This can be useful in situations where documents should be generated based on a specific lookup field from a given record, such as generating a document based on a contact’s parent account. This article will demonstrate how that can be done.
Prerequisites
Before continuing with this article, it is recommended to read this article on manually adding a “Create Document” button.
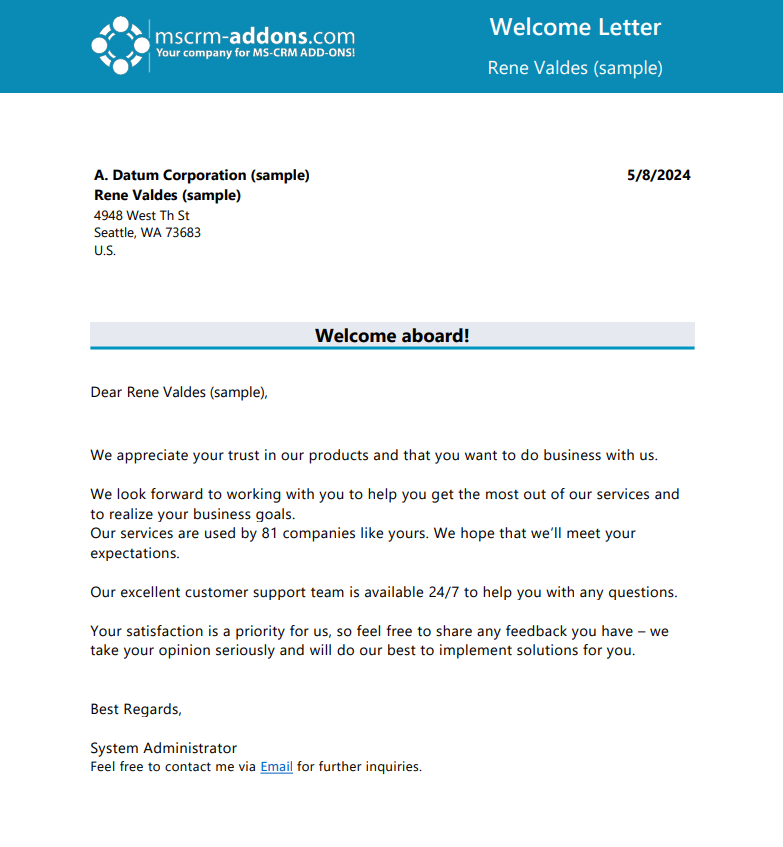
Use Case: Generating a “Welcome Letter” for an account’s primary contact
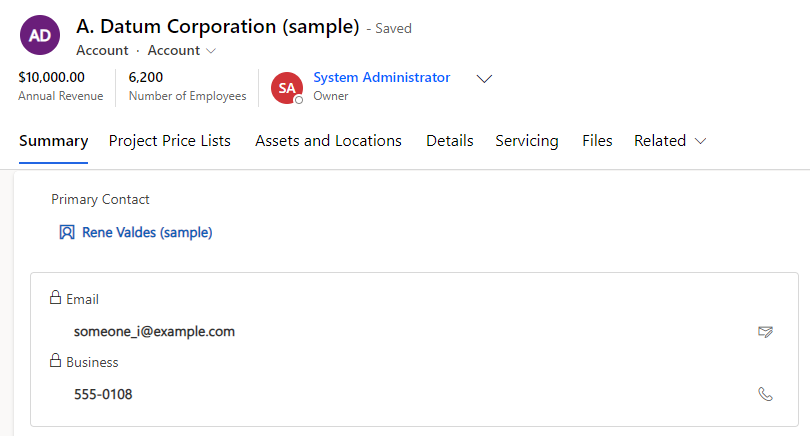
In this example, we have an account record with a primary contact. We would like to add a button that enables users to create documents for this contact directly from the Account form. Specifically, we want to allow for the generation of welcome letter documents for this contact directly from the CommandBar of the account.
Creating the custom button
Create a custom button in the main form or main grid of the account table as outlined here. However, do not incorporate the mentioned custom script. We will label this button as “CreateRelatedDocument.”
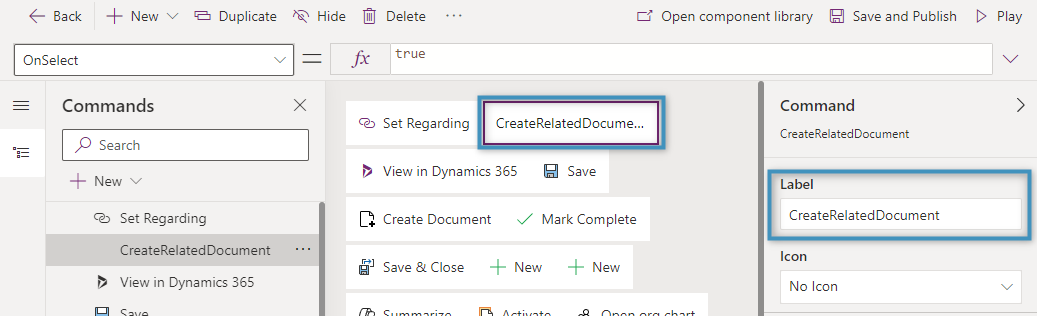
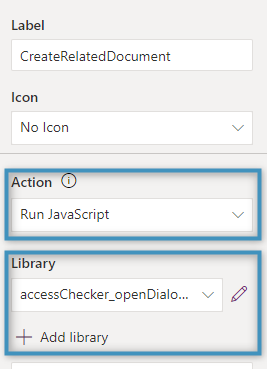
Set the Action of the button to Run JavaScript. Under Library, select Add Library.
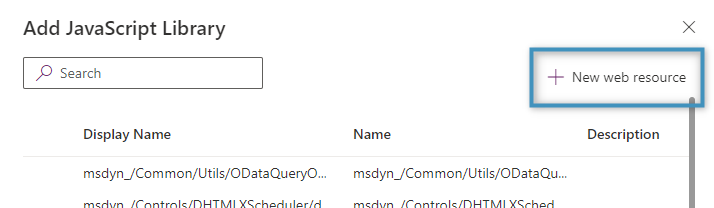
Then, in the Add JavaScript Library window, click on New web resource.
We will need to upload our own JavaScript file that contains the necessary functions to launch the DocumentsCorePack Dialog for a related record. The required JavaScript can be found below:
// -- CustomDcpCreateDocumentButtonOnTrigger: Main function triggered by a custom Menu button --
// executionContext: "PrimaryControl"
function CustomDcpCreateDocumentButtonOnTrigger(executionContext)
{
    try
    {
        // code to get primarycontact of current account (could be any other code to get a related record)
        var primaryContactValue = executionContext.getAttribute("primarycontactid").getValue();

        if (primaryContactValue != null && primaryContactValue.length === 1)
        {
            let id = primaryContactValue[0].id;
            let typeName = primaryContactValue[0].entityType;
            let typeCode = 2;

            if (typeName !== "contact")
                throw Error("Unexpected typename: " + typeName);

            // trigger function to open DCP Dialog
            OpenPtmDcpDialogFromCustomScript(id, typeCode, typeName);
        }
    }
    catch (e)
    {
        alert("Error in CustomDcpCreateDocumentButtonOnTrigger: " + e?.message);
    }
}


// -- OpenPtmDcpDialogFromCustomScript: Function to open the DCP Dialog --
// recordId: Target RecordId (e.g. "4cf2ef9b-fb2c-ed11-9db0-000d3a95950b")
// typeCode: Target EntityTypeCode (e.g. 2)
// typeName: Target EntityTypeName (e.g. "contact")
function OpenPtmDcpDialogFromCustomScript(recordId, typeCode, typeName)
{
    const openDialog = function ()
    {
        try
        {
            window.top.ptm_openLookupDlg(null, [recordId], typeCode, 1, typeName, true);
        }
        catch (e)
        {
            alert("Error in OpenPtmDCPDialogFromCustomScript_openDialog: " + e?.message);
        }
    }


    try
    {
        if (typeof (recordId) !== "string" || recordId === "")
            throw new Error("inRecordId is empty");

        var typofEtc = typeof (typeCode);
        if (typofEtc !== "number")
        {
            if (typofEtc !== "string" || isNaN(typeCode))
                throw new Error("inTypeCode is no number");
            else
                typeCode = parseInt(typeCode);
        }

        if (typeof (typeName) !== "string" || typeName === "")
            throw new Error("inTypeName is empty");

        const webresource = "/webresources/ptm_globalambutton.min.js"

        if (window.top.document.querySelector('script[src$="' + webresource + '"]') != null)
            openDialog();
        else
        {
            const dialogScriptUrl = Xrm.Page.context.getClientUrl() + webresource;
            let dcpScript = document.createElement("script");
            dcpScript.setAttribute("type", "text/javascript");
            dcpScript.setAttribute("src", dialogScriptUrl);
            dcpScript.onload = function ()
            {
                openDialog();
            }
            window.top.document.getElementsByTagName("head")[0].appendChild(dcpScript);
        }
    }
    catch (e)
    {
        alert("Error in OpenPtmDCPDialogFromCustomScript: " + e?.message);
    }
}
Note: If this code is used for a different related record, the “primarycontactid” and “contact” values should be changed to match the lookup and entity respectively.
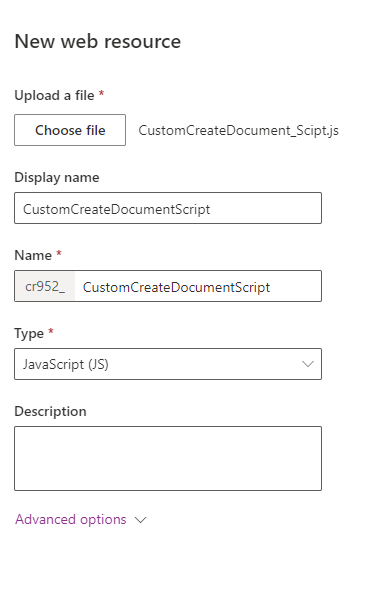
After saving the JavaScript as a .js file, upload the file as shown below.
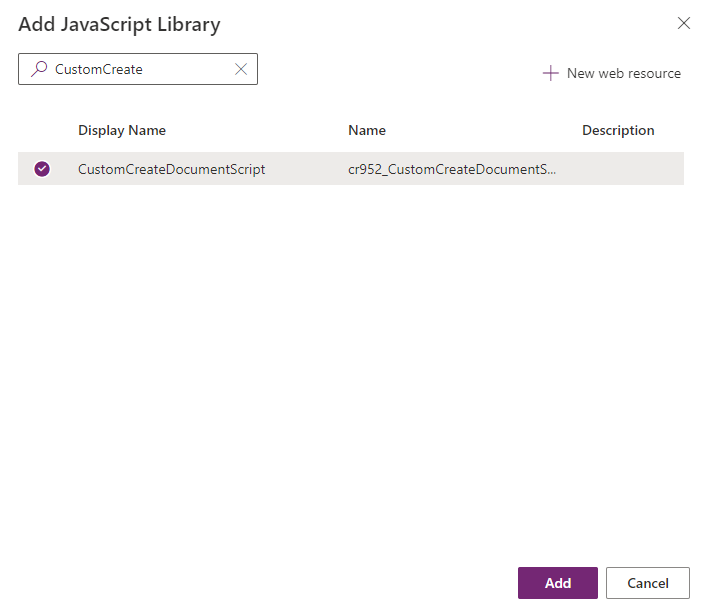
Save and publish the file. Then, select the JavaScript file and add it.
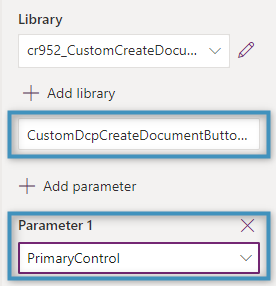
Once added, write in “CustomDcpCreateDocumentButtonOnTrigger” for the function name, and add “Primary Control” as a parameter.
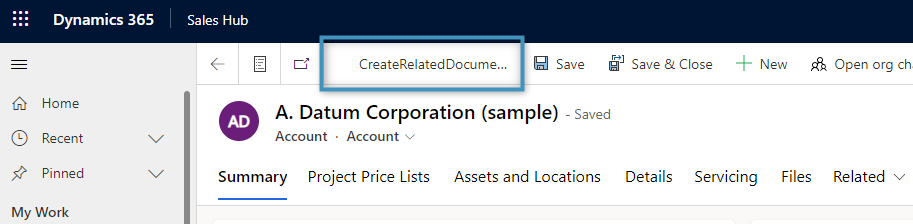
Save and publish your changes. Navigate to an account record. The newly created button should be displayed on the toolbar.
When clicking the button, you will notice that the listed templates are that of the contact entity, not of the account entity.
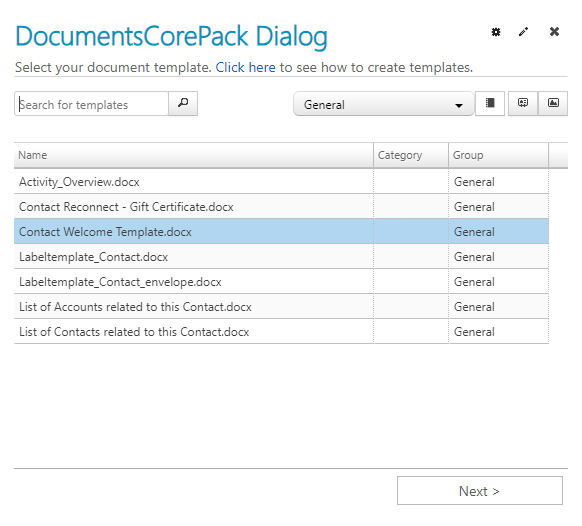
We can thus select the “Contact Welcome Template” and generate a document for our primary contact.
That’s it! We appreciate your feedback. Please share your thoughts by sending an email to support@mscrm-addons.com.