Sometimes you may need to make minor edits to a template you routinely use before sending it. This article outlines how to edit a template for one-time use during the Choose Template step of the DocumentsCorePack dialog. The original template is not changed. This edit template capability allows users to edit templates without saving multiple versions.
Example: A common use case is when a user needs to generate batch documents from a standard template, but wants to update wording or a section to mention the holidays or special occasions. For example, we send out emails every few months to accounts that we have not heard from in a while. We are looking to send out our next batch of emails, but this run will be sent out in December, so we want to change the message to include a brief message about the upcoming holidays.
Prerequisite: SharePoint must be configured on the service for this Edit Template feature to be shown and used.
Step-by-Step Guide
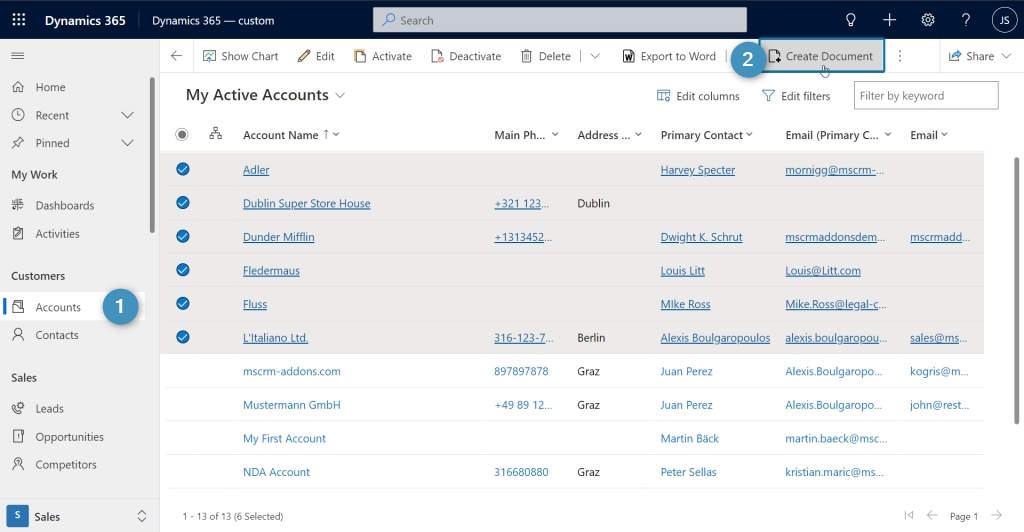
The first step to generate the desired documents is to navigate to Dynamics 365 and select ❶ Accounts. After filtering the accounts and selecting the ones that we would like to contact, we can select the ❷ Create Document button. This will open the DocumentsCorePack dialog.
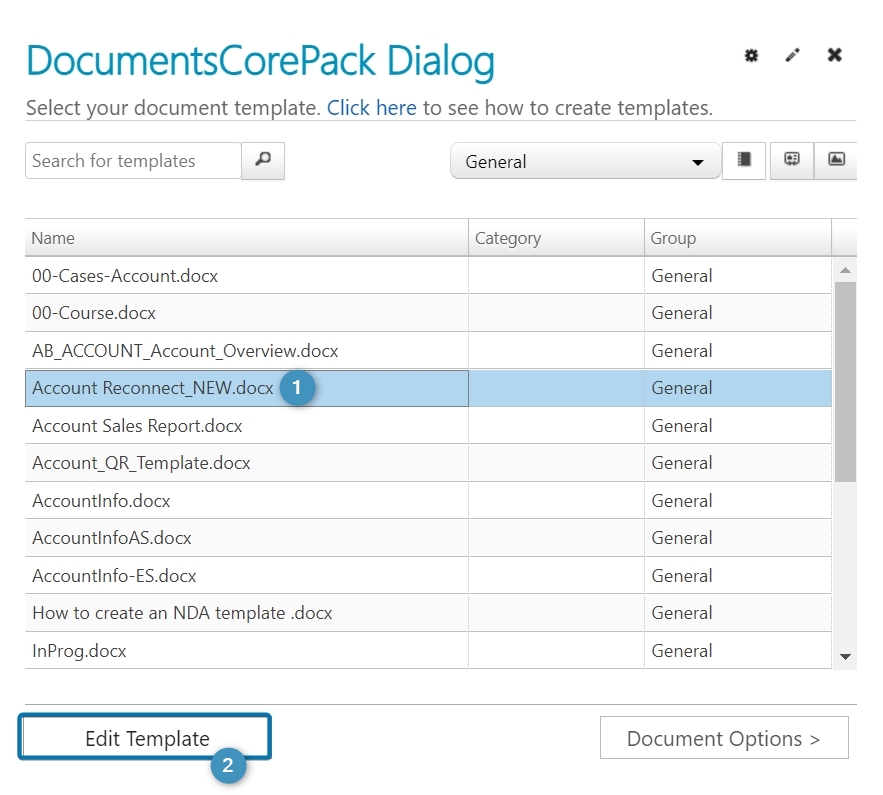
When prompted to select a template, we will select our ❶ Account Reconnect template. Since we would like to edit this template to add a message about the holidays, we will select the ❷ Edit Template button in the bottom left corner of the dialog.
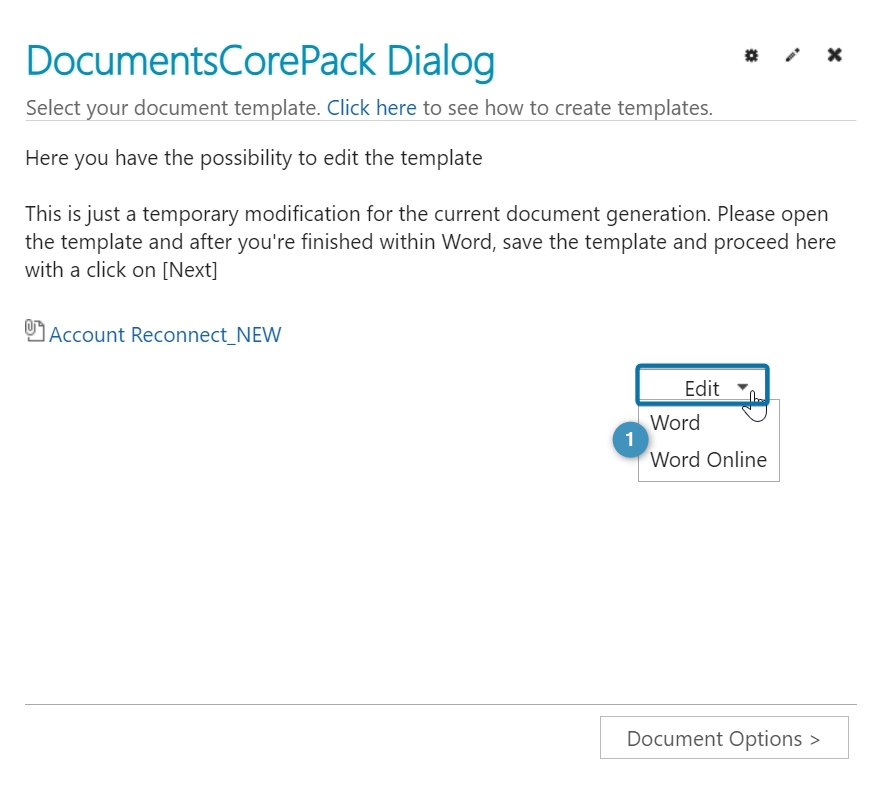
We then have the option to choose between editing the template via ❶ Word or Word Online. For our example, we will choose to edit via Word.
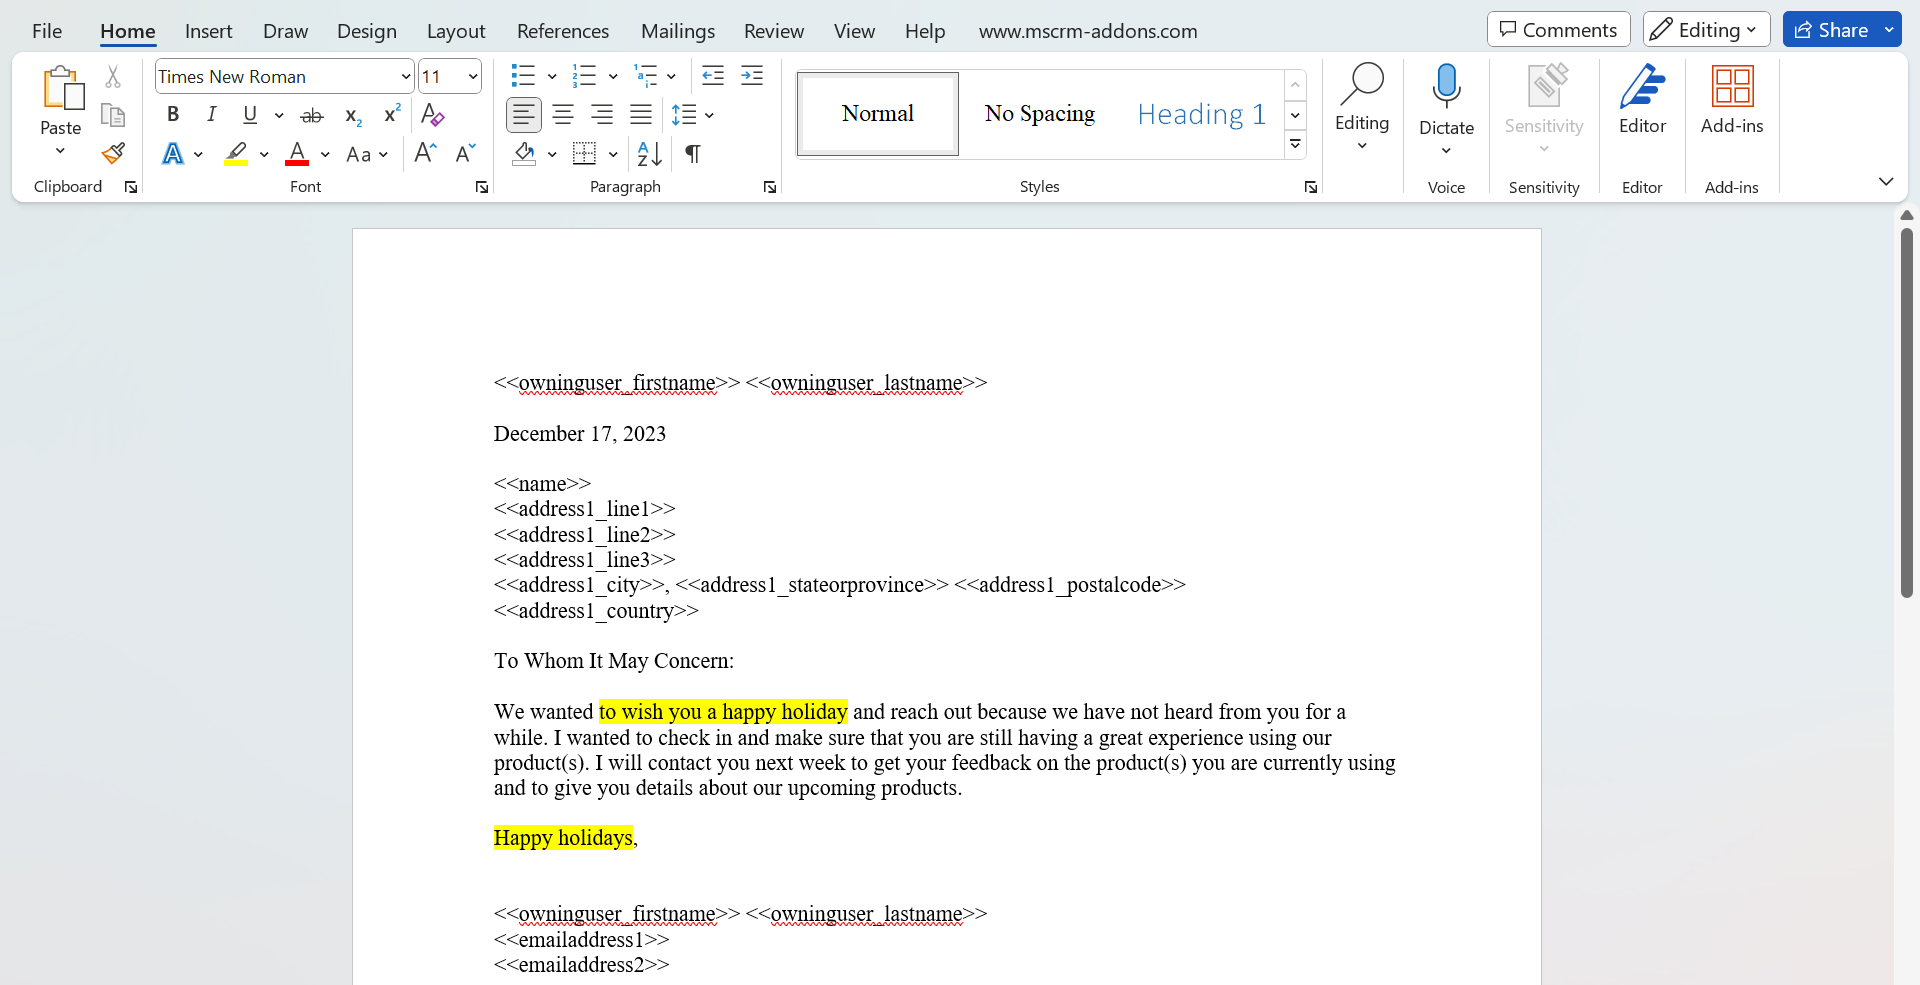
The template will open in Word, and here we can edit the template as normal. Please note: This is just a temporary modification for the current document generation. This does not change the original template.
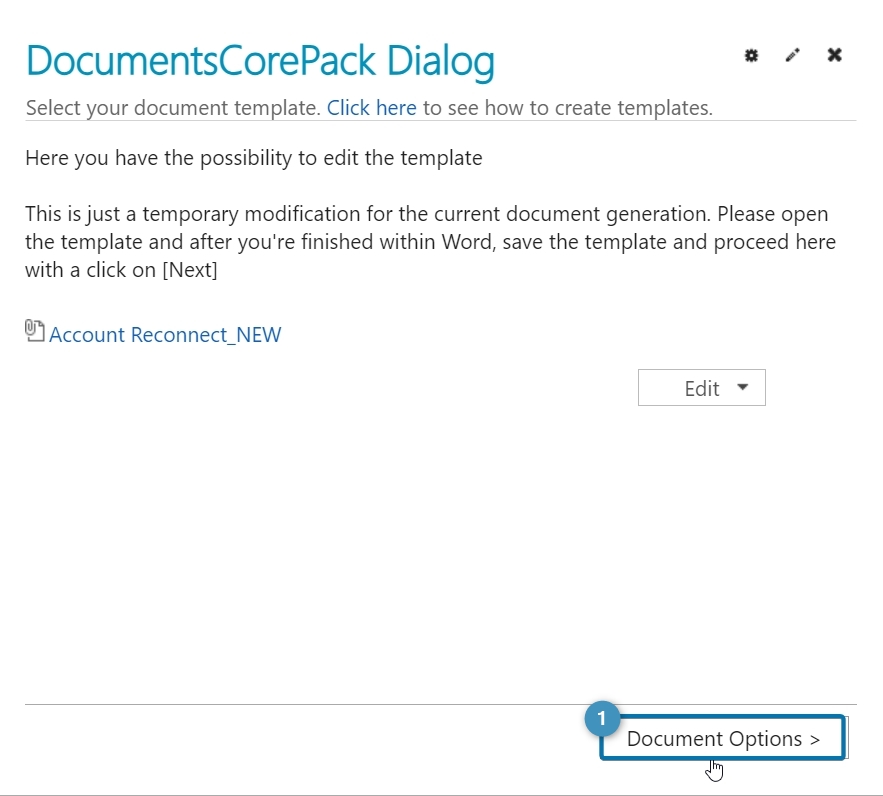
After we have finished editing the template, we will save the template with the save icon in Word and then navigate back to the DocumentsCorePack dialog and select ❶ Document Options to continue.
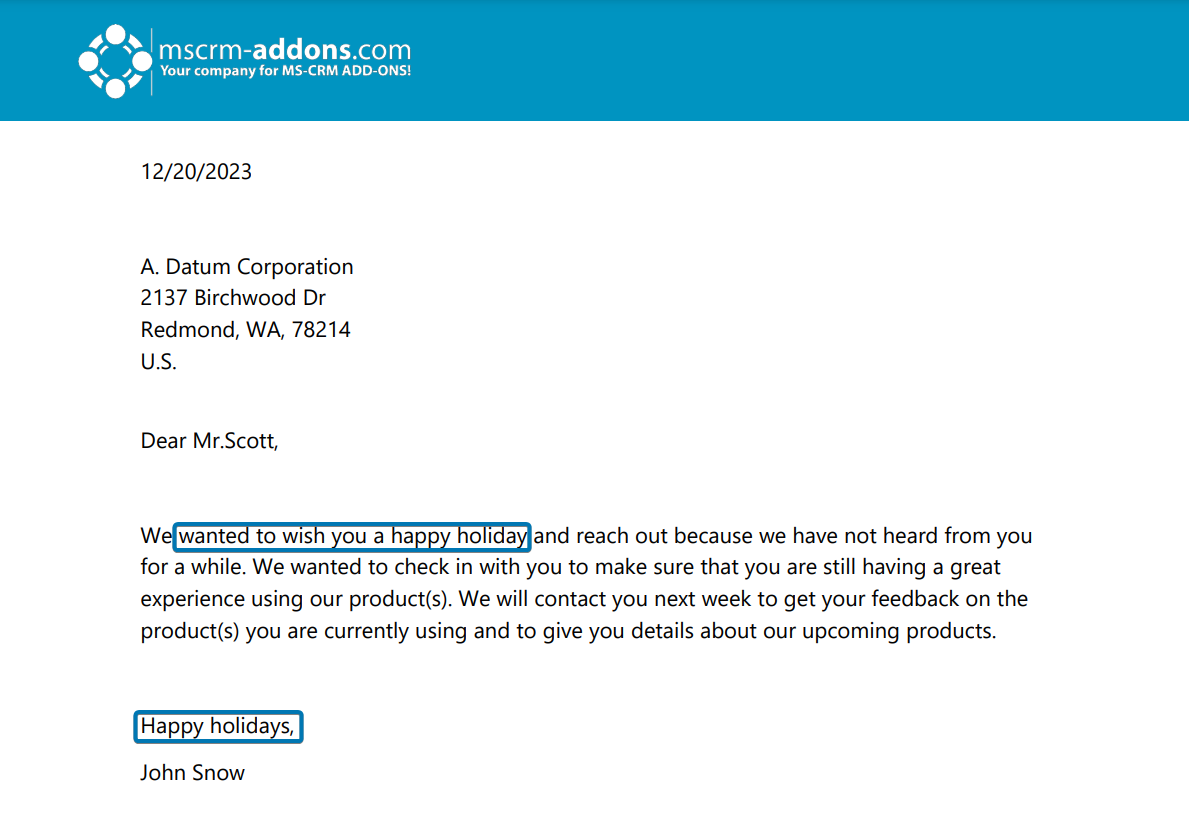
From here we proceed through the steps of the DocumentsCorePack dialog as normal to generate the desired batch-documents. Below is a sample final document with the edits.
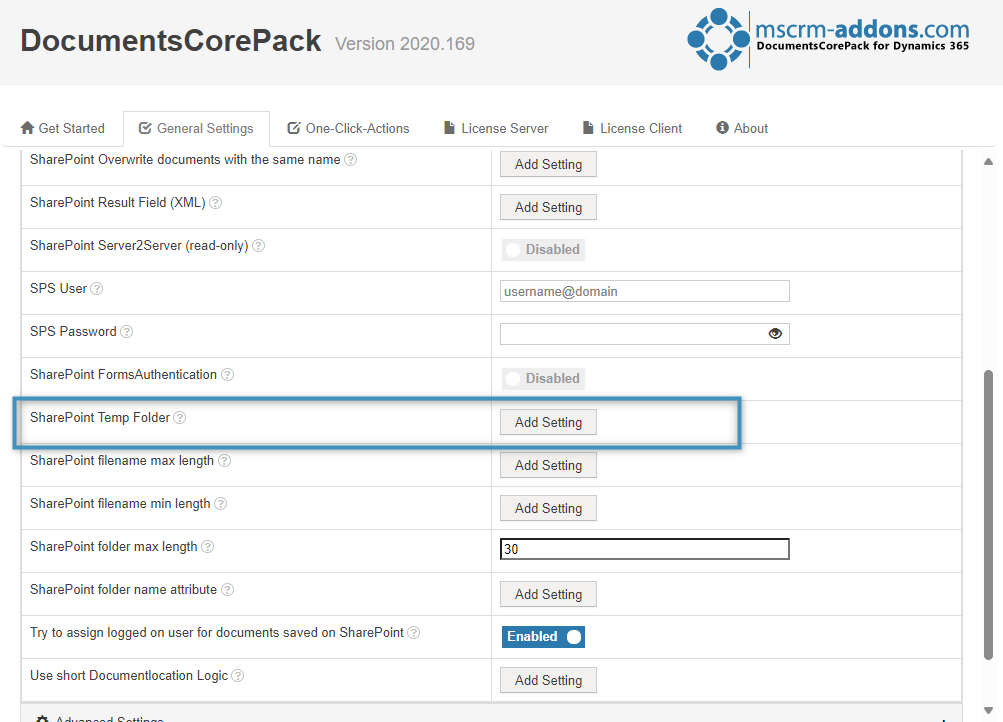
The SharePoint Temp Folder
Under General Settings > SharePoint Settings in DocumentsCorePack, you can configure where your temporary templates are stored in SharePoint with the SharePoint Temp Folder setting. By default, temporary files are stored in the root of the entity’s SharePoint folder, but the location can be changed if needed. However, it is not recommended to change this setting without contacting support.
That’s it! We appreciate your feedback! Please share your thoughts by sending an email to support@mscrm-addons.com.