DeepSign is another e-signature tool that empowers users to electronically sign documents. It is primarily used in Switzerland, Germany, and Austria. This article describes how to generate a DocumentsCorePack (DCP) template that contains a DeepSign signature, and how to initiate the signing process.
Requirements:
- Installation of the DeepSign for Dynamics 365 solution
- Prepare a template for e-Signing via DeepSign
Generating a document from the DCP dialog
After saving your template, navigate back to your Dynamics 365 environment. Select a record from the entity that you have used for your template entity type (ex: Account), and then select the Create Document button to open the DCP dialog. From here, select the Let me decide every step option and then the DeepSign template. On the document options page, make sure to attach the document as a DeepSign email. After creating the document, it will generate the DeepSign email and send the document to selected recipients for signing.

Note: You can also create an OCA with DeepSign functionality.
Generating a document via Power Automate
Alternatively, you can generate the document via Power Automate instead using our DocumentsCorePack Connector. After creating a Flow and adding a step that generates the document, you can add the Sign DocumentJob (sync) step.
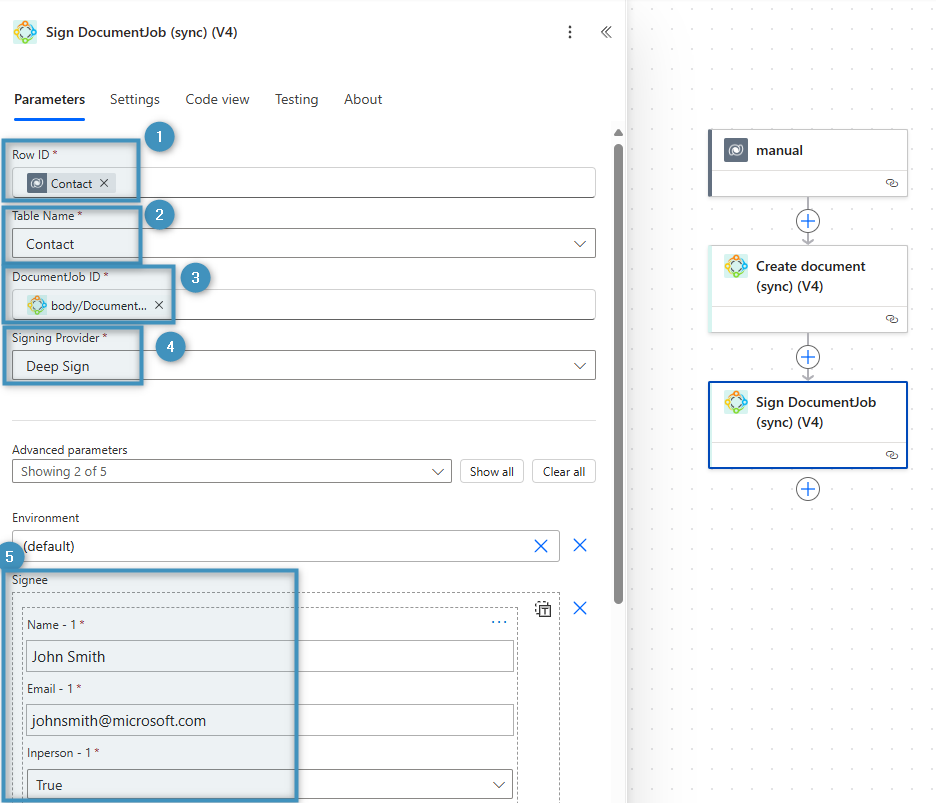
Once the step has been added, you will need to configure the ❶ Row ID and ❷ Table Name to correspond you the entity type (Contact, in this case). Fill in the ❸ DocumentJob ID field with the DocumentJob ID from the Create Document step. Then, set the ❹ Signing Provider field to DeepSign.
Additionally, you will need to configure the ❺ Signee parameter if you want the generated document to be sent to the signee(s) after the flow is executed.
That’s it! We appreciate your feedback! Please share your thoughts by sending an email to support@mscrm-addons.com.