Conditions allow you to define content that is either displayed or removed from the final document based on a certain condition (for example field values in Dynamics 365).
This step-by-step description explains how to set conditions in our DocumentsCorePack (DCP) TemplateDesigner. In this example, we want to create a quote and choose between “Mr” and “Ms” depending on the gender of the recipient.
This webinar also covers this topic in detail.
Please note: As well as the method described in this article, Microsoft Word also supports conditions inside documents that can alternatively be used.
Step 1. Create a quote template
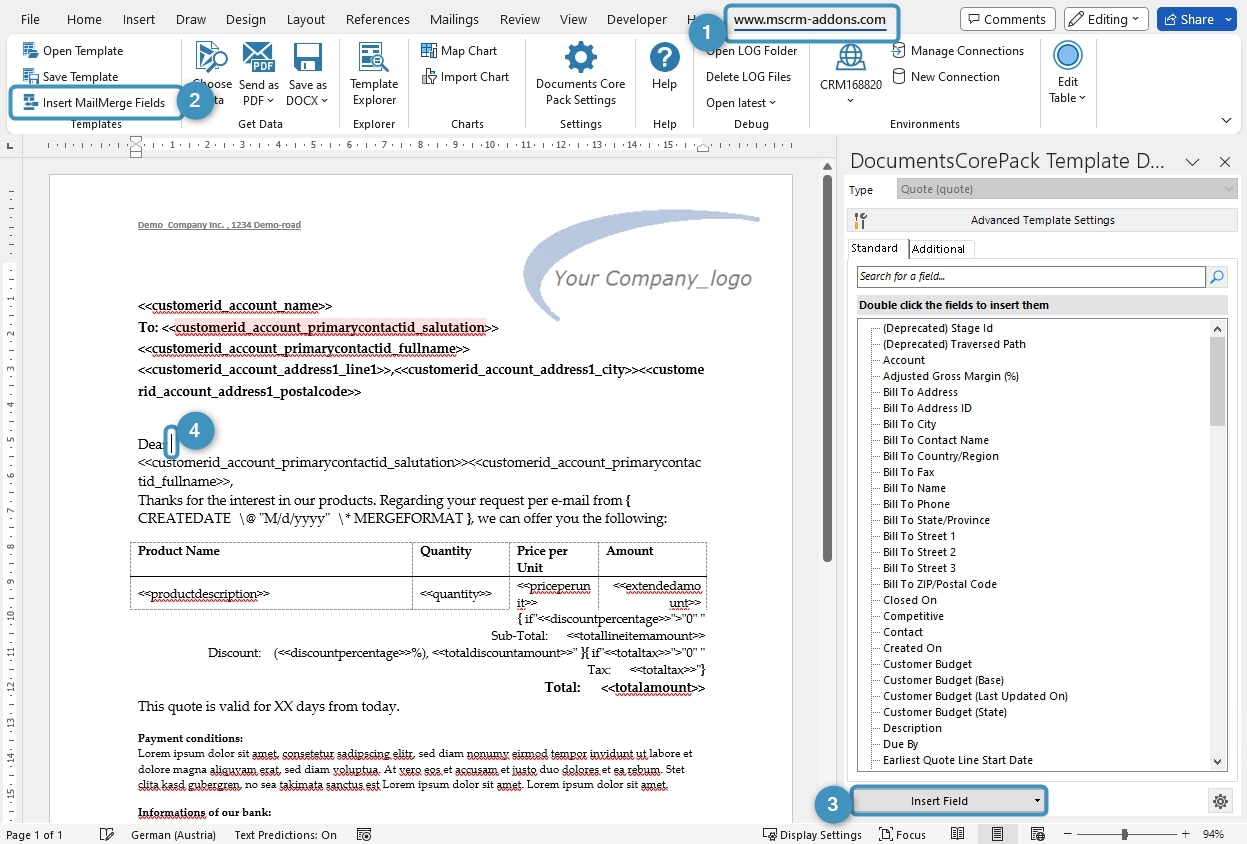
First, you must create a new template or open an existing one. Once the Word template is open, click the ❶ www.mscrm-addons.com tab on the top of the Word ribbon and ❷ press Insert MailMerge Fields to open the TemplateDesigner on the right side. More information about how to create DCP templates can be found here. Select the ❸ Insert Field button.
Please note: Set the cursor ❹ at the position where you would like to insert a condition field. In our example, we want to set the condition in the subject line after “Dear” choosing between “Mr” and “Ms” based on the recipient, as you can see below.
Step 2. Use the Condition field option
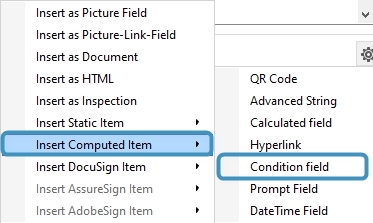
Press the ❸ Insert Field button. Select Insert Computed Item and then Condition field.
Step 3. Configure the setup of your condition fields
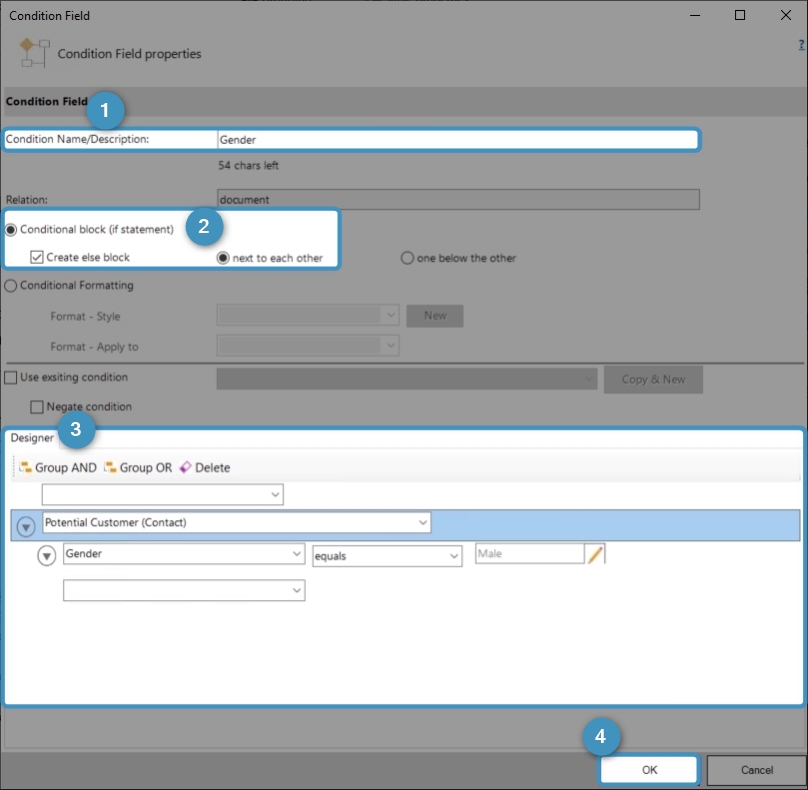
The Condition Field window opens. For further steps:
❶ Give your condition a descriptive name. It makes it easy to re-use existing conditions in a template.
❷ Enable the creation of an ELSE block and define the layout of the inserted condition fields, which in in this case is next to each other.
❸ Use the condition designer to create your condition. In this example, we want to create the condition for the entity Potential Customer (Contact). We want our condition to choose between “Mr” and “Ms” depending on the gender of the recipient. Therefore, we select in the first drop-down menu the field Gender and the operator as equals. Depending on the data type of the field, you have an additional control that opens a new dialog to select the compare value, which in this case is male. A more detailed description of the condition designer can be found here.
In your template, you can see placeholders for the formatting options next to each other. Because you selected to insert an ELSE block, you have the second placeholder, as you can see in the figure below.

Step 4. Set your custom text block
Within these placeholders, you can now enter the content of your conditions. In this example, IF Gender equals to Male it should display “Mr” and ELSE “Ms“.

Step 5. Save your template
Before you can use or test your template, you must save it. Use the Save Template option of the DocumentsCorePack TemplateDesigner to publish the template to Dynamics 365.

Step 6. Test your template
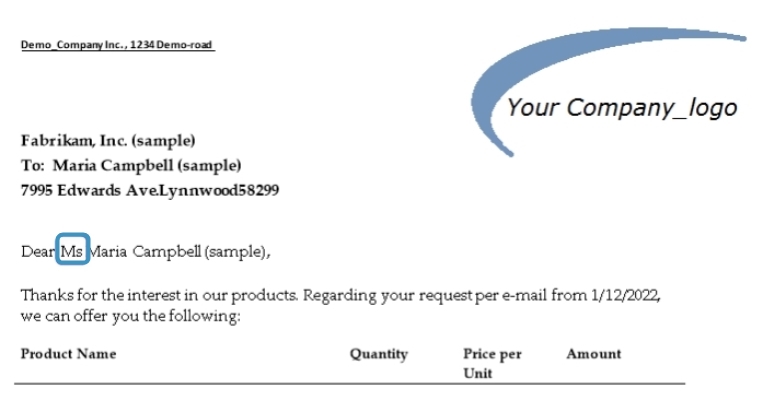
As you make changes to your template, you may want to test them quickly. A step-by-step description of how to test your template can be found here. Below you can see the result of our created template containing the set condition (highlighted).
That’s it! We appreciate your feedback! Please share your thoughts by sending an email to support@mscrm-addons.com.