This guide walks you through installing DocumentsCorePack Layout Designer for Business Central directly from Microsoft Word via the Office Add-In store.
Prerequisites
Before installing the DocumentsCorePack Layout Designer for Business Central, please ensure that you have installed DocumentsCorePack in your Business Central environment and configured your service via our Online Service Configuration.
Option 1: Deploy via Microsoft App Source
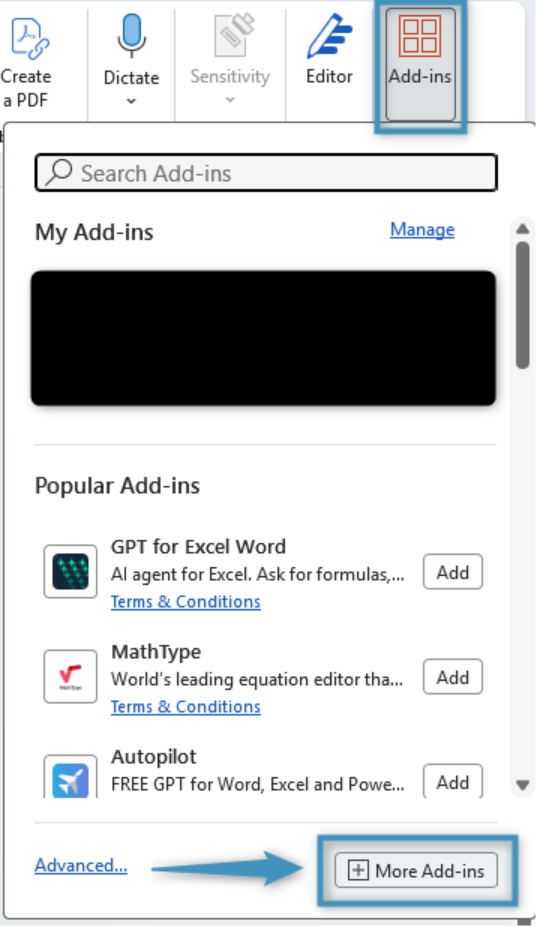
Step 1: Open the Add-Ins Menu
Launch Microsoft Word and click the Add-Ins button under the Home ribbon. Then, click More Add-ins.
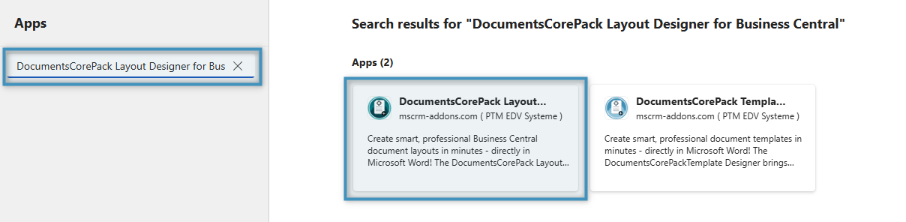
Step 2: Locate and Install the Add-In
In the search bar, search for the DocumentsCorePack Layout Designer for Business Central. Select the add-in from the results.
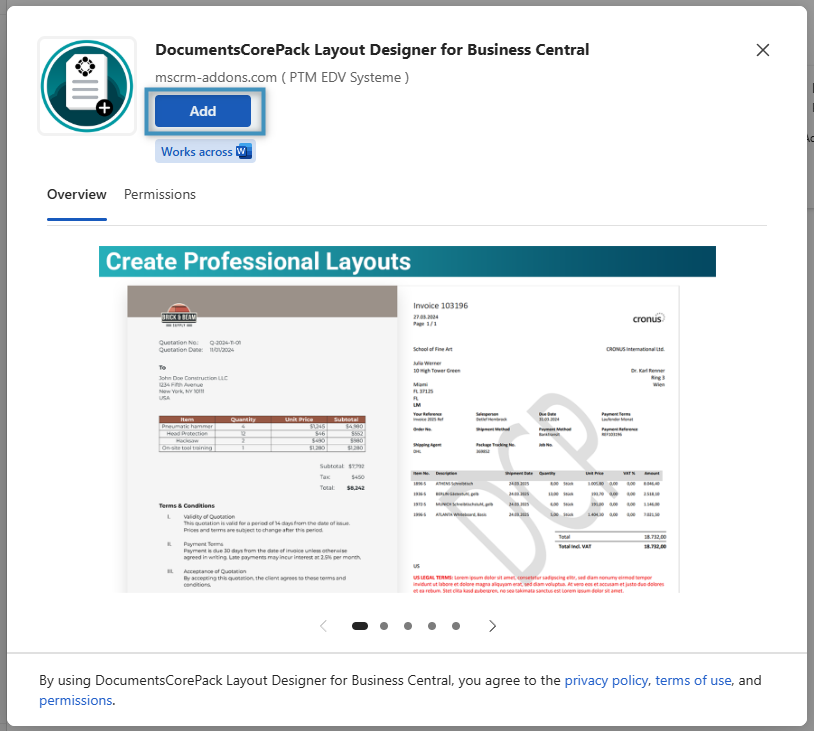
In the overview, click Add.
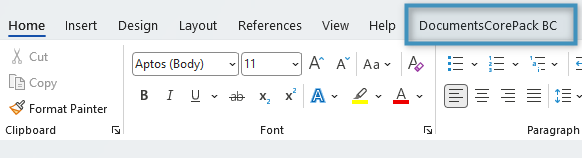
The add-in will appear in your Word ribbon as a new tab labelled DocumentsCorePack BC.
Step 3: Connect to Business Central
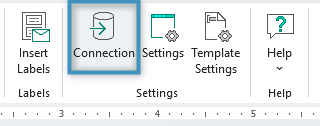
To begin using the add-in, you must first establish a connection to your Business Central environment. To do this, click the Connection button in the Settings group in the DocumentsCorePack BC tab.
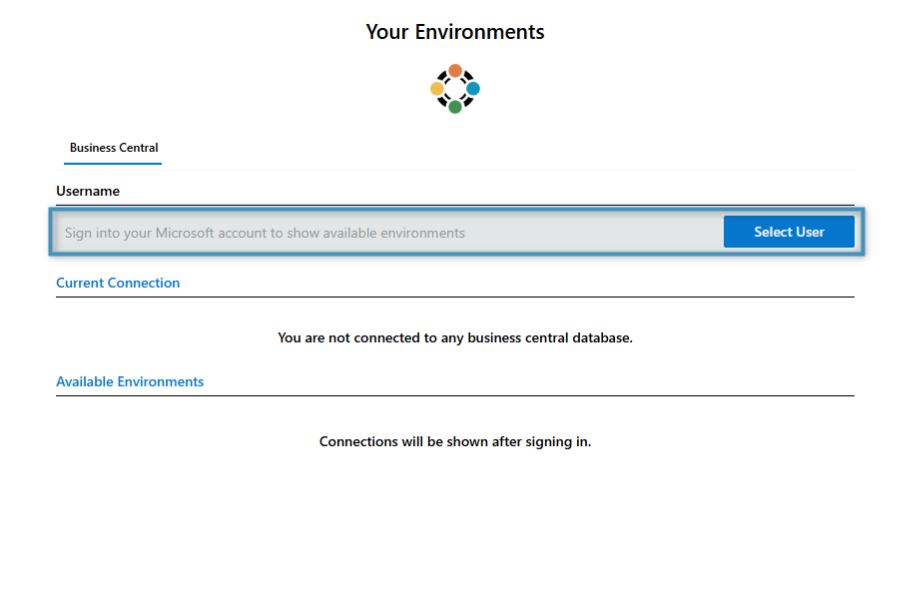
You will be prompted to sign in with your Microsoft account.
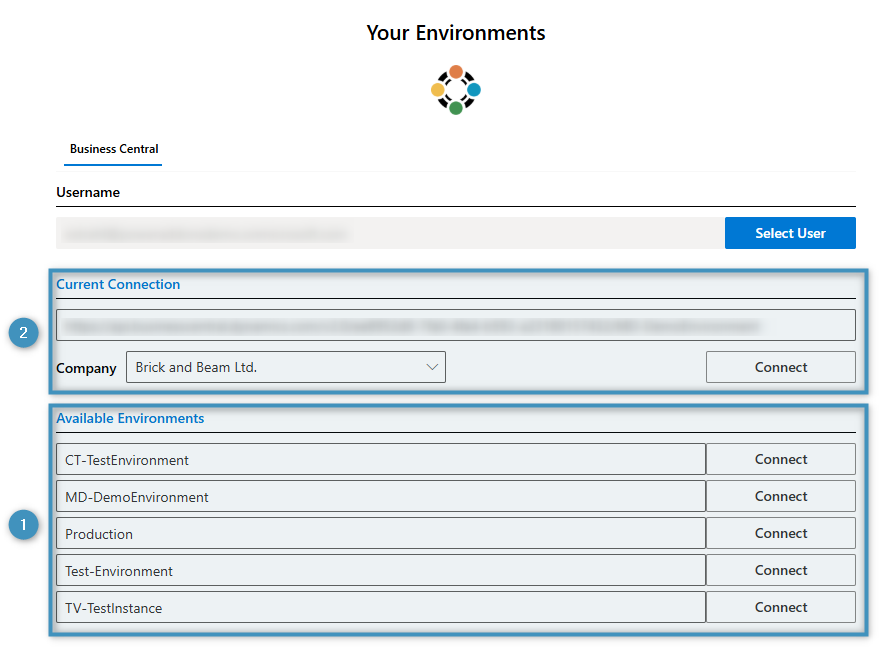
After you have signed in, you will be prompted to connect. You will first need to ❶ select an environment and then ❷ choose a company.
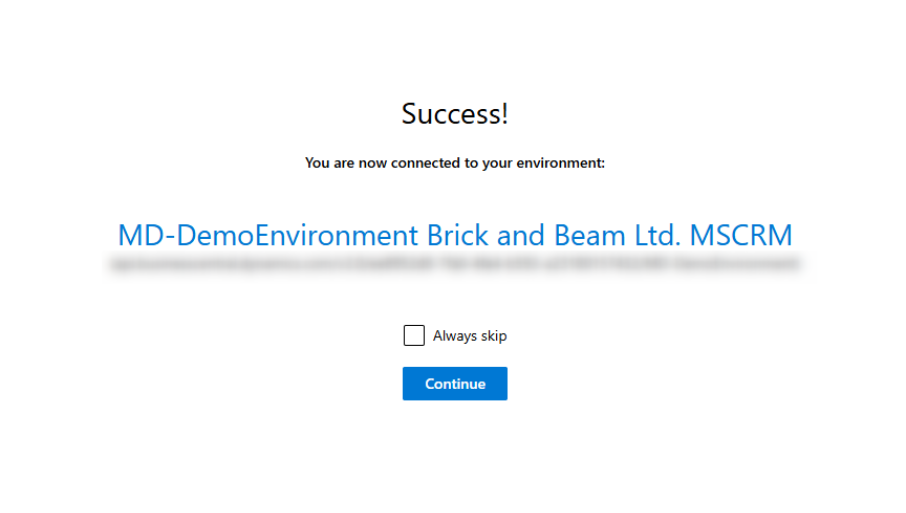
Once you have chosen a company, you will be connected to your environment. You can then click Continue to begin using the DocumentsCorePack Layout Designer for Business Central.
Option 2: Deploy via Microsoft 365 Admin Center
In many organizations, end-users are not allowed to deploy Add-Ins directly. Instead, Add-Ins are centrally maintained via the Microsoft 365 Admin Center. Administrators can deploy the DocumentsCorePack Layout Designer for BC for all users or specific groups by following these steps:
Step-by-step deployment
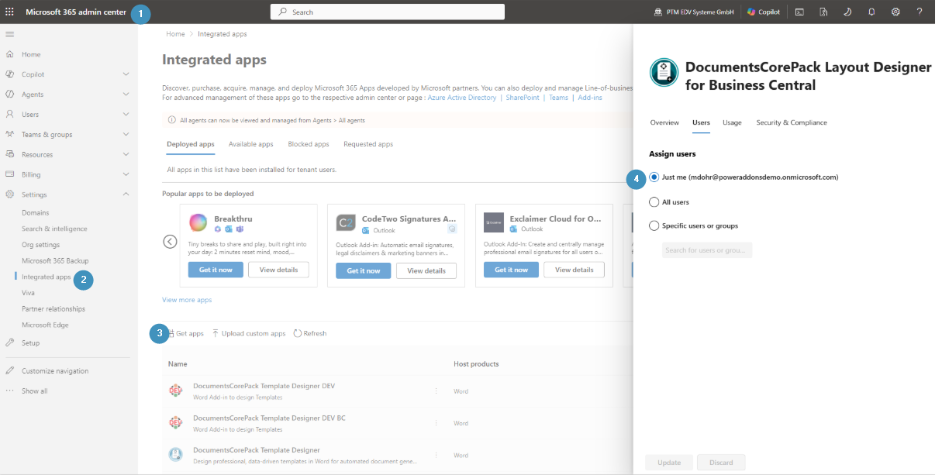
- Open the Microsoft 365 Admin Center
- Go to https://admin.microsoft.com and sign in with your admin account.
- Navigate to Integrated Apps
- In the left navigation menu, select Settings → Integrated apps.
- Add the Layout Designer
- Click Get apps, search for DocumentsCorePack Layout Designer, and select it from the list.
- Assign users
- Under the Users tab, choose how the Add-In should be deployed:
- Just me – installs the Layout Designer only for the admin user.
- Entire organization – deploys the Layout Designer for all users in your Microsoft 365 tenant.
- Specific users/groups – deploys the Layout Designer for selected users or Microsoft 365 groups.
- After making your selection, click Update to confirm.
- Under the Users tab, choose how the Add-In should be deployed: