Images can be added to templates using the Insert as Picture Field option in the DocumentsCorePack Layout Designer for Business Central.
Inserting as a Picture Field
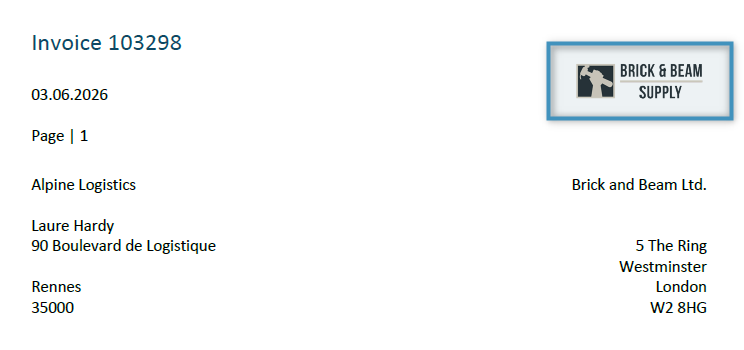
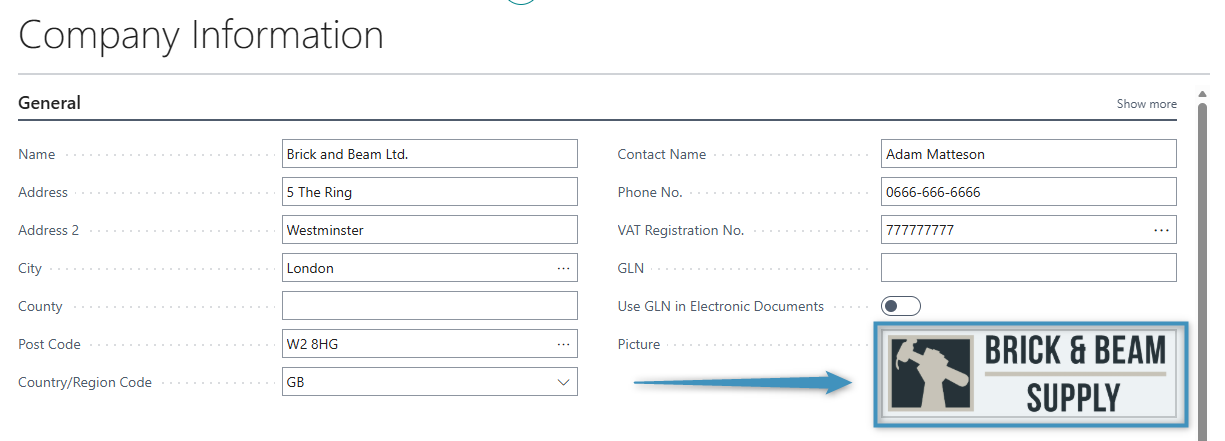
In our example, we would like to include our company image in a template. The image is shown here in Business Central.
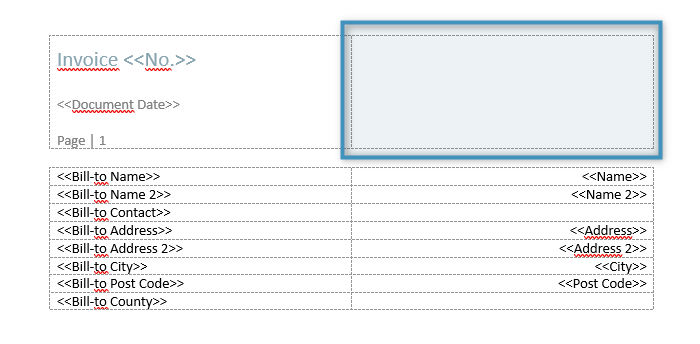
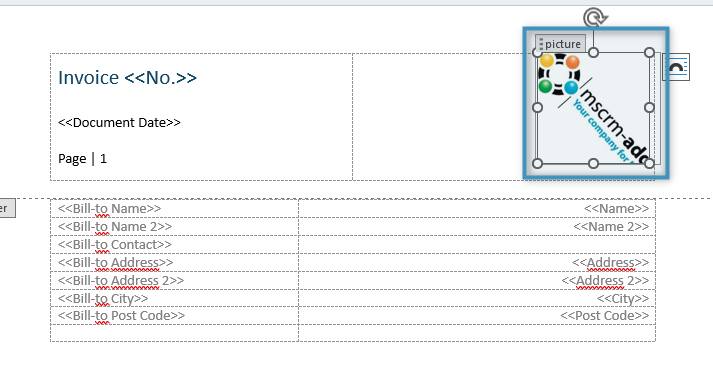
Our image should be added to the top right of the template, located in the header. It should be placed in the position shown below.
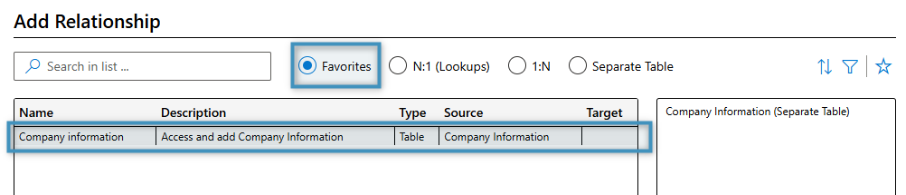
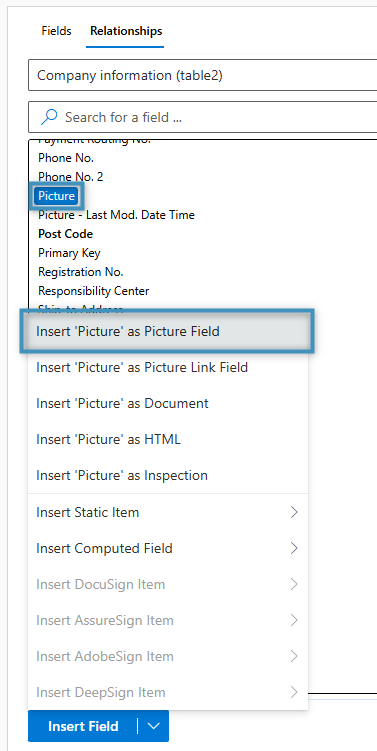
Since we’re adding an image from our company, we will need to establish a relationship with the Company Information table, which can be done via the Relationship Designer.
With our Company Information table added, place your cursor where the image should go and select the field associated with the image; in our case, it is the Picture field. Then, click the dropdown arrow next to the Insert Field button and select Insert “Picture” as Picture field.
This will place an image placeholder field at the location of your cursor.
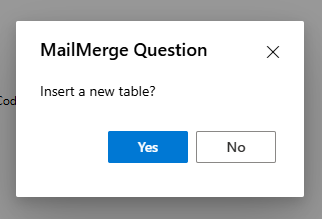
Note: If the image is being inserted from a relationship, you will be prompted to create a table. If you are only trying to insert a single image, such as in our case, click No.
Once the image has been inserted, save your template. Upon generating a document based on the template, the image will be shown.