The DocumentsCorePack Layout Designer for Microsoft Business Central is designed to help users create document templates ranging from simple layouts to more advanced data-heavy documents. This guide explains the fundamentals of template creation by demonstrating how to insert fields and relationships while making an invoice template.
Setting the Starting Entity
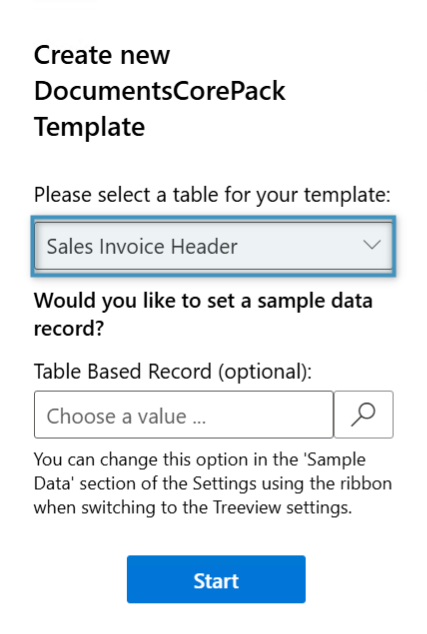
When creating a template, start by clicking the Insert Fields button in the Fields group of the DocumentsCorePack-BC tab. This will open the Template Designer. You will be prompted to select a table for your template. In this case, we will select the Sales Invoice Header table, since we want to create an invoice template. Optionally, you can set a record to be used as sample data.
Inserting Fields
With the entity selected, we can now insert our fields. Fields can be added to the template simply by double-clicking on them. They will be placed at the cursor’s location. Since we are creating an invoice template, we will add some fields relating to the invoice itself, including the invoice number, and some of the related account information.

Creating Relationships and Tables
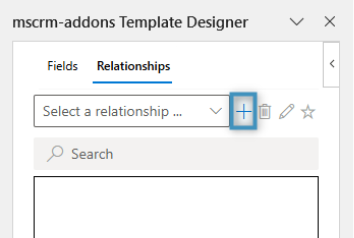
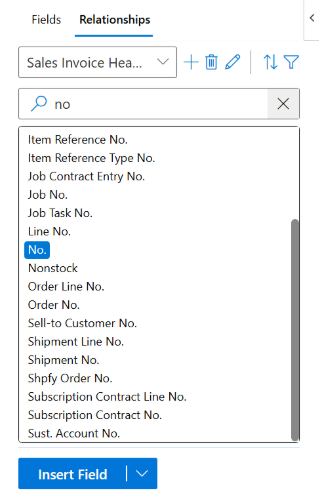
To include the invoice products, we will need to create a table by resolving a relationship to the Sales Invoice Line table. This is done through the Relationships tab. Navigate the “Relationships” tab in the template designer and click the “+” button.
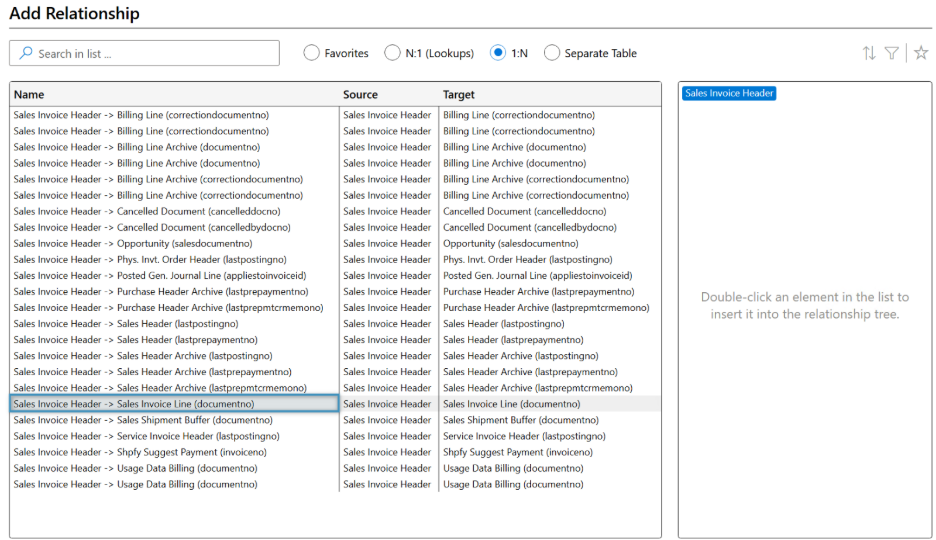
This will open the Relationship Designer. Here, you can resolve relations between any two entities that have an existing connection.
Since we would like to include our invoice products, we need to resolve a relation to the Sales Invoice Line table. Navigate to the 1:N section of the relationship designer and search for “Sales Invoice Header -> Sales Invoice Line”. Double click the option and select Add Relationship in the bottom right corner.
Next, we will create the sales invoice table. We will start with the first field, called No. This field displays each invoice item’s number when you create a document using this template. Double click the field to open the Table Designer.
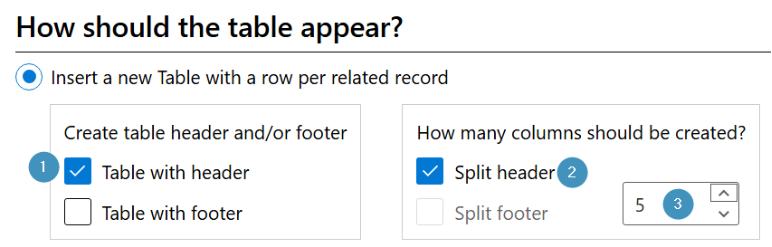
Once the table designer appears, we will ❶ insert a table with header, ❷ split the header into ❸ 5 Columns to account for the item number, product description, quantity, unit Price, and amount. Finally, click OK to save the table.
When the table designer closes, you will see our previously selected field “<<No.>>” field in the table.

We will now add the rest of our fields from the fields list by double clicking them in the template designer. In addition, we will add headers to accompany each column. Once finished, your table should look something like this:

Formatting Fields
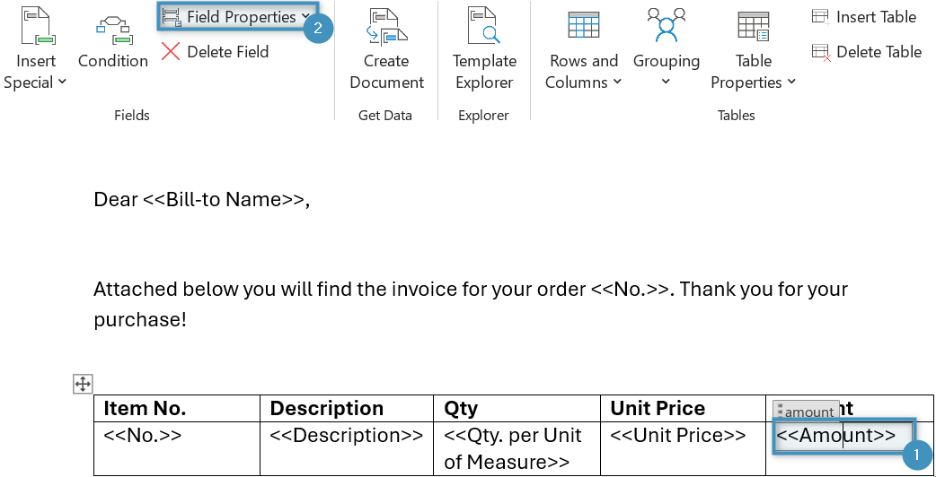
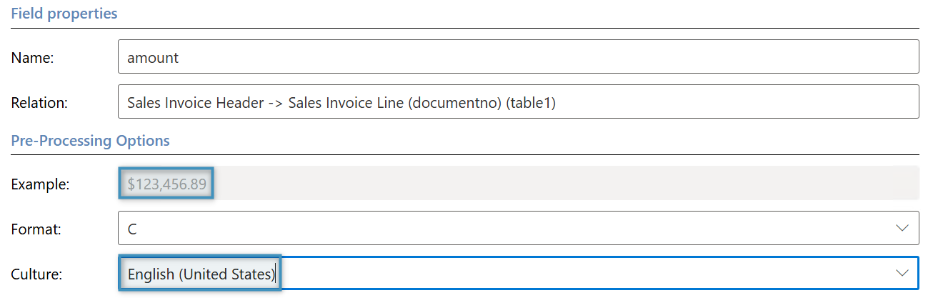
Using the field properties, users can format different fields into currency, percentages, and display correctly for different cultures. In this case, we will use the field properties dialog to display the Unit Price and Amount fields as currency.
To open the field properties dialog, ❶ click anywhere inside of the inserted field and ❷ select Field Properties from the DCP ribbon.
In the new dialog you will first select the Format, which determines how the number will be displayed, and then the Culture, which will alter the field to the correct cultural format ($, €, £, etc…).
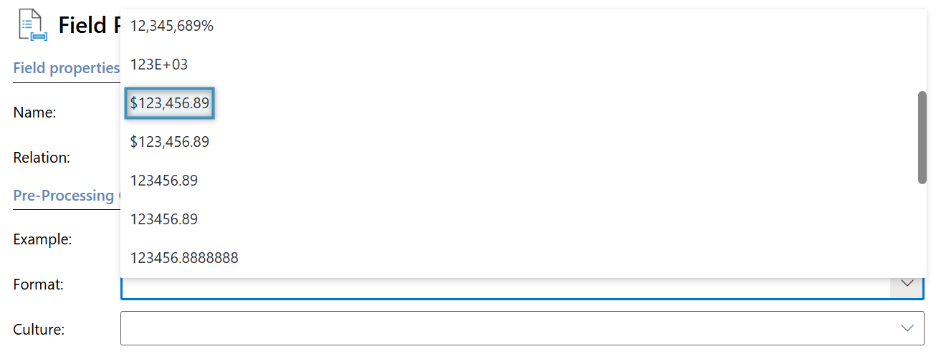
In addition, you can also see a preview of how the field will be displayed in the Example section of the Pre-Processing Options.
When you’re finished adjusting the field properties, your completed template should look something like this:

Testing our template
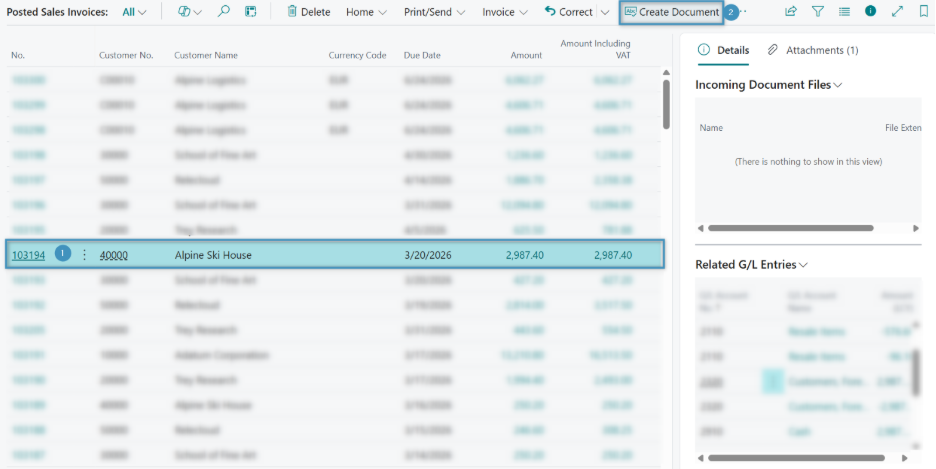
The invoice is now complete. We can test the full template with data using the Create Document function on the Business Central interface.
In your environment, ❶ select the customer you would like to generate the invoice for from the list and ❷ click Create Document in the top ribbon to open the “Generate Document” options.
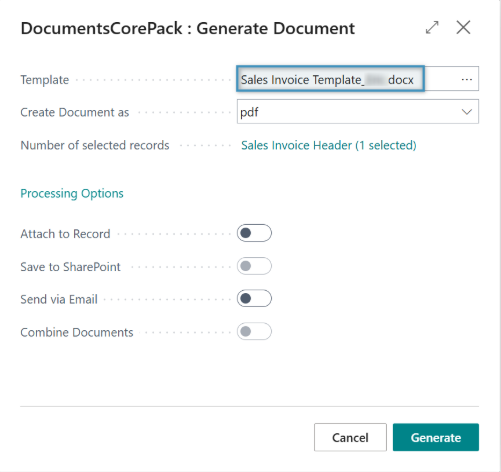
Here, you can select your newly saved template that we created in this tutorial. Once you have configured the settings to your liking, click Generate to create the invoice.
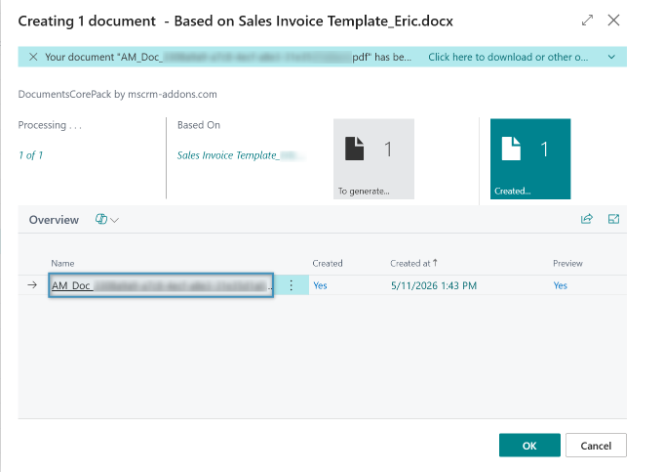
To preview the document, click on the highlighted document once it has finished processing to download it.
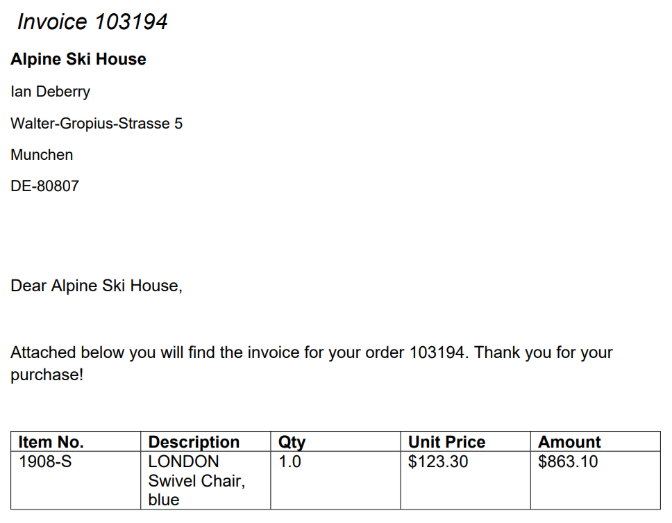
Finally, you can view our result document below.