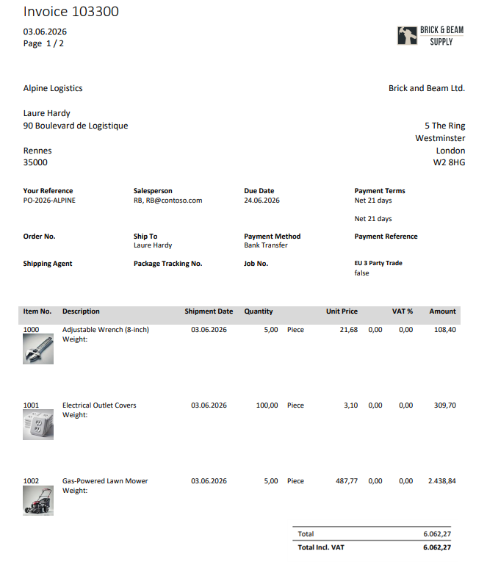
This documentation explains how to create a sales invoice template using the DocumentsCorePack Layout Designer for Microsoft Dynamics 365 Business Central.
In this step-by-step guide, we will create a sales invoice template that includes general invoice details, customer and billing information, a list of invoice lines, and relevant totals such as discounts, VAT, and the invoice amount. The finished template can then be previewed and used for document generation directly from Business Central.
Step 1: Set the base table
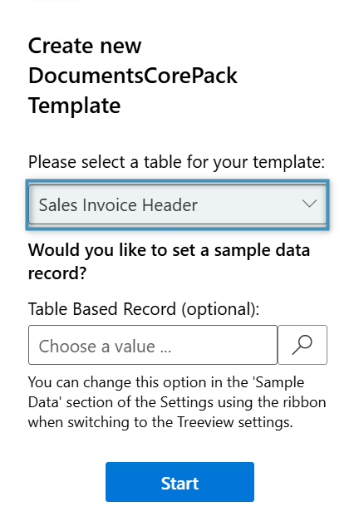
Before you start designing your template, the first step is to define the base table. This selection determines which fields will be available in the Layout Designer.
For this walkthrough, open Microsoft Word and start the DocumentsCorePack Layout Designer. Once the Layout Designer is opened, select Sales Invoice Header as the base table.
Note: The exact table name may vary depending on whether you are creating a layout for posted sales invoices or another sales document. Make sure to select the table that matches the Business Central document you want to generate.
Step 2: Add the text and general structure
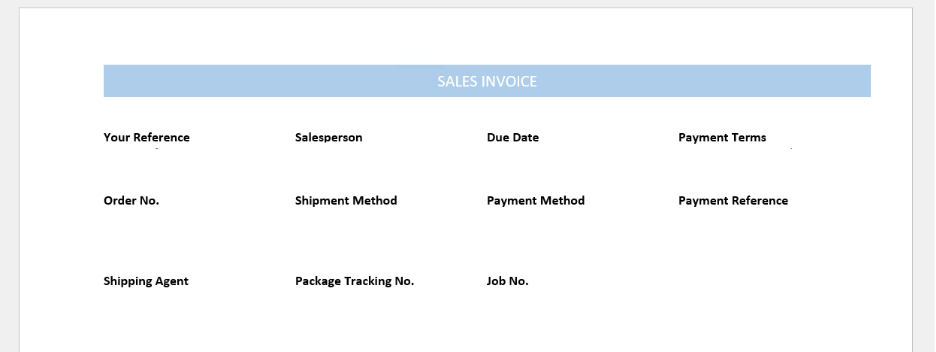
Next, create the basic structure of the sales invoice template in Word.
Start by adding static text to the document and applying formatting where needed. A typical sales invoice template includes:
- A document title, such as Sales Invoice
- Company information
- Customer and billing information
You can use standard Word functionality to add tables, text boxes, headers, footers, logos, colors, and other formatting. At this stage, the document only needs the visual structure.
Step 3: Add standard fields
After the layout structure has been created, insert the standard fields that should be filled with data from your record. These fields come either directly from the Sales Invoice Header table or from its related lookup fields.
For this example, we can begin with the Your Reference field. Simply select the area under the text and insert the field right below by double clicking it in the template designer.
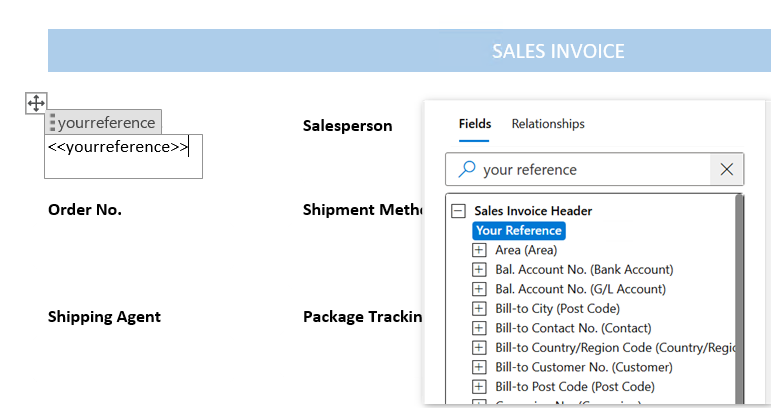
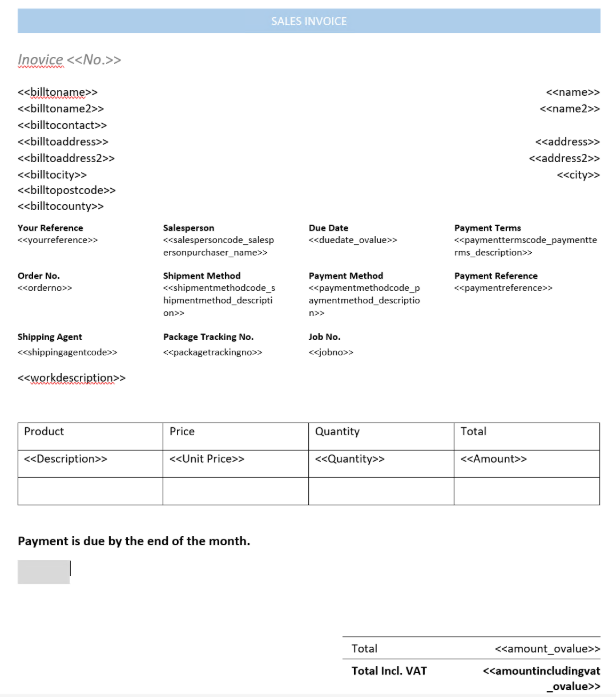
Continue adding fields from the field list as needed. Our template looks like this:
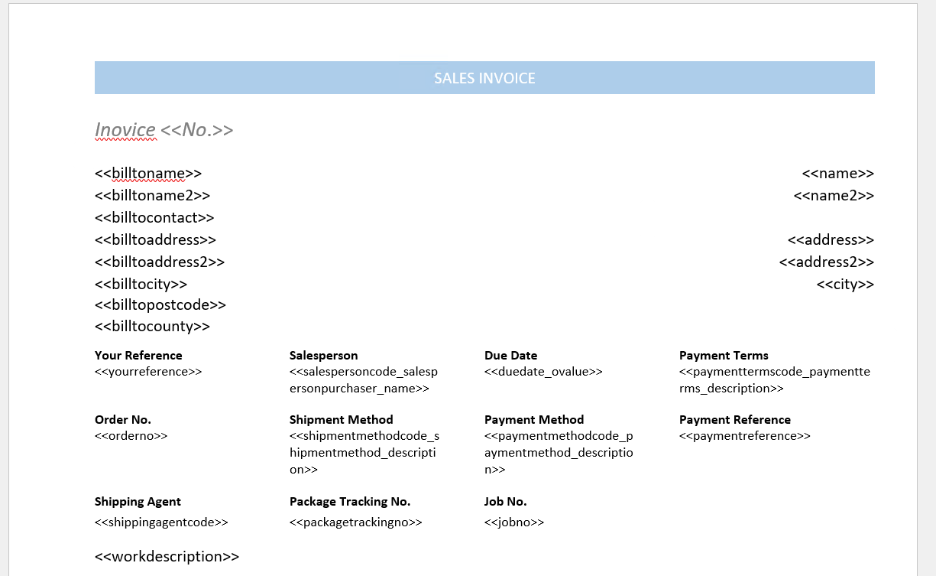
For more information on inserting fields, please see here.
Step 4: Create the invoice line table
The next step is to add a table that displays our invoice lines. This table includes repeating records that list the products, resources, or services included in the sales invoice.
To create the invoice line table, open the relationships tab in the Template Designer and select the Sales Invoice Header -> Sales Invoice Line relationship under 1:N and click Add relationship.
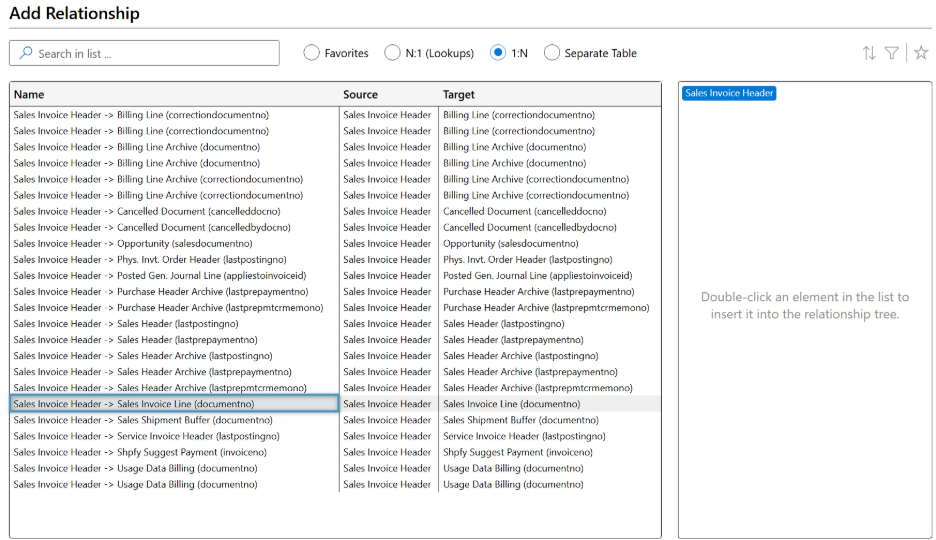
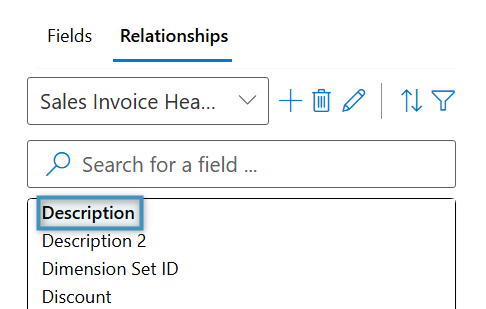
You will return to the Template Designer, where we will select the first field for our table. In this instance, we will start with the Description Field. Simply double click on the field to open up the table designer.
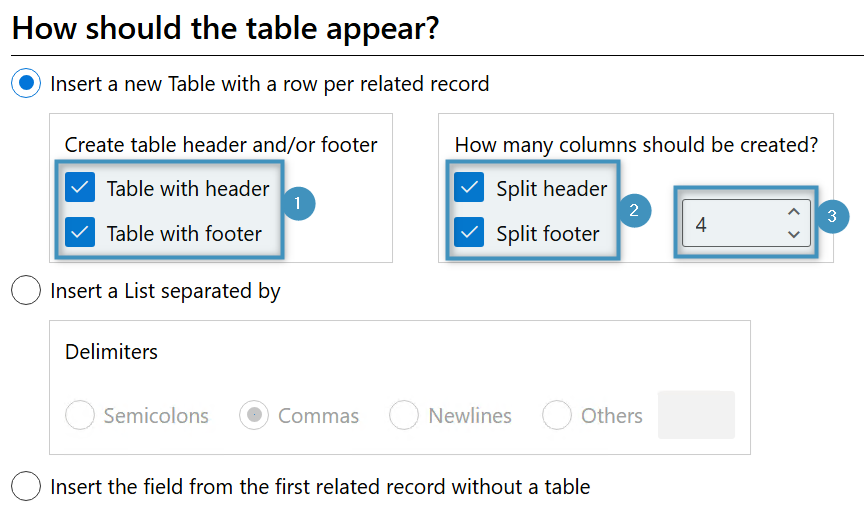
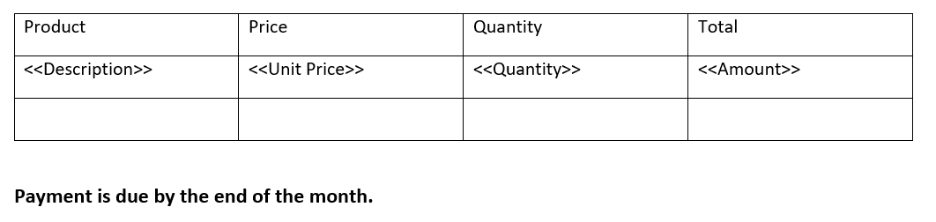
Once the table designer opens, we will ❶ format it so that it has a ❷ split header and footer for each of our ❸ categories
Once you have selected to add in the table, you will see the <<Description>> field displayed in the table.
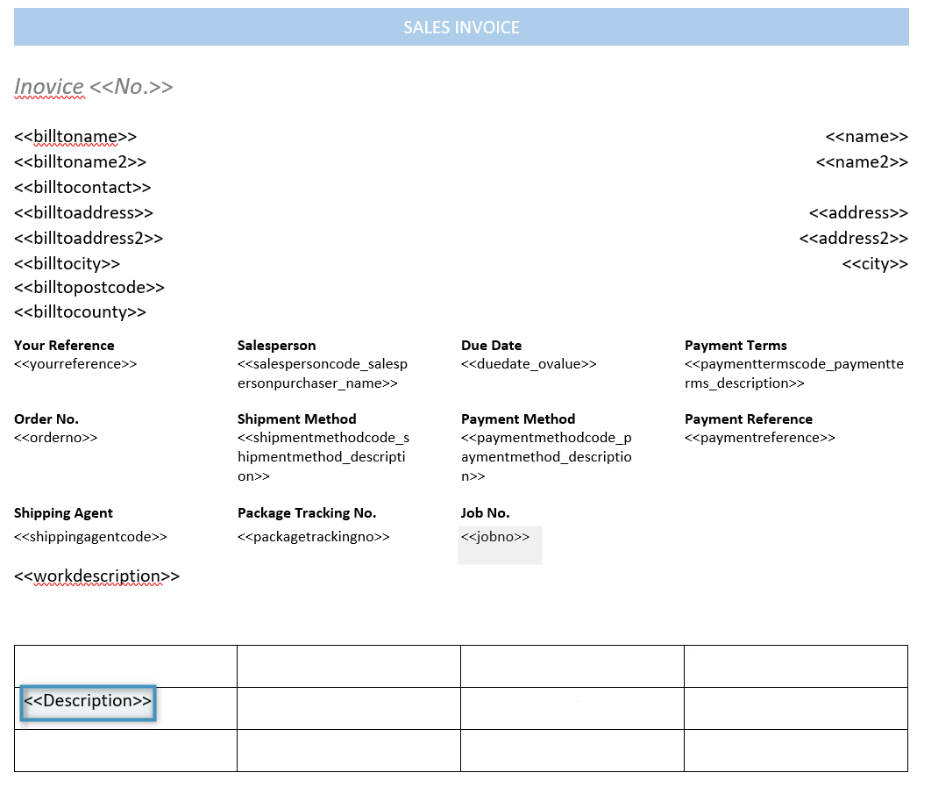
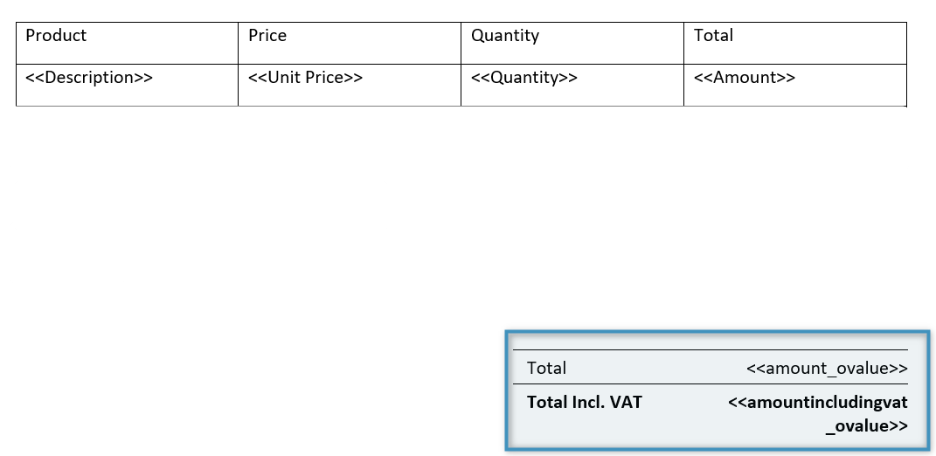
Then, define the columns you want to display in the invoice line section. We will include the following fields:
- Description
- Quantity
- Unit Price
- Amount
After all of the fields have been inserted, rename the column headers to be understandable for the recipient of the invoice.
Note: Users can also use Word table formatting to adjust borders, alignment, spacing, and column widths.

We will also add two fields to reflect the subtotal and total including VAT.
Step 5: Adding a condition
Below the invoice line table, we will add a due date message below the table using Conditions. Conditions allow us to include fields in the template that only appear when a condition is fulfilled.
To get started, we will create a Condition Field using the Condition button in the Fields group under the DocumentsCorePack BC tab.

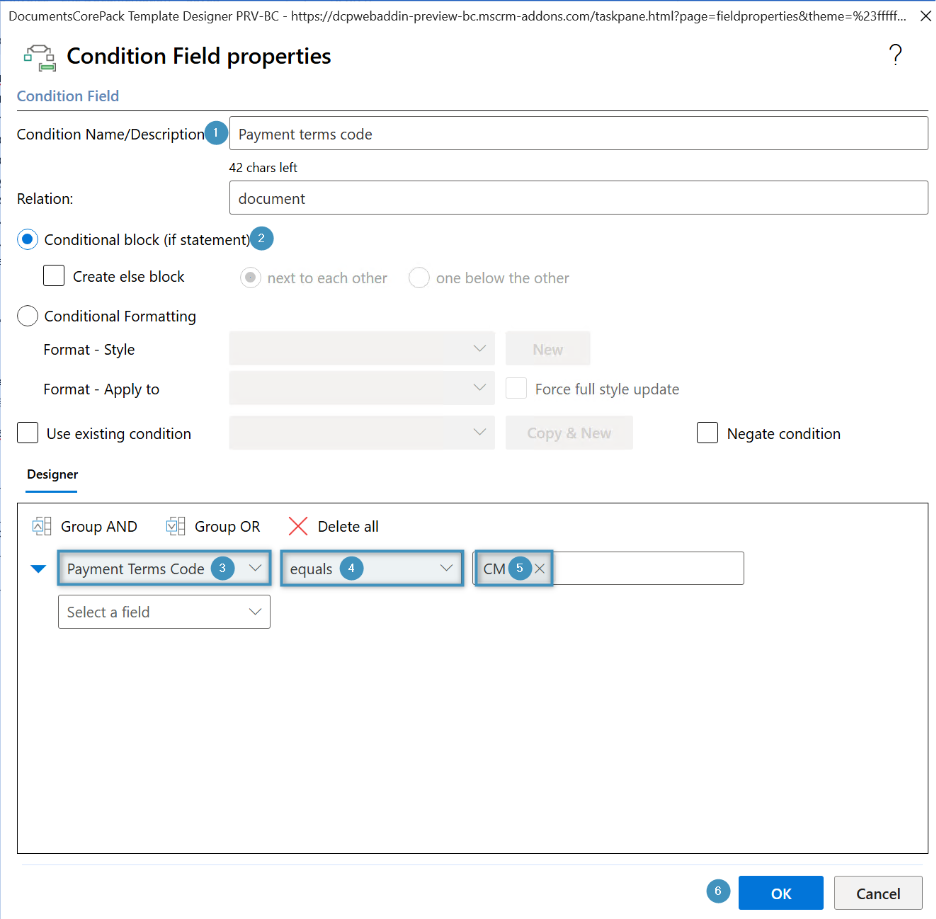
This will open the Condition Field properties window, which is used to define when specific content should be displayed in the generated document. In this example, the condition is ❶ named Payment terms code, which makes it easy to identify later in the template. The condition is set up as a ❷ Conditional block (if statement), meaning that the content placed inside this condition field will only appear if the defined rule is true.
For this condition, the selected Business Central field is ❸ Payment Terms Code. The operator is set to ❹ equals, and the comparison value entered is ❺ CM. This means the condition checks if the invoice should be paid at the end of the month.
When the Payment Terms Code equals CM, the content inside the condition field will be included in the generated document. If the payment terms code has a different value, that content will not be shown. This is useful for displaying specific payment instructions, notes, or layout sections only for documents that use a certain payment term.
After the condition has been configured, click ❻ OK to save the settings and insert the condition field into the template.
Inside the condition field, the placeholder text “Please enter the content IF your condition is met” appears. Replace this placeholder with the text that should be displayed when the condition is true.
For example, you could enter a message such as:
“Payment is due by the end of the month.”
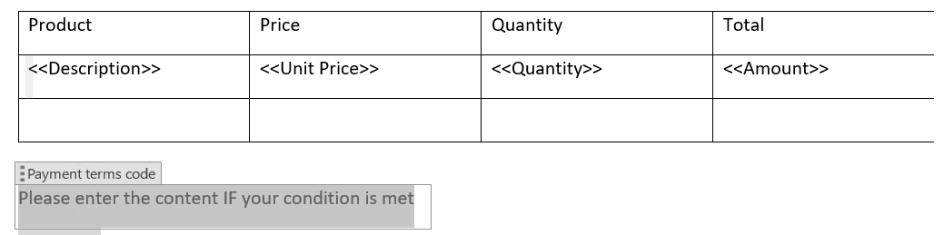
After the text has been entered, it will only be displayed in the generated document if the condition is met. If the Payment Terms Code does not equal CM, this section will be hidden in the final document.
Step 6: Testing the template
The finished sales invoice should look something like this:
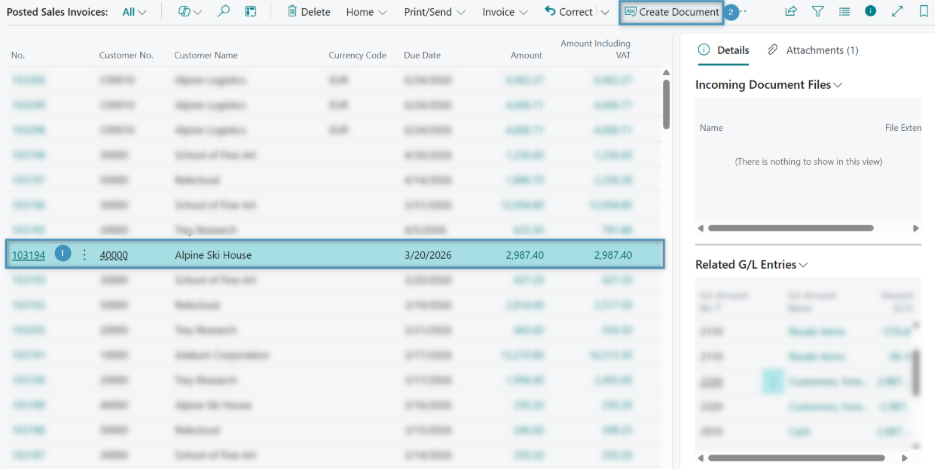
After saving the template, we can now test the full template with data using the Create Document button on the Business Central interface.
In your environment, ❶ select the customer you would like to generate the invoice for from the list and ❷ click Create Document in the top ribbon to open the “Generate Document” options.
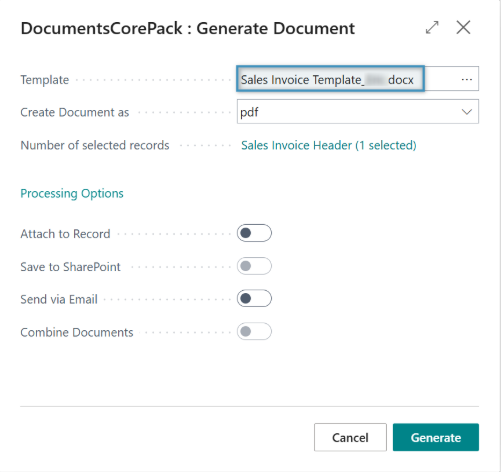
Here, you can select your newly saved template that we created in this tutorial. Once you have configured the settings to your liking, click Generate to create the invoice.
To preview the document, click on the highlighted document once it has finished processing to download it.
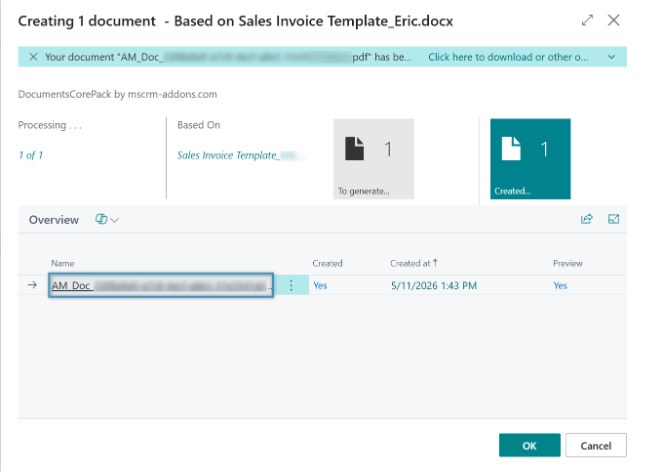
To preview the document, click on the highlighted document once it has finished processing to download it.
You can view our result document below.