DocumentsCorePack allows for quick and seamless document generation with Dynamics 365 data for any industry. Along with generating documents, DocumentsCorePack allows for the processing of documents (e.g. attach and send documents, begin an E-signature process, concatenate documents, and more).
With the DocumentsCorePack (DCP) dialog, you can perform such document processes with ease. The dialog guides users through the document generation process and offers a variety of options to process the document. This article explains the many features and capabilities of the DCP dialog.
Step-by-step instructions for using the dialog
1. Open the DCP Dialog
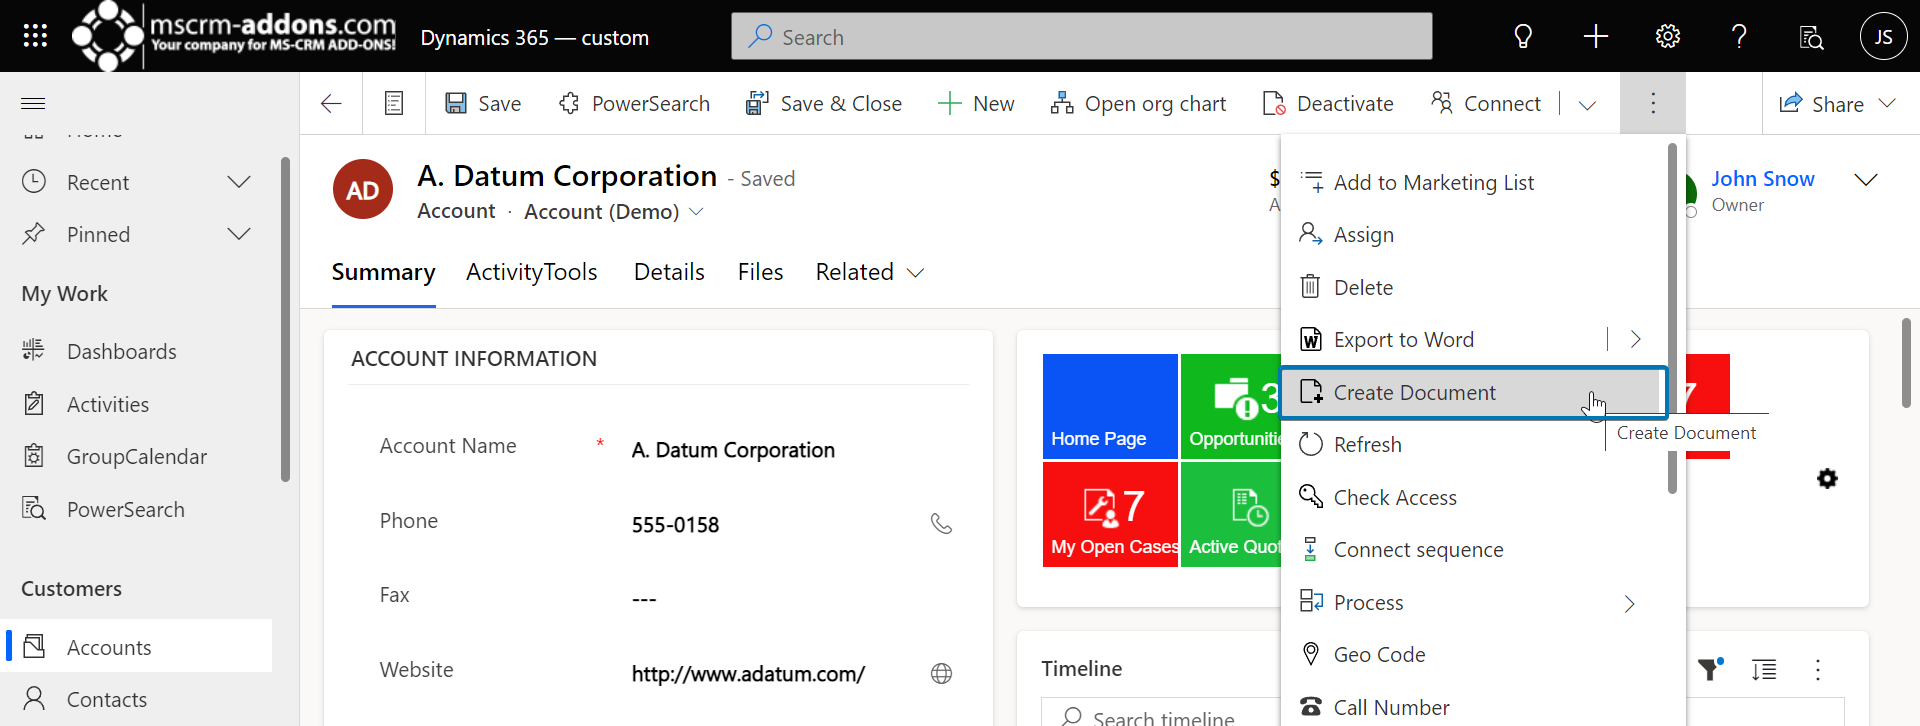
To open the DCP dialog from your Dynamics 365, first select the record that you want to generate a document for, which in the example below is an account record. Then select the Create Document button from the Command Bar.
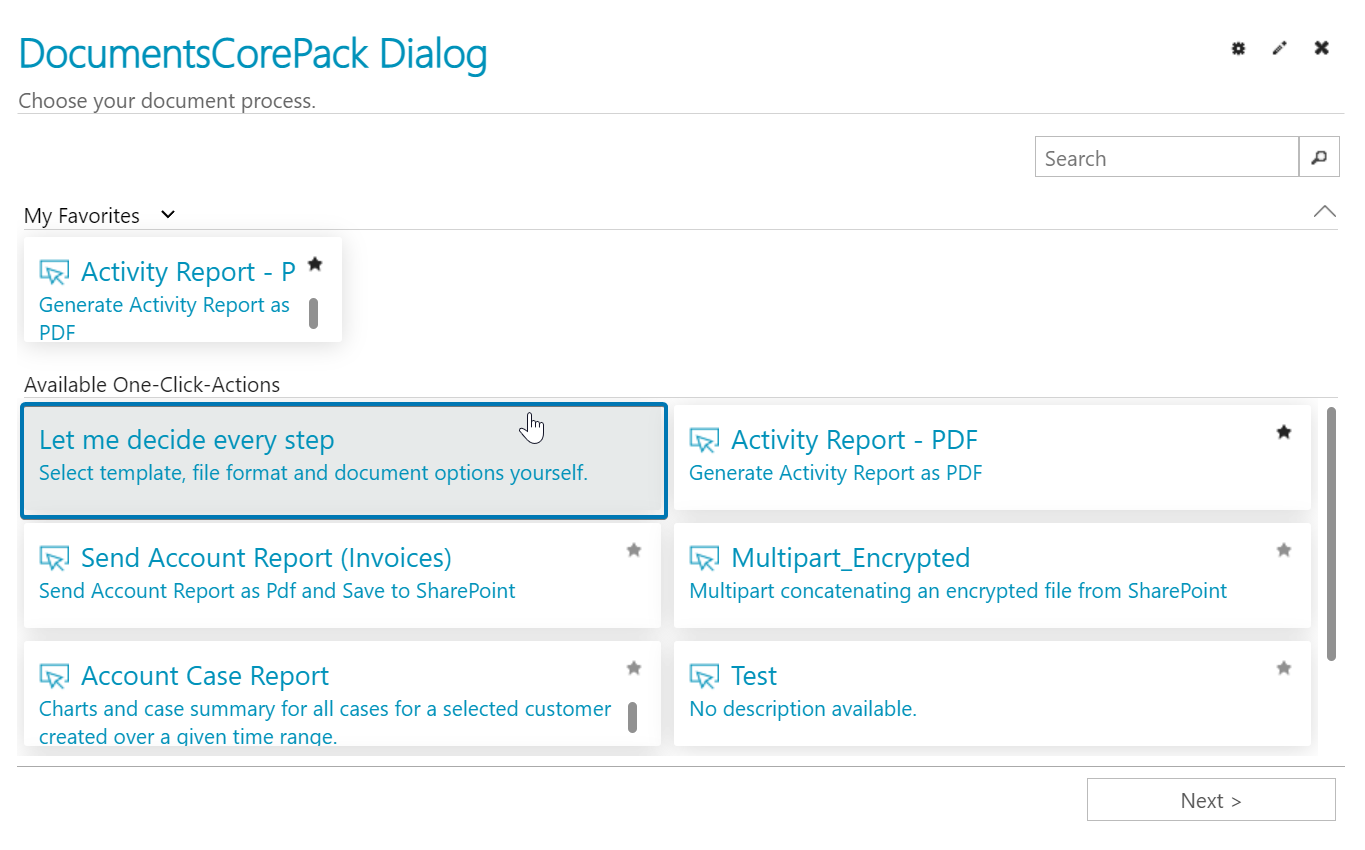
2. One-Click-Action or manual document process option
Once the DCP dialog opens, you can select the classic Let me decide every step option, or a pre-configured One-Click-Action if you have one. Please see this article to learn more about One-Click-Actions (OCAs).
Please note: For the following steps, we will move forward with the Let me decide every step option.
3. Template Selection
Choose a DCP template.
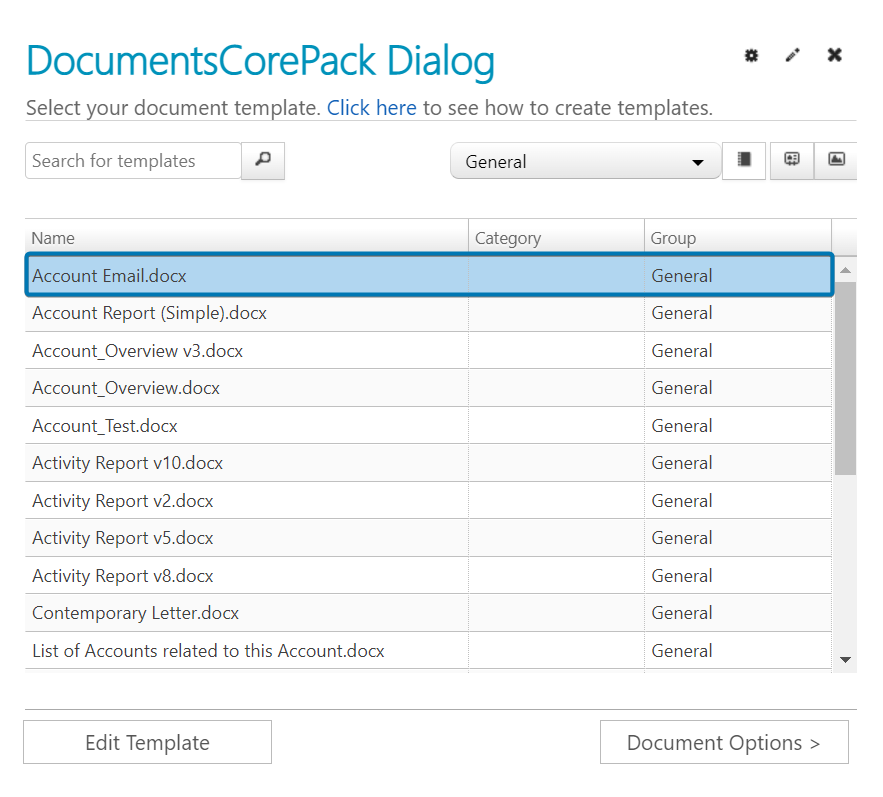
Please note: You can choose from templates that have been designed with our Word-based DCP Template designer. Here is information on designing templates with our Template designer.
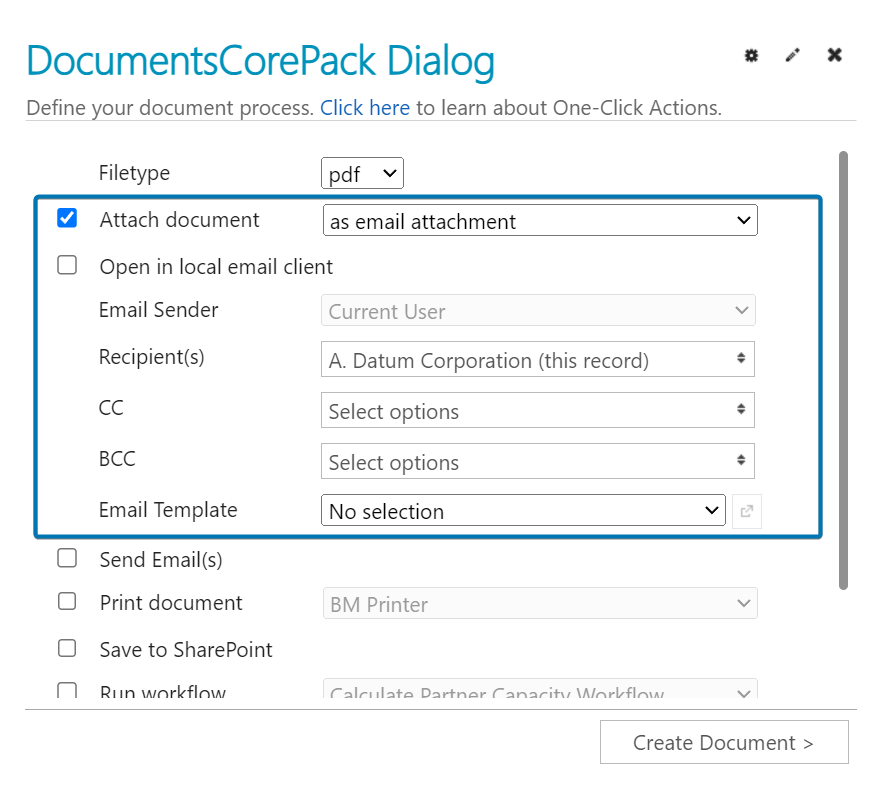
4. Document Processing
For the next step in the dialog, you can make selections from a list of document processing and delivery options. These options are listed below and described in further detail here.
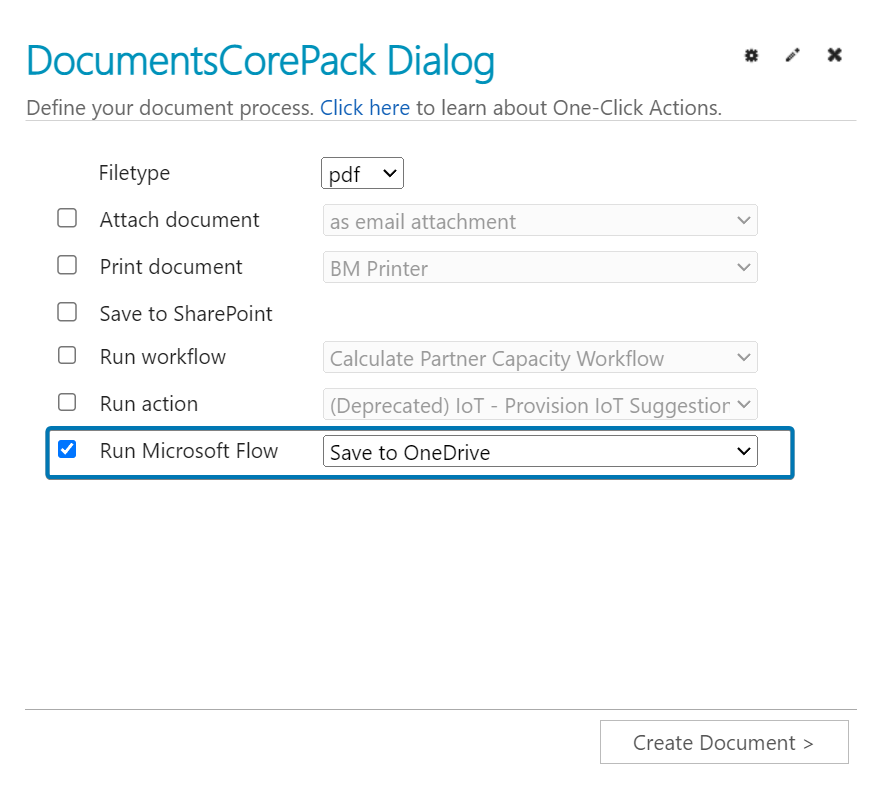
- 4.1. Select the filetype for your document.

- 4.2. Choose if you would like to attach the document, and if so, then how. Next, fill out the details based on your selection. In the example below, we would like to attach the document as an email. You can then select the sender, recipient(s), any accounts to CC or BCC, an email template, and whether or not to send the email(s) after document generation.
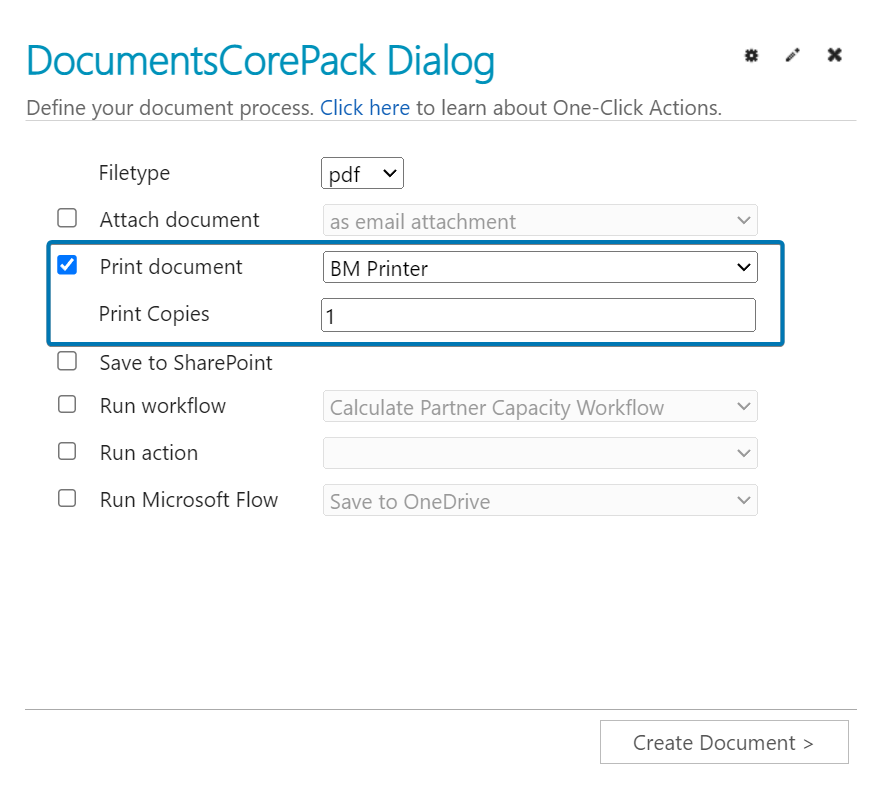
- 4.3. Select if you would like to print the document. (See here for more details on printing with DocumentsCorePack)
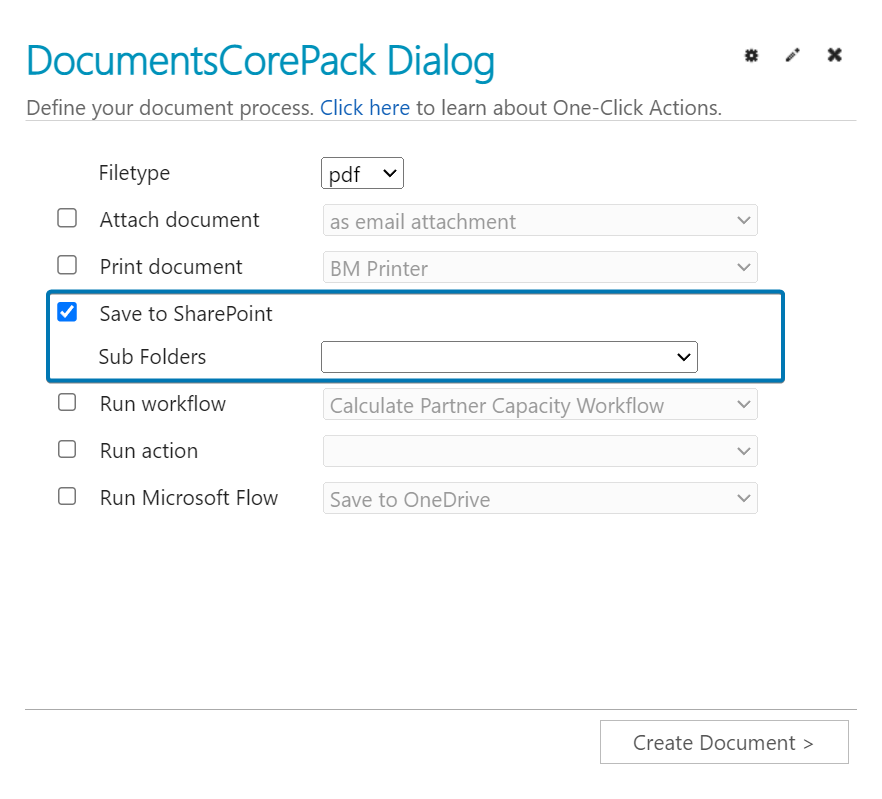
- 4.4. Check this option if you would like to save the document to SharePoint. (See here for more details on saving DocumentsCorePack documents to SharePoint)
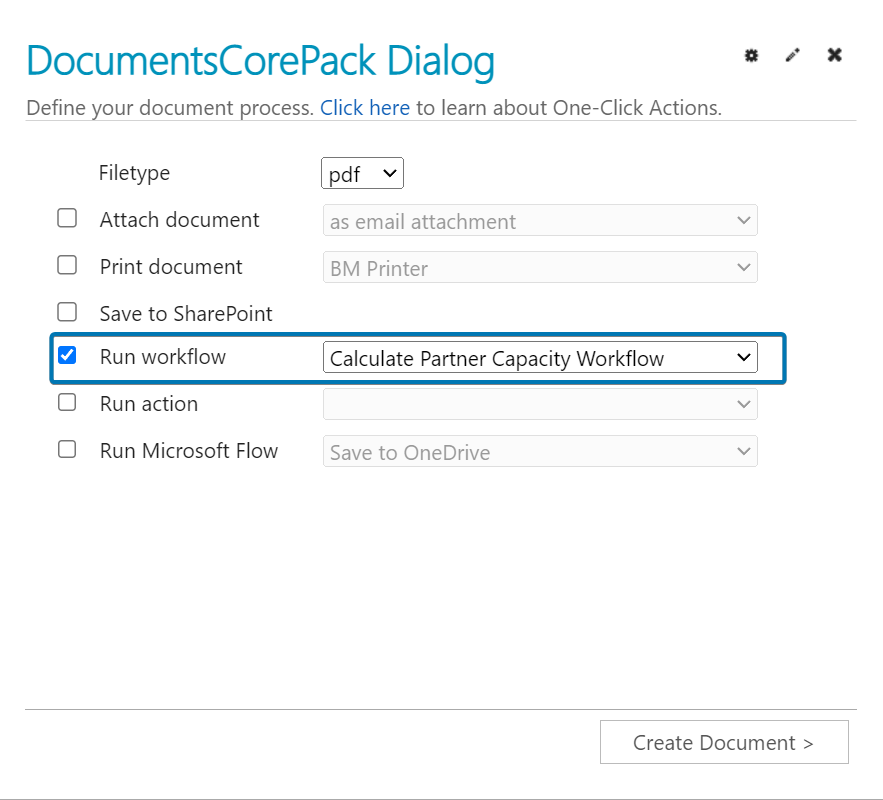
- 4.5. Select if you would like to run a workflow once the document is generated, and if so, then which one. (See here for more information on processing a generated document in a workflow)
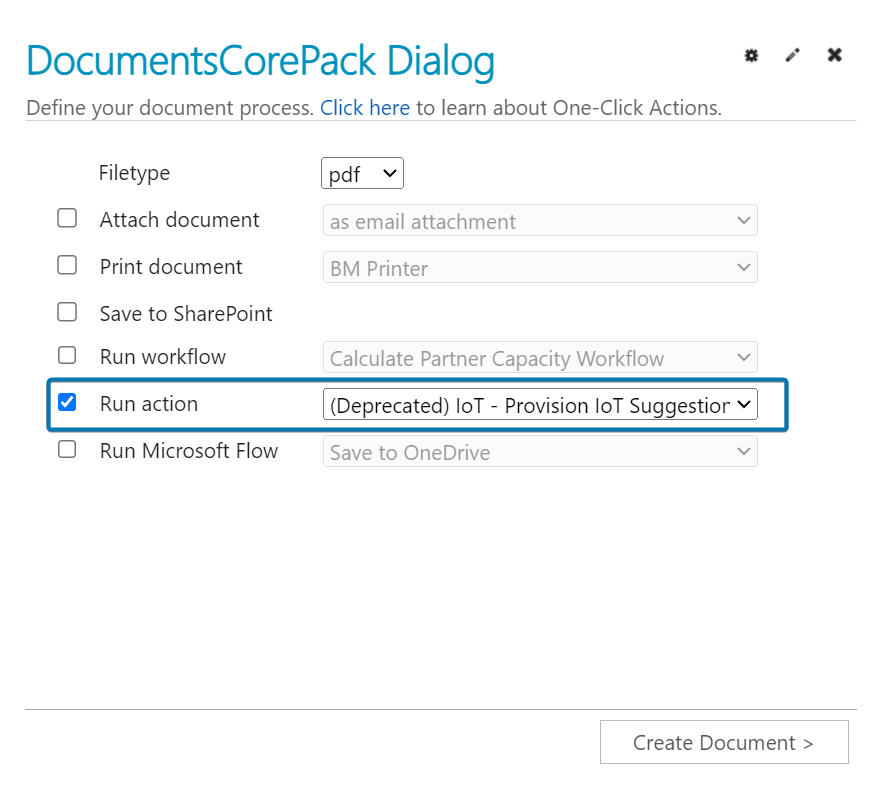
- 4.6. Select if you would like to run an action to process the generated document, and if so, then which one. (See here for more on triggering actions from the DCP dialog)
- 4.7. Check this option if you would like to run a Microsoft Flow, and if so, then which one. (See here for more on triggering Microsoft flows from the dialog)
5. Review
Once you have finished making your selections, press the Create Document button at the bottom of the dialog. Before processing the document, you can access a preview to ensure the document is as expected.
Please note: With SharePoint integration enabled, an Edit button will appear. Using this functionality will allow the generated document to be edited further in Word (locally or online). If SharePoint is not enabled, the button will be replaced with a Preview button instead, and clicking on the filename will download the document to your local system.
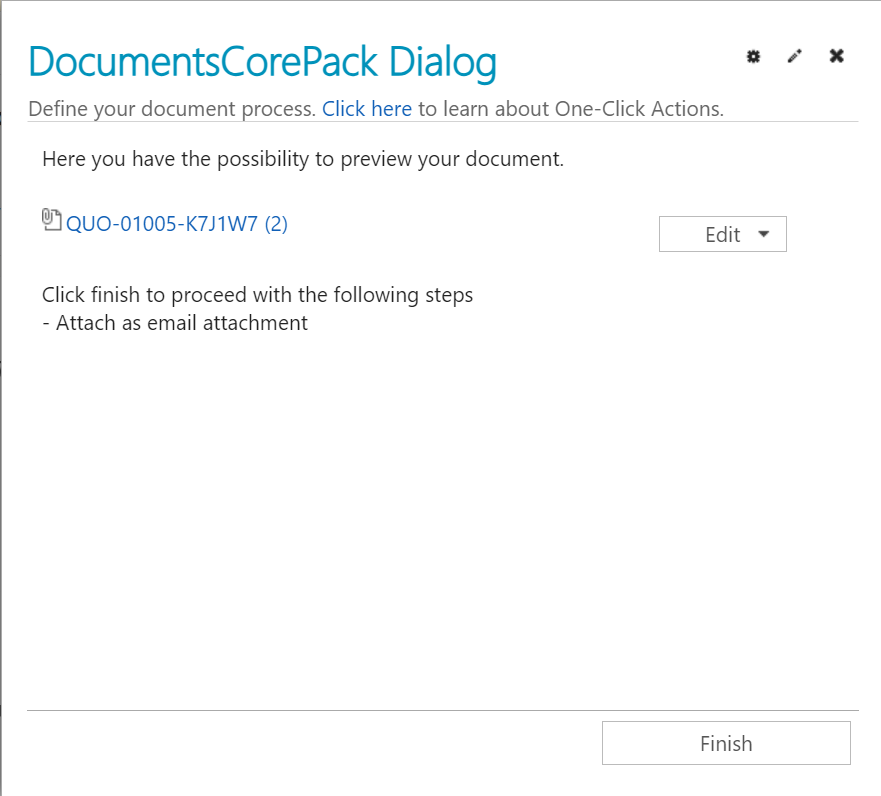
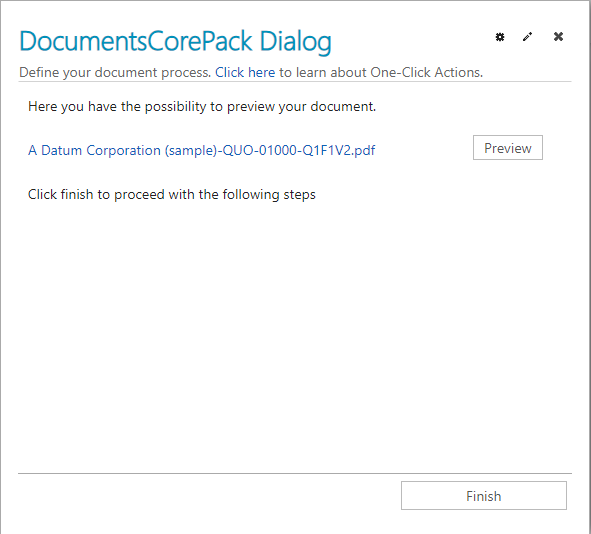
6. Finish
If you are satisfied with the preview of the document, then press Finish at the bottom of the dialog to complete the document generation process.
This concludes the explanation of the features and capabilities of the DCP dialog.
One-Click-Actions (OCAs)
As forementioned, in addition to choosing every step of the document generation process, you have the option to create and select One-Click-Actions (OCAs) in the dialog.
OCAs are pre-configured options that have the choices/selections for the document generation process pre-selected. So once a user selects an OCA, the document will be automatically generated based on those previous selections, which can save time and boost efficiency. Learn more about how to configure and use OCAs here.
Related Articles
Listed below are some articles related to the DocumentsCorePack dialog and other information shared in this article.
- How to create custom language translations for the DocumentsCorePack dialog
- DocumentsCorePack Template Designer
- One-Click-Actions (OCAs) in DocumentsCorePack
That’s it! We appreciate your feedback! Please share your thoughts by sending an email to support@mscrm-addons.com.