The Service Configuration page is the central hub for managing your DocumentsCorePack services. Here, you can create new Business Central services or modify existing ones.
This documentation outlines the array of options available on this platform, beginning with how to access the service configuration itself.
Accessing the Service Configuration
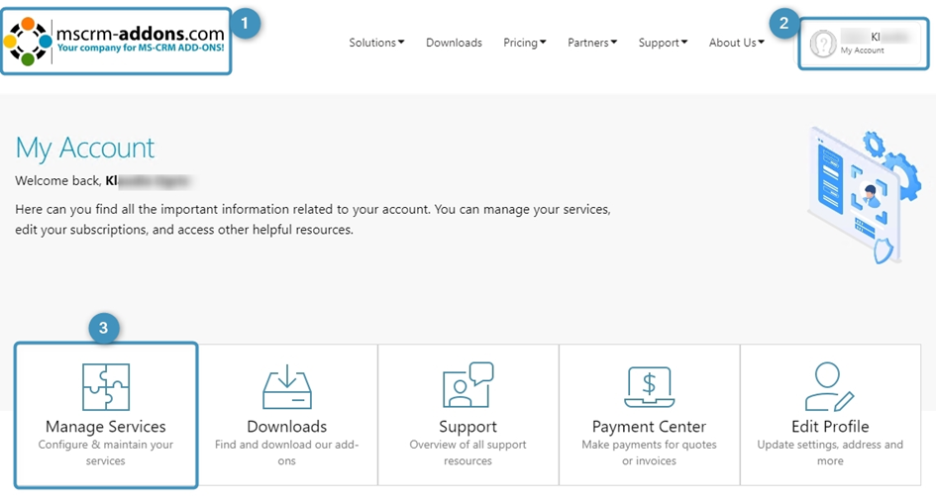
To access the Service Configuration navigate to our ❶ website and click on ❷ My Account. You can then access the Service Configuration page by selecting ❸ Manage Services.
The Service Configuration page displays a list of configured services. If no services are configured, the page will be left empty.
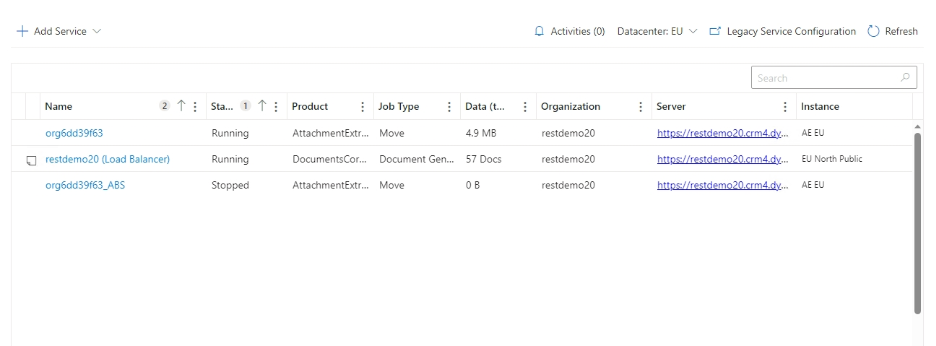
Selecting a service will bring up the Service Configuration Overview.
Overview
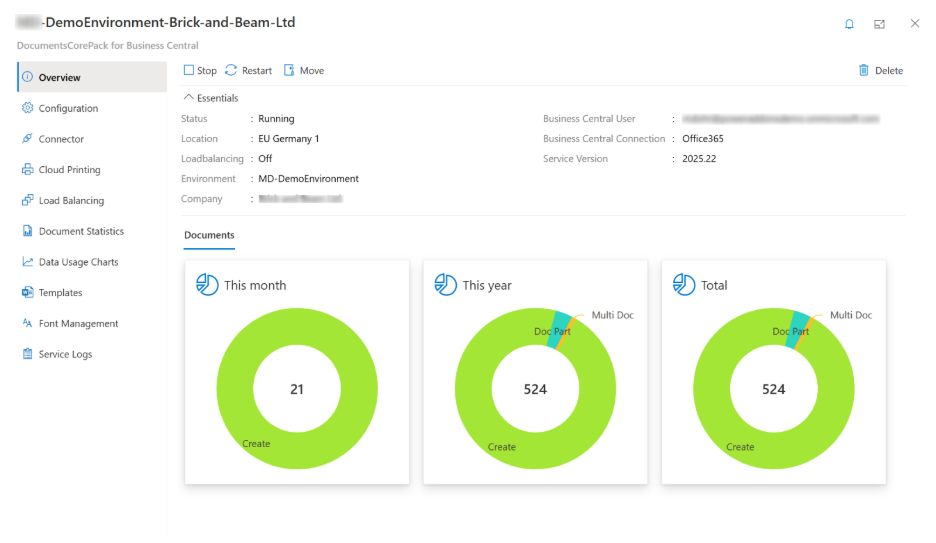
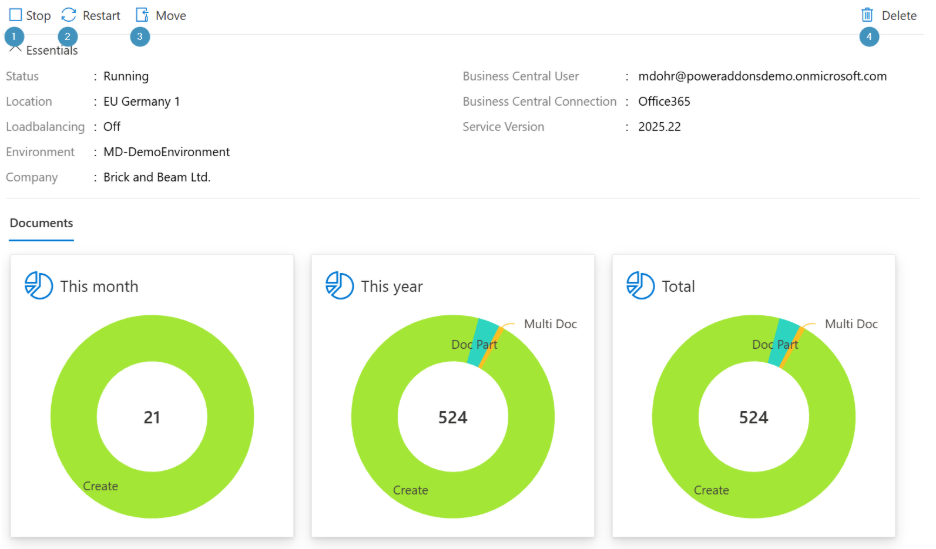
This page displays essential information about the service, including how your service has been used. It is also possible to ❶ Stop a service, ❷ Restart a service, ❸ Move the service to another instance, or ❹ Delete the service entirely.
Configuration
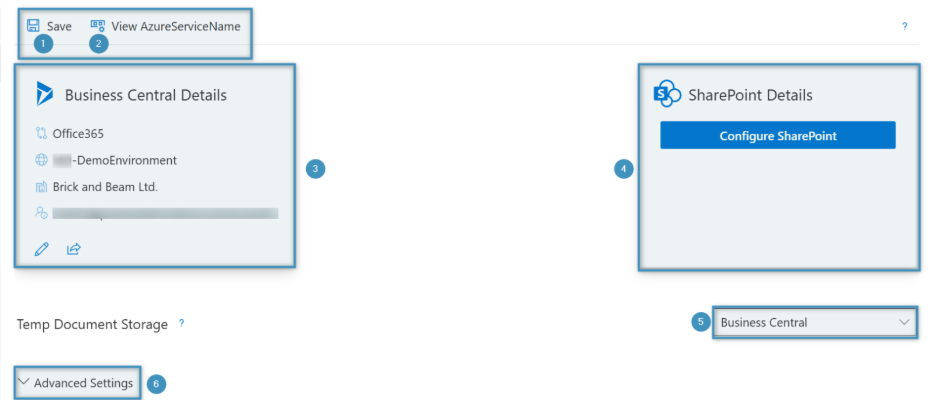
The configuration tab is divided as follows:
- ❶Save: Saves the current configuration and applies any changes made on this page.
- ❷View AzureServiceName: Displays the Azure service name that is connected to the current Business Central setup.
- ❸Business Central Details: Displays the currently connected Business Central environment, including the tenant type, environment name, company, and connected user/account information.
- ❹SharePoint Details: Shows the SharePoint configuration area. Use Configure SharePoint to connect or adjust SharePoint storage settings for generated documents.
- ❺Temp Document Storage: Defines where temporary documents are stored during document generation. In this screenshot, Business Central is selected as the temporary document storage location.
- ❻Advanced Settings: Expands additional configuration options for the Business Central connection and document storage setup. The following options are available:

- Enable Debugging: When enabled, the service generates debug logs during the document generation process. This is useful for troubleshooting issues, analyzing errors, or providing more detailed information to support.
- Job Type: Defines which type of jobs the service should process. You can select whether the service should focus on Document Generation, Print Jobs, or both, depending on how the service is used in your environment.
- Notify on service changes immediately: Enables email notifications if there is an issue with the service. To avoid false positives, the system sends an email after 30 minutes only if the issue still exists.
- FIPS Compliance Required: Enable this setting when using DocumentsCorePack Template Designer in a FIPS-enabled environment. This ensures the installation is compatible with environments that require FIPS-compliant security standards.
Connector
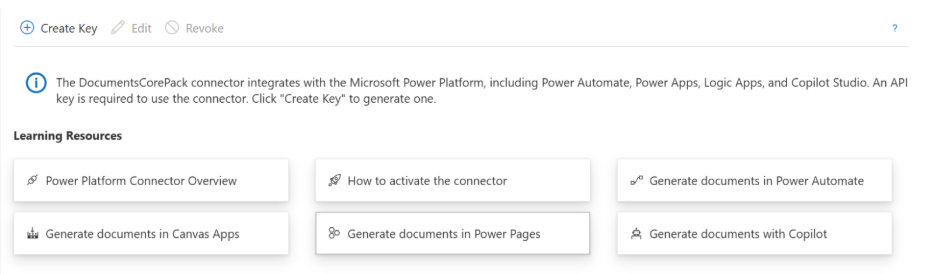
The DocumentsCorePack connector integrates DocumentsCorePack with the Microsoft Power Platform, including Power Automate, Power Apps, Logic Apps, and Copilot Studio. It allows users to trigger and automate document generation processes from these services.
To use the connector, an API key is required. Select Create Key to generate a new API key. Existing keys can be managed using the available options to Edit or Revoke access when needed.
This page also provides learning resources for setting up and using the connector, including guides for activating the connector and generating documents in Power Automate, Canvas Apps, Power Pages, and Copilot.
Cloud Printing
The Cloud Print section is used to configure printers that can be used with DocumentsCorePack for Business Central. Once a Business Central connection has been created, the available printing options can be managed from this area.
Before using cloud printing, make sure that your cloud printers have already been configured. Once configured, the printers can be used to print generated documents from Business Central or through connected automation scenarios, such as Power Automate.
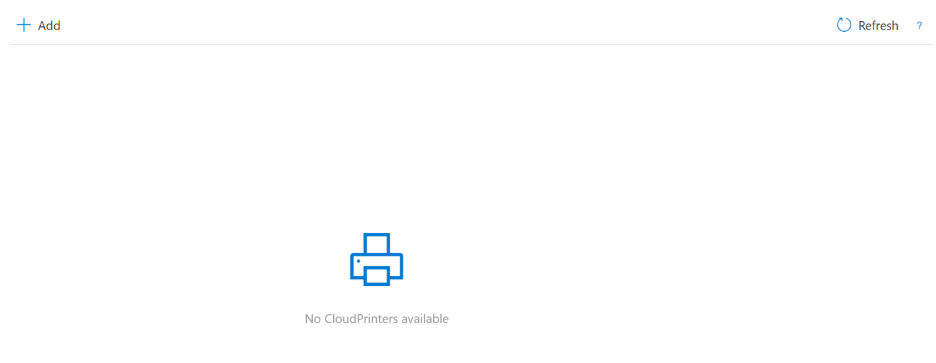
If no printers have been configured yet, the page displays the message “No CloudPrinters available”. Select Add to configure a new cloud printer connection.
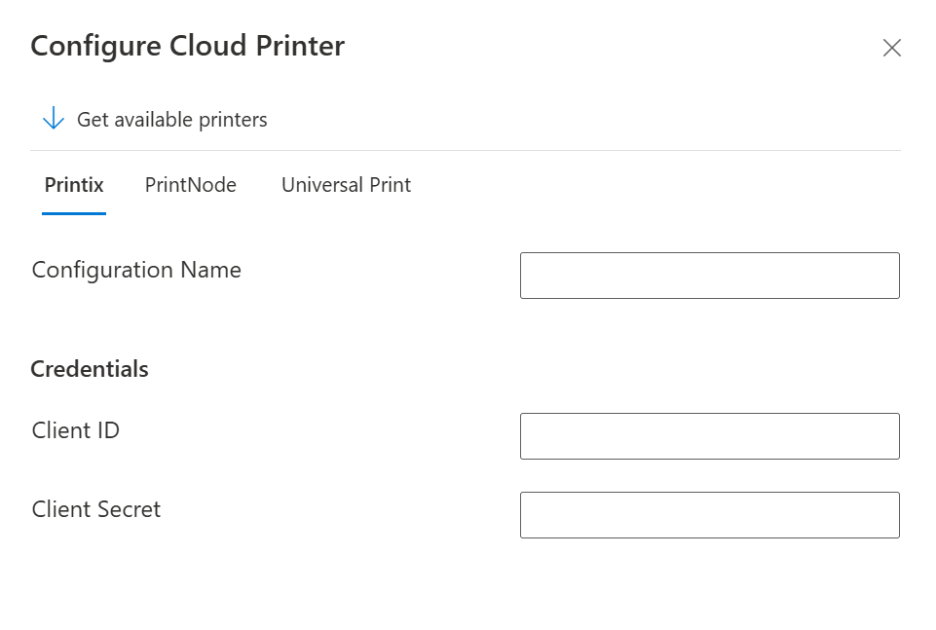
When adding a cloud printer, you can choose between the available cloud print providers:
- Printix: Allows you to connect DocumentsCorePack to a Printix cloud printing environment. Enter a configuration name and the required credentials, such as the Client ID and Client Secret.
- PrintNode: Allows you to connect DocumentsCorePack to PrintNode so that configured printers can be used for document printing.
- Universal Print: Allows you to connect DocumentsCorePack to Microsoft Universal Print for cloud-based print management.
Use Get available printers to retrieve the printers available for the selected provider after the required credentials have been entered.
Load Balancing
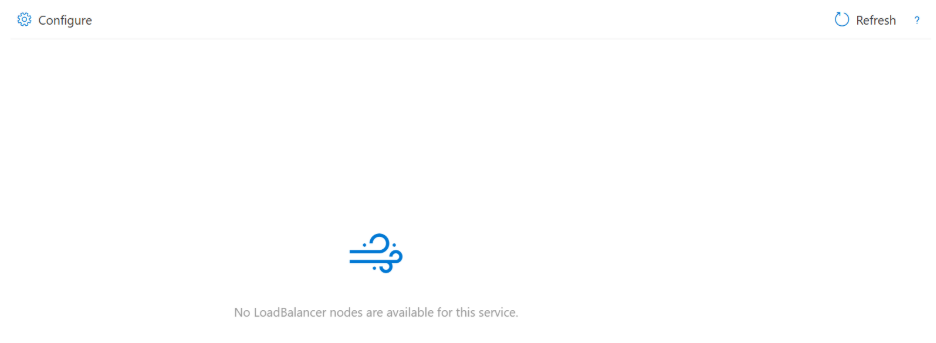
The Load Balancing section is used when a large number of documents need to be processed by the DocumentsCorePack service for Business Central. If one service is not enough to handle the document generation workload, load balancing can be enabled to distribute the processing across multiple DocumentsCorePack services.
To use load balancing, a separate load balancing license is required. After the required license has been purchased, select Configure to open the Load Balancer Configuration window.
To purchase a license, please contact sales@mscrm-addons.com. For more information on load balancing, please see here.
Document Statistics
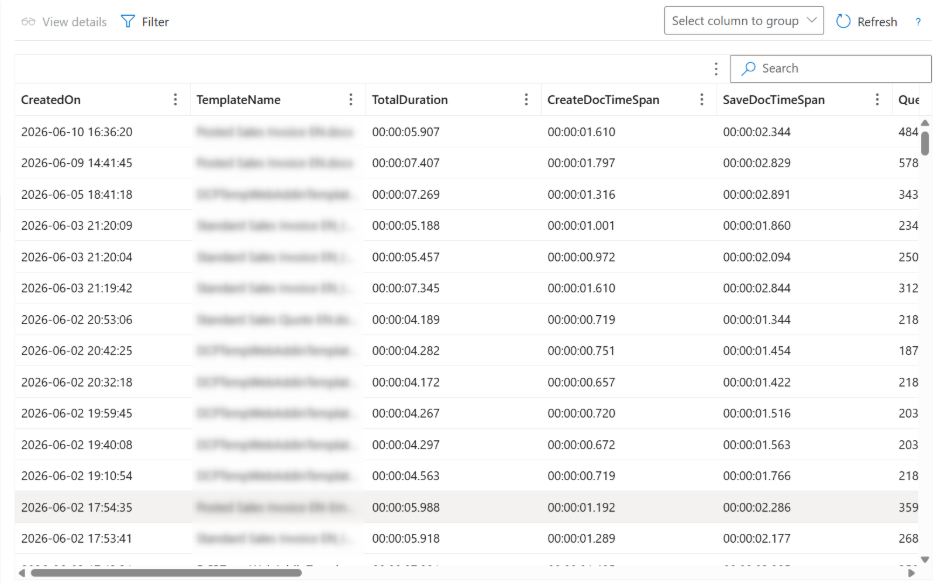
The Document Statistics contain valuable information on every document generated with the most notable entries being:
- CreatedOn: When was the template created?
- TemplateName: Which template was used?
- TotalDuration: How long did the overall action (create, convert, save back) take?
- CreateDocTimeSpan: How long did the incorporation of data into your template take?
- SaveDocTime: How long did it take to save the document back to Dynamics as a note or to SharePoint (if chosen to)?
Data Usage Charts
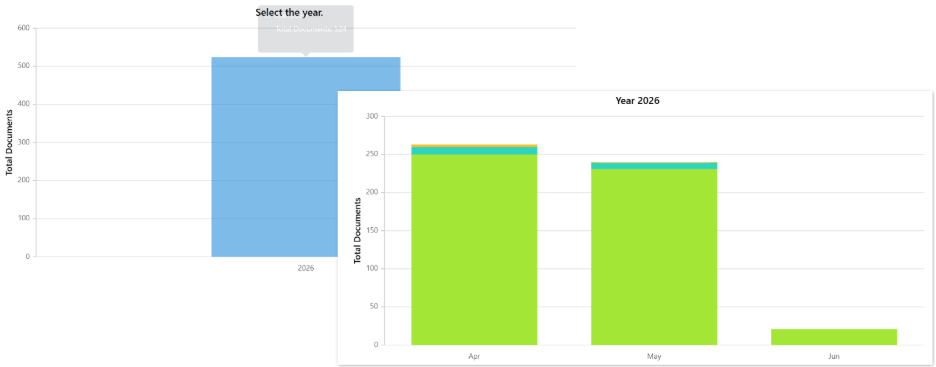
The front page shows an annual overview. Click on the year and the monthly detailed charts are shown. When you hover over the color-coded bars, it shows how many documents were generated per month and how large these documents were in total.
Since every license comes with a certain number of documents included, this number gives you an idea of where you are at and if it is necessary to buy additional licenses.
Templates
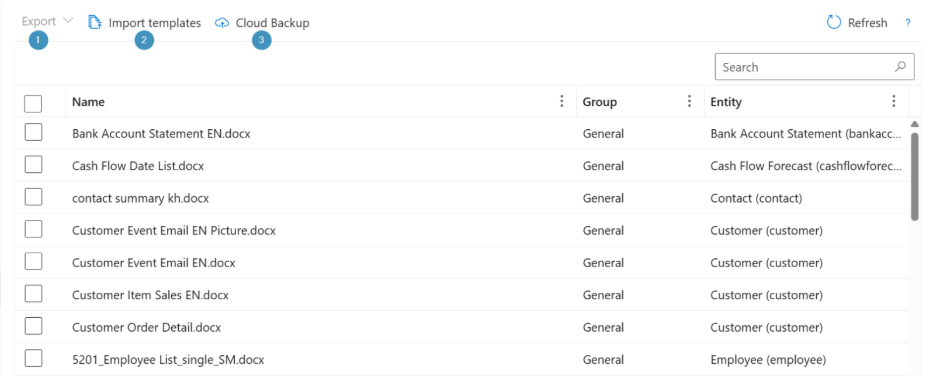
Under Templates, templates can be ❶ exported, ❷imported, or ❸ backed up using the DocumentsCorePack Online Service Configuration as shown below.
Import
Click the Import button if you would like to import DocumentsCorePack templates. You may select multiple *.docx/ *.docm/ *.dot templates or *.zip files containing multiple templates.
You can also drag and drop files from the explorer into this dialog.
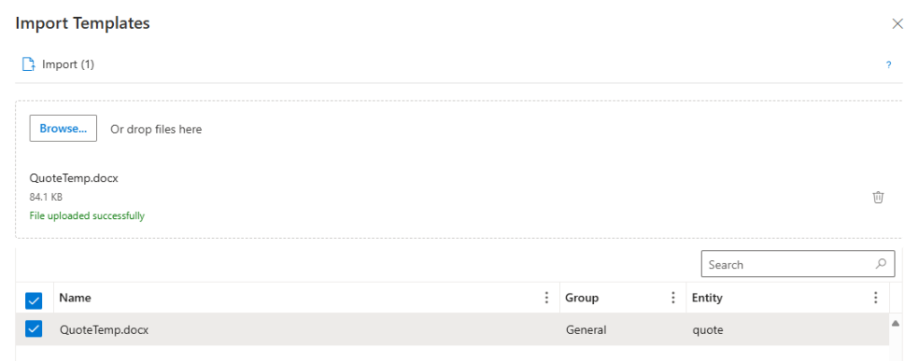
Furthermore, you will be asked to specify how to proceed with the templates you want to import if they already exist in the system. You can select from Overwrite, Create new, or Skip.
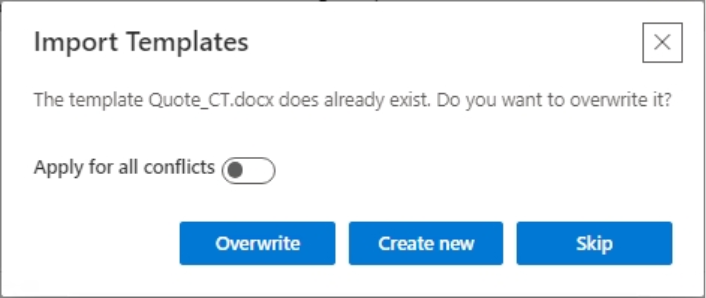
- Overwrite: The template GUID stays the same.
- Create new: The old version will be kept with the old template GUID and the new version of the template will be imported with a new template GUID.
- Skip: All existing templates will be ignored. Only new templates will be imported.
Export
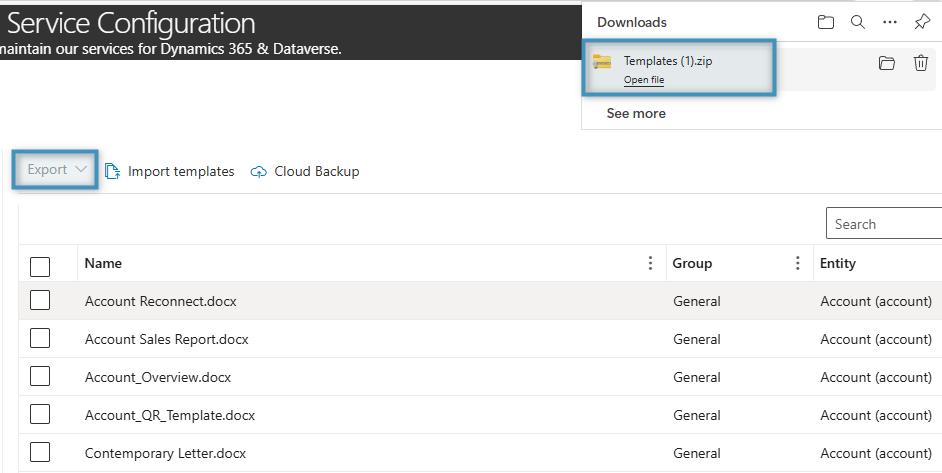
Once you have selected the templates you would like to export, you can choose one of two export options: Export as ZIP and Export to Dataverse.
Export as ZIP
Click on the Export button to export all DCP templates as *.zip-files.
Note: During the export, the GUID of the template record is added to the document name. The GUID is a unique alphanumeric code that is assigned to each template. It is important to retain the GUID associated with a template during the export process because it acts as a unique identifier, preserving the template’s identity and connections. It is essential not to modify the GUID during the export/import process to guarantee the seamless operation of templates within your system.
IMPORTANT: To ensure that the templates are extracted correctly, make sure to export to a folder that does not contain many subfolders. The maximum path length should not be over 260 characters.
Examples:
- Proper path length for exporting: C:\temp\DCP_Templates
- Improper path length for exporting: C:\Users\MyUSerAccount\Documents\CRMData\DocumentsCorePackTemplates\28_11_2017\DCP_Templates
Export to Dataverse
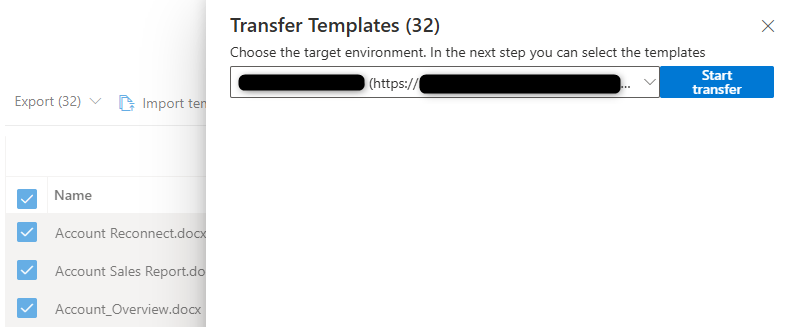
This option combines exporting and importing into one step. You can choose which other Dataverse environment you would like to export the DocumentsCorePack templates into. Use this option when you want to, for example, export your templates from your QA into production.
Cloud Backup
You can back up your templates on a scheduled interval to your Azure Blob Storage. We highly recommend setting up a cloud backup of your DocumentsCorePack templates.
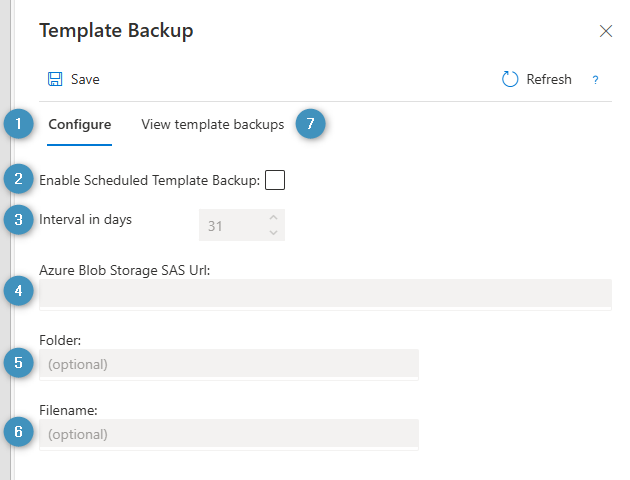
In the ❶ Configure tab, you can ❷ enable scheduled template backups and decide on the ❸ interval in days. Make sure to set your ❹ Azure Blob Storage SAS Url. Optionally, you can set the ❺ folder and ❻ filename. You can view your backups in the ❼ View Template backups tab.
Font Management
If your templates are using custom fonts, you will need to provide those for your service. You may upload and install your fonts into your DocumentsCorePack instance by clicking on the Browse… button and choosing the fonts from your system.

Service Logs
The Service Logs tab provides valuable insights into service health. This information is mainly used by our support team to gain information about the service.
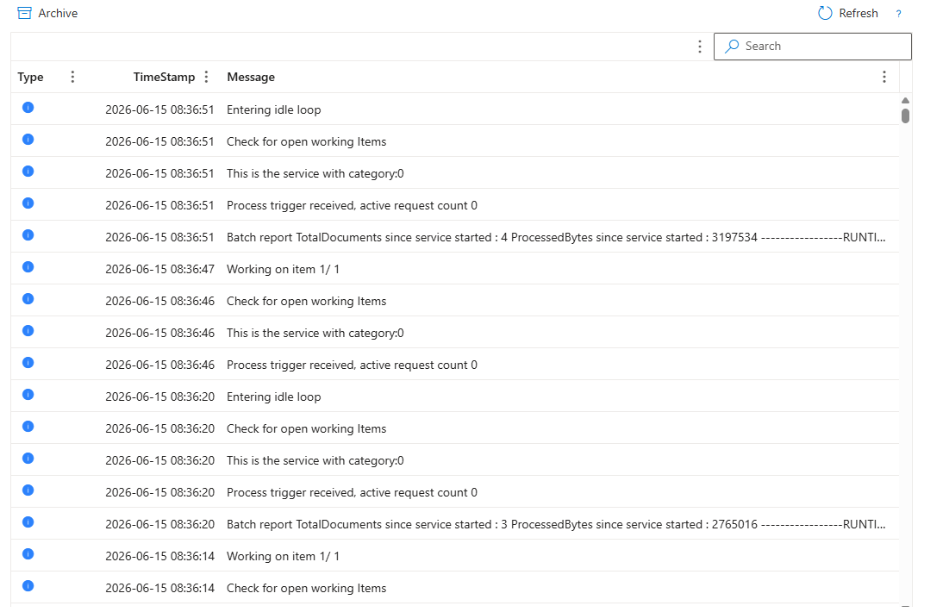
Note: Service logs are only kept for an interval of about 14 days.