DocumentsCorePack templates consist of several properties like the “Document name: name of documents generated off a certain template”. Such properties can be configured to include
- Static text
- Dynamics 365/Dataverse field values
This article provides an overview of how properties are defined, including its approach to adding fields, adding text, adding parameters, and modifying parameters.
NOTE: These changes are only relevant to users with DCP Template Designer version 10.48 or higher. For information on the syntax of older versions, please see here
Overview
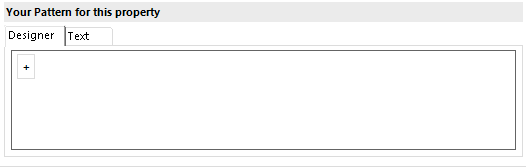
The Property Designer is now split into two tabs. The new Designer tab is the one selected by default. If the older designer is still preferred, it can be accessed by clicking on the Text tab.
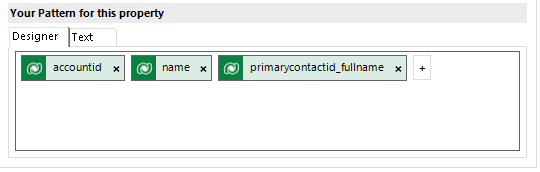
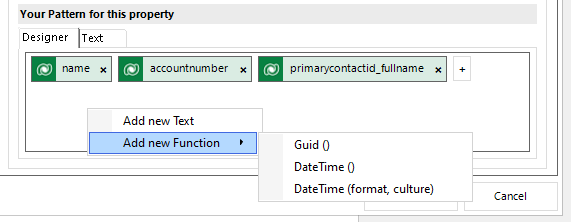
Fields can still be added by double clicking on them when using the new designer. However, the fields themselves now appear differently.
Right-clicking on these fields brings up a context menu. Here, you can select a variety of functions to add to your field from the Add Function submenu, set the field to its internal value, or delete the field entirely.
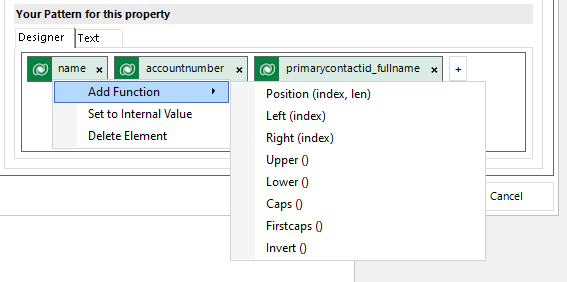
If a function is added, the field is expanded with the new function added to it. If a function with a parameter is selected, the user can enter a value for the parameter.

Under Add Function, a list of options are available:
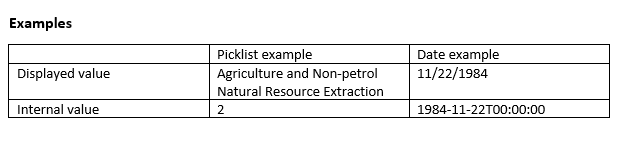
NOTE: For all examples, assume the X field will be “MSCRM-addons.com” after the merge
| Function | Description | Example |
| Position (index, len) | Will insert only the first len characters from the position of index | X SubStr index 2, len 5 Result: “CRM-a” |
| Left (index) | Will insert the first index characters | X Left 5 Result: “MSCRM” |
| Right (index) | Will insert the last index characters | X Right 3 Result: “com” |
| Upper | Displays all characters in the field in upper case | Result: “MSCRM-ADDONS.COM” |
| Lower | Displays all characters in the field in lower case | Result: “mscrm-addons.com” |
| Caps | Displays the first character in a sentence in upper case | Result: “Mscrm-addons.com” |
| Firstcaps | Displays the first character in a field in upper case | Result: “Mscrm-addons.com” |
| Invert | Inverts the case of every character | Result: “mscrm-ADDONS.COM” |
If Set to Internal Value is selected, the field will return the internal value instead of the value listed in your environment.
Additionally, right-clicking within the empty space of the designer will bring up a separate context menu to add either a text field, or to add a function (either the guid, DATETIME, or DATETIME (with Format) functions). Text fields can also be added by clicking on the “+” button and entering the text within the container.
The following functions for this context menu are listed here:
| Function | Description | Example |
| Guid | Generates a unique serial number | a310b0b0-82bd-4e63-8b5d-0d458eafbfc4 |
| DateTime | Inserts the current local date | 10/05/2023 |
| Without Spacing DateTime(format, culture) With spacing DateTime(format ‘ ‘ mm:ss, culture) | Inserts the current local time and date based upon the given format and culture. For more information on formatting, please click here. For information on which cultures can be displayed, click here. | Without spacing dd.MMMM.yy.hh:mm, en-AT Result: 10.May.23.08:57 With spacing dd.MMMM.yy ‘ ‘ mm:ss, de-DE Result: 06.Dezember.13 16:06 |
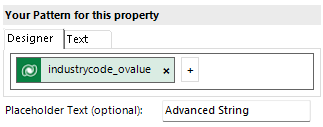
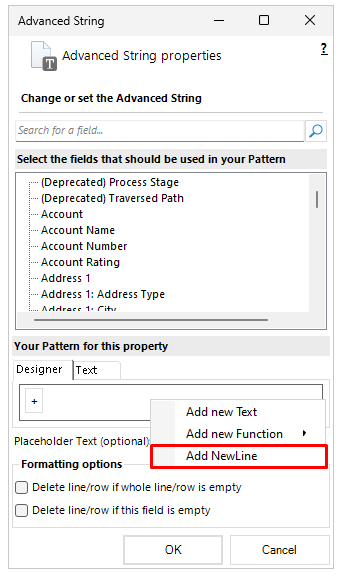
With certain functionalities (such as the Advanced String and QR Code functionalities), the context menu has an additional Add NewLine option.
Finally, once a field has been added, it can be moved within the designer by dragging it and dropping it into the desired location.
Features that use the updated Property Designer
The following is a list of the features that use the new designer:
- Advanced Template Settings
- Document Name and Subject
- General -> Note Creation Settings
- Note Title
- Note Description
- Document Protection
- Subfolder
- SharePoint Metadata
- Dynamic Document Properties
- Insert Field
That’s it! We appreciate your feedback! Please share your thoughts by sending an email to support@mscrm-addons.com.